If you’re using Visual Composer Website Builder, you can easily embed WPVR virtual tours on your WordPress website.
WPVR has a dedicated Visual Composer element named WP VR Visual Composer Element that you can use to:
- Find any specific virtual tour from your saved tour list easily.
- Customize the width of your virtual tour.
- Assign a fixed height to your virtual tour.
- Set a radius to your virtual tour.
In this guide, you’ll learn how to use the WP VR Visual Composer Element to publish a virtual tour on your website.
Let’s get started.
Embed Virtual Tours Using Visual Composer Element #
Once you have created at least one virtual tour using WPVR, follow the steps below:
Step 1: #
Choose to edit an existing page or a new page on your website using Visual Composer.
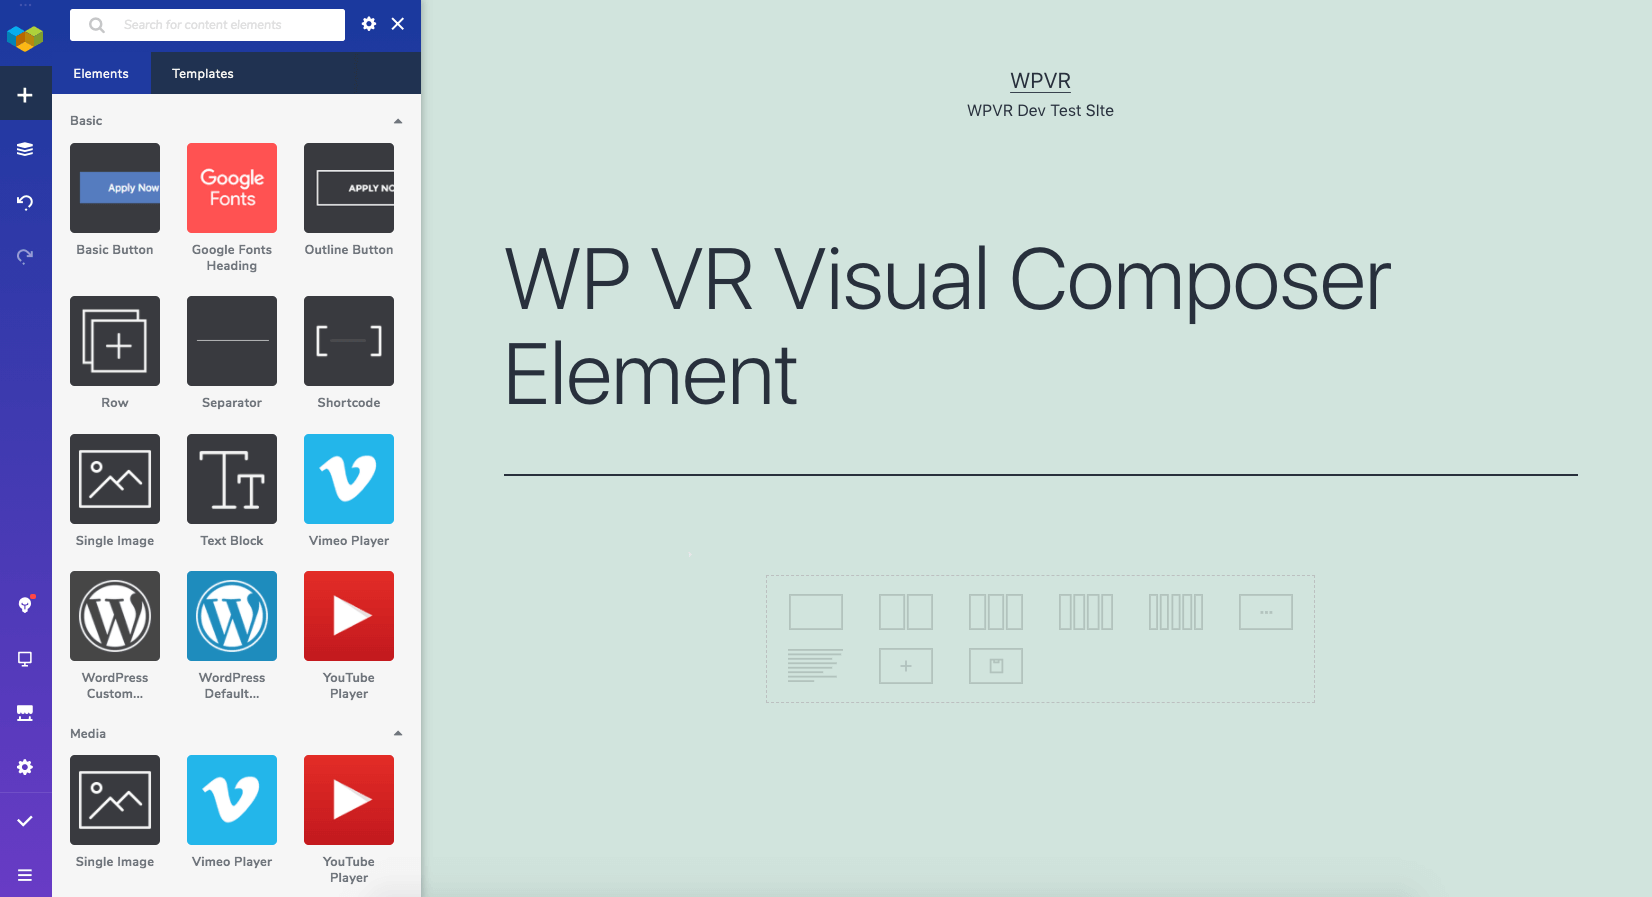
Step 2: #
On the search bar for Visual Composer Elements, type “WP VR”.
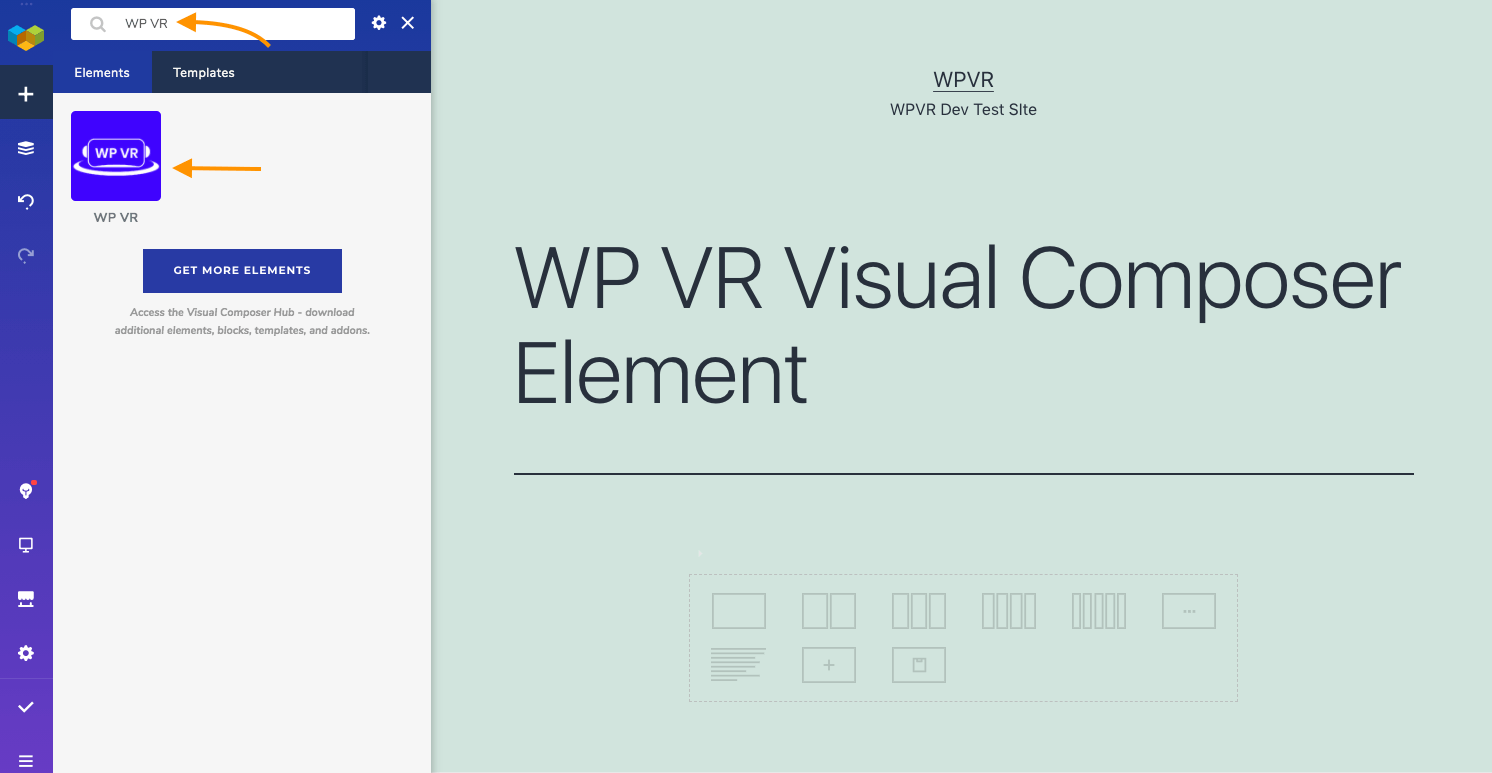
The thumbnail for the WPVR Visual Composer Element will appear on the result.
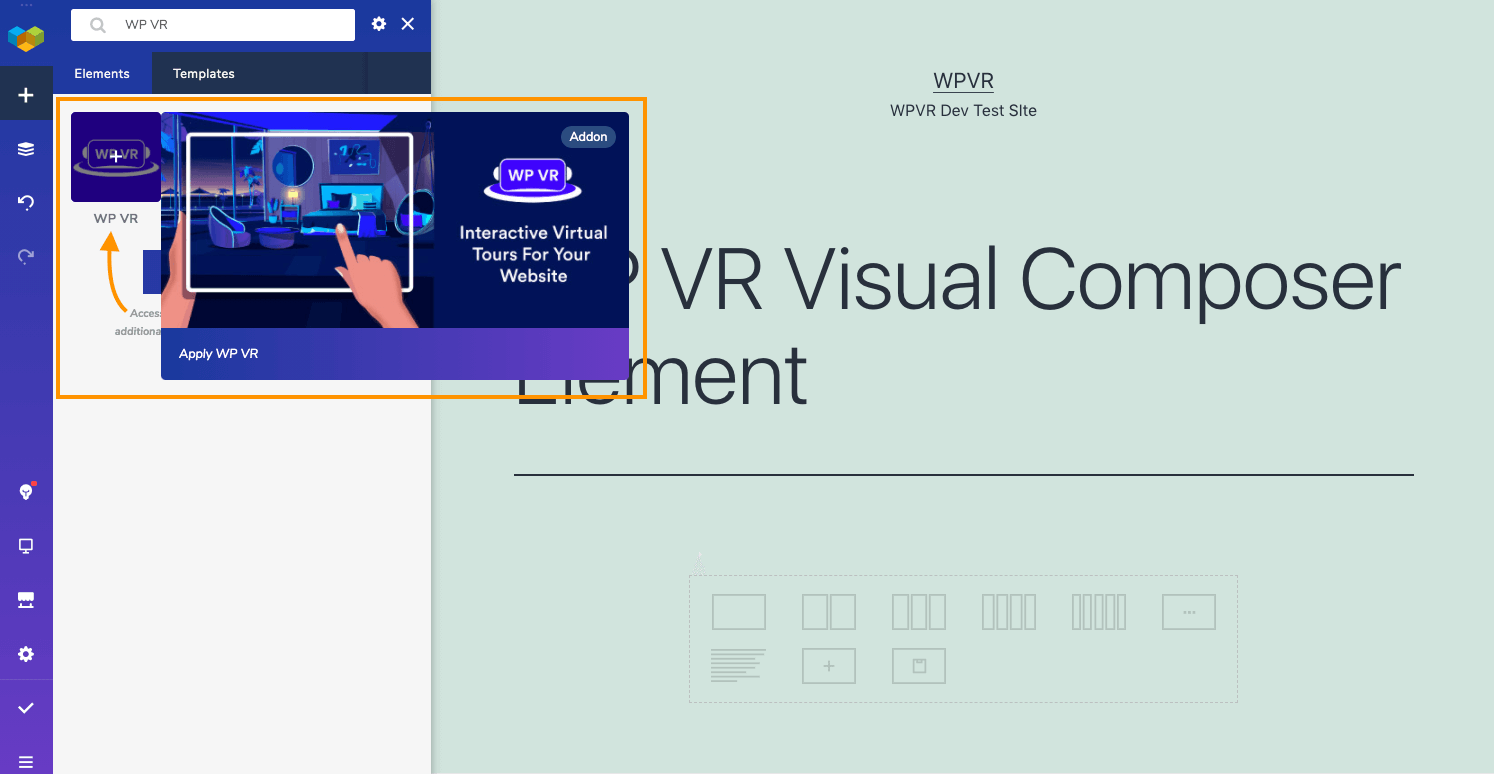
Now if you hover on the thumbnail, you will see the preview image of this add-on.
Step 3: #
Drag the WP VR thumbnail, and drop it on your page where you want to publish the tour.

It will add the element on your page and give you the options to set your Tour ID, Tour Width, Tour Height, and Radius of the tour.
These fields will be available here:
- WP VR ID
- WP VR Width
- WP VR Height
- WP VR Radius
WP VR ID or Virtual Tour ID: #
This is a drop down field and if you click on it:

- It will show the titles of the saved tours on your site.
- The titles will appear from the latest to the oldest.
Choose your desired tour from this list.
WP VR Width: #
Here, you can set a width for your virtual tour on the front-end.
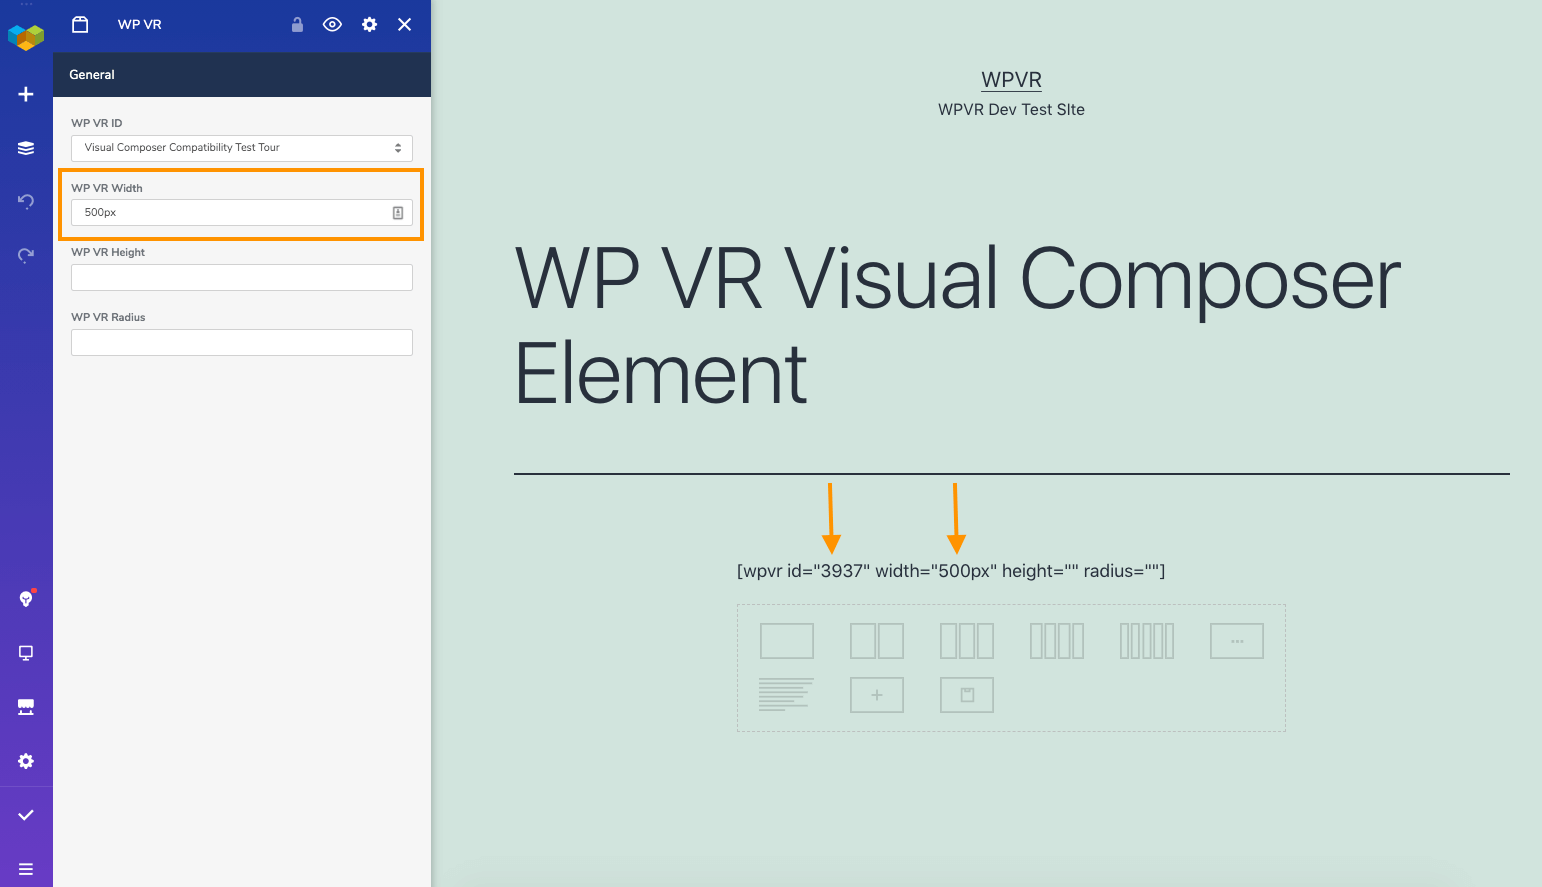
- Assign only positive numerical pixel values here. For example, 500px.
- You can use the ‘fullwidth’ tag here, your tour will take the full width of the container.
- Do not set any percentage or text here.
If you’ve chosen a Tour ID, it will appear in the element along with your width value.
WP VR Height: #
In this field, you can set a custom height value to your virtual tour for the front-end.

- Assign positive numerical pixel values here. For example, 350px.
- Do not set any percentage here.
WP VR Radius: #
This field allows you to set a radius for your virtual tour.

- Assign only positive numerical pixel values here. For example, 5px.
- Do not set any percentage or text here.
**You can also keep this field empty, then no radius will be assigned to your tour.
Step 4: #
Once you’ve set these for your tour, publish or update the page. Here is how the virtual tour will look like once you’ve published on your page:

That’s it.
As you can see, it’s really easy to publish WPVR virtual tours on your WordPress website using Visual Composer Website Builder.