If you’re creating a special virtual tour, you may want to make it a full screen virtual tour by default and dedicate a page for it.
Suppose, you’re creating a virtual tour of a luxury apartment or a virtual conference center.
In that case, you want it as a fullscreen virtual tour, so your viewers will have a proper experience of the place.
With WPVR, you can easily create full page or full view virtual tours.
The Great thing about it, You can do this using the Free Version of WPVR.
In this guide, you’ll learn how to create a full page virtual tour or full view virtual tours on your WordPress website using WPVR.
Let’s get started.
Create Full Screen Virtual Tour Using WPVR #
Then follow these simple steps to create a full page virtual tour:
1. Create A Virtual Tour using WPVR. You can follow this guide to create a virtual tour using WPVR within minutes.
Then go to the edit mode of your tour.
You can also go to the edit mode of one of your already existing tours.
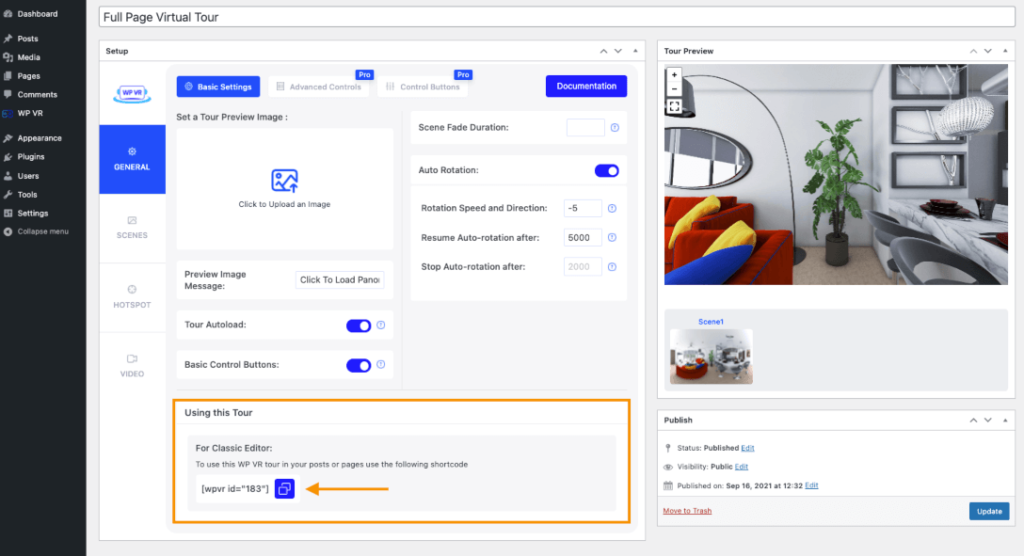
2. You’ll find a section named For Classic Editor, where you’ll find a shortcode here. Copy this code by clicking on the blue button.

3. Choose to create a new page on your website.
You can give a title to this page, but since the virtual tour will be a full page virtual tour, only the tour will appear on the front end.

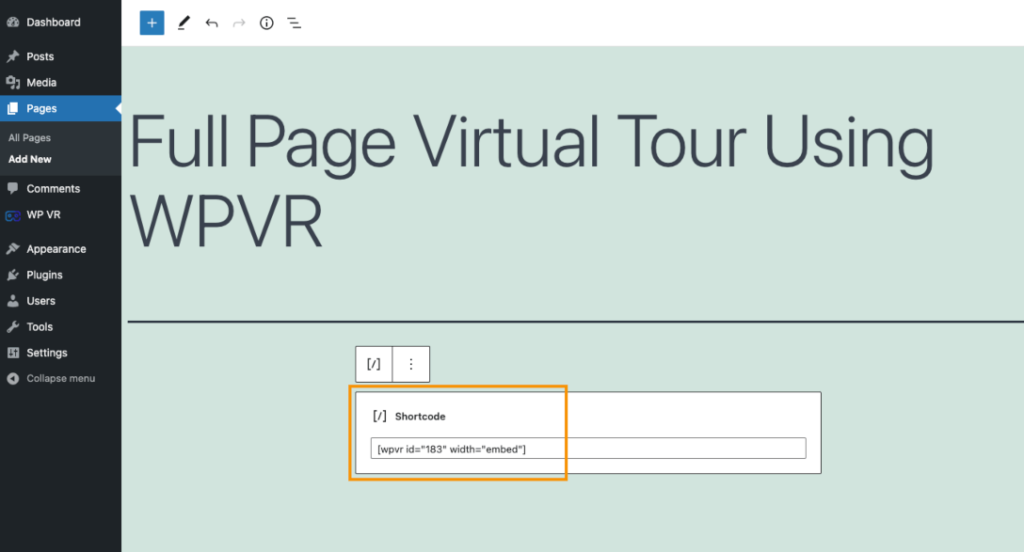
Select the shortcode block or element of your page builder and paste the shortcode here.
Here, we’re using Gutenberg.
Set the shortcode like this:
[wpvr id="xxx" width="embed"]Set your Tour ID in the place of wpvr id.
Now, Update or Publish this page.
4. Choose to view your published/updated page or visit the page.
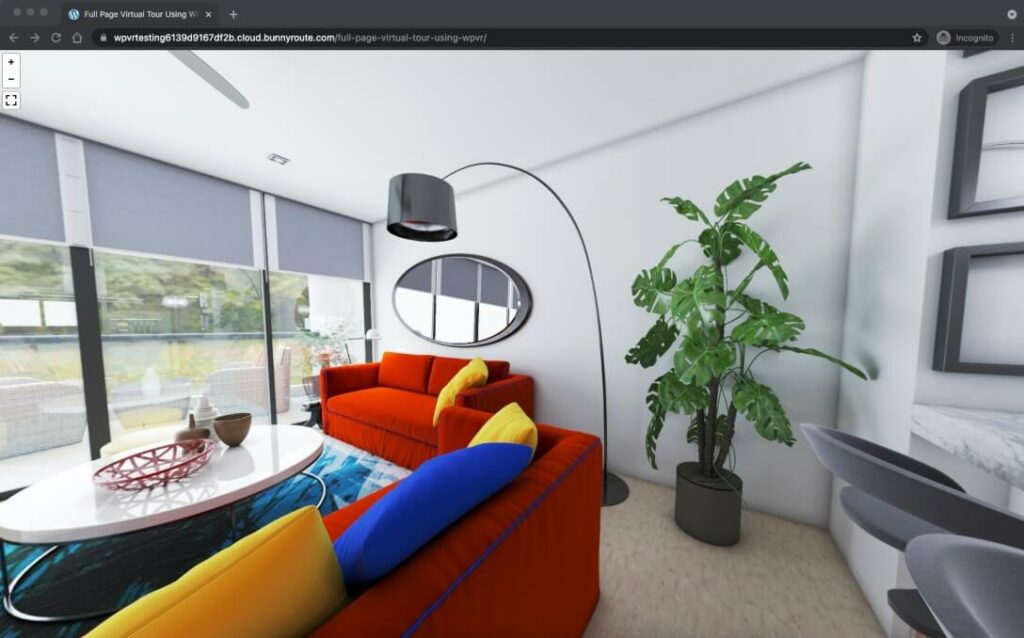
Your page will show up like this:

That’s it. Your virtual tour is now in full window mode or full view mode by default.
Now your viewers can have a focused experience of your virtual tour.
You can also create partial panorama virtual tours using panorama taken with your mobile.
Follow this guide to create mobile panorama virtual tours.