Here’s a quick plugin overview of Product Feed Manager For WooCommerce (PFM).
PFM Plugin Overview #
After you have installed and activated the plugin, click on the Product feed menu on your dashboard.

As you can see, under the Product feed, you will get the following sub-menus:
- All Product Feeds
- Add New Feed
- Category Mapping
- Google Merchant Settings
- Settings
- Support
- License
- Get Started
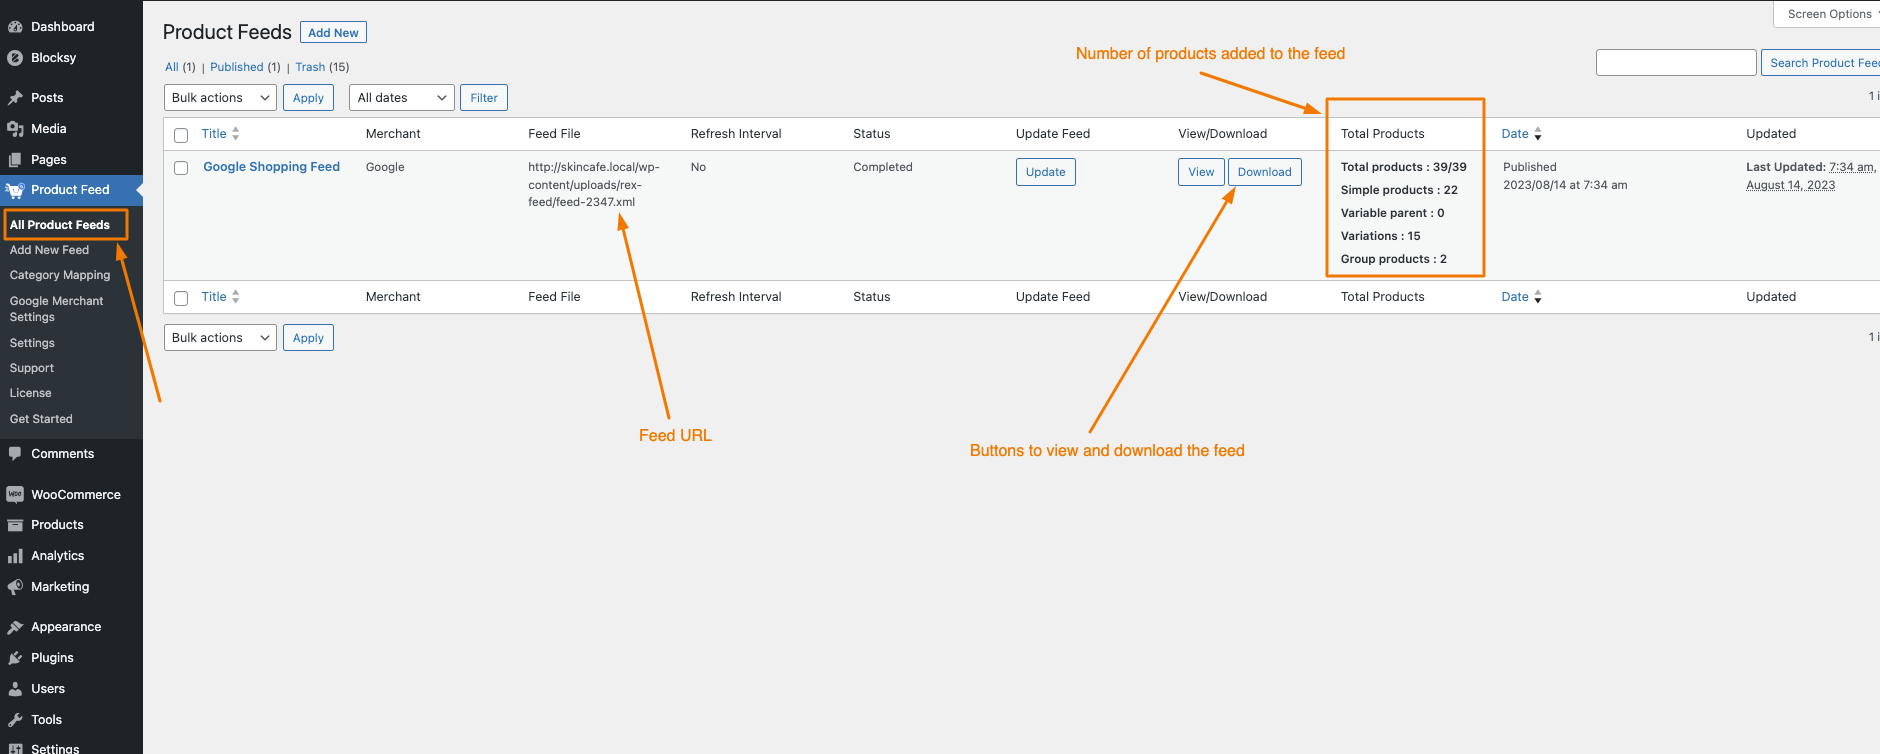
1. All Product Feeds #

Here, you will find all the feeds you generated, listed in one place.
You will be able to collect the feed link, download the feed, or edit the feed.
And you will also be able to check the number of products added to the feed.
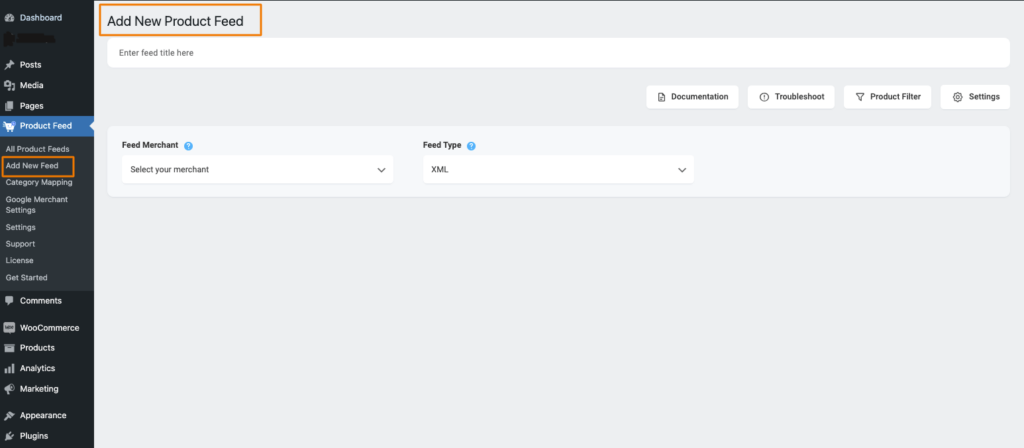
2. Add New Feed #
Clicking on this option will take you to the feed generation page where you can start configuring a new feed.

- Here’s a guide to learn how you can generate a product feed.
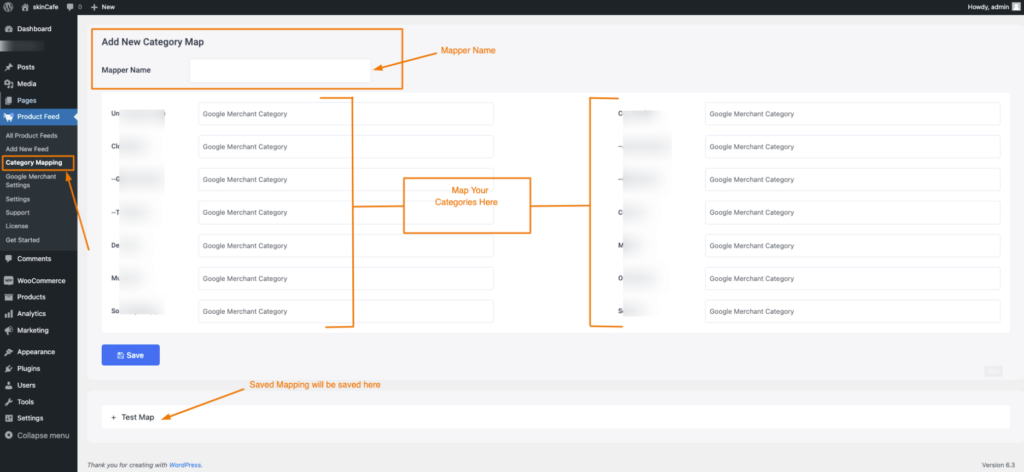
3. Category Mapping #

Some marketplaces require you to submit product categories according to their own set category values.
So, rather than changing categories in your store, you can map your categories accordingly using the Category Mapping page.
Here’s a complete guide on using the Category Mapping feature.
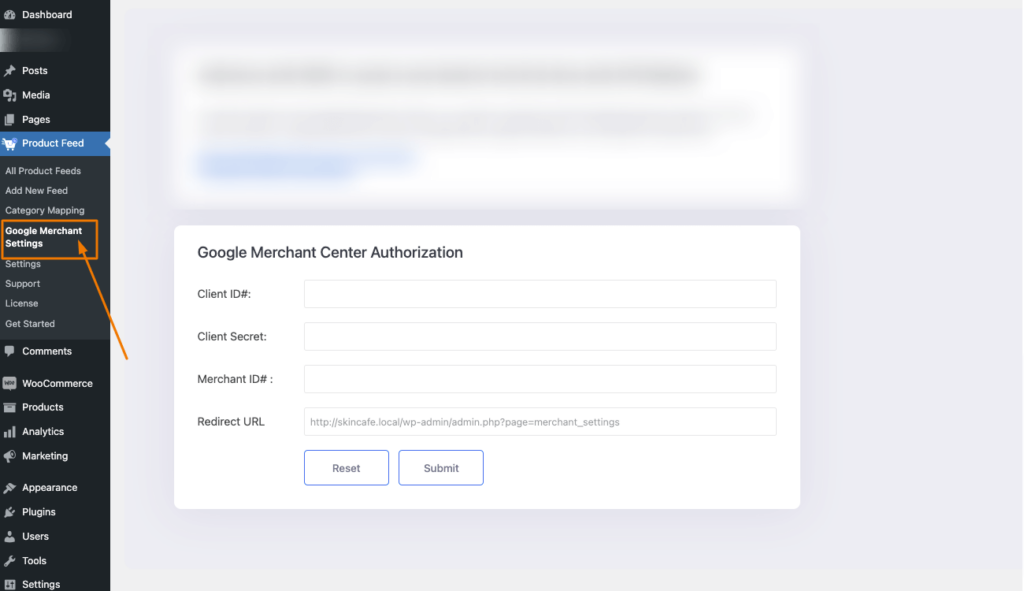
4. Google Merchant Settings #

Our plugin allows you to Auto-sync your products to Google Merchant Center.
You will be able to connect to Google API for auto-sync here.
**Please note that this feature will work for many and may not work for some people due to Google’s API access restrictions. So, rather it’s best to use the alternative method to set Google Auto-sync which is a faster process.
The following are guides to help you out with it.
5. Settings #

In this menu, you will find several useful features to use the plugin more efficiently.
Initially, you will be on the General tab where you will get links to our documentation, and support forum or you can check out some of our other plugins.
However, there you will see more tabs on top:
- Controls
- Merchants
- System Status
- Logs
i. Controls Tab #

This section includes several useful features such as batch control, enabling essential custom fields, JSON-LD structured data fixes, and many more.
ii. Merchants Tab #

Here, you will get a list of all the Supported Merchants.
iii. System Status #

The plugin’s processes depend on a few things to run properly. You will be able to find out if your site meets the minimum requirements here.
iv. Logs #

If you enable the Logs option under the Controls tab, then the plugin will keep logs of all activities with the plugin.
6. Support #
Clicking on the Support menu will take you to our site where you can open a ticket for any issues you may face.
7. License #

Once you upgrade to Pro and activate the Pro plugin, you have to input the license key here and activate it to use all the Pro features of the plugin.
Now, that you got an overview of the plugin, now let us move on to our next guides to learn about all the features that you will be able to use for accurate feed generation.