You can embed a WP VR virtual tour on your website in 3 ways:
You can control the width and height and radius of your virtual tours by following the instructions here.
WP VR Gutenberg Block To Embed and Customize A Virtual Tour #
If you’re using Gutenberg, you will find the WPVR block, under the common blocks, to embed a virtual tour.
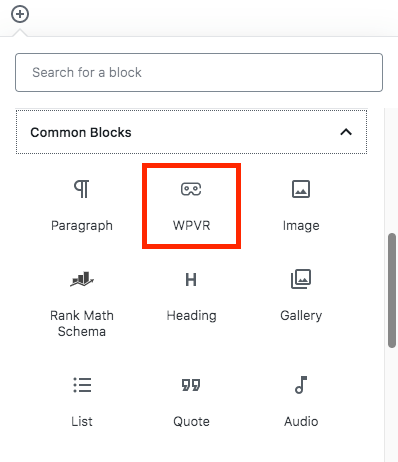
You can also just search for WPVR and this block will appear.
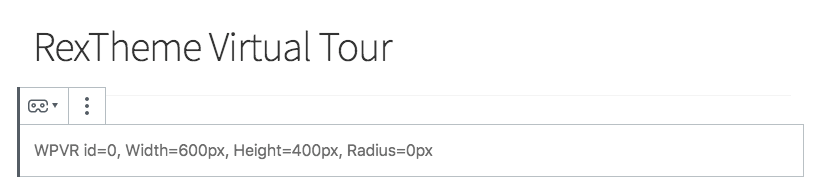
Once you choose the WPVR block, you will see the following:
For this block, look at the options on the right side. You’ll see the following options:
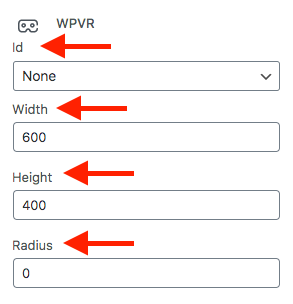
- Id
- Width
- Height
- Radius
Choose the Id of your desired WPVR tour that you wish to embed
Set the Width of the tour as you desire.
- Assign a positive numeric value which will be used as px. For example, 600
- Or, you can use a percentage. Example: 90%
- If you wish the tour to be full-width of the page, just set it as: ‘100vw’.
Set the Height of the tour as you desire.
- Only assign a positive numeric value which will be used as px. For example, 400
- Do not use percentage or any text
Set the Radius of the tour as you desire (to create round edges of the tour).
- Only assign a positive numeric value which will be used as px. For example, 10
- Do not use percentage or any text
That’s it. Now you can preview the tour to see how it looks.
WP VR Elementor Widget To Embed and Customize A Virtual Tour #
If you’re using Elementor, you will find the WPVR widget, under the common widgets, to embed a virtual tour to your website.
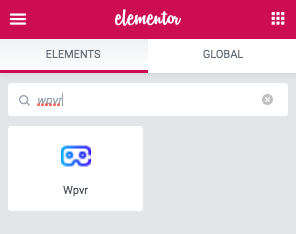
Find it by searching for WPVR on the Elements section.
Or you can simply find it by scrolling down on the General section of Elements.
Drag and drop the widget in the container you want to embed the virtual tour on. On the left side, you will find the following options:

- Id
- Width
- Height
- Radius
Choose the Id of your desired WPVR tour that you wish to embed.
Set the Width of the tour as you desire.
- Assign a positive numeric pixel value. For example: 600px
- Or, you can use a percentage. Example: 90%
Set the Height of the tour as you desire.
- Only assign a positive numeric pixel value. For example: 400px
- Do not use percentage or any text
Set the Radius of the tour as you desire (to create round edges of the tour).
- Only assign a positive numeric pixel value. For example: 10px
- Or, you can use a percentage. Example: 5%
That’s it.
Shortcode To Embed and Customize A WPVR Virtual Tour #
If you’re using the Classic Editor, you have to use shortcodes to embed a virtual tour on a page.
On the edit mode of your tour, you can see a box like this named Using this tour:
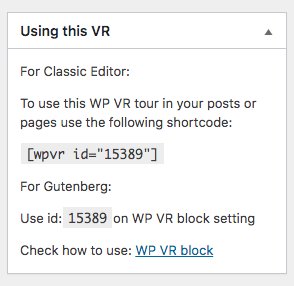
Copy and paste the shortcode on your page.
Then you can customize the size of the tour as shown below:
To set fixed desired tour size:
[wpvr id = "Your Tour ID" width = "1200px" height = "400px" radius = "0px" ]To set the tour size as a percentage of the container width size:
[wpvr id = "Your Tour ID" width = "90%" height = "400px" radius = "0px" ]To view the tour in full width view of the page/post:
[wpvr id = "Your Tour ID" width = "fullwidth" height = "400px" radius = "0px" ]Or you can copy the format from here and edit it to match your needs.
Set the Width of the tour as you desire.
- Assign the width in pixels. For example: width= “600px”
- Or, you can use a percentage. Example: 90%
- If you wish the tour to be full-width of the page, then use the text ‘fullwidth’.
Set the Height of the tour as you desire.
- Only assign a positive numeric value which will be used as px. For example, 400
- Do not use percentage or any text
Set the Radius of the tour as you desire (to create round edges of the tour).
- Only assign a positive numeric value which will be used as px. For example, 10
- Do not use percentage or any text
That’s it. Now you can preview the tour to see how it looks.
Now, let us take a basic overview of the plugin before you can start using all the advanced features.