In this doc, I will show you how you can include the Shipping values in your WooCommerce product feed with the Product Feed Manager for WooCommerce plugin.
Follow this doc to learn how to include Shipping values into your feed for Google and Facebook.
Follow the steps below to learn how to include the Shipping values in your product feed.
Step 1: Set Shipping Zone #
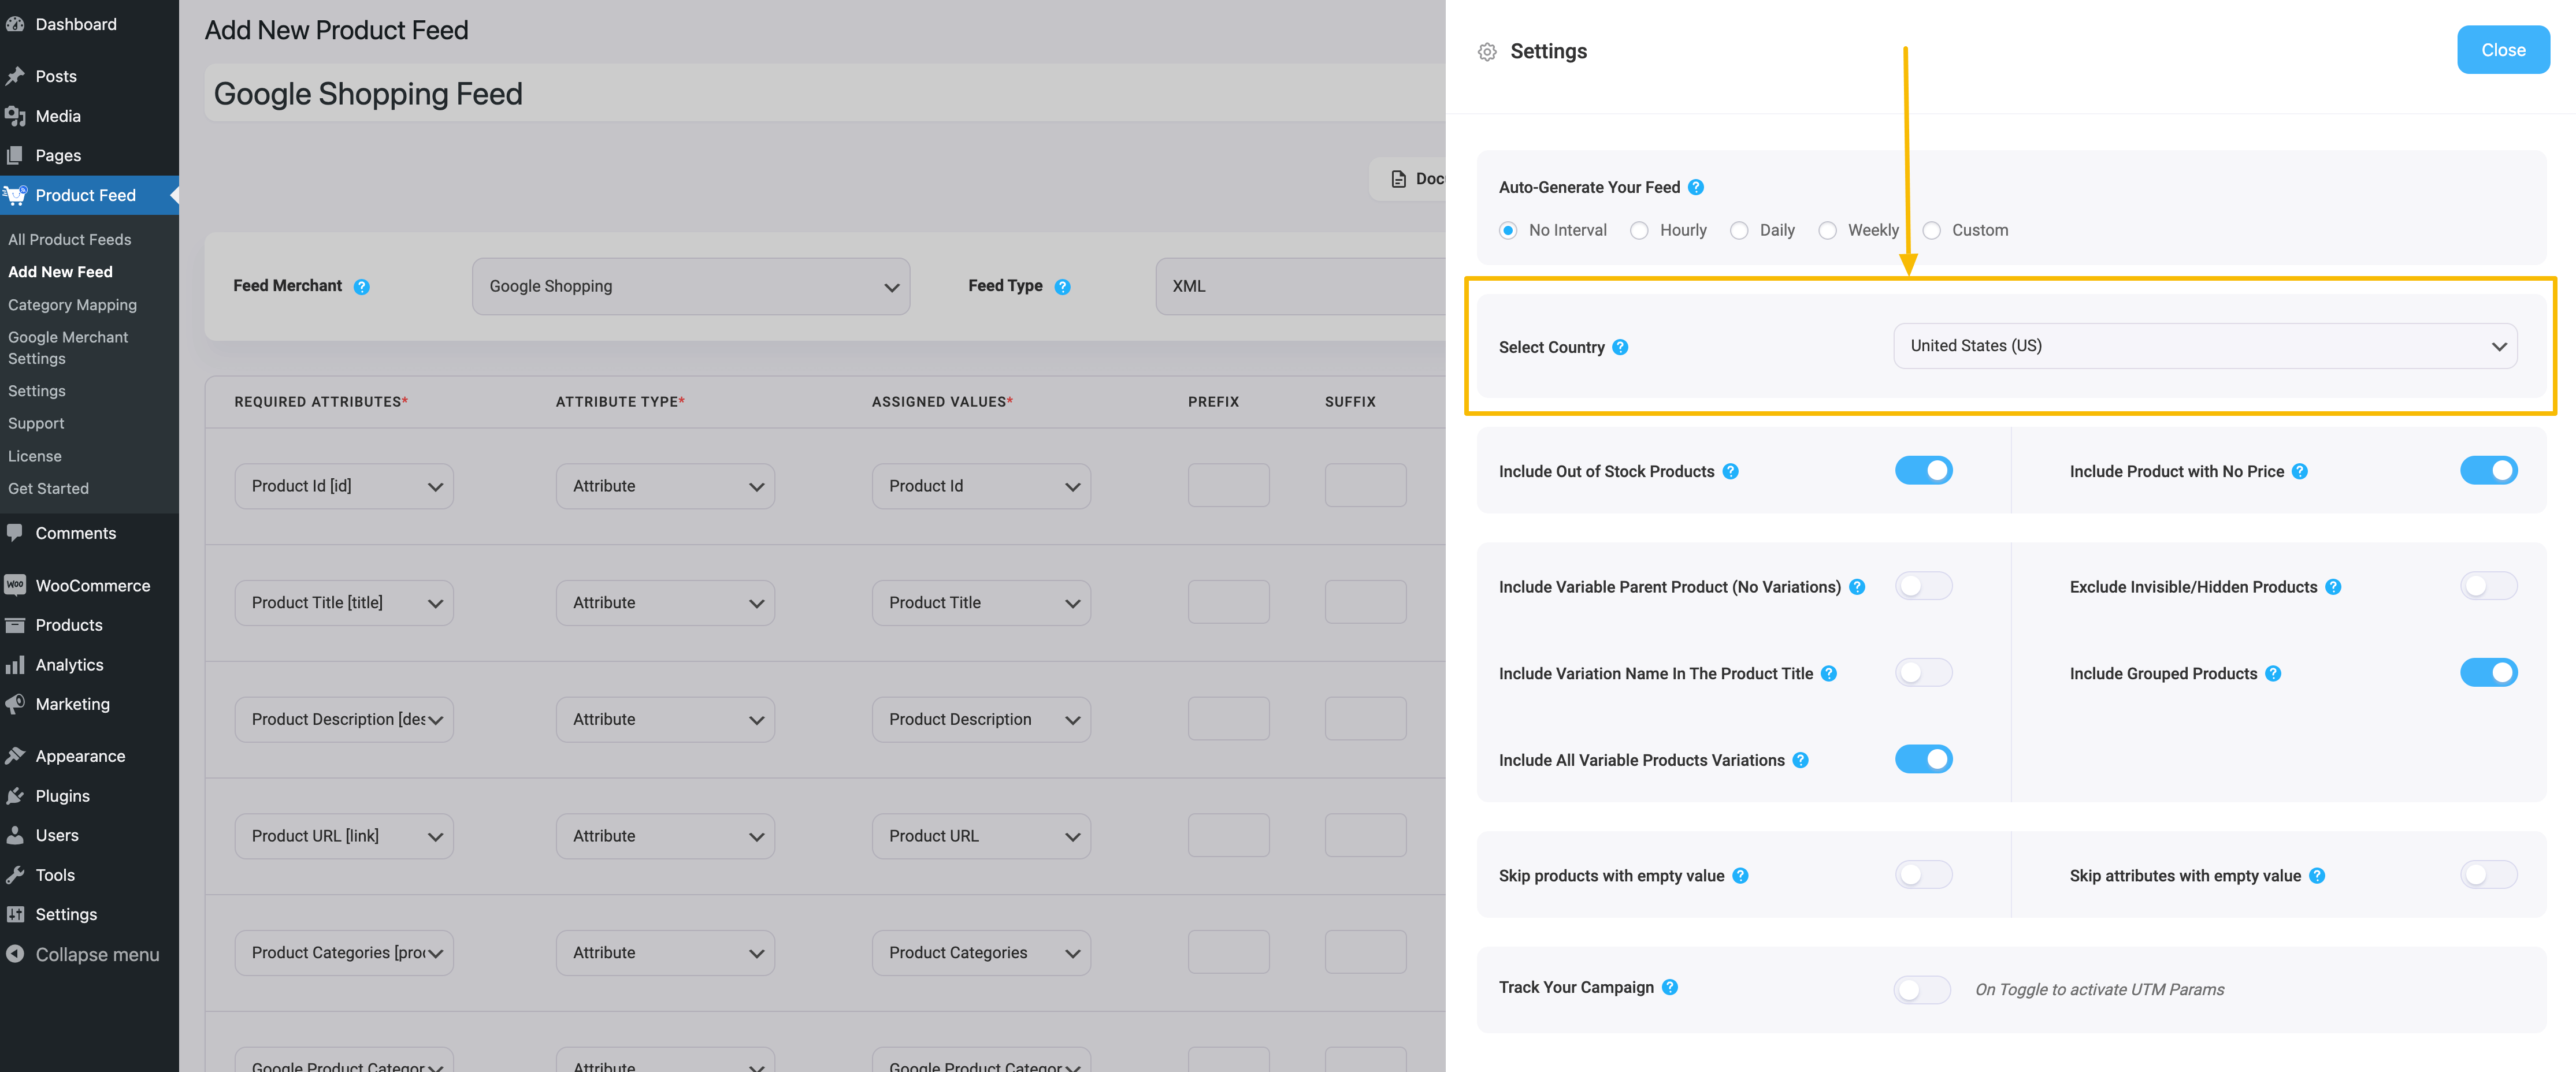
To include the Shipping values in your feed, you need to select Shipping Zone.
To do so,
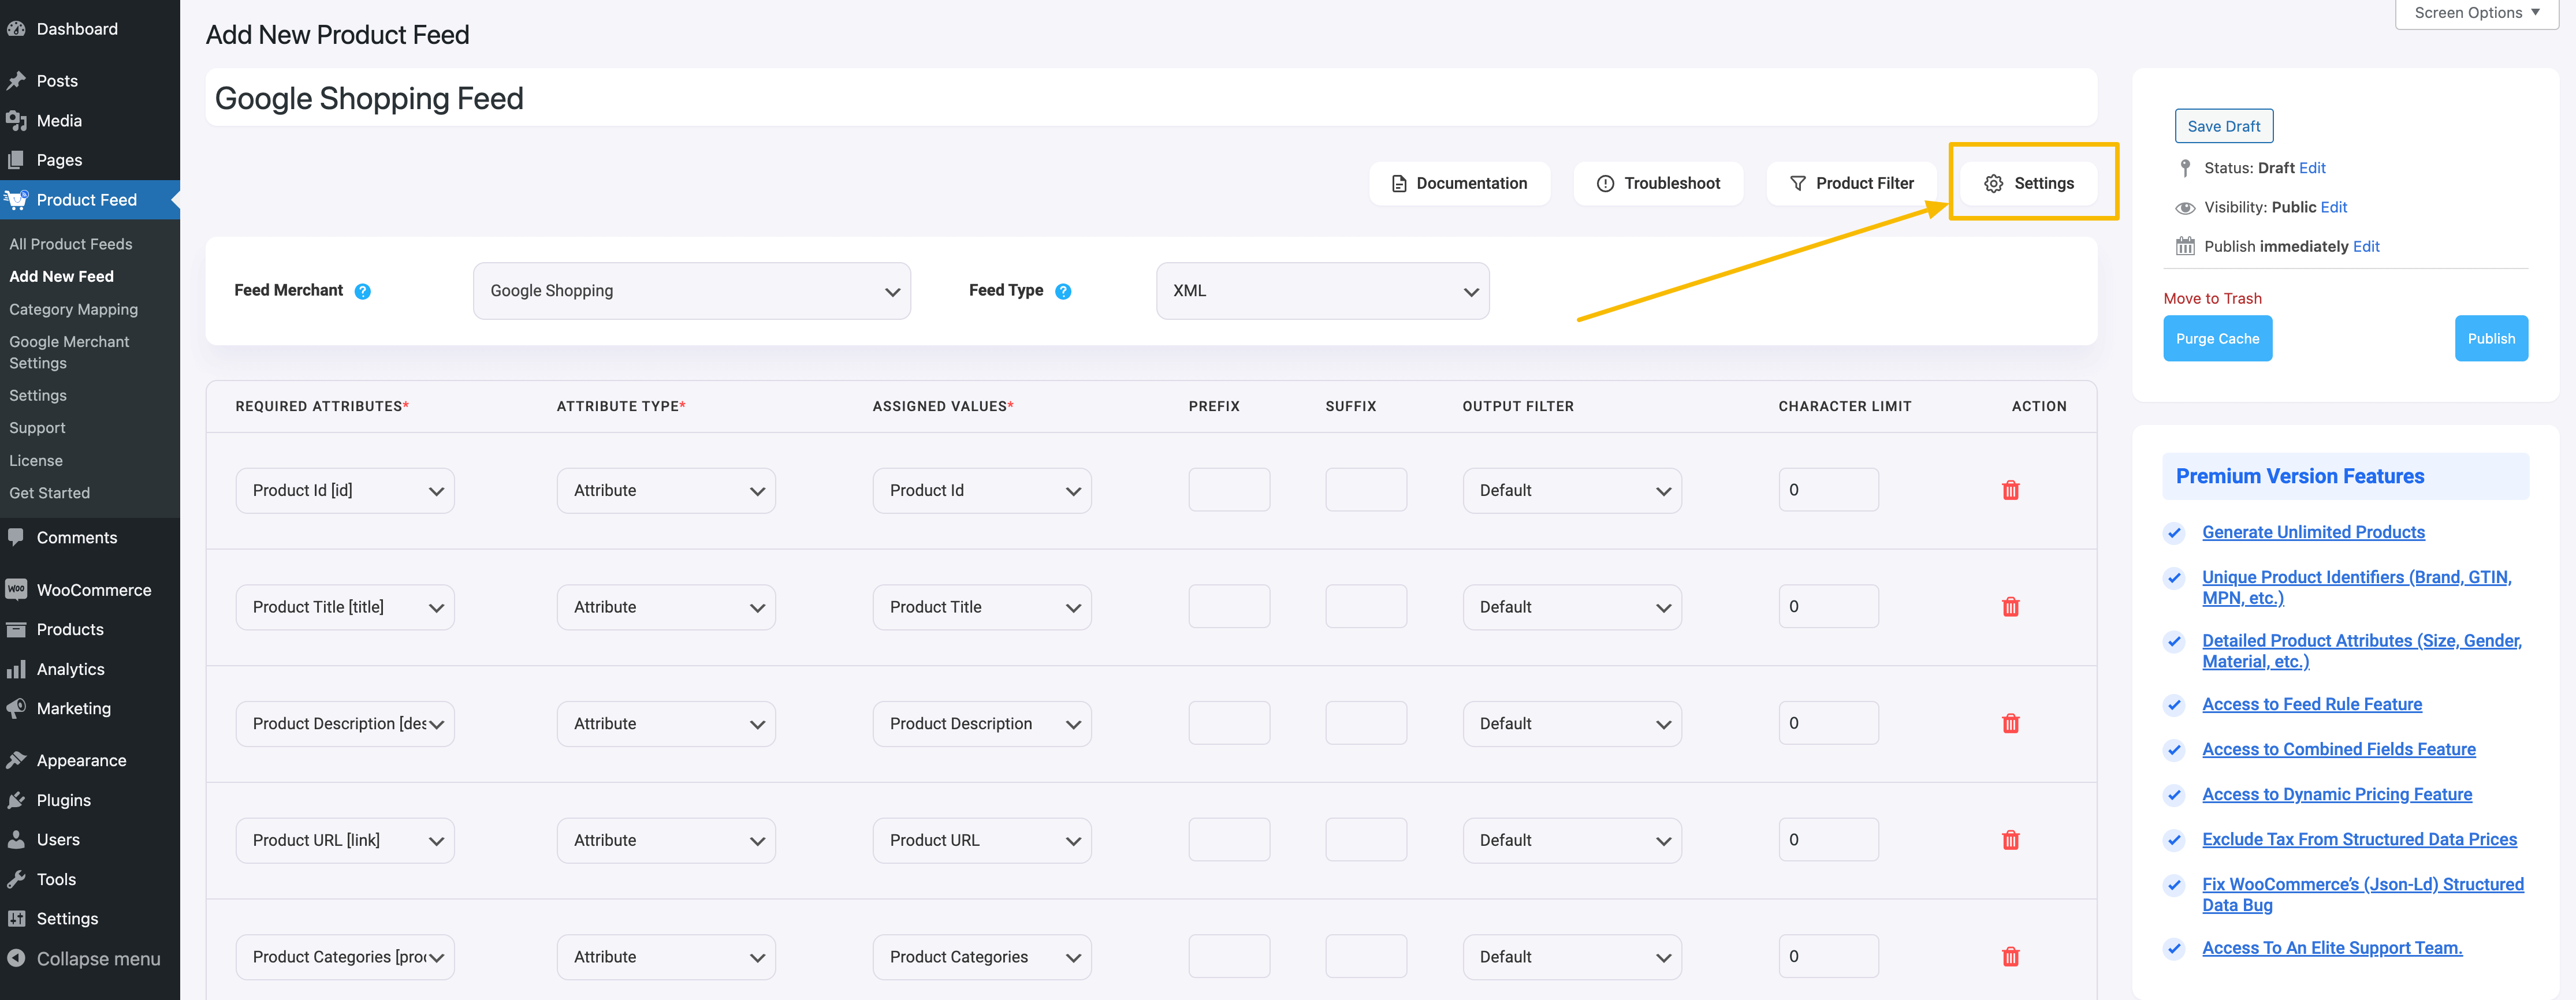
1. Click on the Settings button
2. The Feed Settings drawer will be opened, and here you will see an option to select your targeted Shipping Zone.
3. Close the Feed Settings drawer and go back to the attributes section.
Step 2: Add the Shipping attribute to the feed template #
1. Once you open the feed, scroll back to the bottom, and there you will get an option Add New Attribute and select the attribute on which you want to assign the Shipping price/ value.
For some merchants, you will find that the Shipping attribute is already included in the template as this attribute is required for that merchant.
And for some merchants, you may have to create a new custom attribute for shipping.

2. Once the attribute is in the attribute section, set the Attribute type as “Attribute”
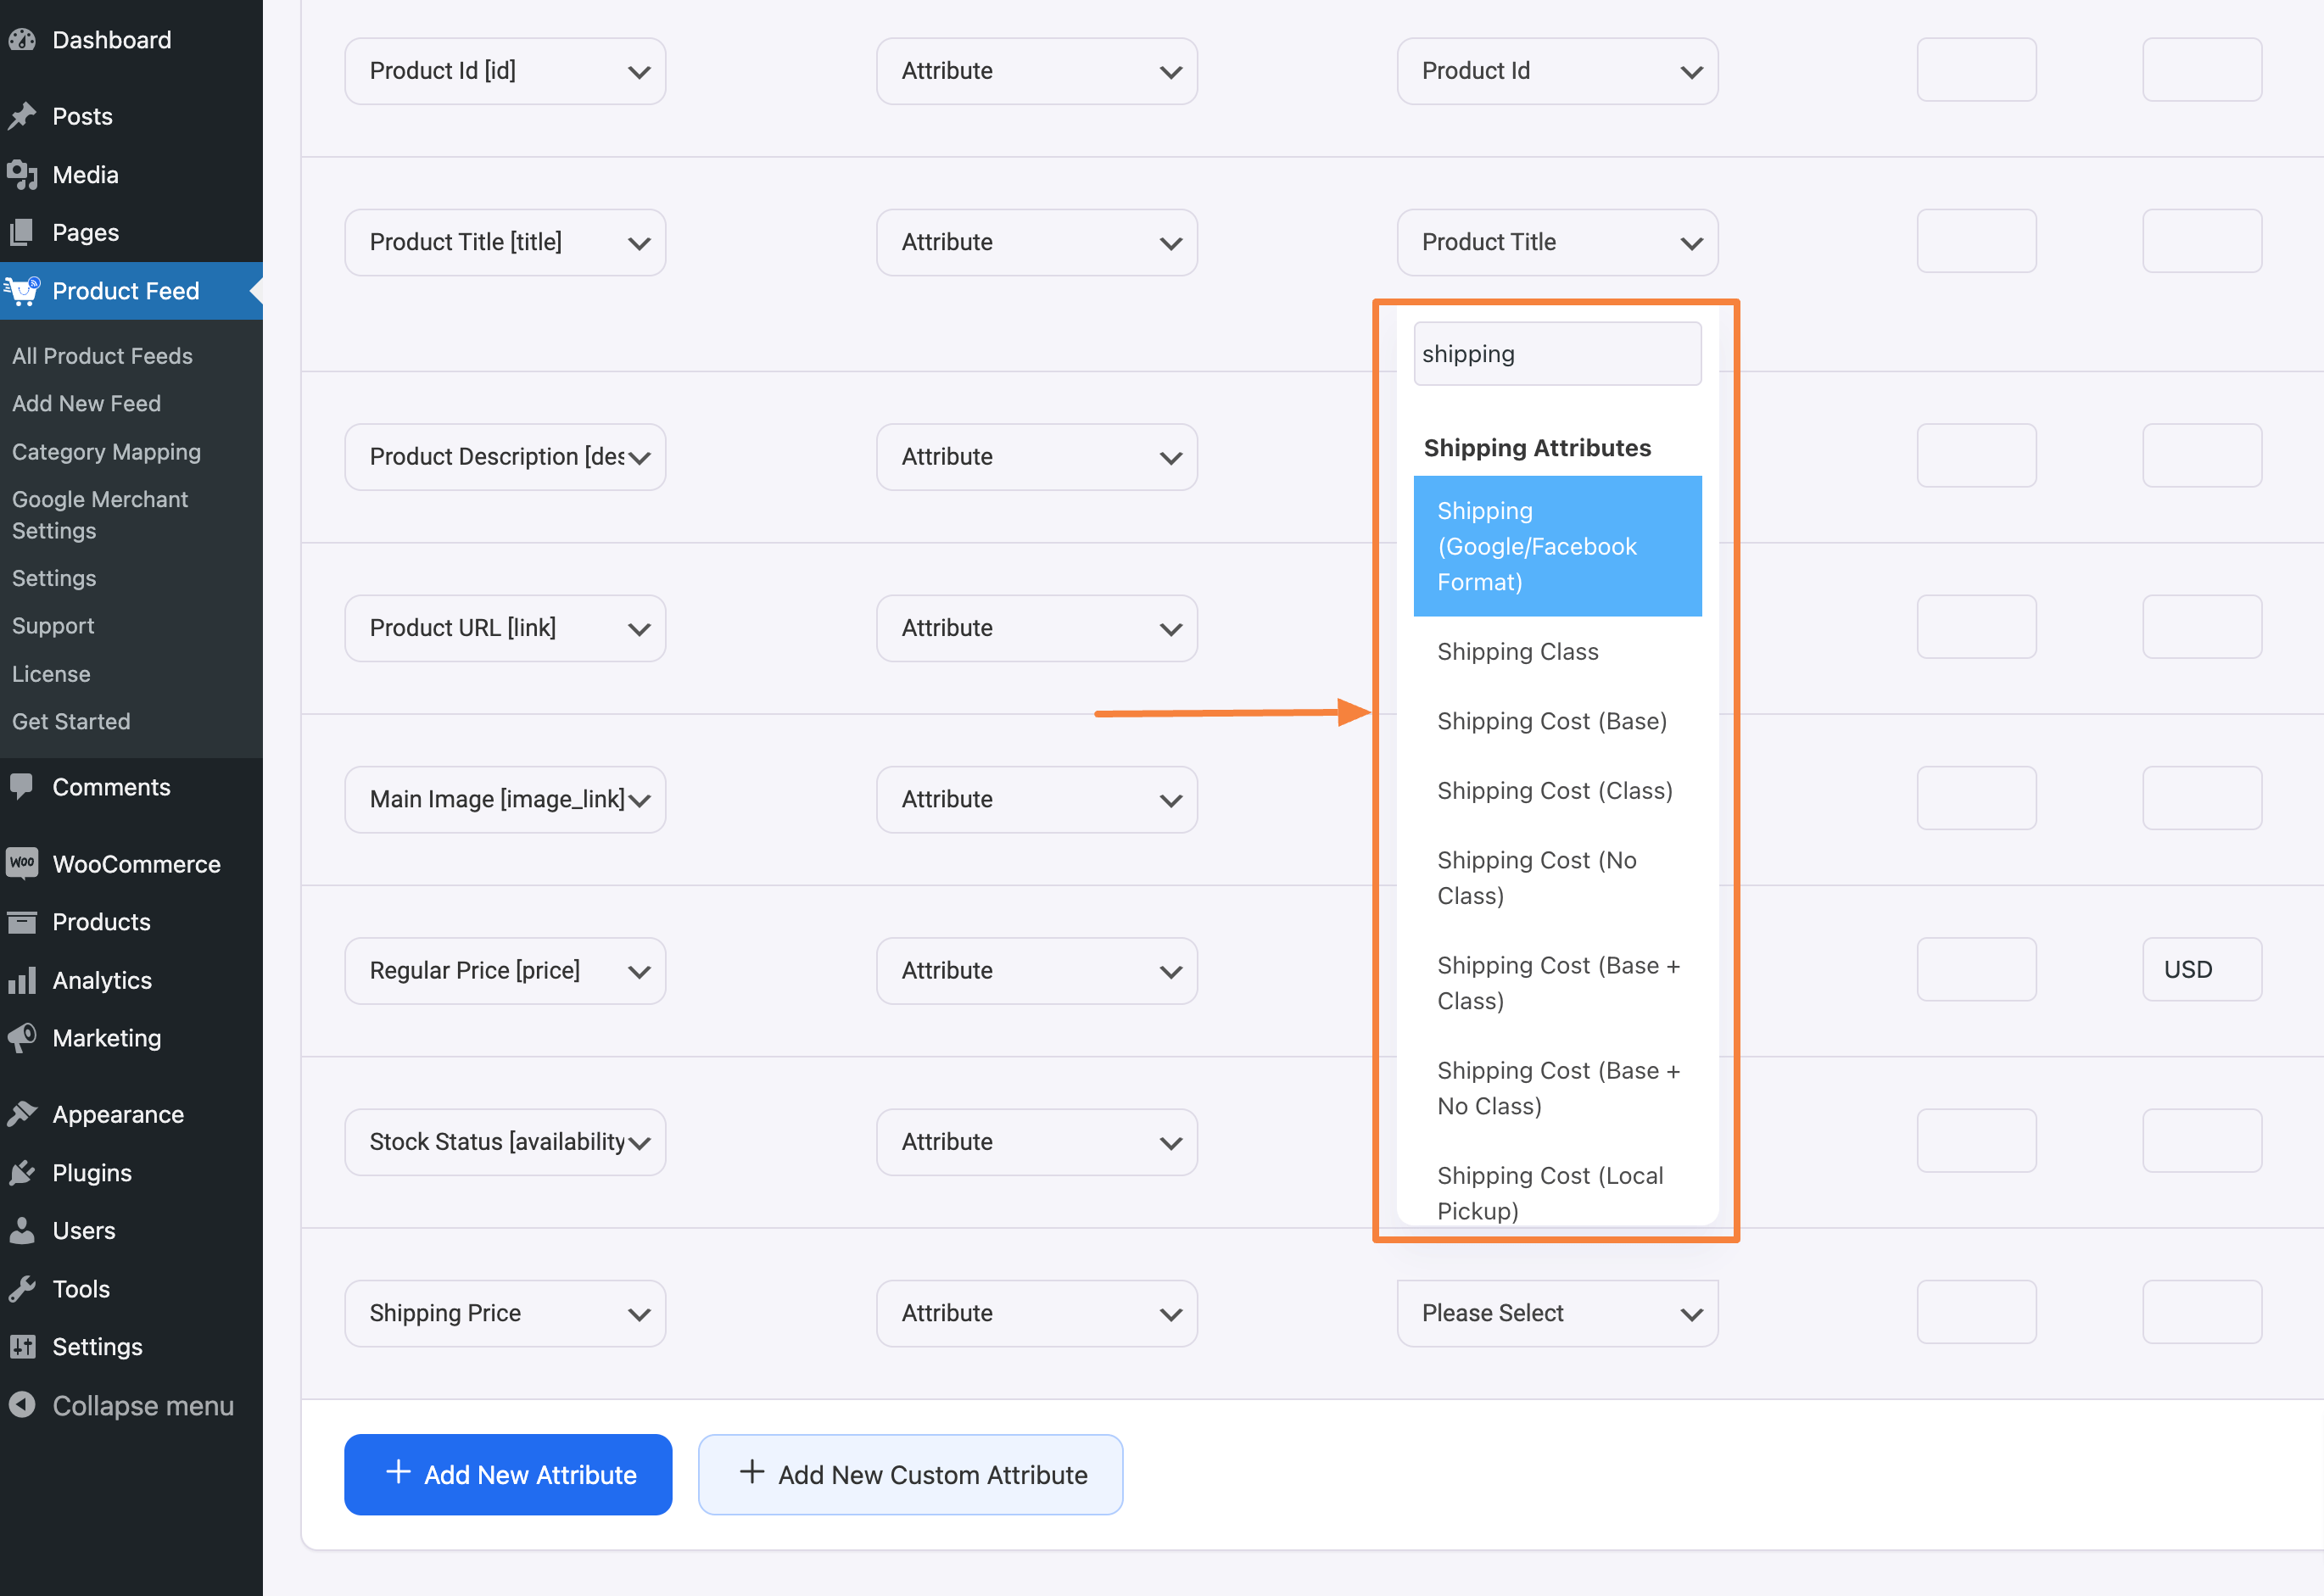
3. Search for the Shipping section in the Attribute value dropdown, and there you will get multiple Shipping value options, such as
- Shipping (Google/ Facebook Format)
- Shipping Class
- Shipping Cost (Base)
- Shipping Cost (Class)
- Shipping Cost (No Class)
- Shipping Cost (Base + Class)
- Shipping Cost (Base + No Class)
- Shipping Cost (Local Pickup)
- Shipping (Google/ Facebook Format) –
Set this Shipping (Google/ Facebook Format) value only if you are generating a feed for Google or Facebook. But in this case you must assign this to value only to the Shipping attribute. You can follow this doc to learn how to include Shipping values into your feed for Google and Facebook.
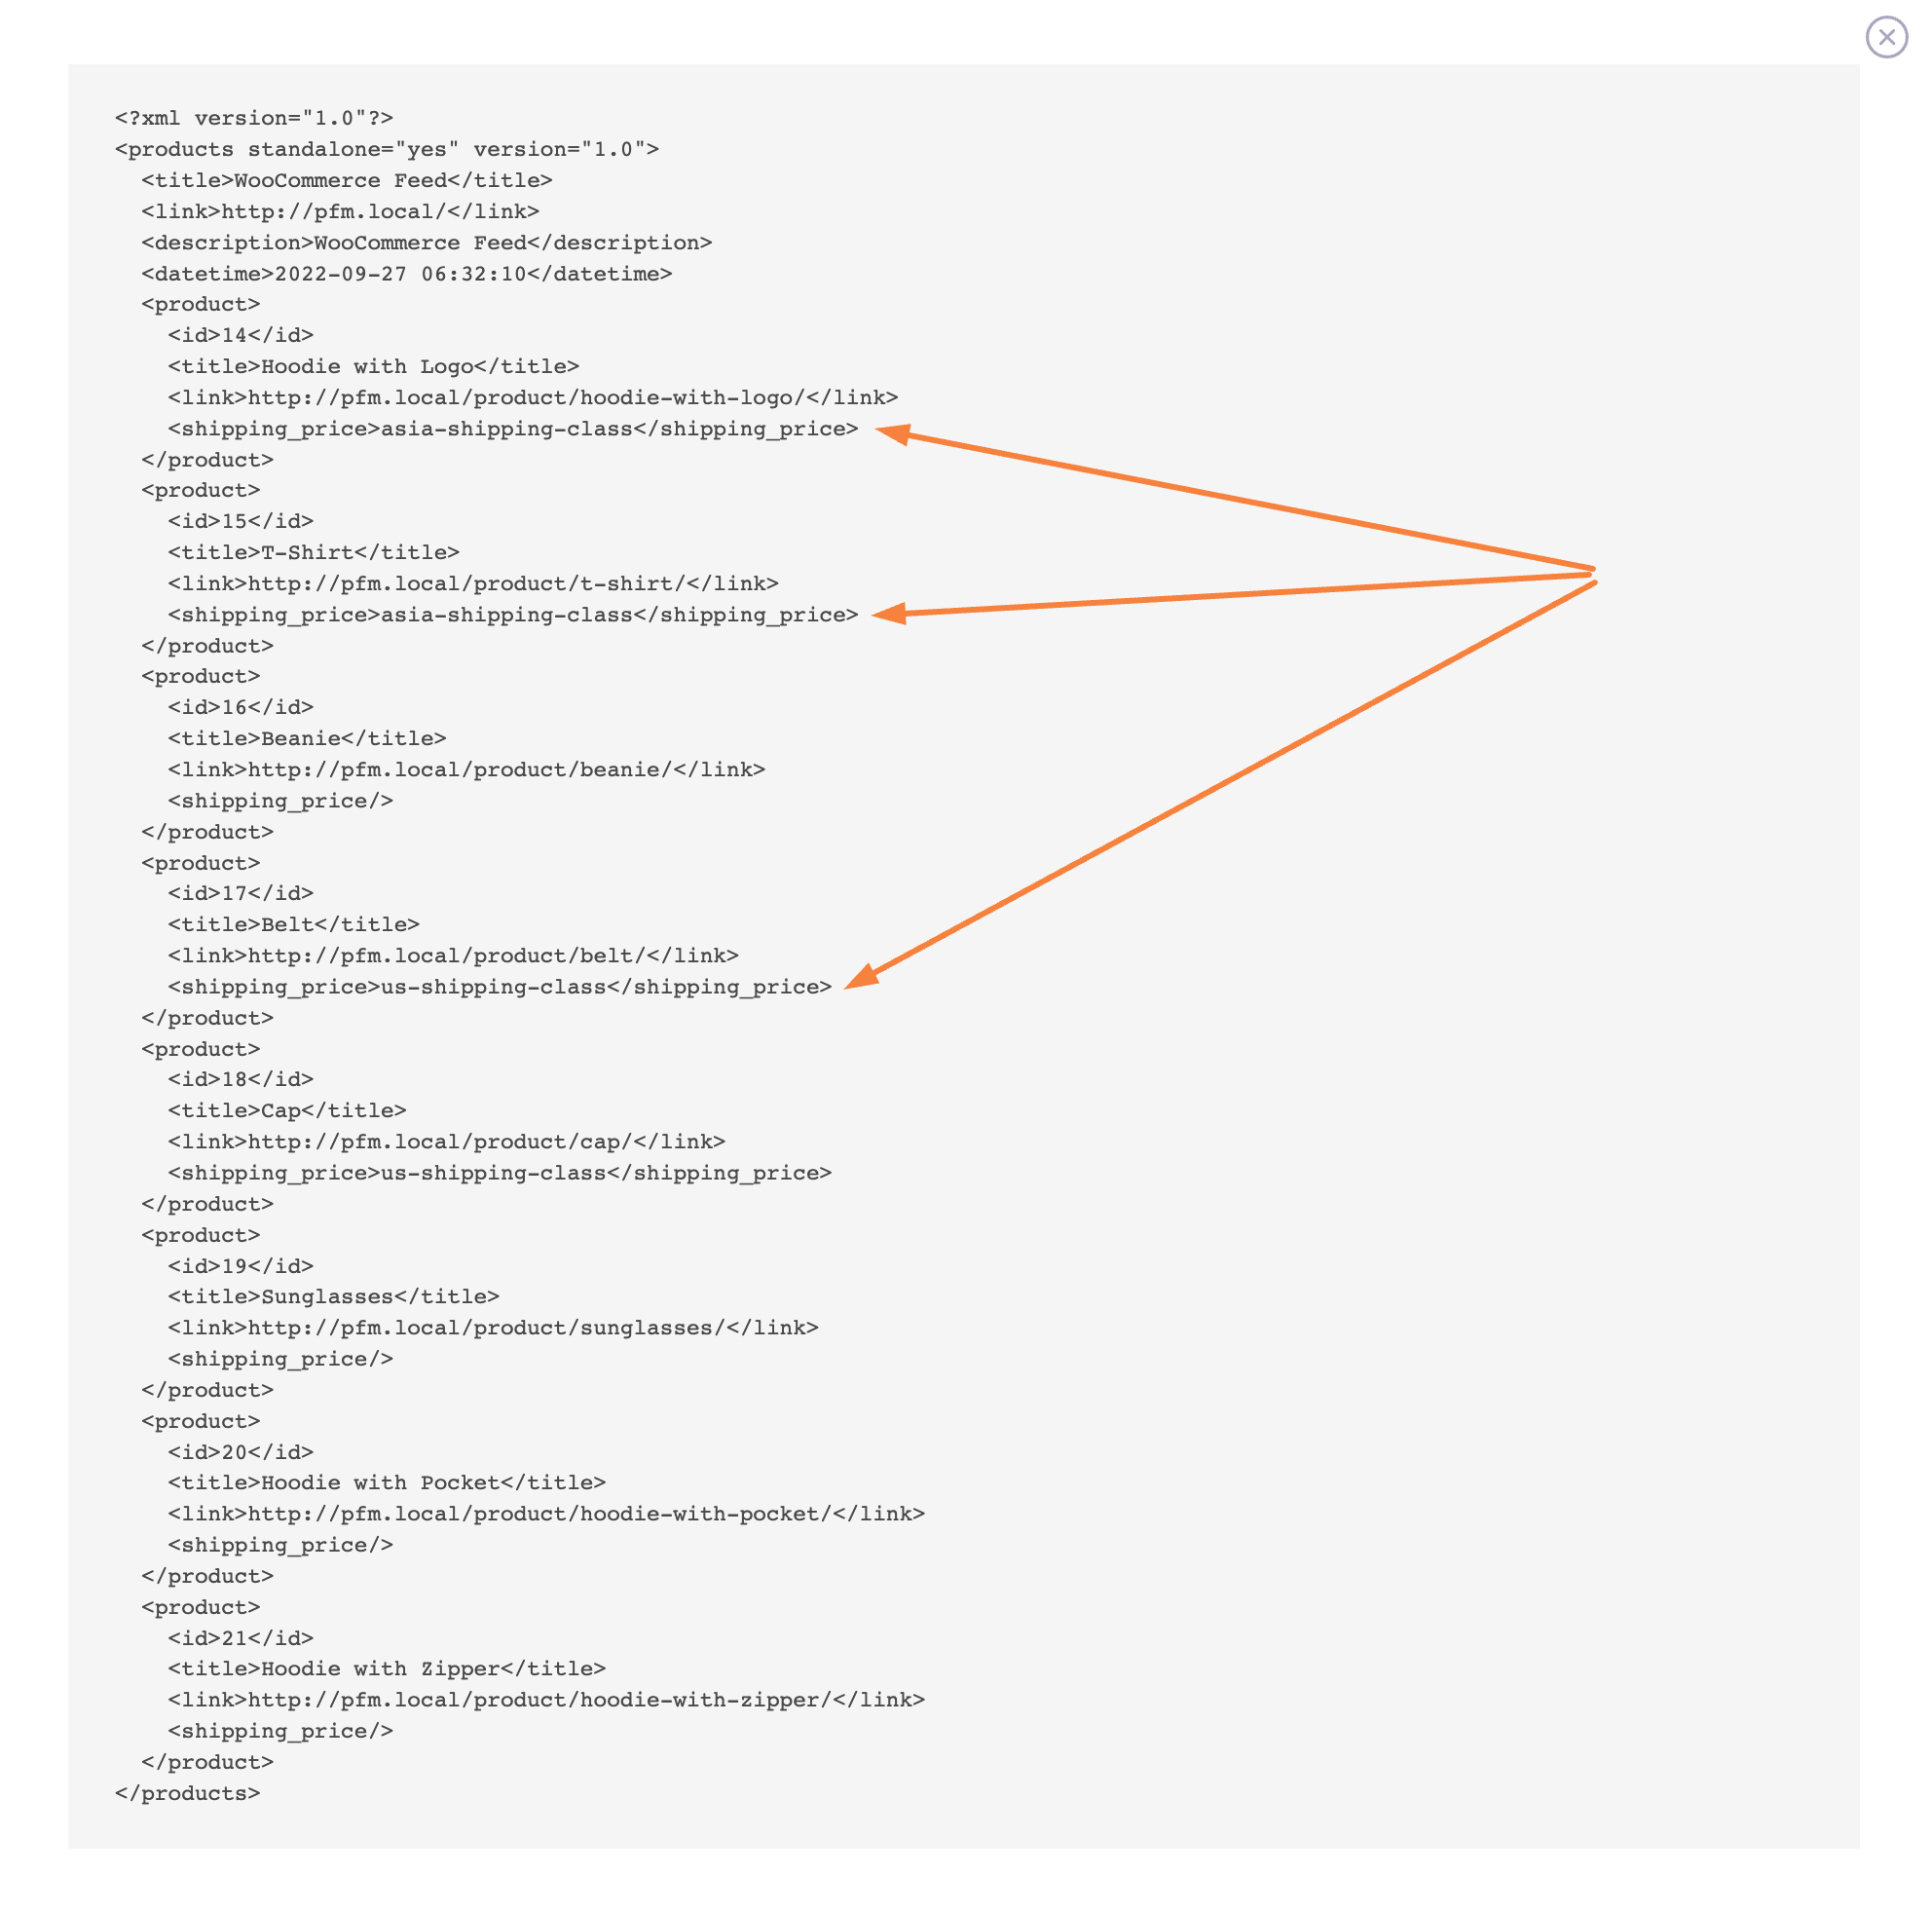
- Shipping Class
Assigning this value will include the shipping class to your feed.
- Shipping Cost (Base)
This will include the base shipping cost.
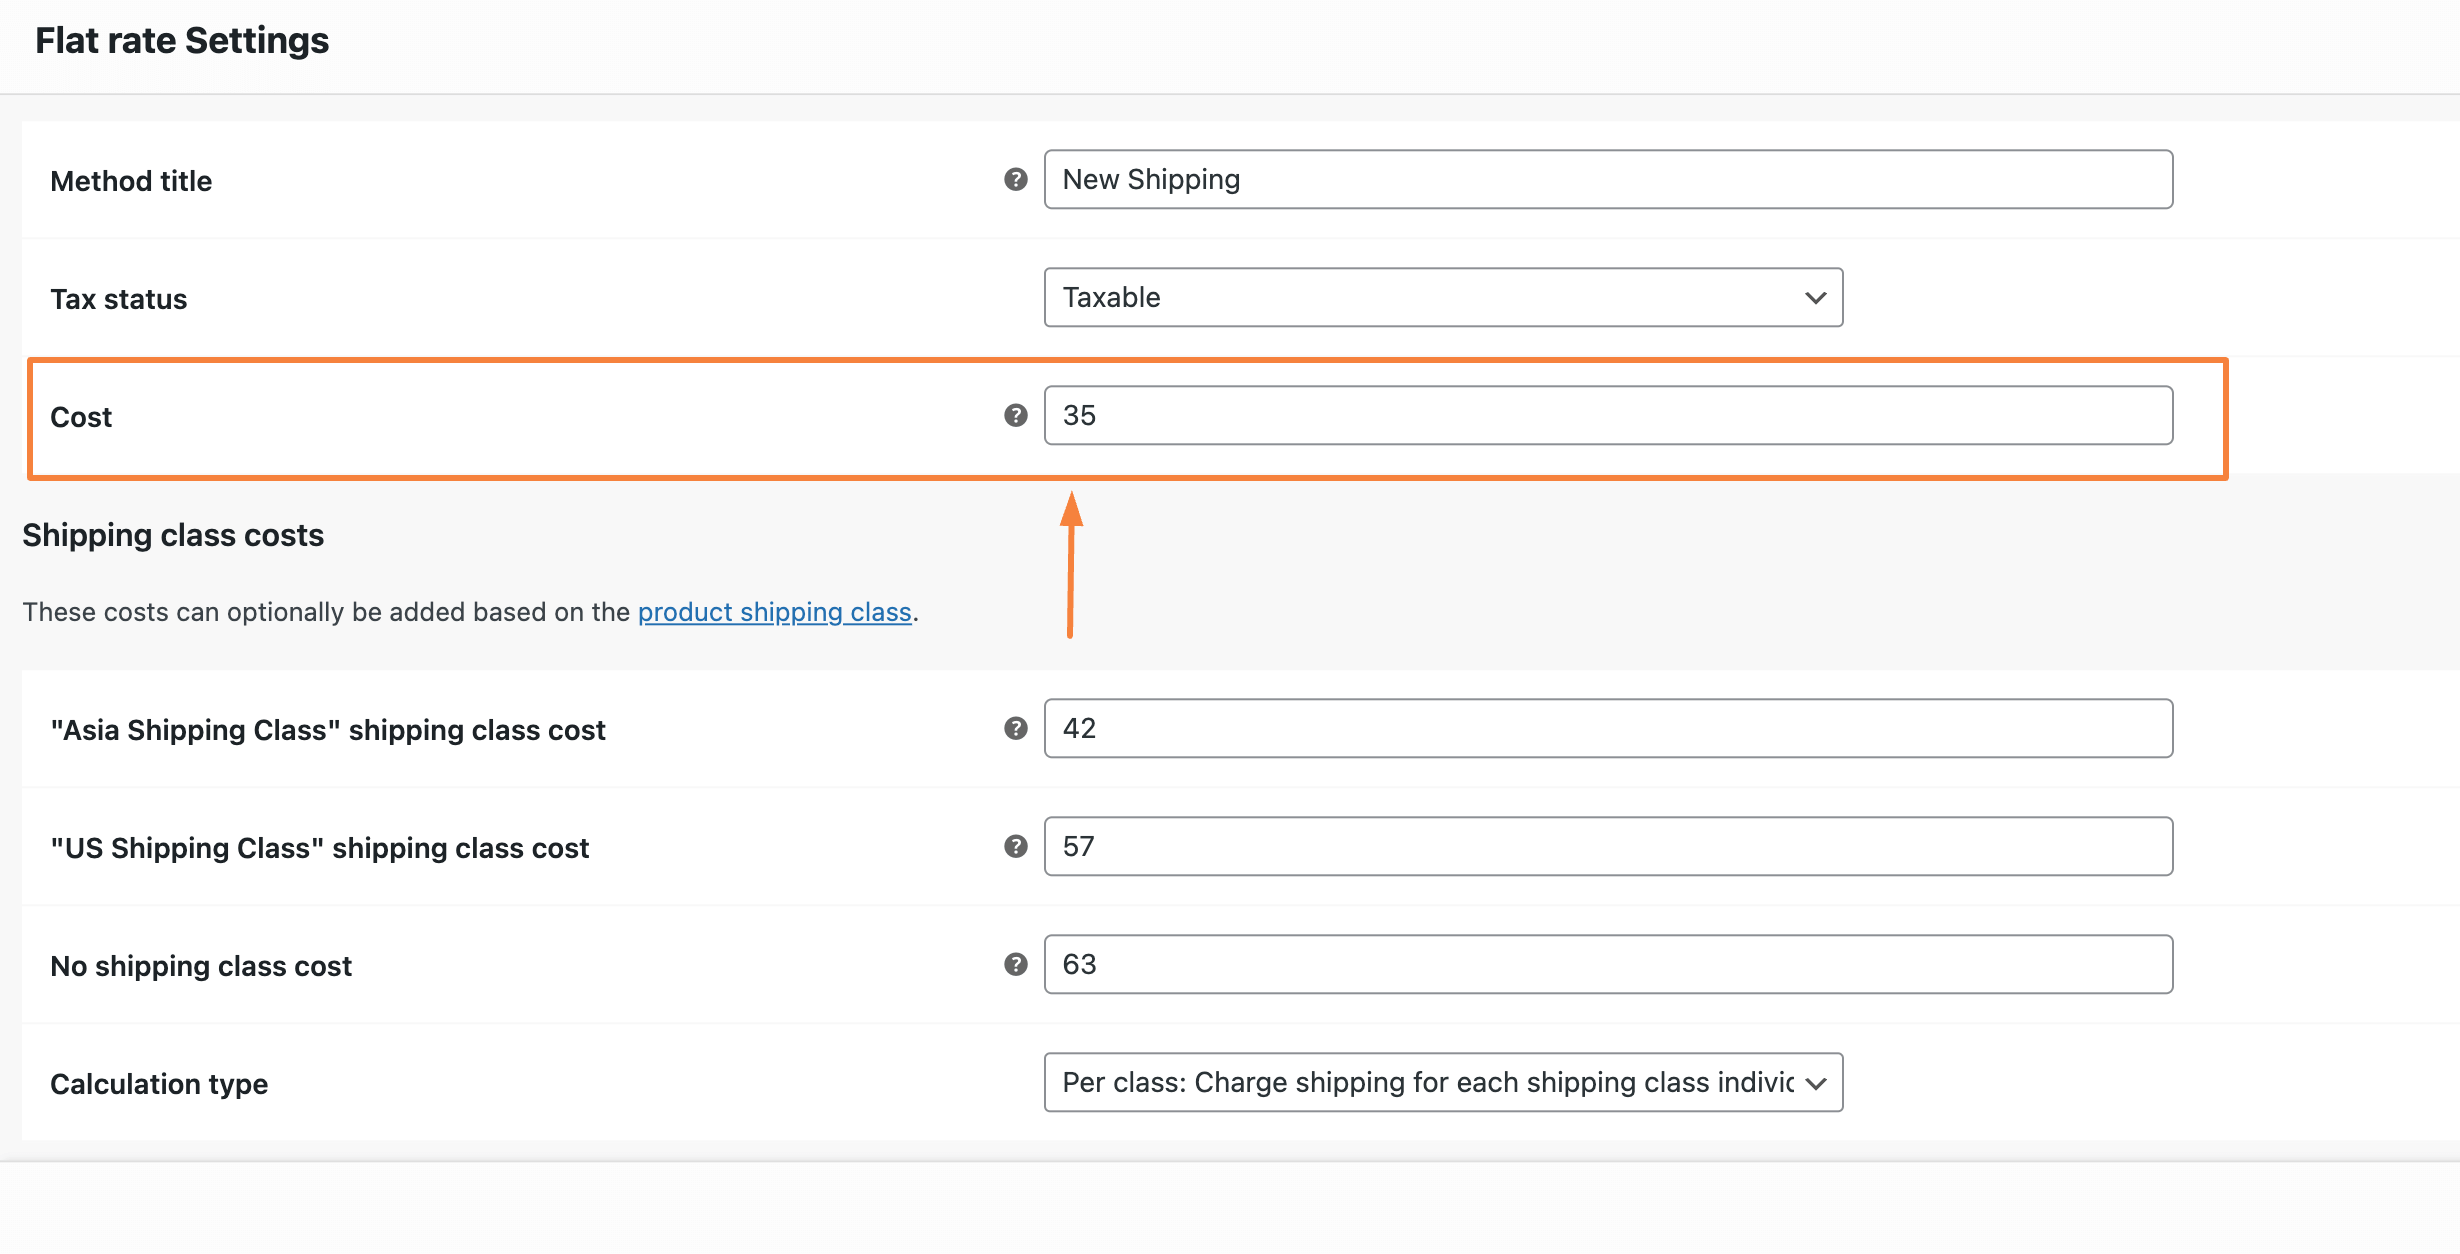
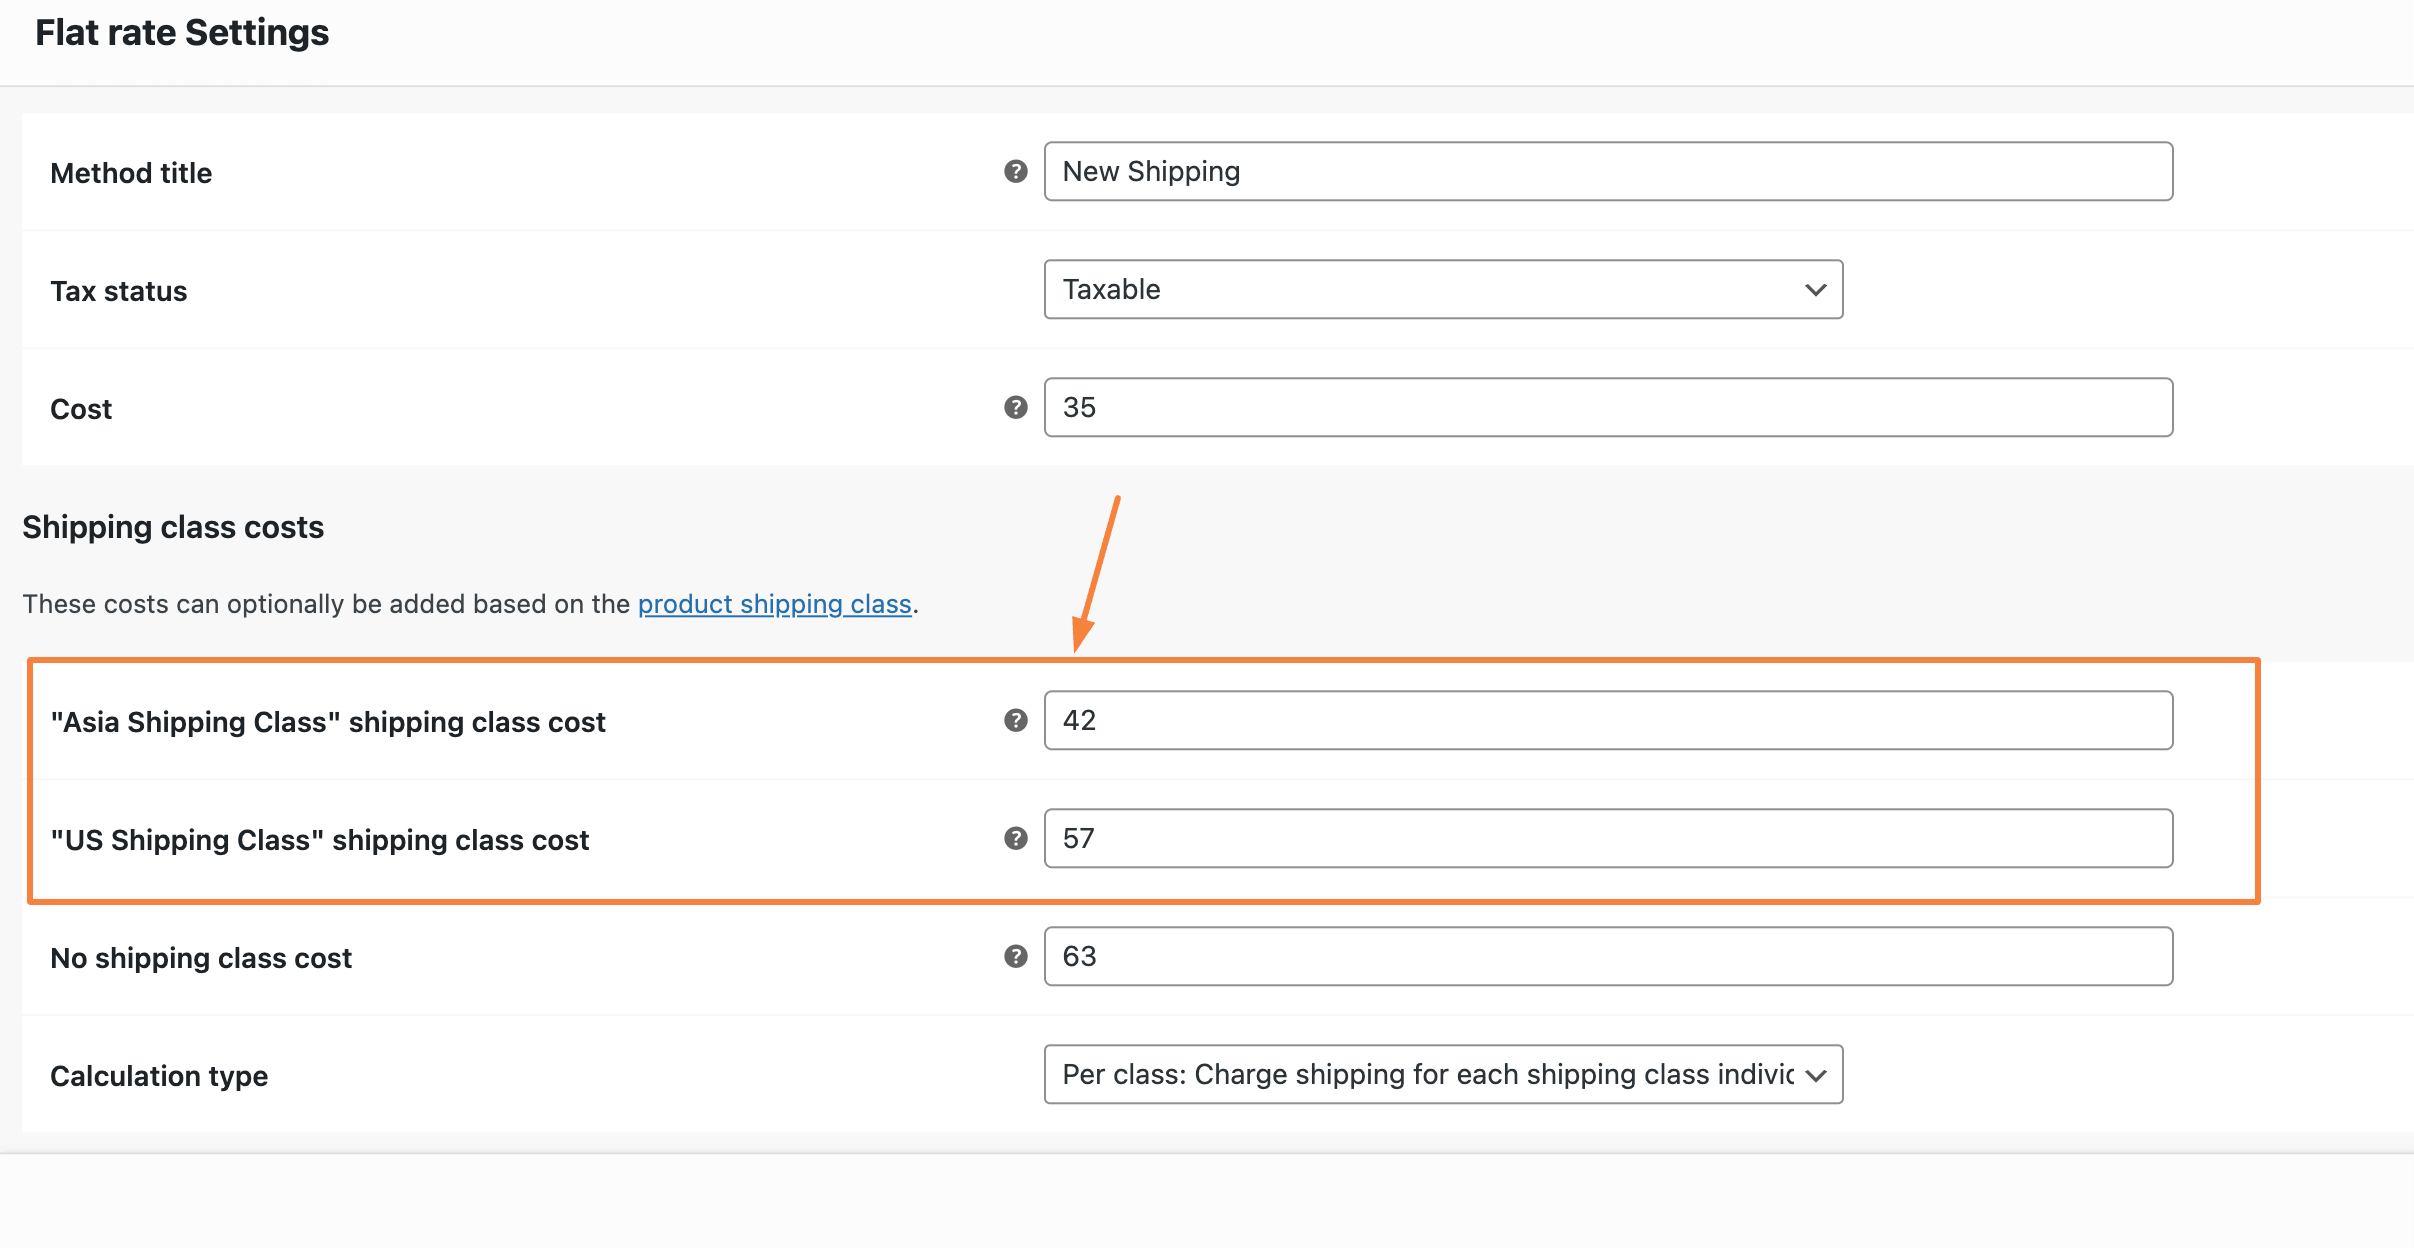
- Shipping Cost (Class)
Shipping Cost (Class) will include the shipping cost according to the shipping class.
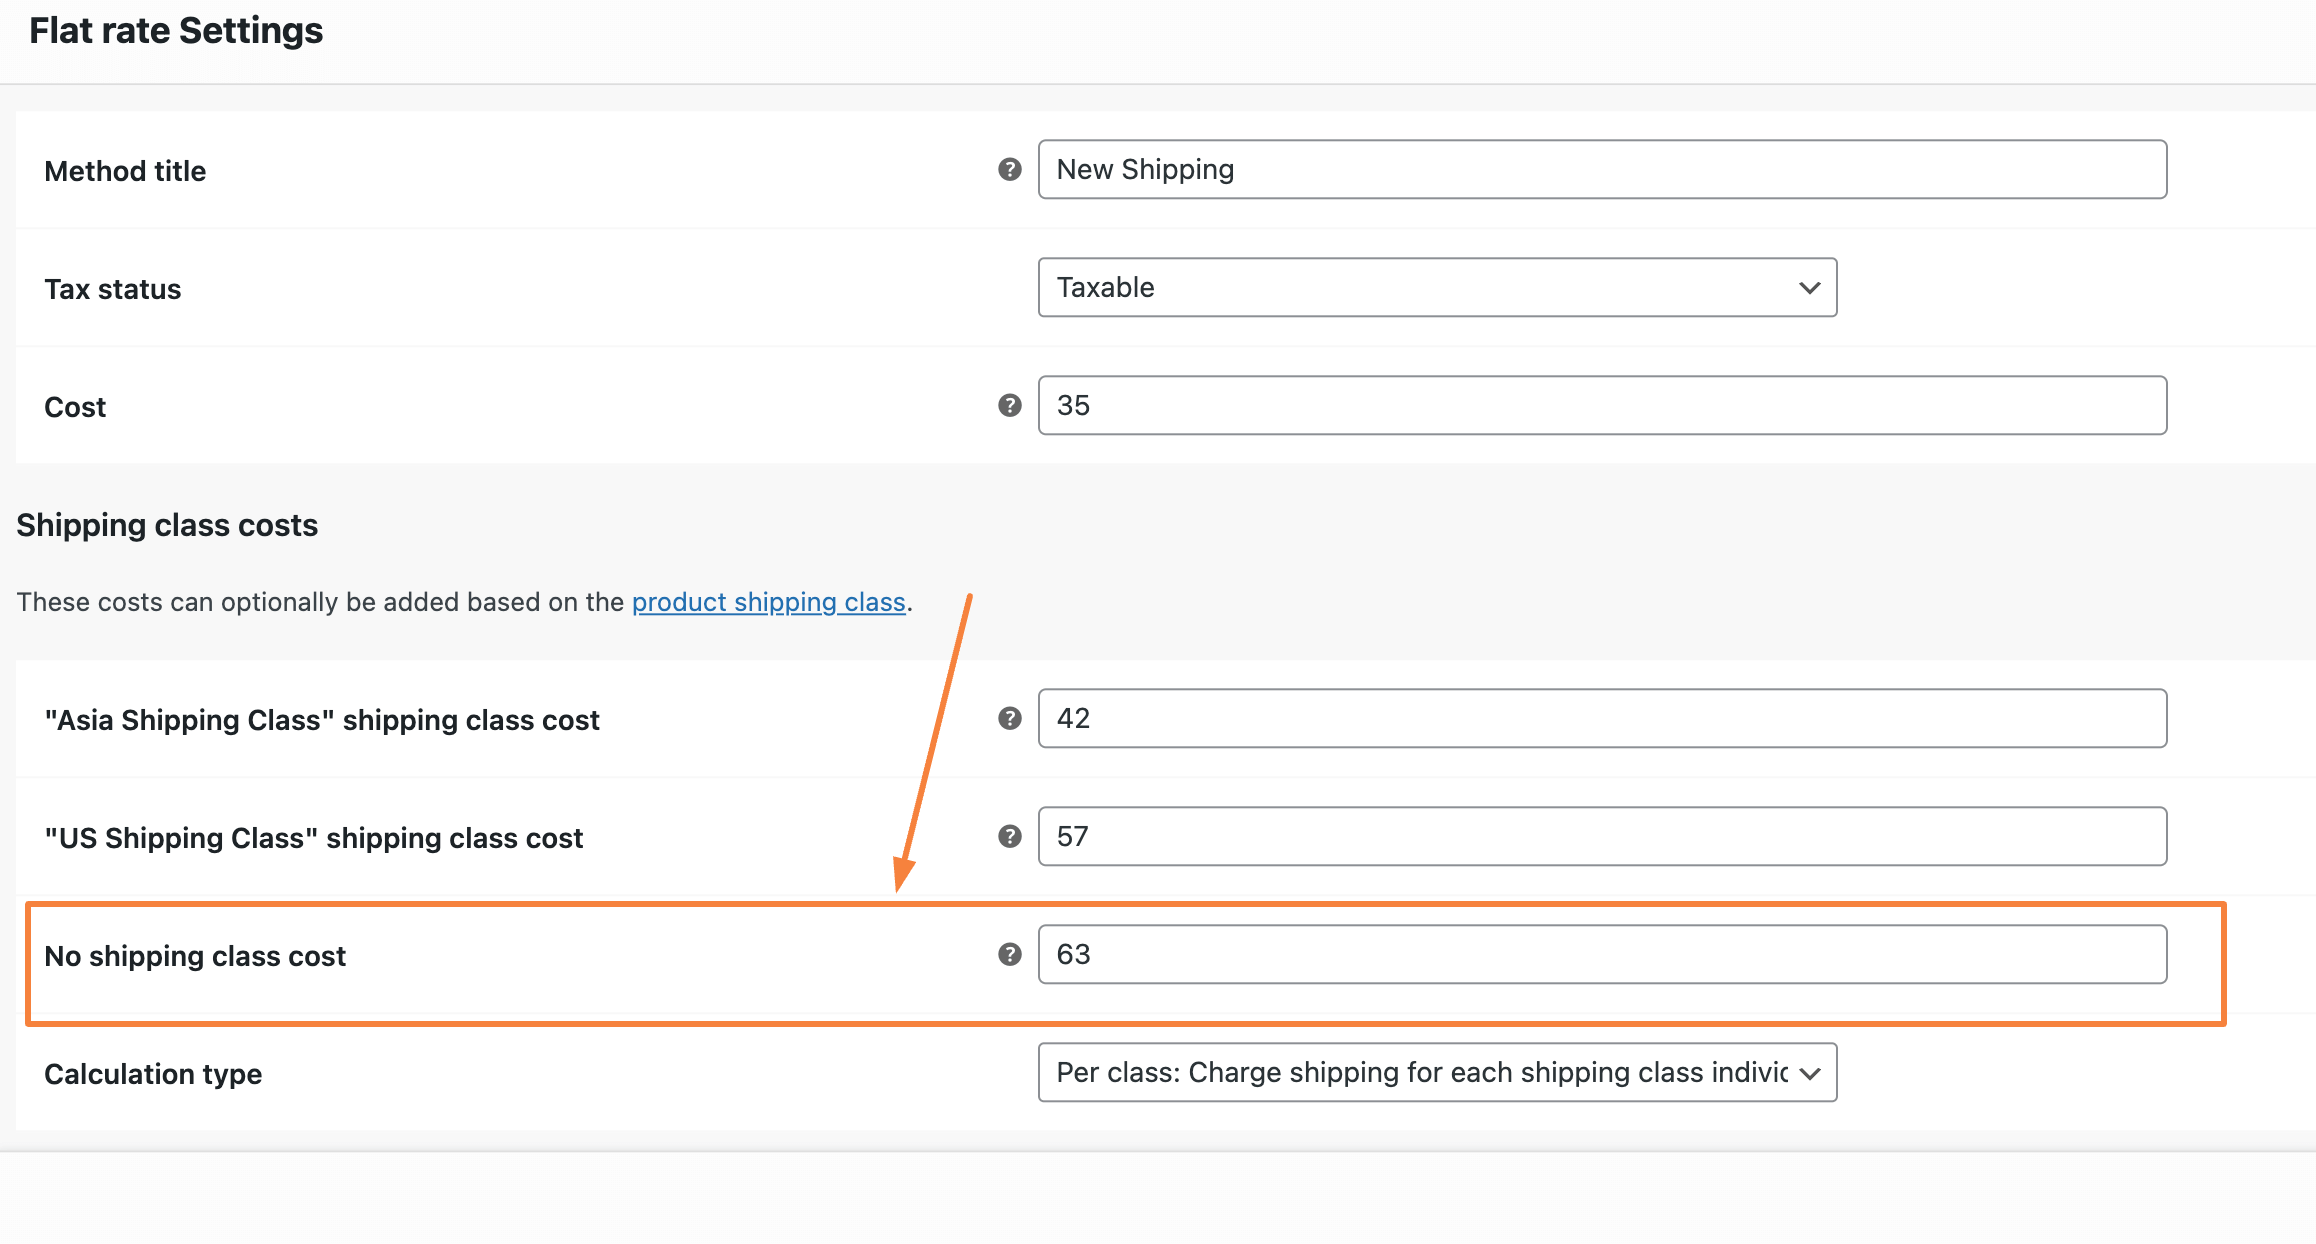
- Shipping Cost (No Class)
No Class will include the No shipping class cost in the feed.
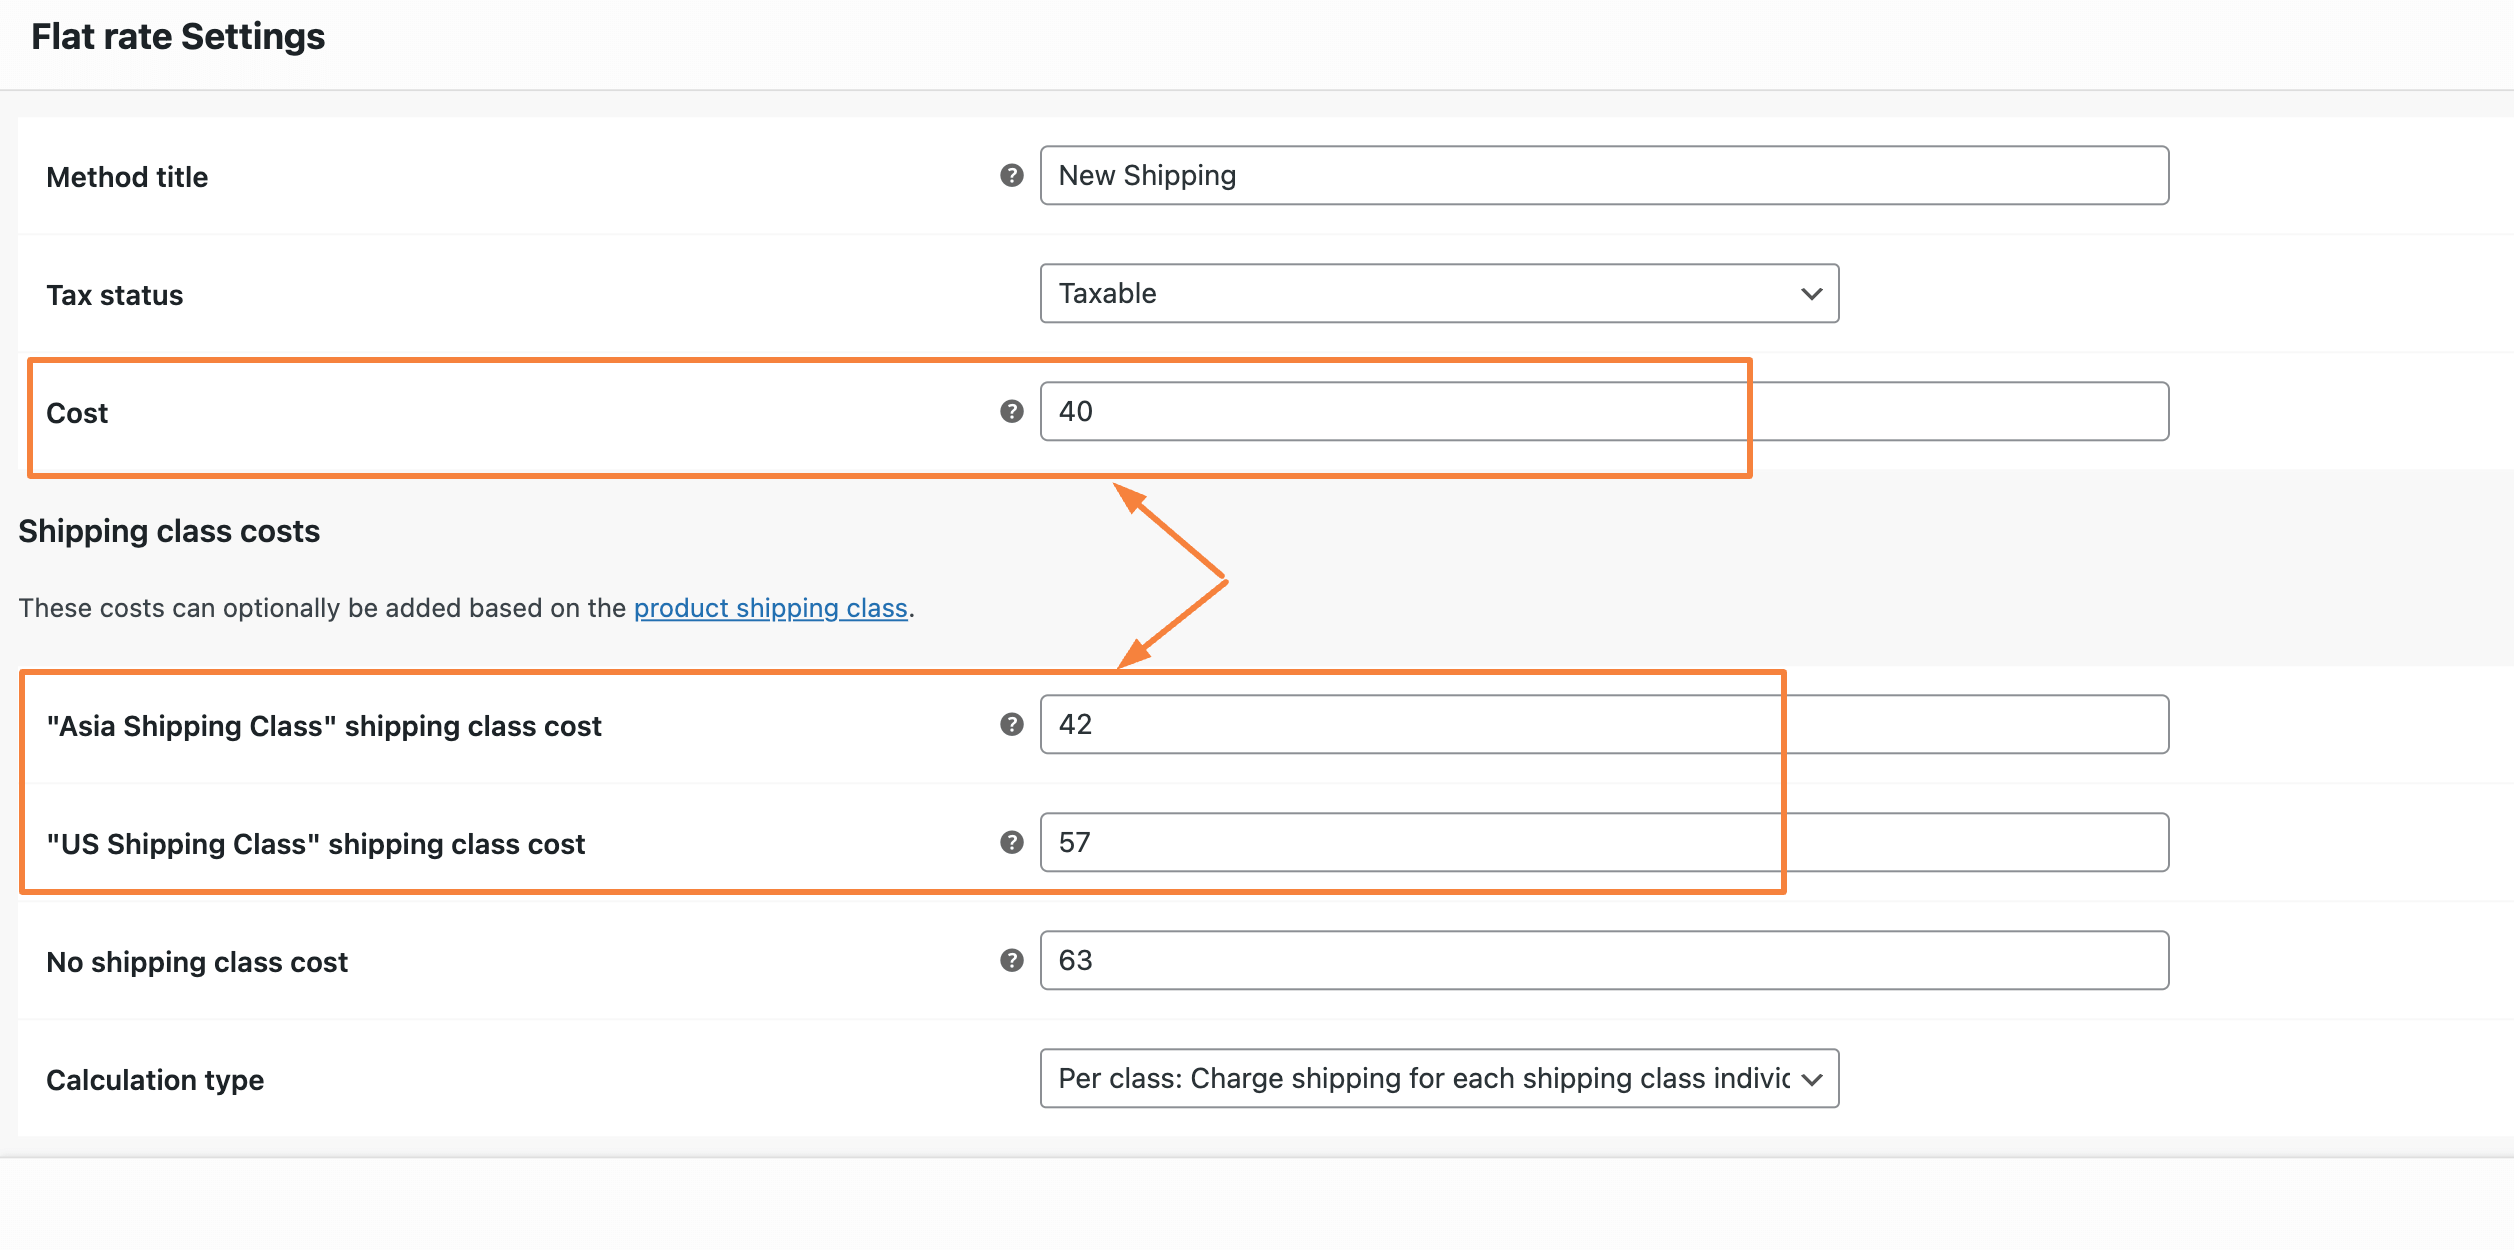
- Shipping Cost (Base + Class)
This sums up the shipping base cost and the class cost and includes the sum in the feed.
- Shipping Cost (Base + No Class)
This will add the shipping base cost and the no class cost and will include the sum in the feed.
- Shipping Cost (Local Pickup)
This will include the local pickup cost – if you’ve setup this on your WooCommerce Shipping Settings.
That’s it, once you’ve configured the Shipping attribute, Publish/ Update the feed and your shipping price/ value will be included in the feed.