Skip to content
RexTheme Logo
  • Home
  • Plugins
    • WP VR
    • Product Feed
    • Social Booster
    • Cart Lift
  • Docs
  • Support
  • Blog
  • Account
    • Log In
  • Contact Us
  • NL
  • DE

Product Feed Manager

  • Introduction To WooCommerce Product Feed Manager
  • Getting Started with Product Feed Manager
  • Install and Activate WPFM
  • Generate Product Feed
  • Category Mapping
  • Auto-sync With Google Merchant Shop
  • Add Extensive Custom Fields
  • Add More Supported Merchant Sites
  • How to Upgrade to Pro – WPFM
  • eBay MIP Feed Generation
  • Useful Options On Controls Tab
  • Fix WooCommerce’s (JSON-LD) Structured Data Bug
  • Control Products Per Batch In Batch Processing
  • Exclude Tax From Structured Data Prices
  • Using Google Merchant Promotions Feed
  • Exclude “Out Of Stock” Products From WooCommerce Product Feed
  • Connect Facebook Pixel With WooCommerce For Dynamic Ads
  • Product Feed Optimization with Yoast SEO Product Title, Meta Description and Primary Category
  • Getting Started With WooCommerce Product Feed Manager
  • How To Install And Activate WPFM
  • How To Generate Product Feed For The First Time
  • Basic Plugin Overview – WooCommerce Product Feed Manager
  • How To Use Category Mapping For Product Feed
  • How To Enable Your Desired Merchant Or Marketplace For Feed Generation
  • Add Extensive Custom Fields Of Unique Identifiers For WooCommerce Products
  • Add Custom Fields For Important Product Attributes
  • How To Add Extensive Custom Fields To WooCommerce Products
  • Fix WooCommerce (JSON-LD) Structured Data For Approval In Google Shopping
  • How To Exclude Tax From Structured Data Prices
  • How To Use Custom Filter When Generating Product Feed
  • Troubleshooting Common Issues – WooCommerce Product Feed Manager
  • How To Use Category Filter When Generating Product Feed
  • How To Use Tag Filter When Generating Product Feed
  • How To Use Product Filter Options When Generating Feed
  • How To Schedule Auto-update of Feed On Set Intervals
  • How To Include Variable Products To The Feed
  • How To Include Private Products In Product Feed

WP VR

  • Introduction To WP VR
  • Getting Started With WP VR
  • How To Install And Activate WP VR
  • How To Create A Simple Virtual Tour In 5 Minutes – WP VR
  • How to Embed A Virtual Tour And Customize It – WP VR
  • WP VR Basic Plugin Overview
  • How To Add A Scene To Your Virtual Tour
  • How To Use Scene Settings To Customize A Scene
  • How To Add Hotspots To A Scene In Your Virtual Tour
  • How To Use Hotspots To Show Information, Images Or Videos
  • How To Use Hotspots To Go From One Scene To Another
  • How To Customize Hotspot Icons And Color
  • How To Use Exclusive Features On General Settings To Customize A Virtual Tour
  • How To Upgrade To Pro – WPVR
  • How To Export And Import Virtual Tours
  • How To Embed A Virtual Tour Using WPVR Gutenberg Block
  • How To Embed A Virtual Tour Using WPVR Elementor Widget
  • How To Use WP VR Oxygen Element To Embed A Virtual Tour
  • How To Embed A Youtube 360 Video On Your Website Using WPVR
  • How To Embed A Google Street View Tour On Your Website Using WPVR
  • Embed A Self Hosted Video on WPVR Hotspots
  • How To Set Up WPVR Exclusive Settings
  • How To Exclude WPVR From Autoptimize
  • Control Script And Style Loading For The Virtual Tours
  • How To Disable WordPress Large Image Handler For Virtual Tours
  • How To Duplicate A Virtual Tour
  • How To Integrate Fluent Forms On A Virtual Tour
  • How To Integrate WooCommerce To A Virtual Tour
  • How To Embed Virtual Tours On Non-WordPress Websites
  • How To Enable Gyroscope Support On Virtual Tours
  • How To Set Up A Scene Gallery On Virtual Tours
  • How To Add Background Music To Virtual Tours
  • How To Limit Keyboard Controls For Navigation And Zoom
  • How To Limit The Use Of Mouse Scroll To Zoom Or Drag To Move A Tour
  • Using Custom Icons For Navigation And Control Buttons In A Virtual Tour
  • How To Add A Home Button To Your Virtual Tour
  • How To Create A Virtual Tour With Partial Panoramas
  • How To Create A Virtual Tour With Mobile Phone Panorama Images
  • How To Set Default Scene Face On A Virtual Tour
  • How To Set A Dynamic Front End Notice On Virtual Tours For Mobile Phone Viewers
  • Demo Virtual Tours
  • Basic Virtual Tour
  • Demo Virtual Tour – WPVR Pro
  • Demo Tour – WPVR (Free)
  • Custom Scene Gallery – WPVR
  • Custom Control Icons – WPVR
  • Google Street View Tour – WPVR Pro
  • Getting Started with WP VR
  • Video Tutorials – WPVR
  • Demo Partial Panorama Virtual Tour – WPVR Pro
  • Bar/Pub Showcase
  • How To Add A Preview Image To Your Virtual Tour – WPVR
  • How to Enable Auto Rotation For Your Virtual Tour
  • How To use a WPVR Shortcode to Embed a Virtual Tour
  • How to Add Your Company Logo in Your Virtual Tour – WPVR
  • Troubleshooting Common Issues – WPVR
  • How To Auto Resize Images On Mobile Devices for Virtual Tours
  • How To Set Custom Zoom Settings On A Scene In Your Virtual Tour – WPVR
  • How to Set 360 Image Grab Limit On A Scene in Your Virtual Tour – WPVR
  • How To Solve Virtual Tour Not Showing Up – WPVR
  • How To Exclude Assets of WPVR From Autoptimize
  • How To Embed Youtube Videos Inside Virtual Tours Using WPVR
  • How To Create Full Screen Virtual Tours – WPVR

Social Booster

  • Social Booster
  • Install and Activate Social Booster
  • Getting Started with Social Booster
  • How Social Booster Works
  • Social Booster Dashboard Overview
  • Connect Facebook For Auto-Posting
  • Connect Twitter For Auto-Posting
  • Auto-Post And Share With Social Booster
  • Connect Tumblr For Auto-Posting
  • Connect LinkedIn For Social Auto-Posting
  • Connect Reddit For Auto-Posting
  • Connect Pinterest For Social Auto-Posting
  • Schedule Post With Social Booster
  • Set Multiple Profiles On Social Booster

Cart Lift

  • Introduction To Cart Lift
  • Getting Started With Cart Lift
  • Install And Activate Cart Lift
  • A Basic Plugin Overview – Cart Lift
  • Configure And Use Cart Lift Effectively
  • How To Track Abandoned Carts Automatically
  • How To Set Up Your Abandoned Cart Recovery Campaign
  • How To Get Notifications For Abandoned Carts And Recovery
  • How To Integrate SMTP Through Cart Lift
  • Get Full Analytics Report On Recovery Campaign
  • How To Upgrade To Pro – Cart Lift

Media Storage To Cloud

  • WP Media Storage To Cloud
  • Getting Started – Media Storage To Cloud
  • How to install and activate Media to Cloud Storage
  • WP Media Storage To Cloud Dashboard Overview
  • How To Connect Amazon S3 Bucket
  • How To Connect Google Cloud Storage
  • How To Set Up IAM User For Amazon S3 Bucket
  • How To Set Up Google Cloud Storage Bucket To Serve Media Files
  • How To Connect DigitalOcean Spaces
  • How To Create An Amazon CloudFront Distribution
  • How To Create An Amazon CloudFront Origin Access Identity
  • Troubleshooting For Common Issues – Media Storage To Cloud
  • How To Create Free HTTPS Certificate On Amazon S3

Variation Swatches

  • Variation Swatches for WooCommerce – Getting Started
  • Variation Swatches For WooCommerce – Dashboard Overview
  • Variation Swatches For WooCommerce – Install And Activate
  • Change Dropdown to Button Swatches for WooCommerce Variations
  • How To Set Up WooCommerce Color Swatches For Color Variation
  • How To Set Up WooCommerce Image Swatches For Image Variation
  • How To Set Up Label Swatches For WooCommerce Product Variations
  • How To Customize Variation Swatch Hover Style
  • How To Customize Variation Swatches Global Style
  • How To Customize Variation Swatches Selected Style

VR Places Theme

  • How To Install And Activate VR Places Theme
  • How To Customize Global Settings for VR Places Theme
  • Home
  • Docs
  • WP VR

How To Use Exclusive Features On General Settings To Customize A Virtual Tour

Table of Contents
  • Customize A Virtual Tour With Exclusive Features
  • General - Basic Settings
  • i. Set a Tour Preview Image
  • ii. Tour Autoload
  • iii. Show Controls
  • iv. Scene Fade Duration
  • v. Auto Rotation
  • General - Advanced Controls
  • i. Keyboard Movement And Zoom Controls
  • ii. Mouse Drag And Zoom Control
  • iii. Gyroscope Control
  • iv. Compass
  • v. Scene Gallery
  • vi. Tour Background Music
  • vii. Add Company Information
  • General - Control Buttons

Now that you know how to add scenes and hotspots, now you can do further customizations with the tour using a lot of exciting features in the General settings.

In this WP VR lesson, you will get an overview of all the features you can use in the General settings to make the tour more attractive.

Customize A Virtual Tour With Exclusive Features #

While creating a virtual tour, you will initially be on the General tab. However, first, it’s best to add scenes and hotspots before applying the general settings.

Once you have a virtual tour ready with scenes and hotspots, publish it, and then go to the General tab.

Exclusive Features On General Tab

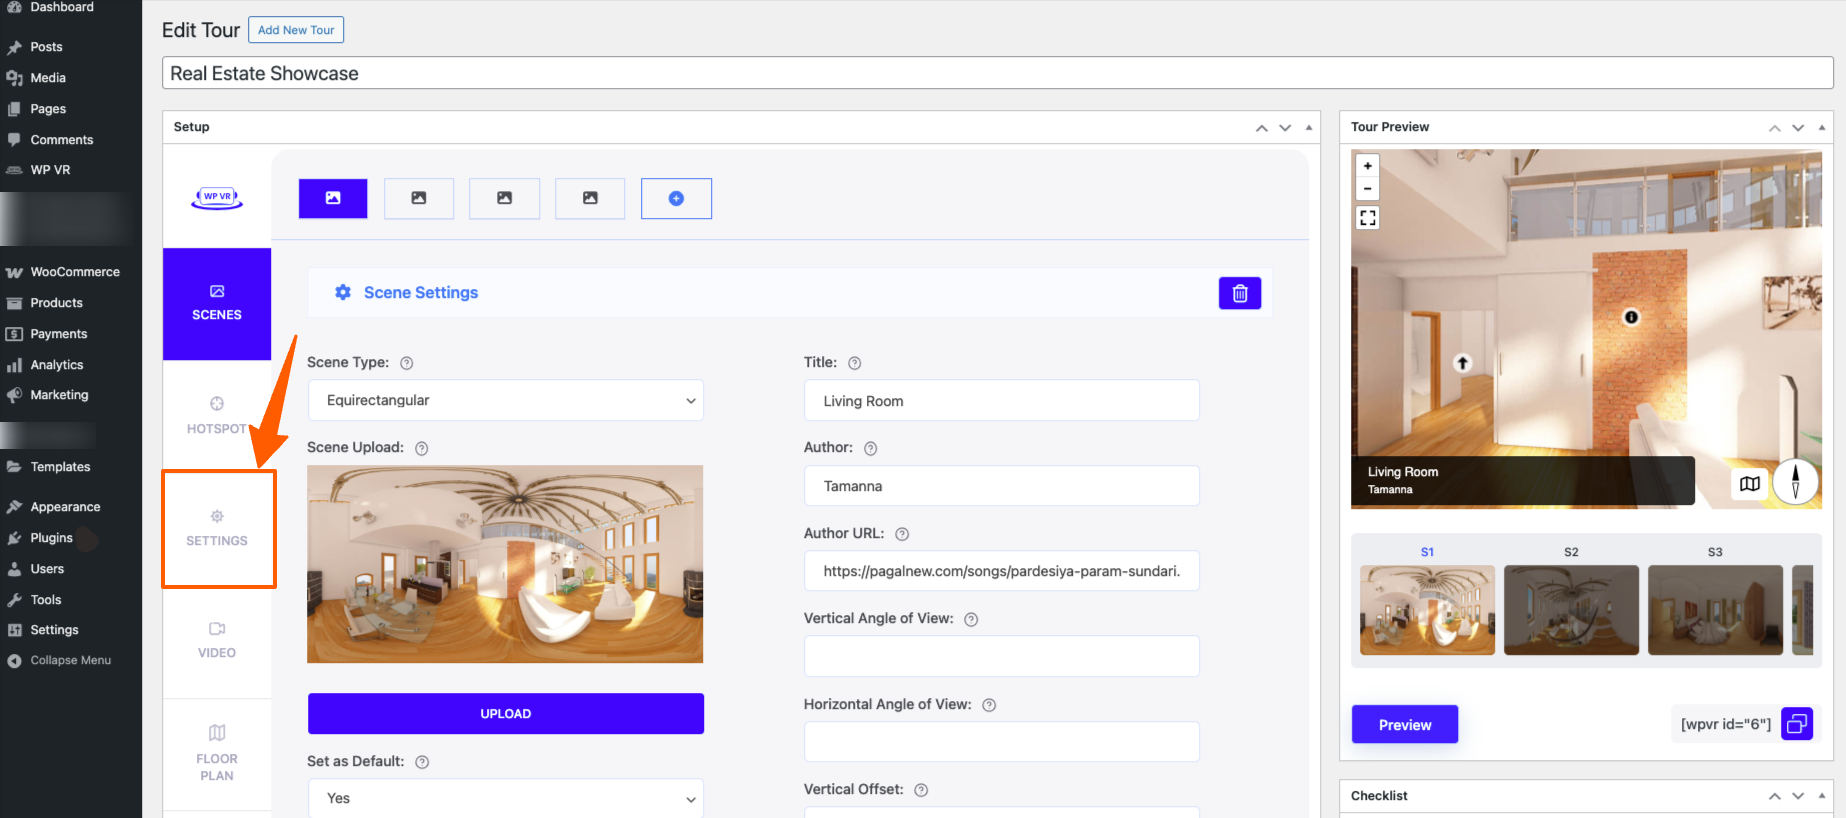
Here, you will see that the exclusive features are divided into 3 tabs on top,

  • Basic Settings
  • Advanced Controls
  • Control Buttons

General – Basic Settings #

General Tab - Basic Settings

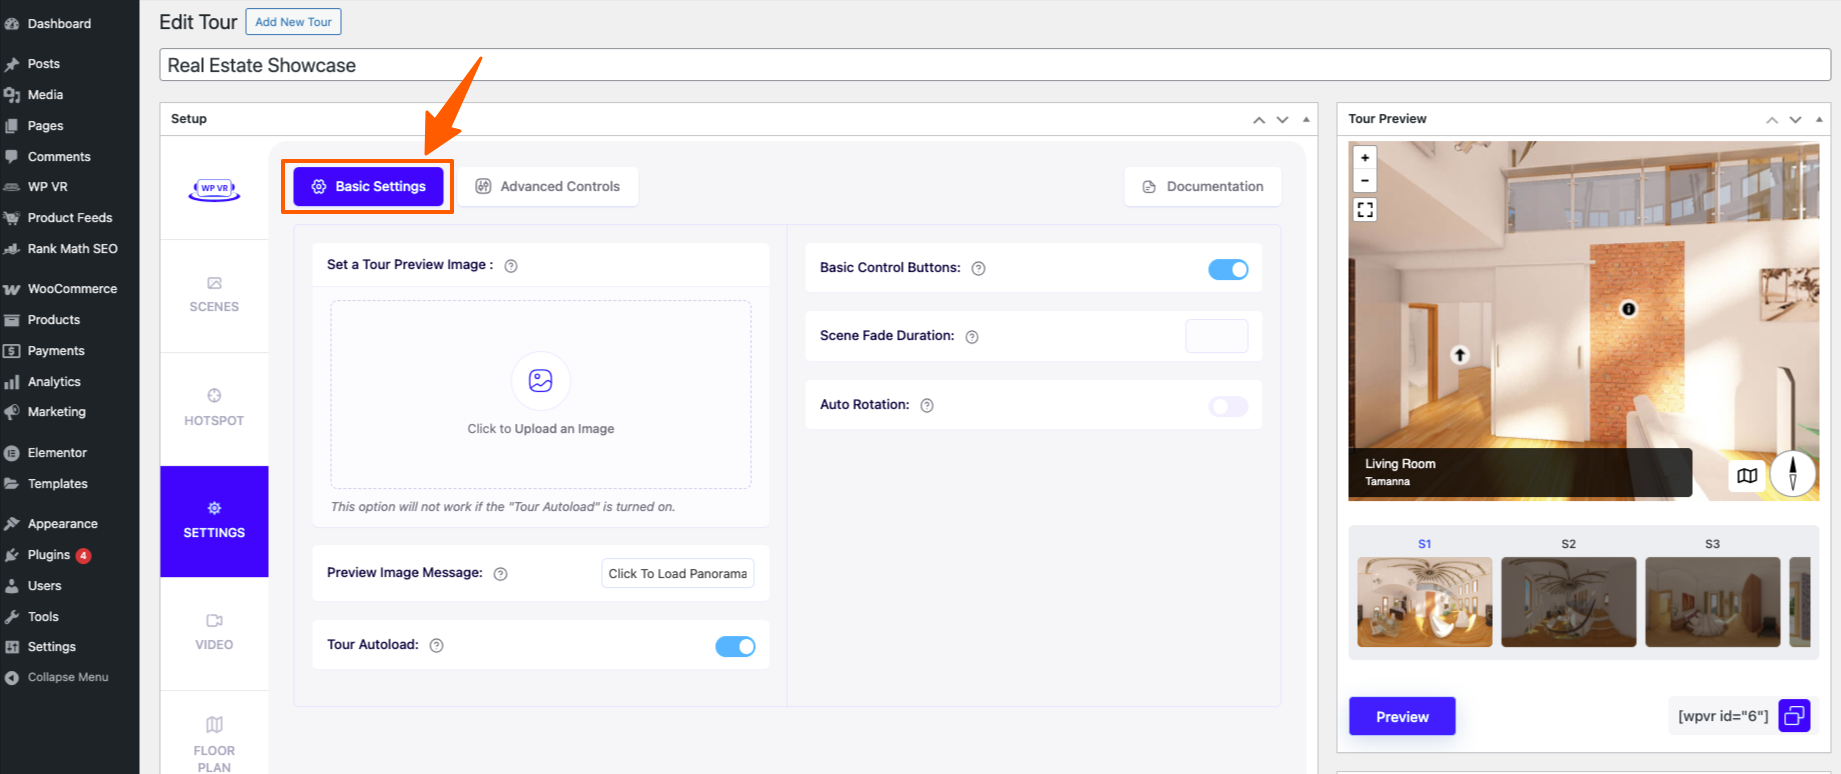
In the Basic Settings, you will find the following exclusive features:

i. Set a Tour Preview Image #

Normally, if you have the Autoload option enabled, then you do not need to use this feature.

However, if do not enable the Autoload option, then the tour will need to be clicked to be viewed. Now at this time, it usually shows a netted filler image.
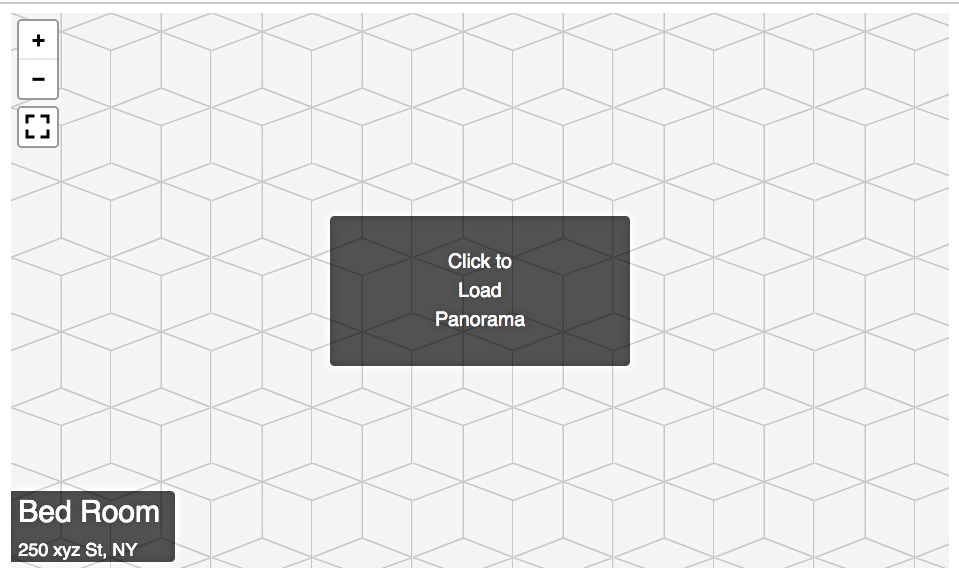
Without a tour preview image

So you can add a Preview Image by clicking on “Click to upload an image” and a thumbnail will appear once uploaded.

Basic settings - Tour Preview image added

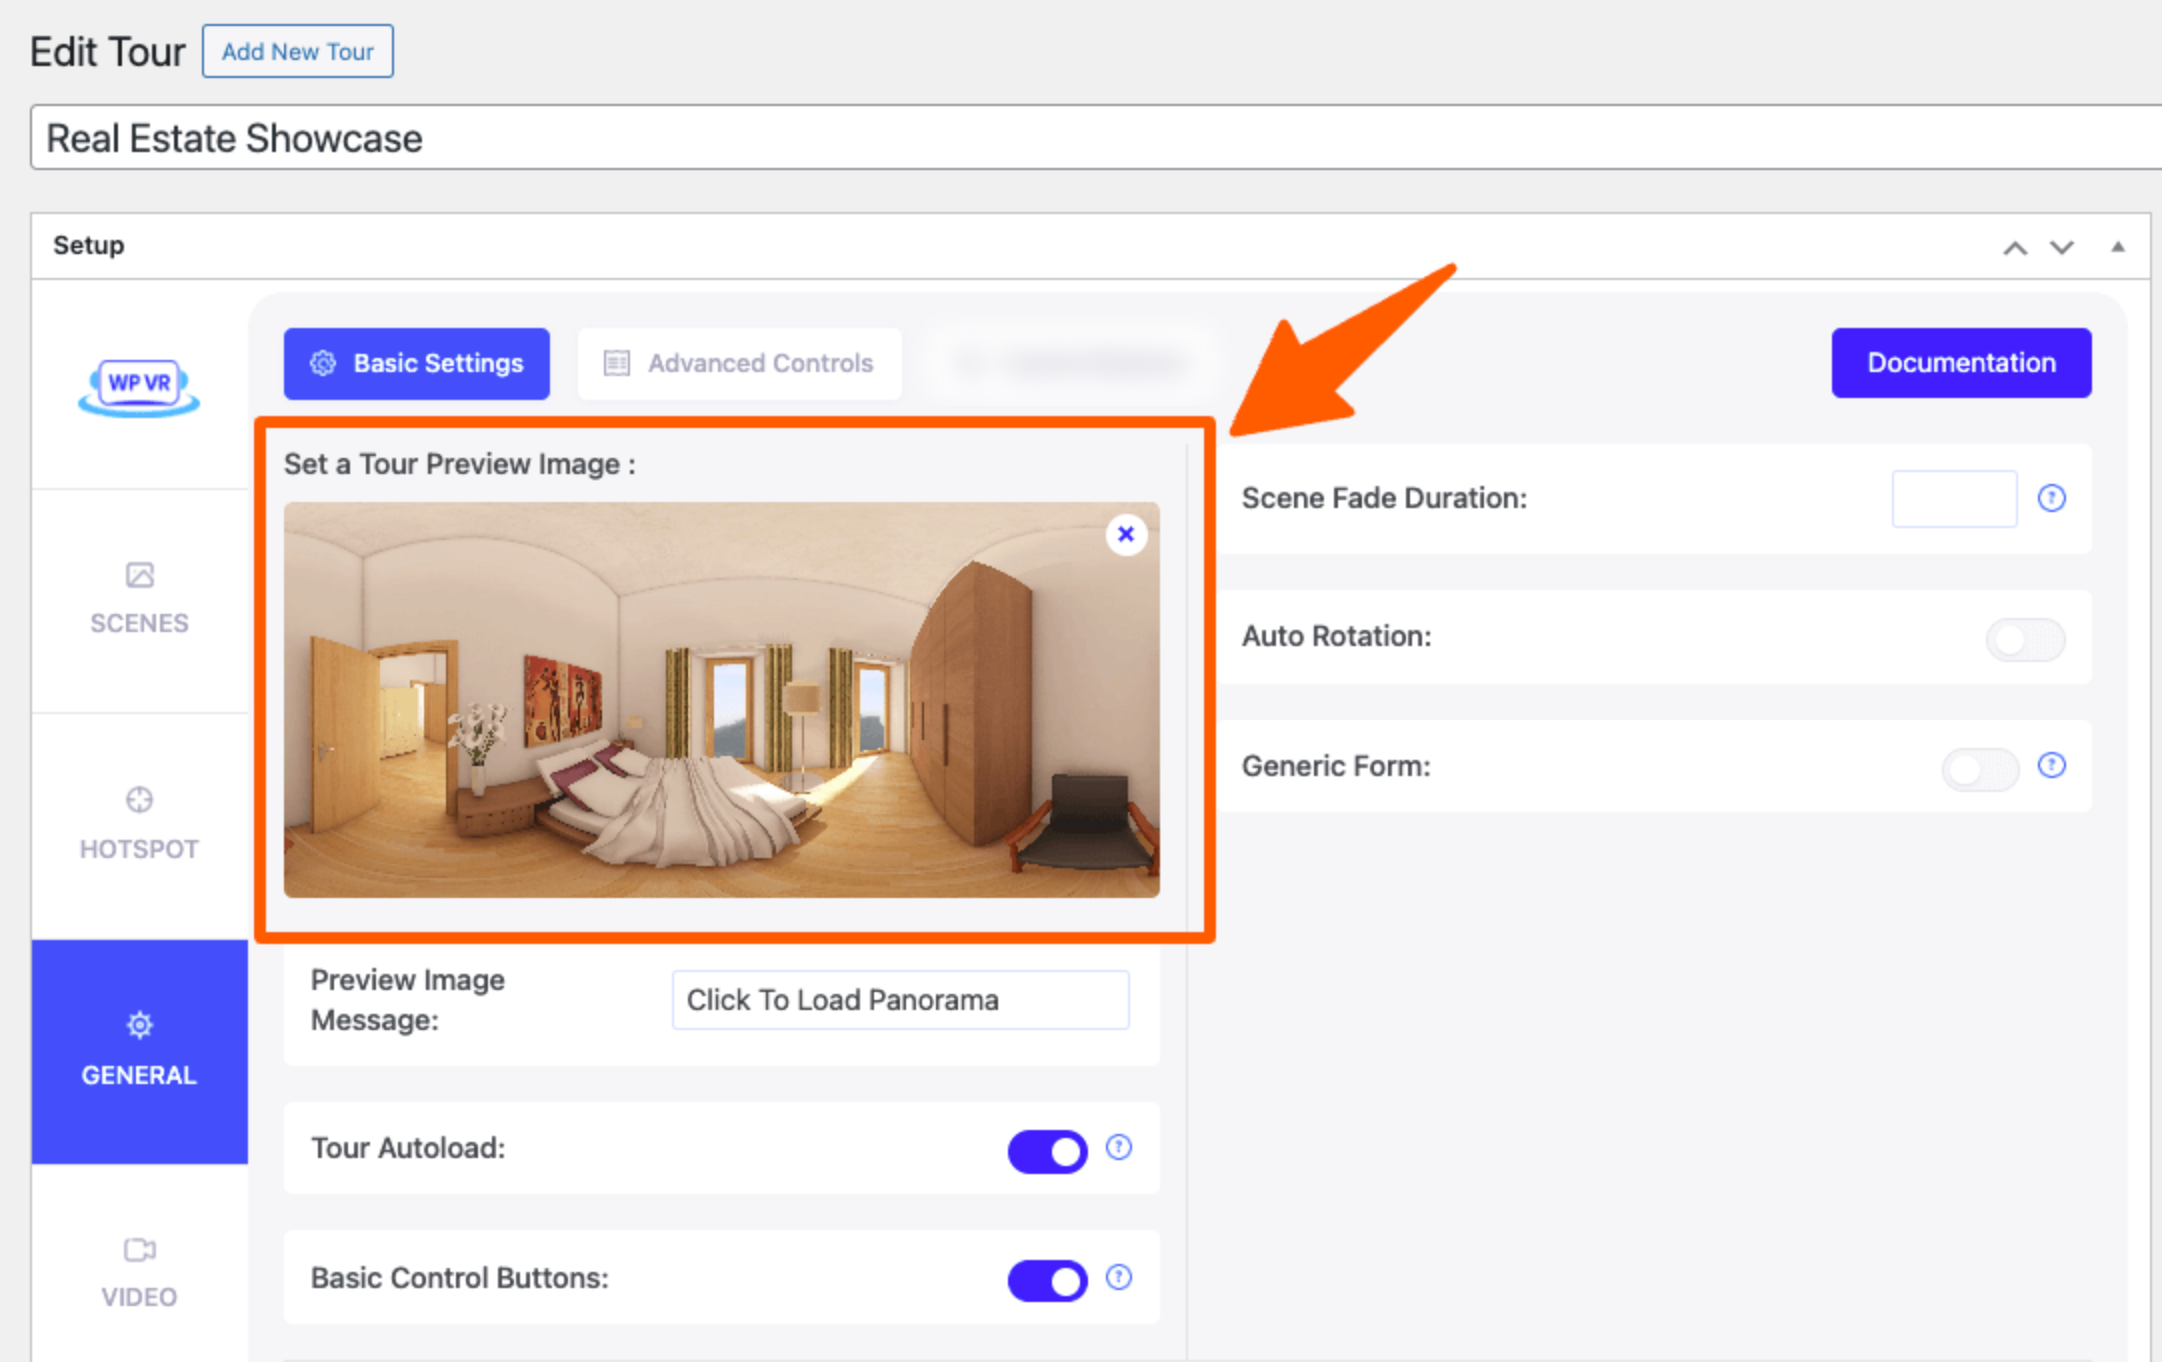
This image will be shown in place of that netted image.
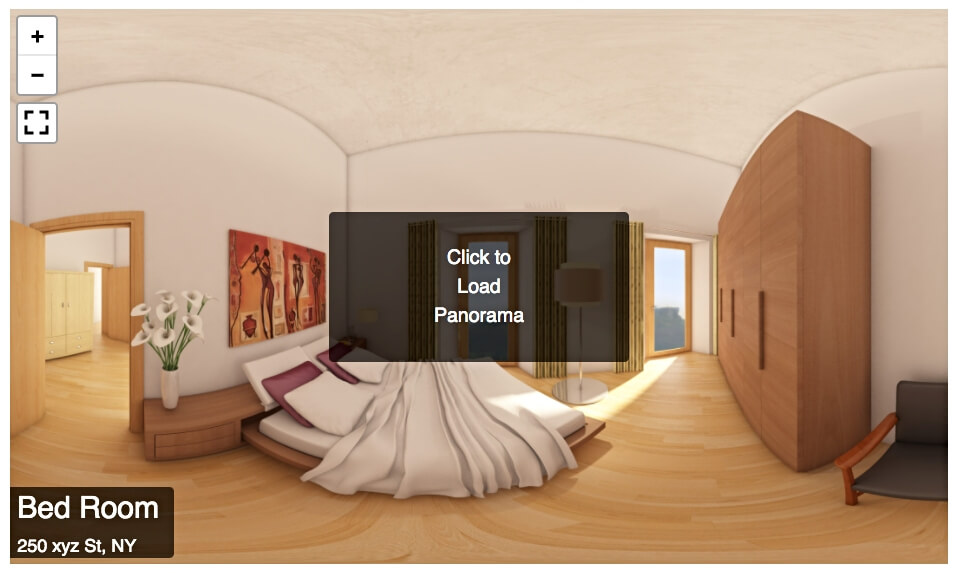
With a tour preview image
  • Click here to learn how to use a Tour Preview Image.

ii. Tour Autoload #

This option is enabled by default, which means the tour will be automatically loaded when someone visits a page with the tour.

Basic settings - Tour Autoload

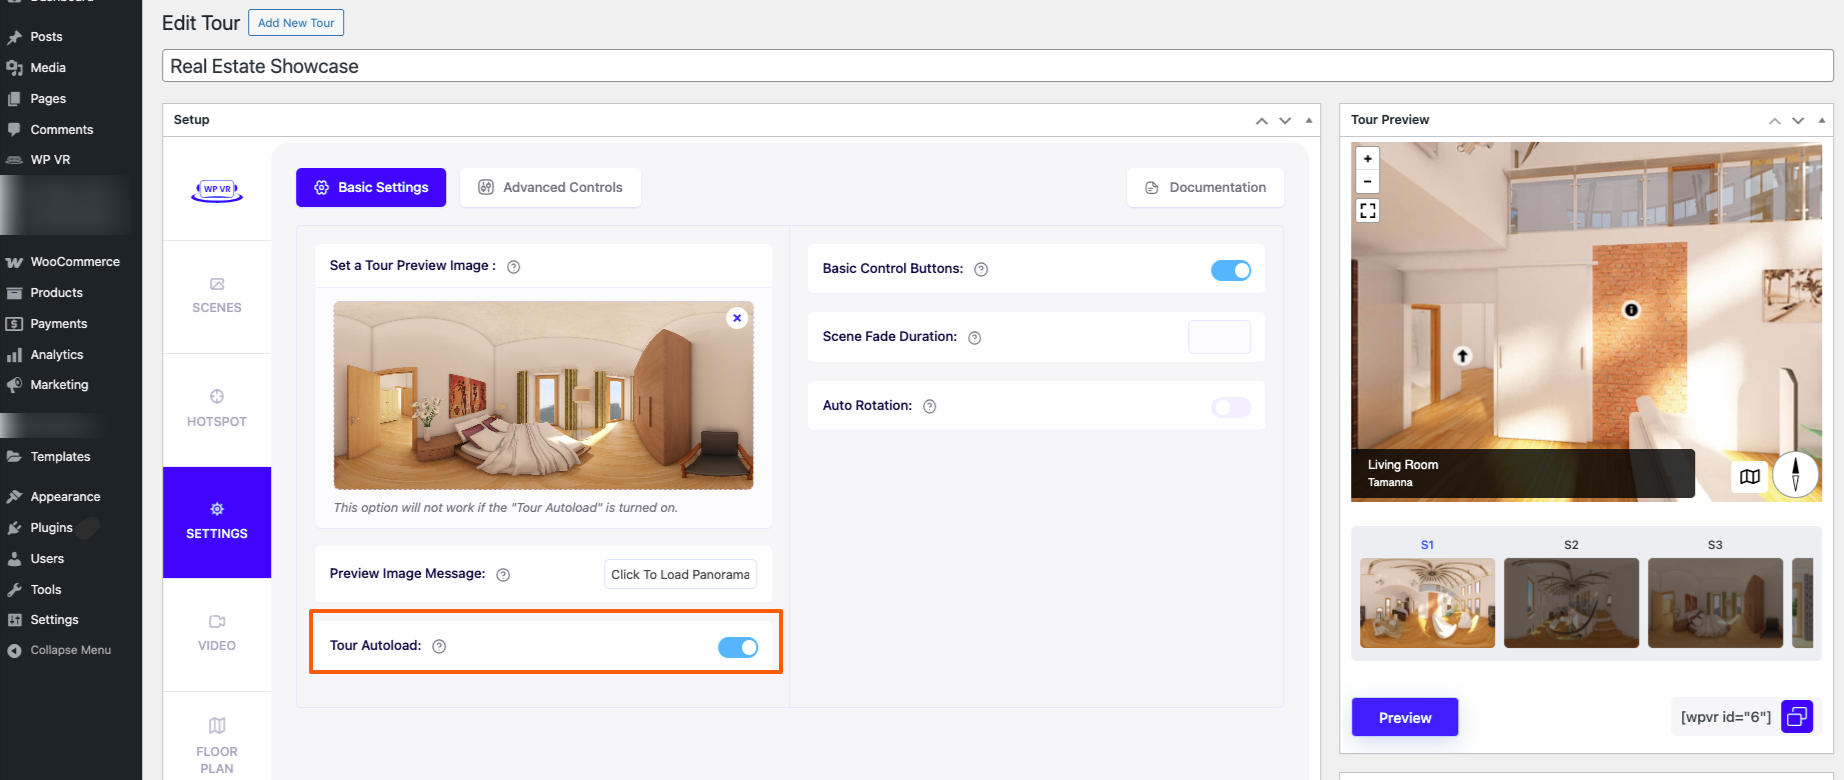
Disabling this option will mean that a person will have to click on it to take the tour (as shown in the image above).
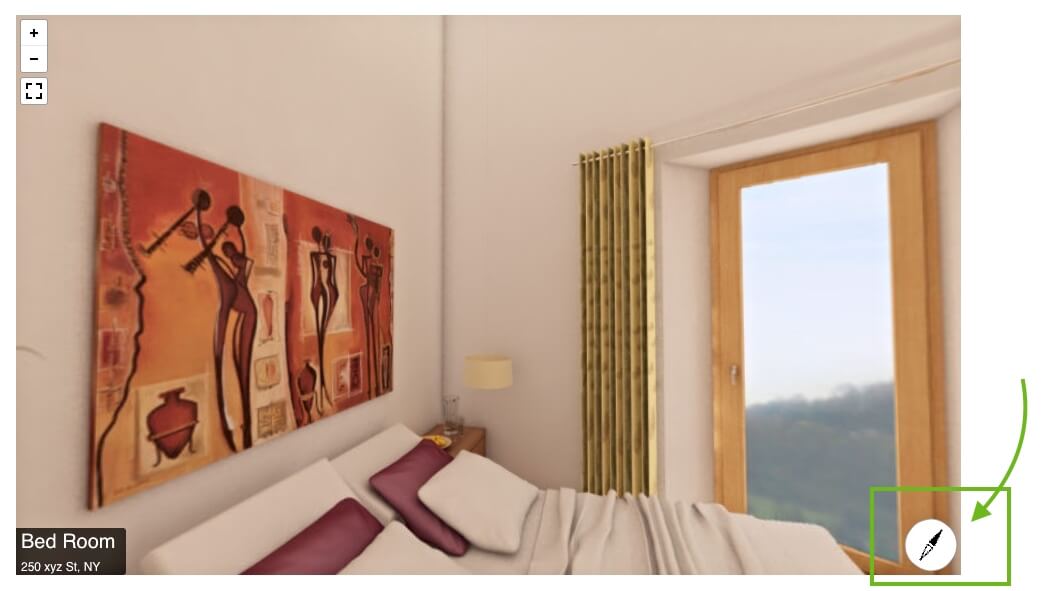
iii. Show Controls #

Basic settings - Show controls

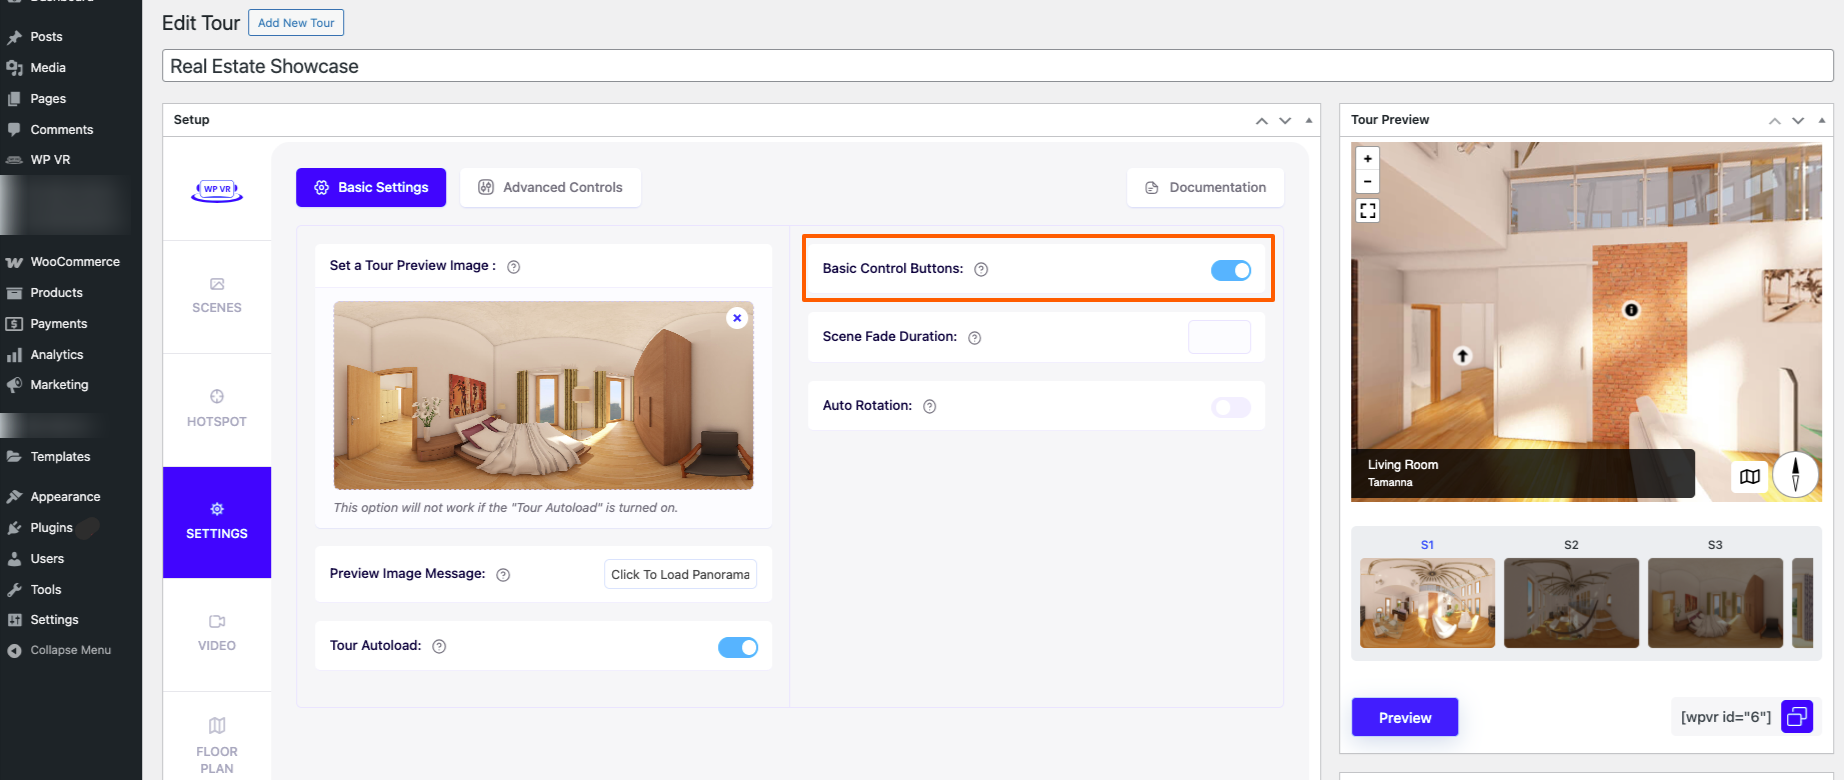
This option displays small control buttons on the top left corner of the virtual tour for zoom in, zoom out and fullscreen.

Show controls enabled

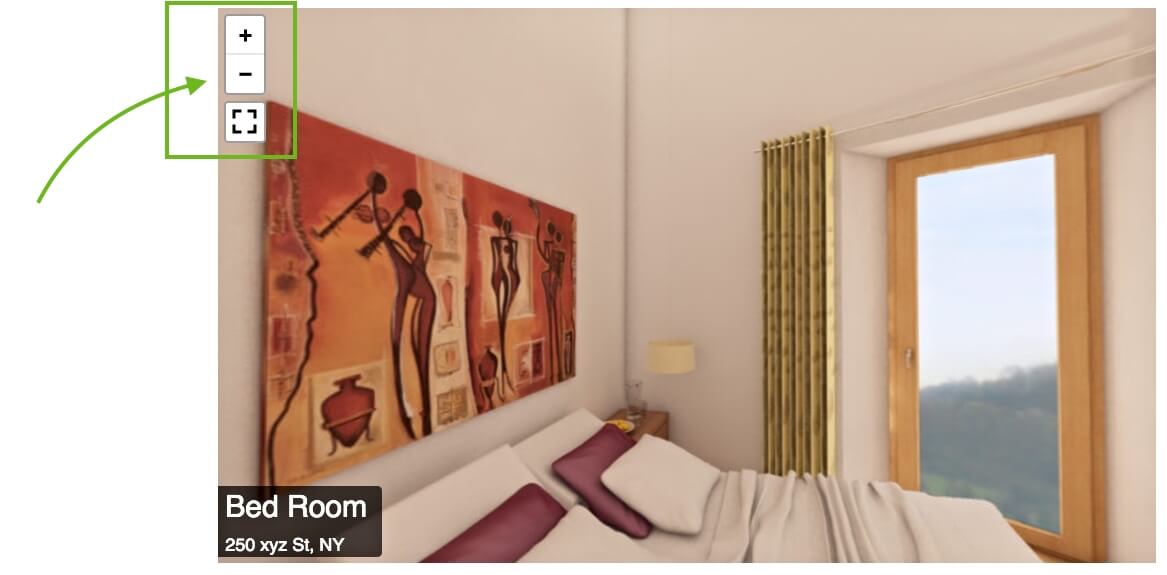
Disabling it will mean these buttons will not be there on the tour.

iv. Scene Fade Duration #

Basic Settings - Scene fade animation

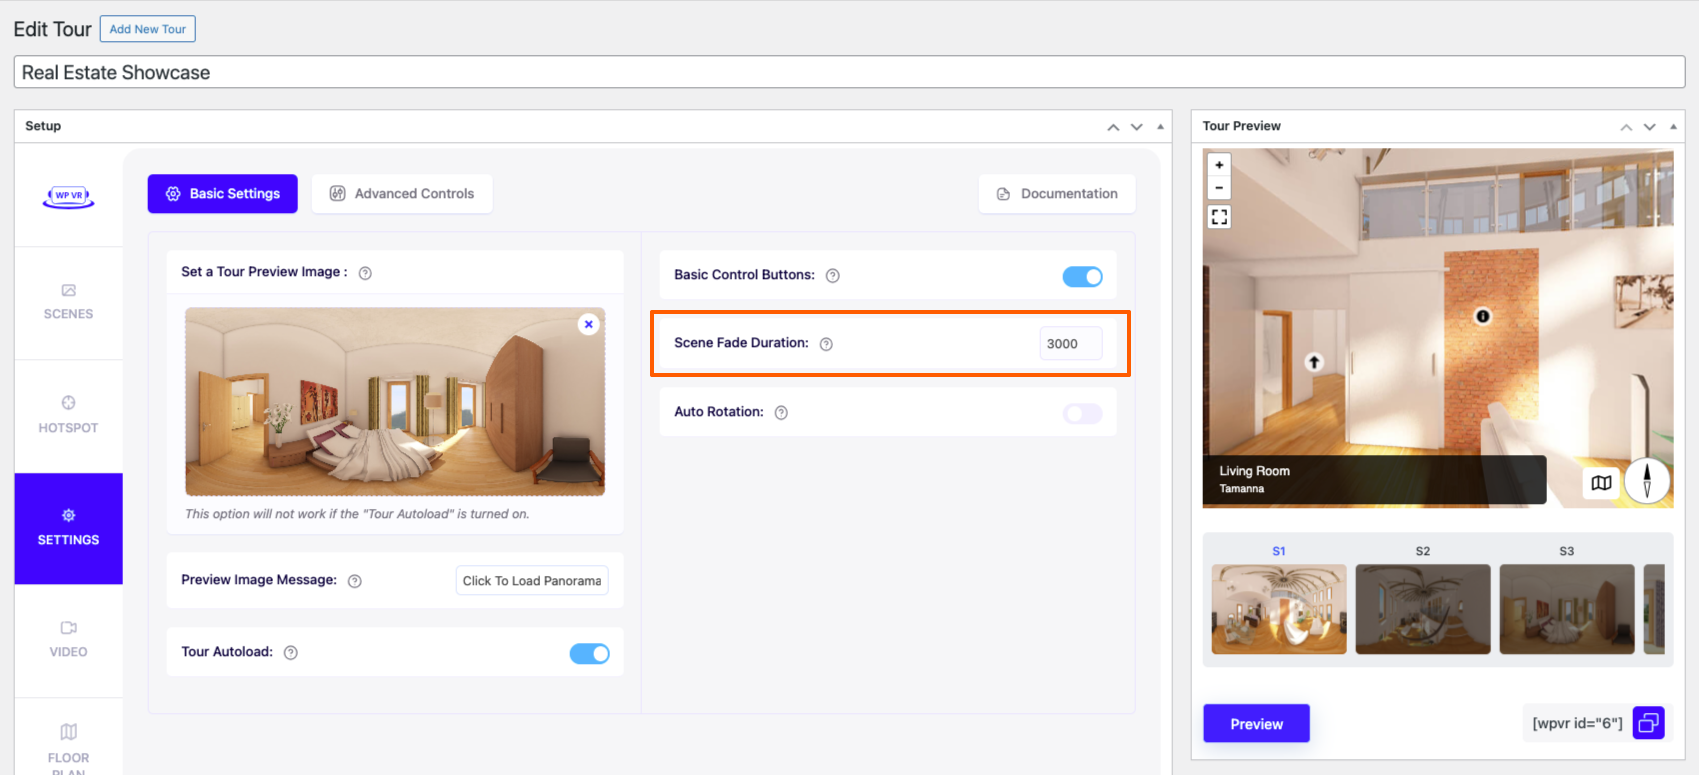
This is when you connect two scenes using a scene type hotspot.

If you input any value here, then when you click on the hotspot, there will be a scene fade animation while going from one scene to another.

The value here indicates the time (in milliseconds) . So if you input a value of 3000, then thee scene fade animation will last for 3 seconds.

Scene fade animation

v. Auto Rotation #

Basic Settings - Auto-rotation

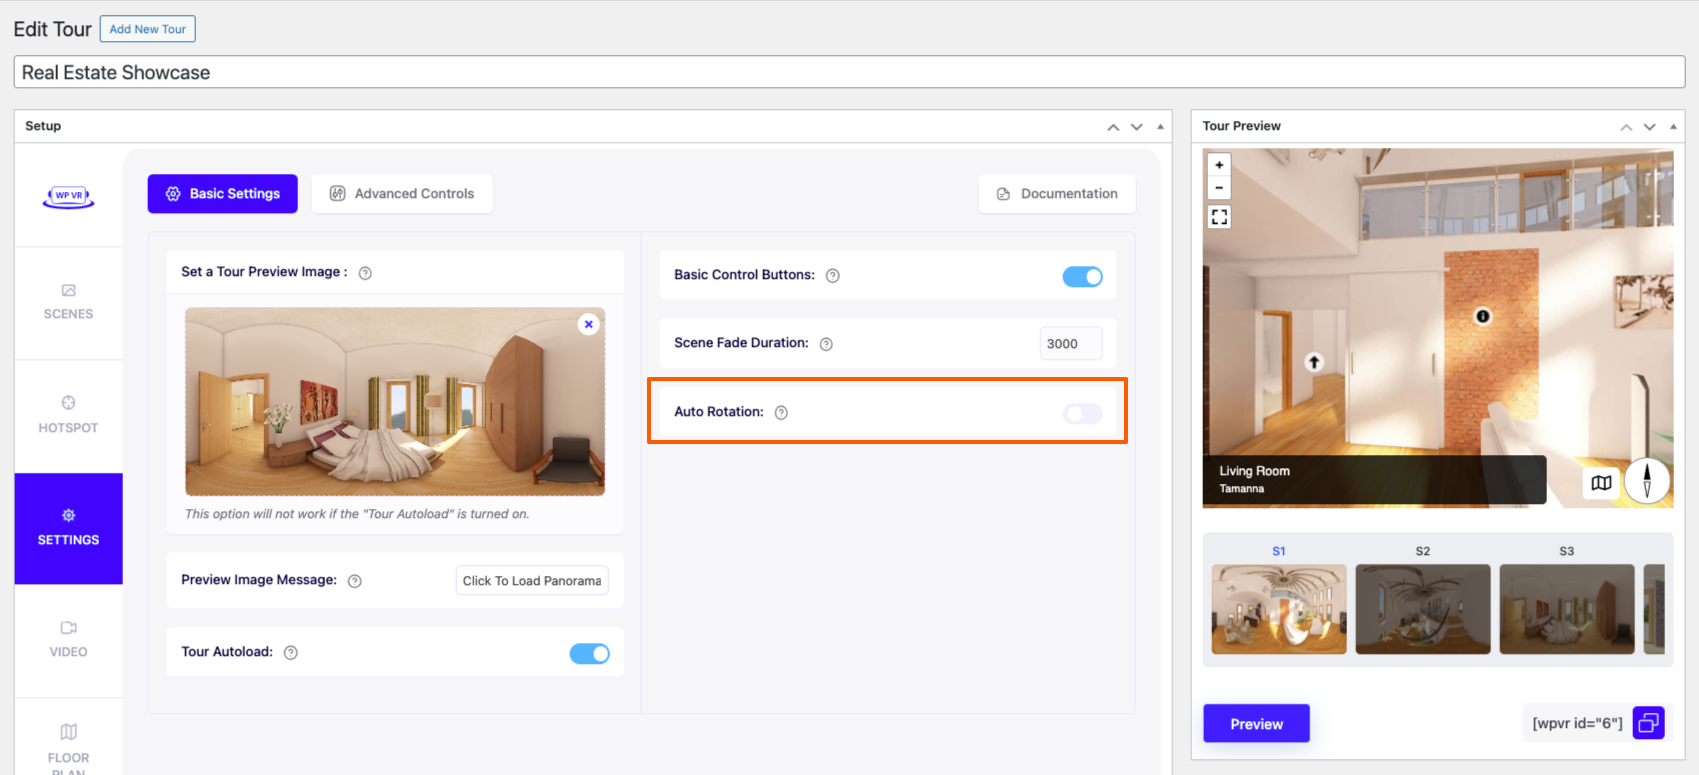
This option will let you implement an auto-rotation effect on the tour, i.e., the tour will be rotating clockwise or anti-clockwise, automatically.

  • Click here to learn how to use Auto Rotation on your tour.

General – Advanced Controls #

Now on top, if you go to the Advanced Controls Tab, you will get more useful exclusive features.

General tab - Advanced Controls

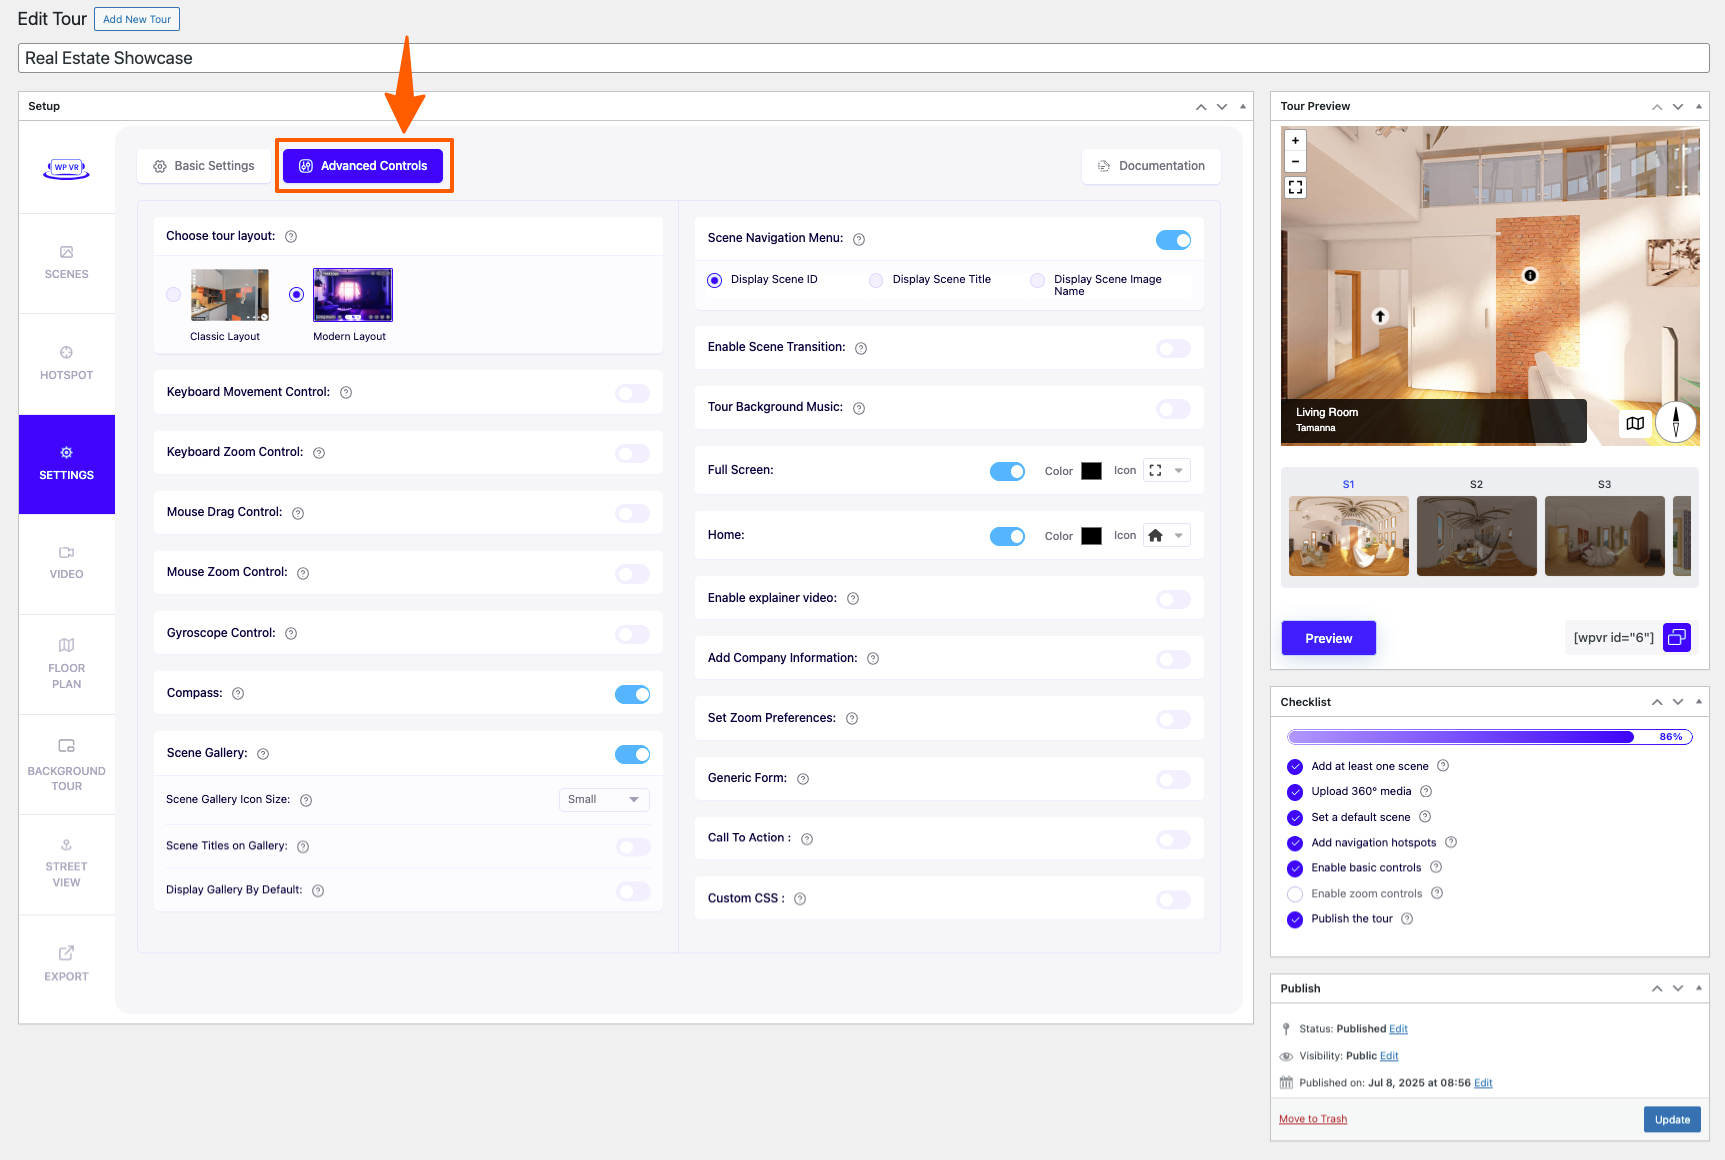
Here, you will find the following features:

i. Keyboard Movement And Zoom Controls #

Using these features, you can limit how people can use a keyboard while taking a virtual tour.

  • Here’s a guide on Keyboard Movement And Zoom Controls

ii. Mouse Drag And Zoom Control #

Using these features, you can limit how people can use a mouse while take a virtual tour.

  • Here’s a short guide on Mouse Drag And Zoom Control

iii. Gyroscope Control #

This option will let you allow visitors to take a tour on Gyroscope mode when take the virtual tour using a mobile device.

  • Here’s a short guide on using Gyroscope Control

iv. Compass #

Enabling this option will display a compass icon on the bottom right corner of the tour.

Compass on tour

v. Scene Gallery #

You can display a scene gallery on your virtual tour so that a visitor can take a quick look at the scenes you have in the tour.

  • Here’s a short guide on using a Scene Gallery

vi. Tour Background Music #

You may add a background music to the virtual tour using this feature.

  • Here’s a guide on using a Tour Background Music

vii. Add Company Information #

You may use this feature to add a company logo on the top right corner of the tour and allow people to click on it to get further information.

  • Here’s a short guide on adding Company logo & Information.

General – Control Buttons #

Now on top, if you go to the Control Buttons tab, you will get options to add custom navigation and control buttons to the virtual tour using colors and icons of your own choice.

General tab - Control buttons
  • Here’s a guide on how you can use these features

Now that you know about all the exclusive features in the General settings, use whichever you feel is necessary to make the tour more attractive and Publish the tour.

Share This Article :
Updated on August 14, 2020
How To Customize Hotspot Icons And Color How To Upgrade To Pro – WPVR
Table of Contents
  • Customize A Virtual Tour With Exclusive Features
  • General - Basic Settings
  • i. Set a Tour Preview Image
  • ii. Tour Autoload
  • iii. Show Controls
  • iv. Scene Fade Duration
  • v. Auto Rotation
  • General - Advanced Controls
  • i. Keyboard Movement And Zoom Controls
  • ii. Mouse Drag And Zoom Control
  • iii. Gyroscope Control
  • iv. Compass
  • v. Scene Gallery
  • vi. Tour Background Music
  • vii. Add Company Information
  • General - Control Buttons
RexTheme Logo
Our Plugins
  • WP VR
  • Product Feed Manager
  • Social Booster
  • Cart Lift
Resources
  • Privacy Policy
  • Terms of Service
  • Affiliate Program
  • Contact Us
Payment Methods
Payment methods

© . All rights reserved by RexTheme