Exciting update for multi-vendor marketplace owners! WP VR – the leading WordPress 360° panorama and virtual tour plugin – now seamlessly integrates with Dokan, the most popular WooCommerce multi-vendor marketplace solution. This powerful WP VR Dokan integration empowers vendors to create their own 360° virtual tours directly on their store pages, without requiring admin access.
Vendors can build immersive product showcases, real estate listings, hotel room previews, or event space walkthroughs – all independently. Each vendor manages only their own tours, ensuring security while preventing access to others’ content.
This integration transforms ordinary product pages into engaging, interactive experiences, boosting customer trust, reducing return rates, and giving your marketplace a competitive edge.
Whether you’re running a real estate marketplace, travel booking platform, or general e-commerce store, WP VR and Dokan together deliver stunning 360° virtual shopping experiences that drive conversions.
Key Benefits of WP VR Dokan Integration #
- Vendor Independence: Vendors create, edit, and embed tours without admin help.
- Better Product Presentation: 360° virtual tours increase engagement and sales conversion.
- Secure & Organized: Vendors manage only their own tours – no cross-access.
- SEO Advantages: Interactive content boosts dwell time, reduces bounce rates, and improves Google rankings.
- Fully Mobile-Responsive: Tours look stunning on smartphones, tablets, and desktops.
- Easy Scaling: Ideal for marketplaces with hundreds of vendors.
Ready to enable this feature? Follow the simple setup below.
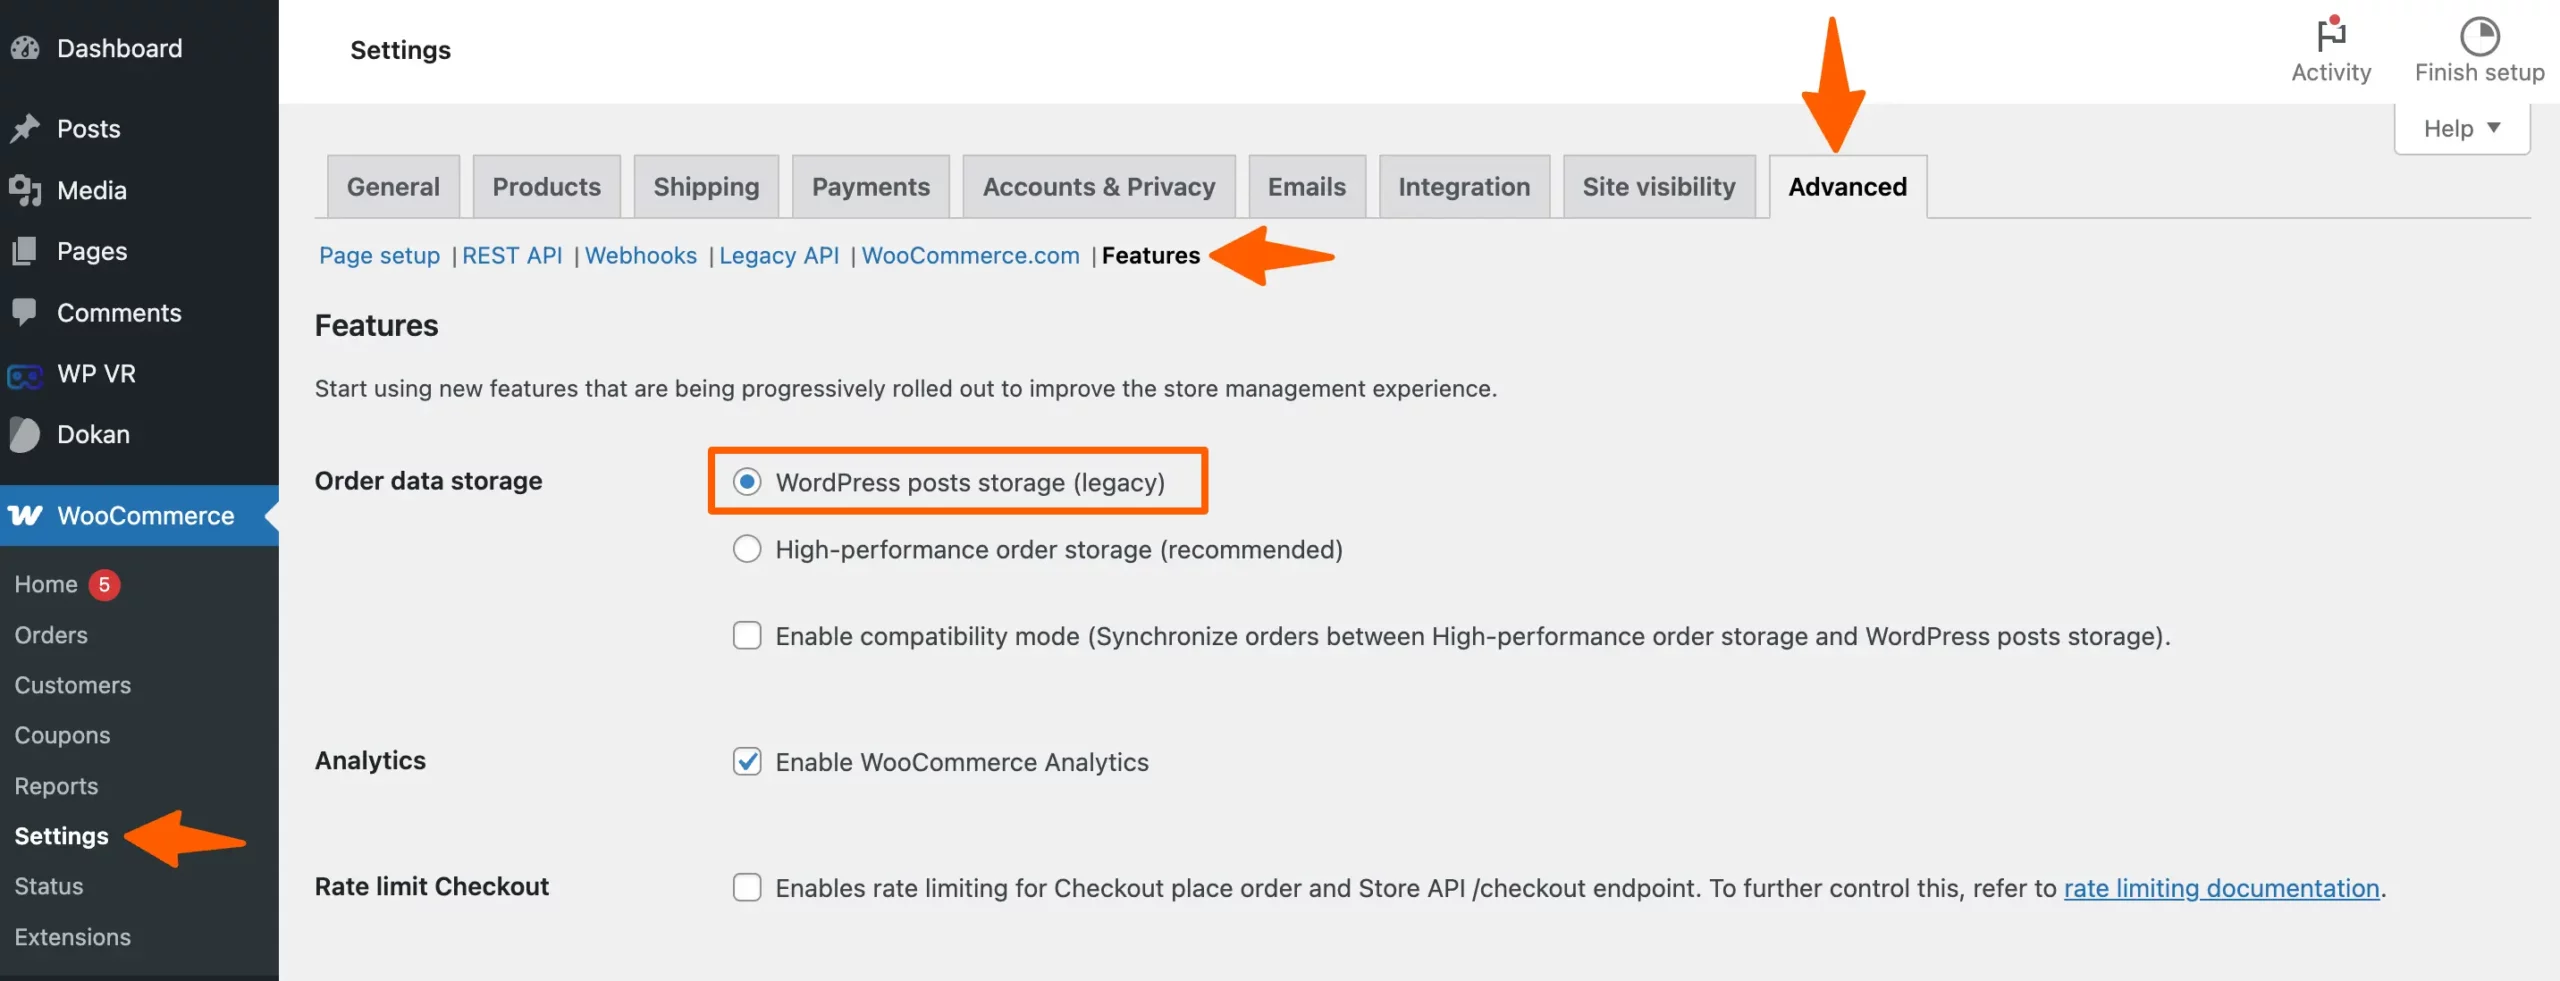
Step: 1 WooCommerce Configuration #
To ensure proper functionality, adjust the following WooCommerce settings:
- High-Performance Order Storage (HPOS): If the HPOS feature is enabled, it restricts admin access regardless of Dokan’s settings. For detailed information, refer to WooCommerce’s documentation on HPOS.
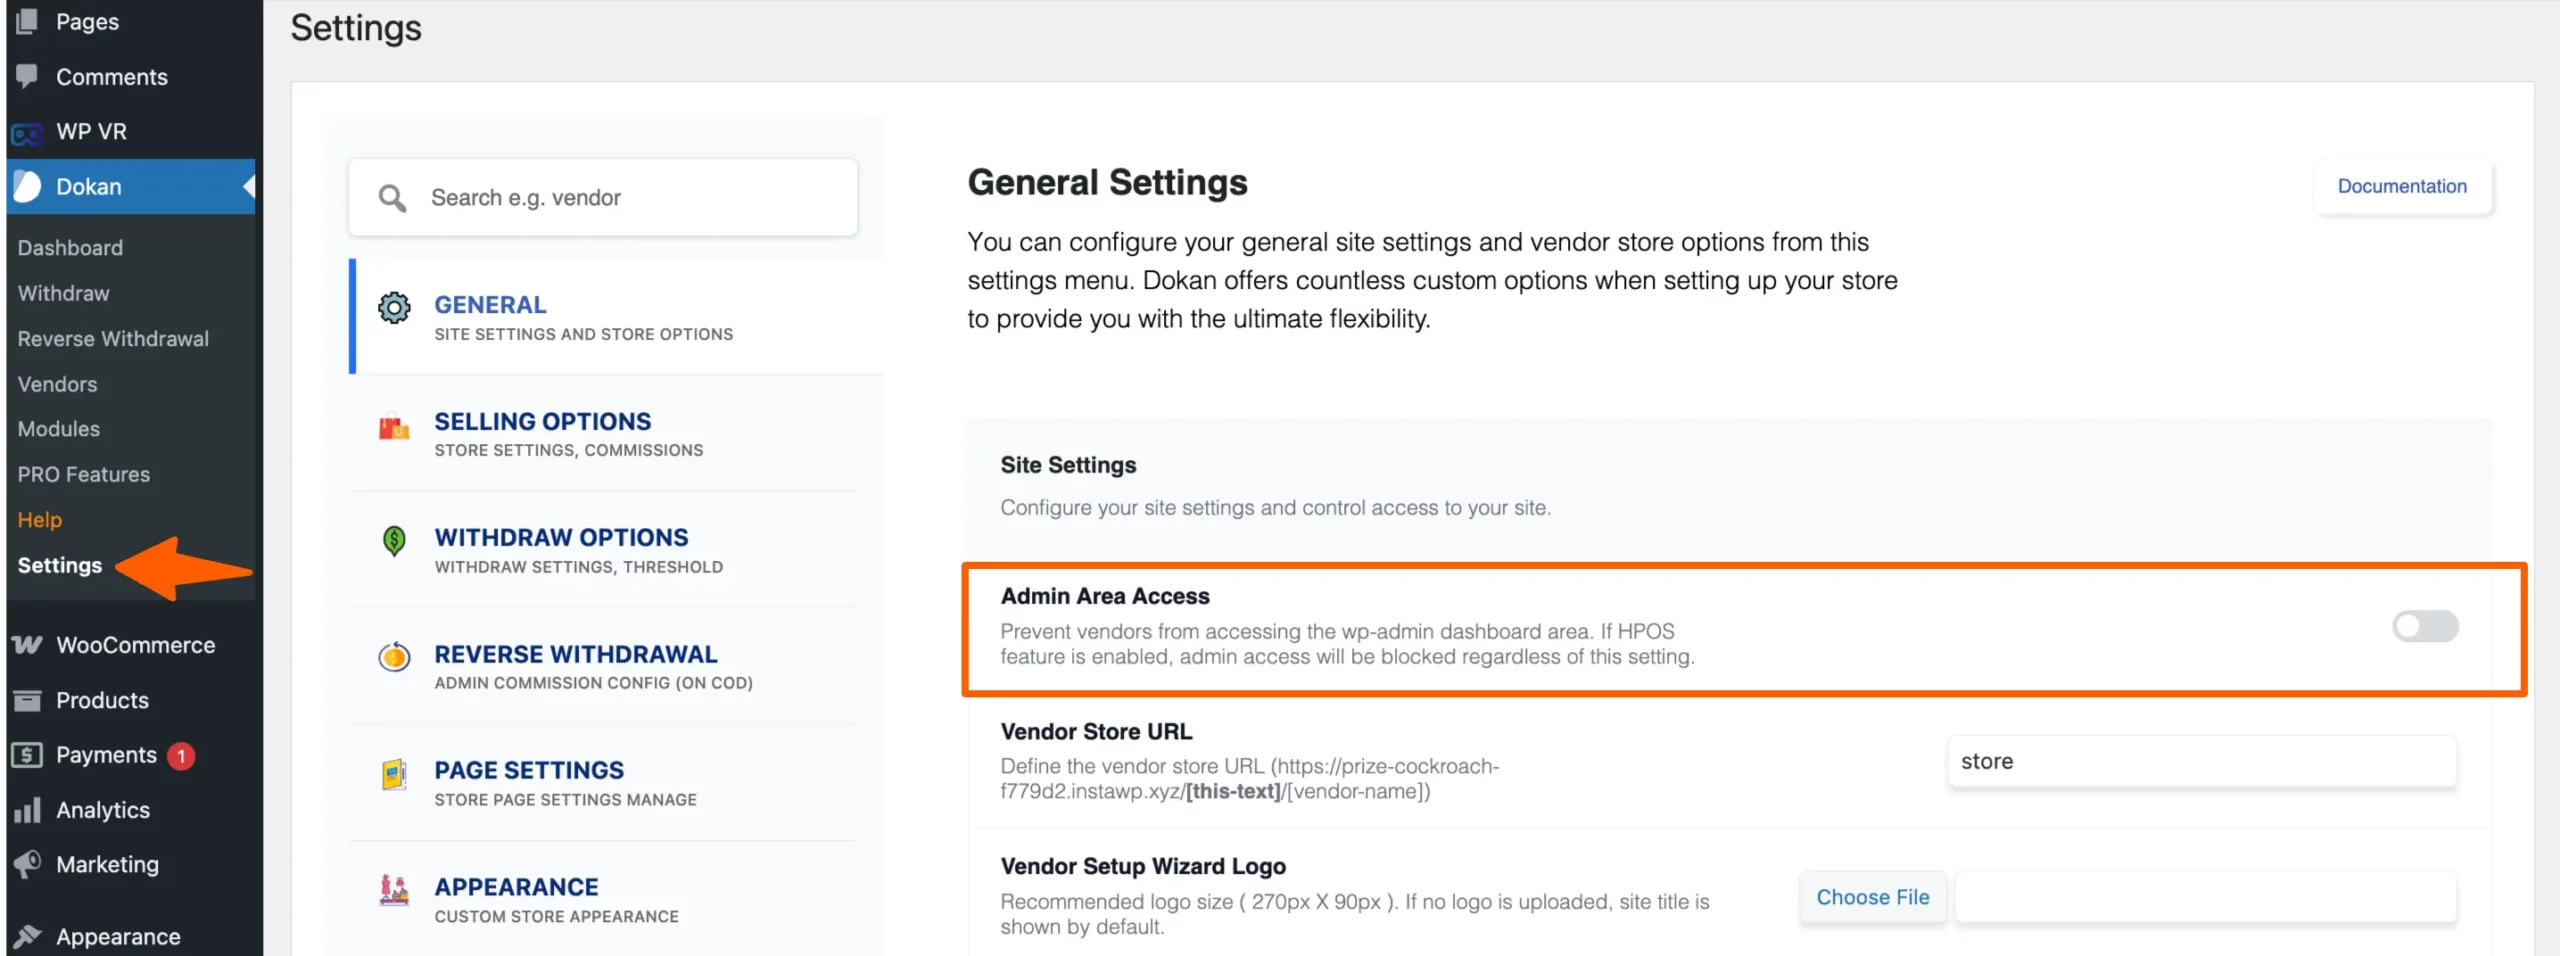
Step: 2 Dokan Configuration #
To grant vendors backend access necessary for utilizing the WP VR plugin:
- Disable Admin Area Access Restriction: Navigate to
WP Admin Dashboard → Dokan → Settings → General. - Uncheck the option labeled Admin Area Access. This setting, when enabled, prevents users from accessing the WordPress admin area. Disabling it allows vendors to access necessary backend features. Checkout Dokan’s Official Documentation.
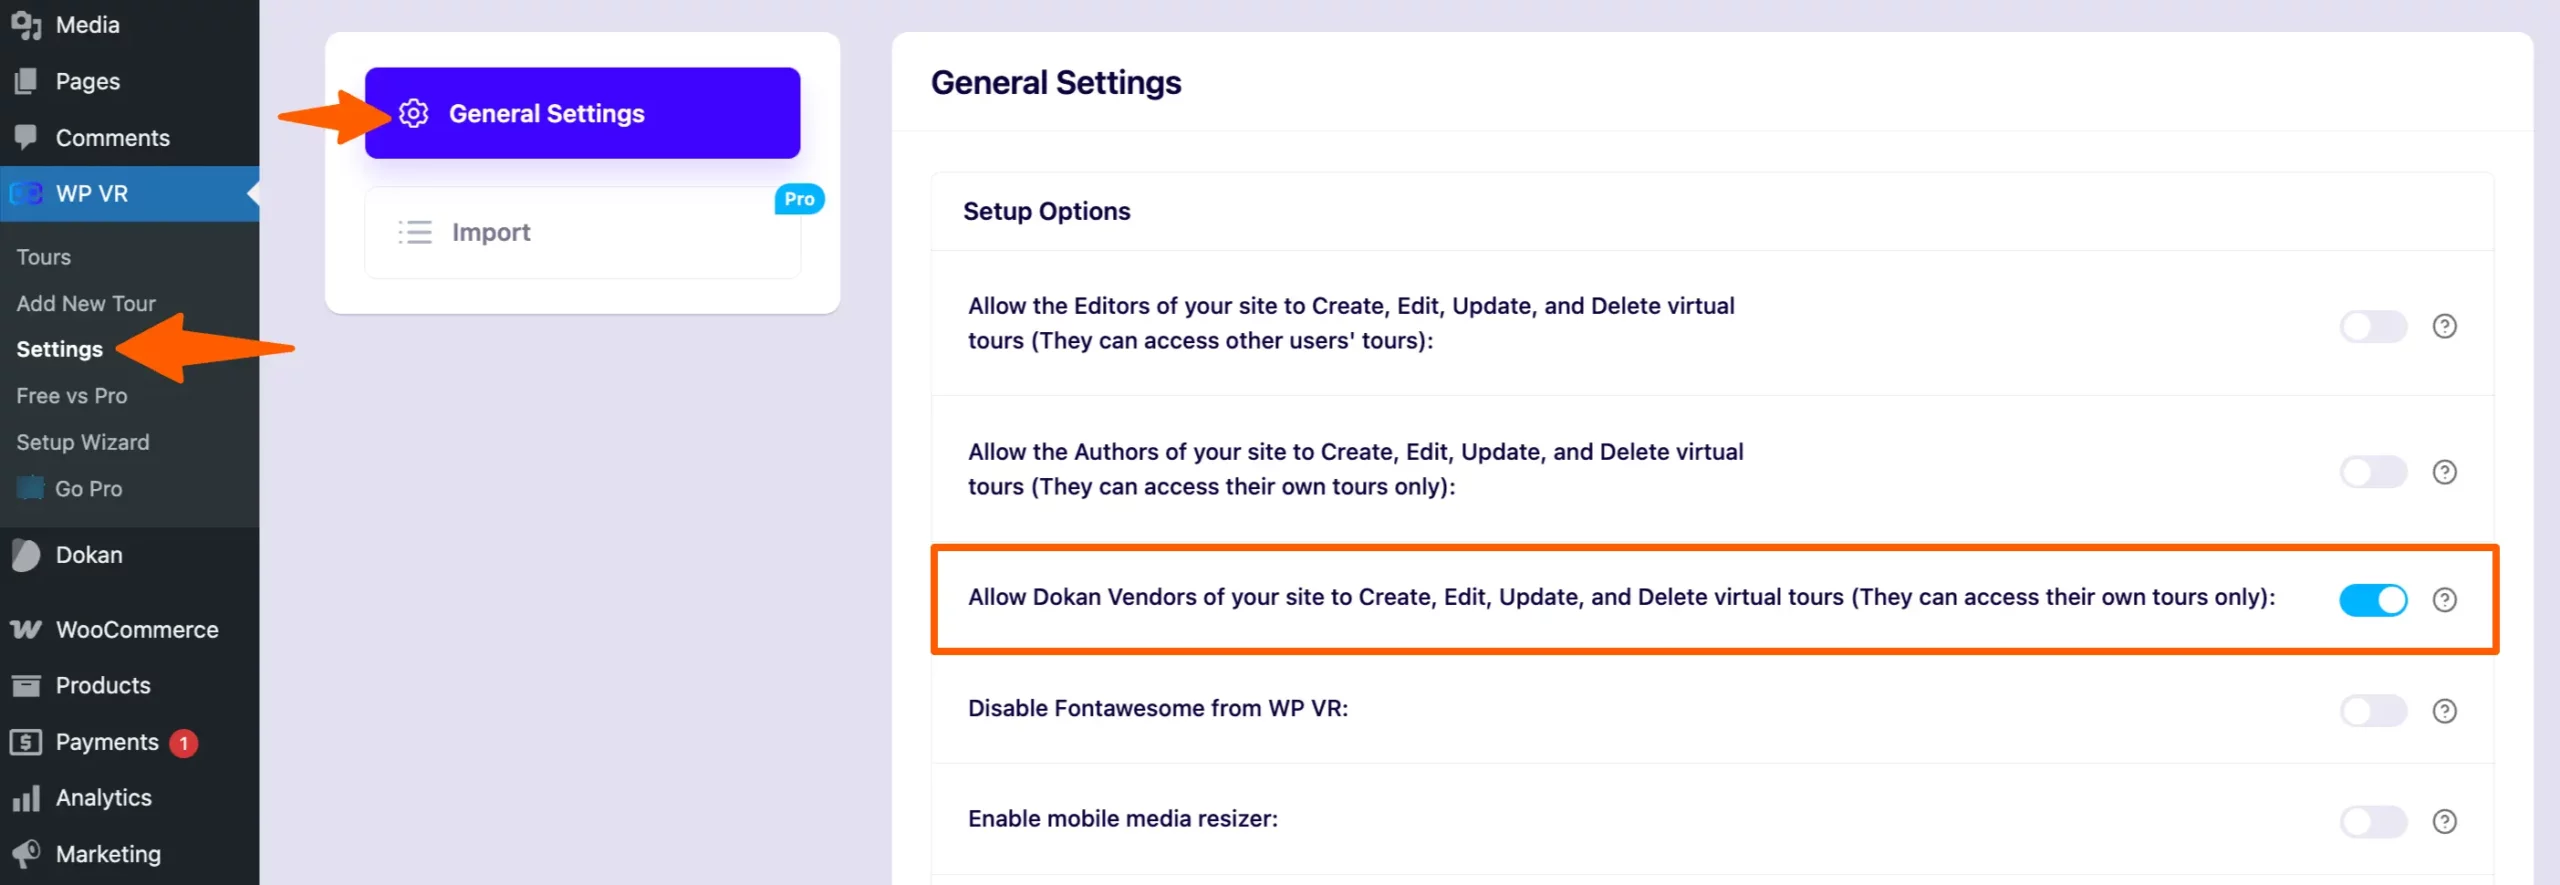
Step: 3 WP VR Configuration #
Enable vendor permissions within WP VR:
- Go to
WP Admin Dashboard → WP VR → Settings. - Enable the option: Allow Dokan Vendors of your site to Create, Edit, Update, and Delete virtual tours (They can access their own tours only).
That’s it.
By following these configurations, vendors will have the capability to access WP VR and create their own virtual tours, enhancing the overall marketplace experience.
Tips for Best Results with WP VR Dokan Integration #
- Guide vendors with a simple tutorial on creating tours.
- Use WP VR Pro for advanced features like hotspots, multi-scenes, and Google Street View.
- Monitor tour performance – interactive content often improves conversion rates significantly.
- Ensure your site uses HTTPS for optimal embedding.
This integration makes WP VR + Dokan one of the most powerful combinations for multi-vendor 360° virtual tour marketplaces in 2026.
Start empowering your vendors today – update WP VR and enable the integration!
Related Guides: