
If you’re using the WPBakery Page builder, WP VR has a dedicated WPBakery Element that you can use to embed virtual tours on your site easily.
Once you create a virtual tour, follow the steps below to embed a virtual tour using WPVR and WPBakery Element.
1. After creating the tour, remember the Tour ID or Tour Name.
2. Edit the page/post using WPBakery Page Builder, where you want to embed this virtual tour.
3. On the Element area of WPBakery, search for the WPVR widget.
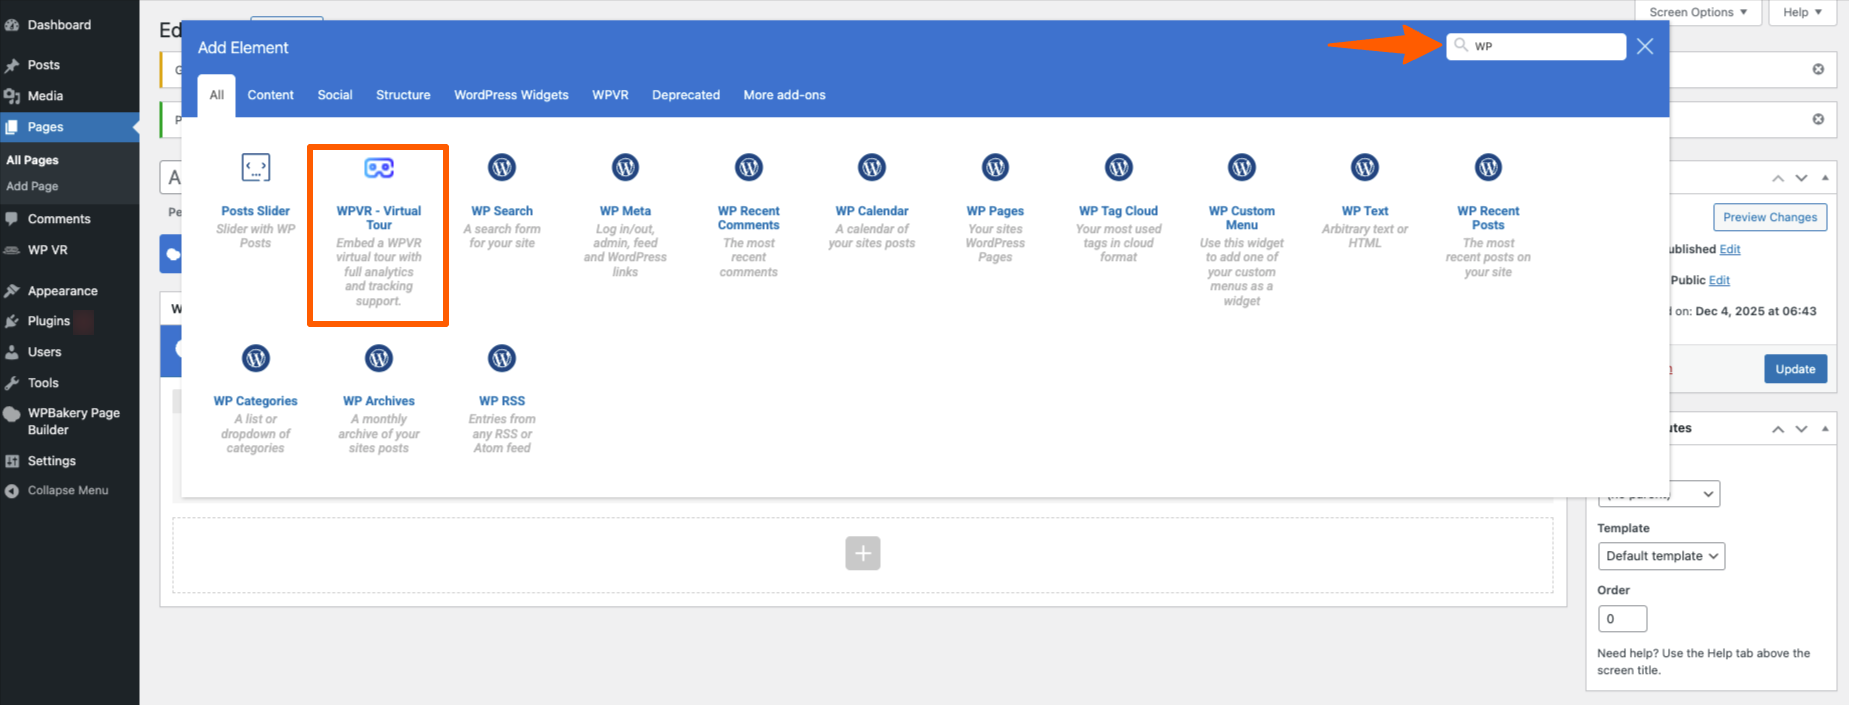
4. Click on the WPVR – Virtual Tour Element, and it will add the element.
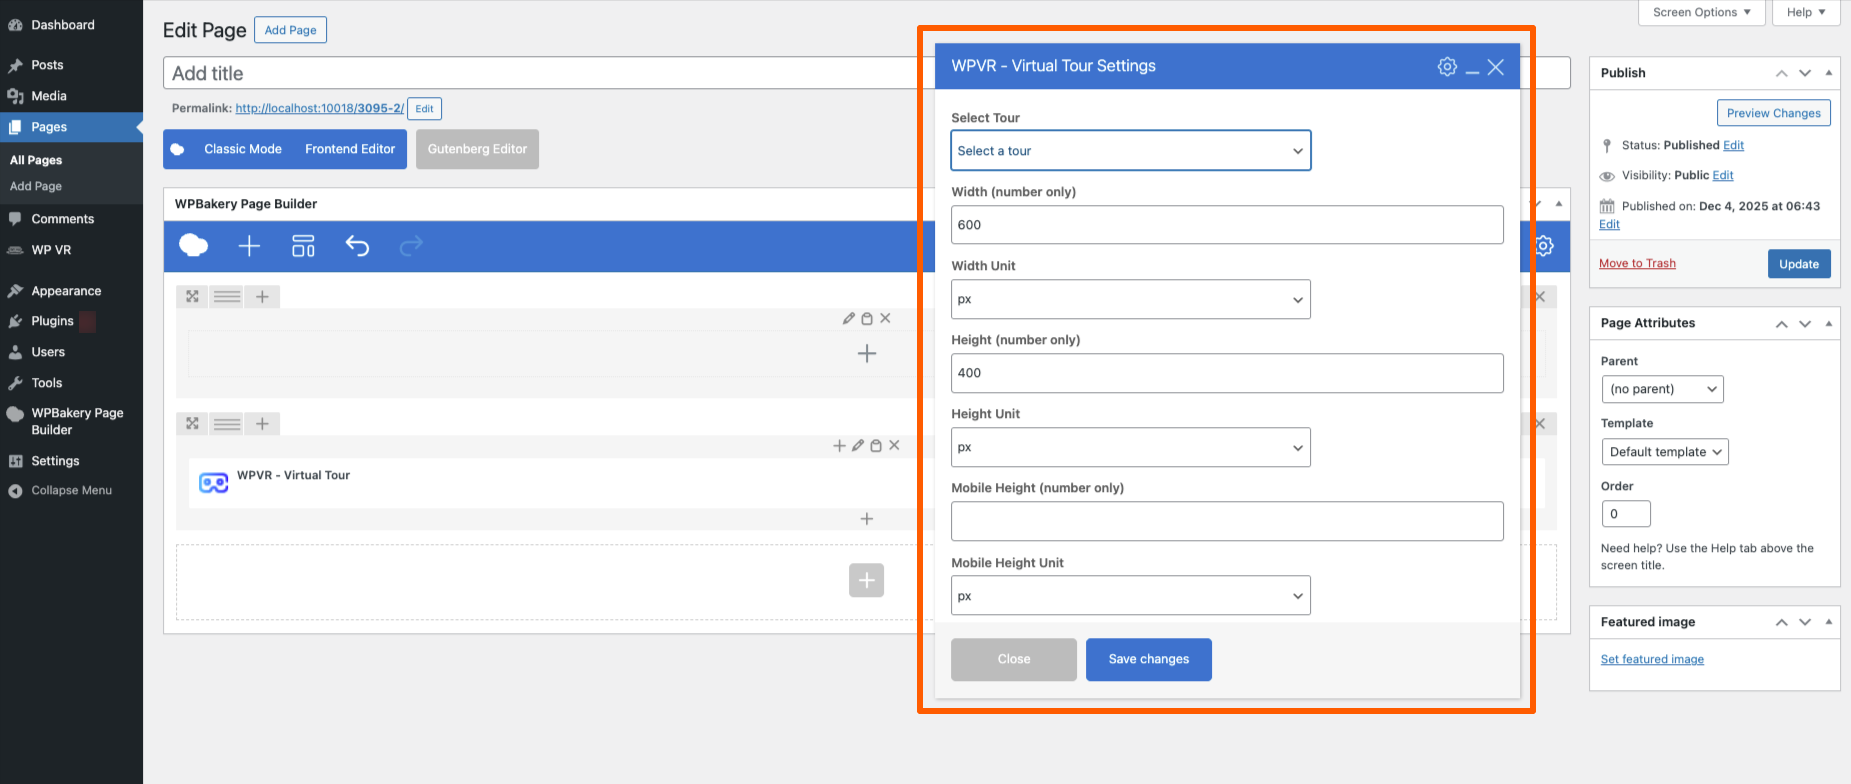
5. Now, you will be required to select the Tour from the drop-down. Then you’ll need to input the “Width”, “Height”, and “Radius”.

- Width –
– Assign a positive numeric pixel value. For example: 600px.
– Or, you can use a percentage that will take the percentage width of the container of the page. Example: 90%.
– If you wish the tour to be full-width of the whole page, then input the text “100vw”.
- Height –
– Only assign a positive numeric pixel value. For example – 400px
– Do not use percentage or any text
- Radius –
– Assign a positive numeric pixel value. For example – 10px
– Or you can use a percentage. For example – 10%
6. Once you provide the required data, you will get a preview of the tour on your web page like this:
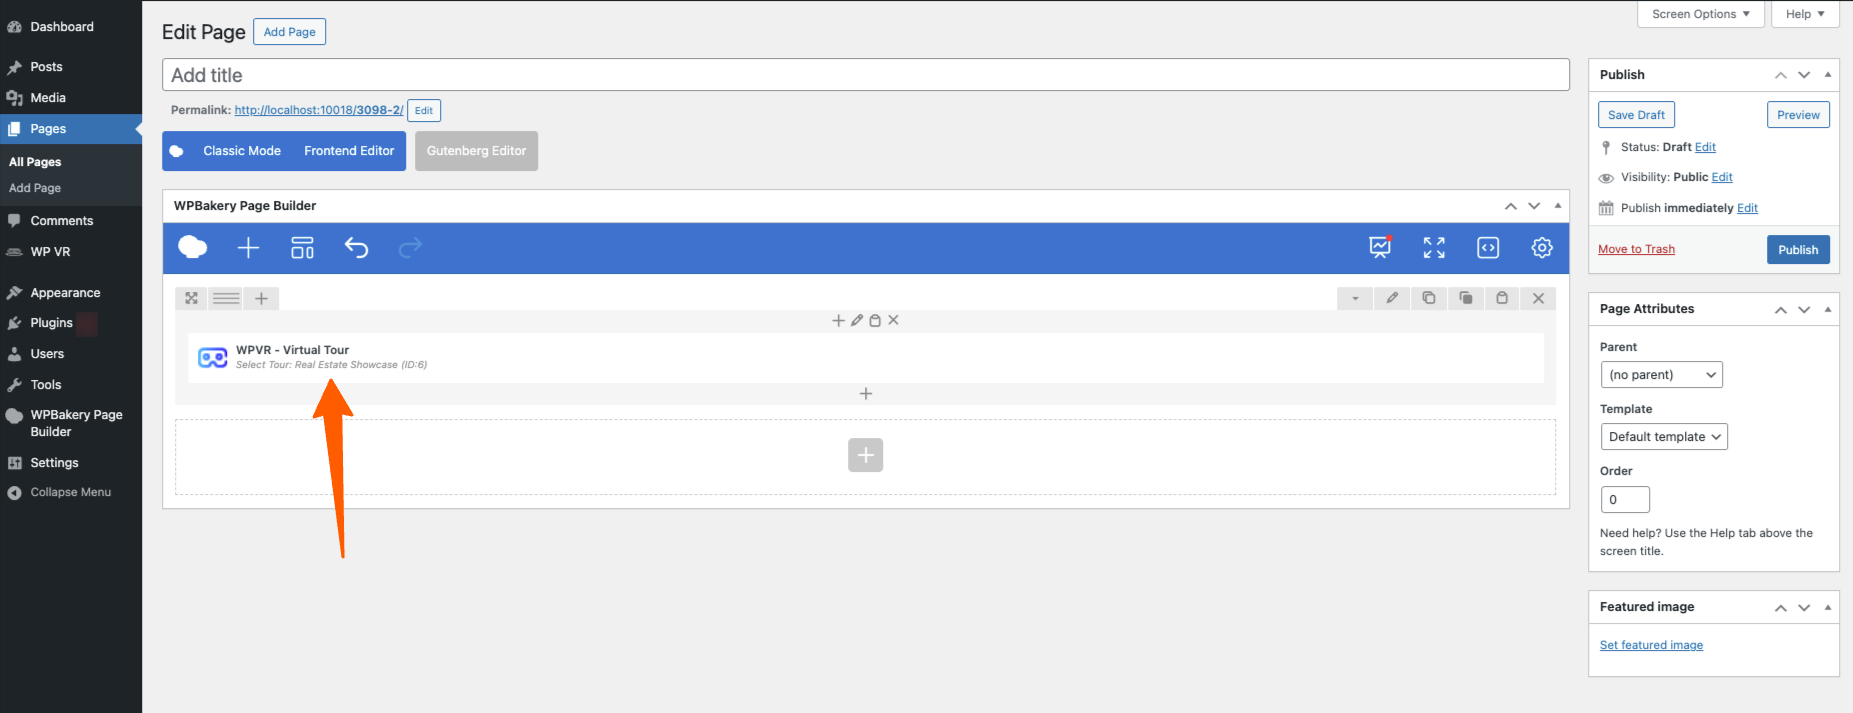
7. Now, you can preview or publish the page, and you will see that a virtual tour has been embedded on your site.
That’s how easy it is to publish the WPVR tours on your webpages using WPBakery.