If you are using WPVR free and looking for Unlimited Scene Uploads and more exciting features like Hotspots, and Customization Options, you should upgrade to WPVR PRO.
The WPVR PRO will allow you to properly customize your virtual tours and give more control of your tours to your viewers.
Upgrading to WPVR PRO is a simple and easy process.
Follow these steps to upgrade to WPVR Pro.
Step 1: Get WP VR Pro #
You can get WPVR Pro from the plugin dashboard.
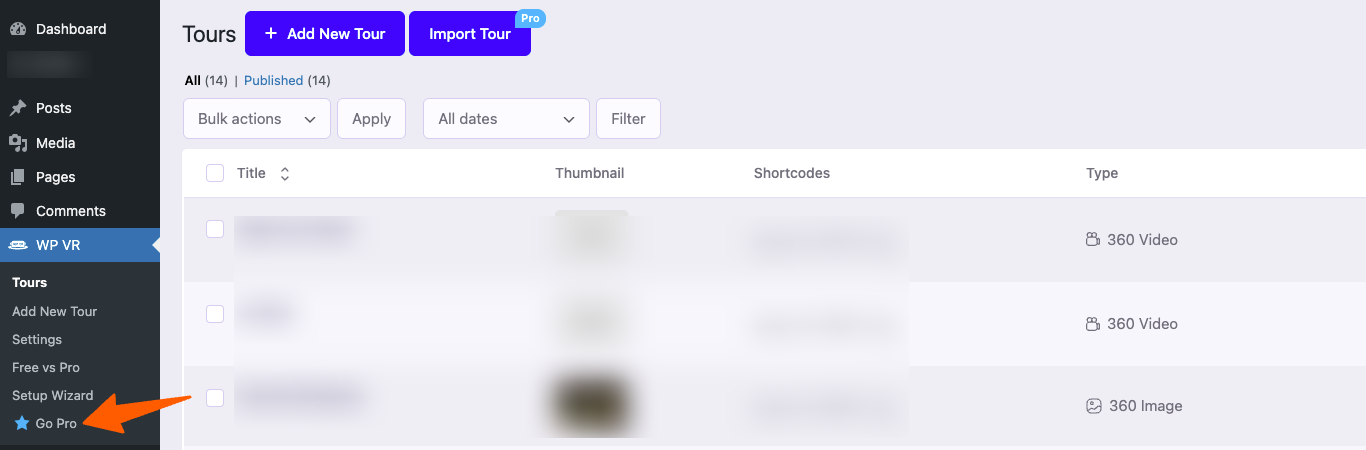
1. From the WordPress Dashboard > WP VR, click on the Go Pro
2. After you click on the Go Pro button, you’ll be taken to the WPVR PRO pricing page.
By default, it will show you the Annual Pricing Plans.
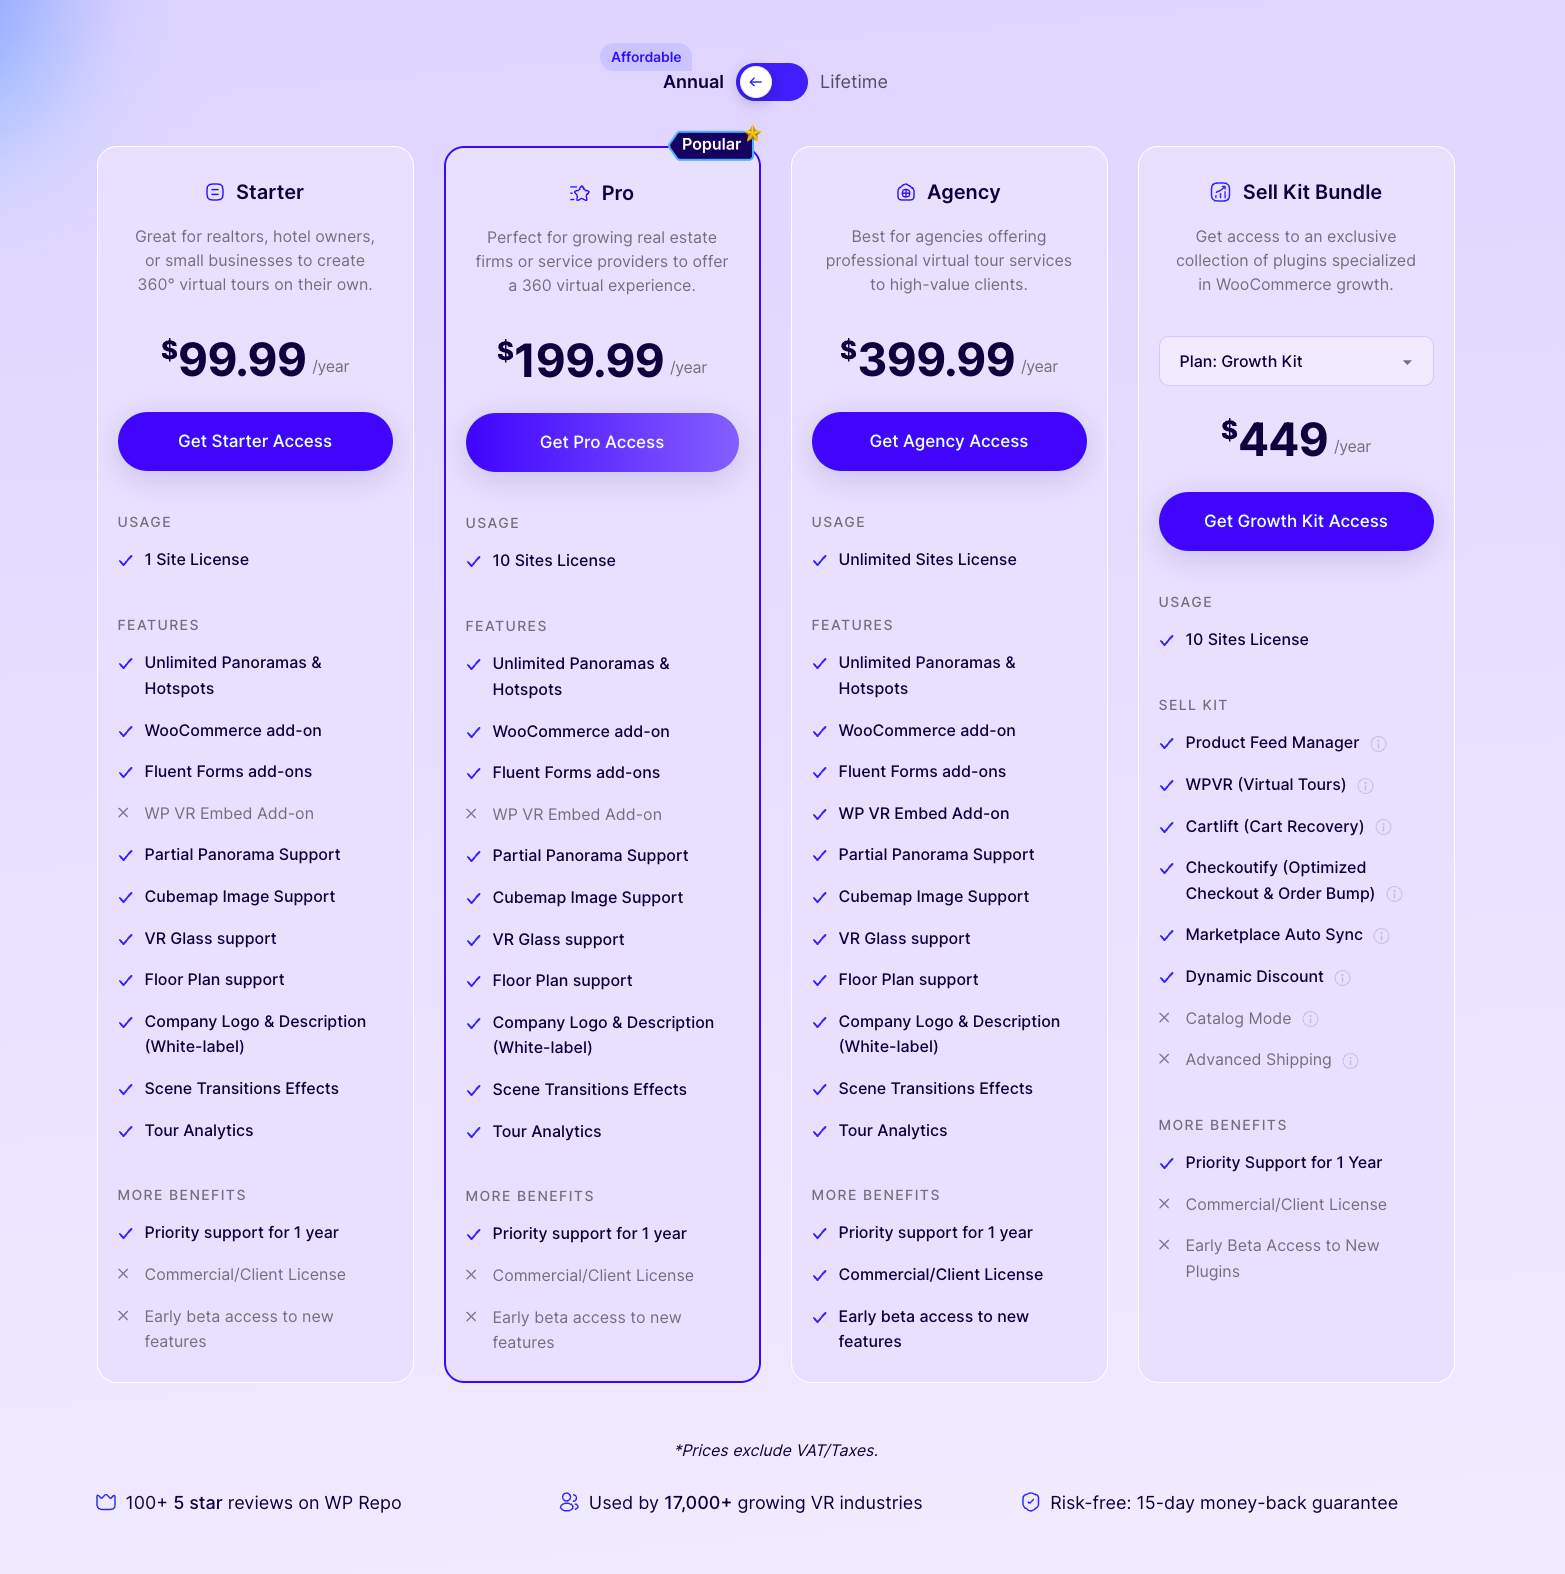
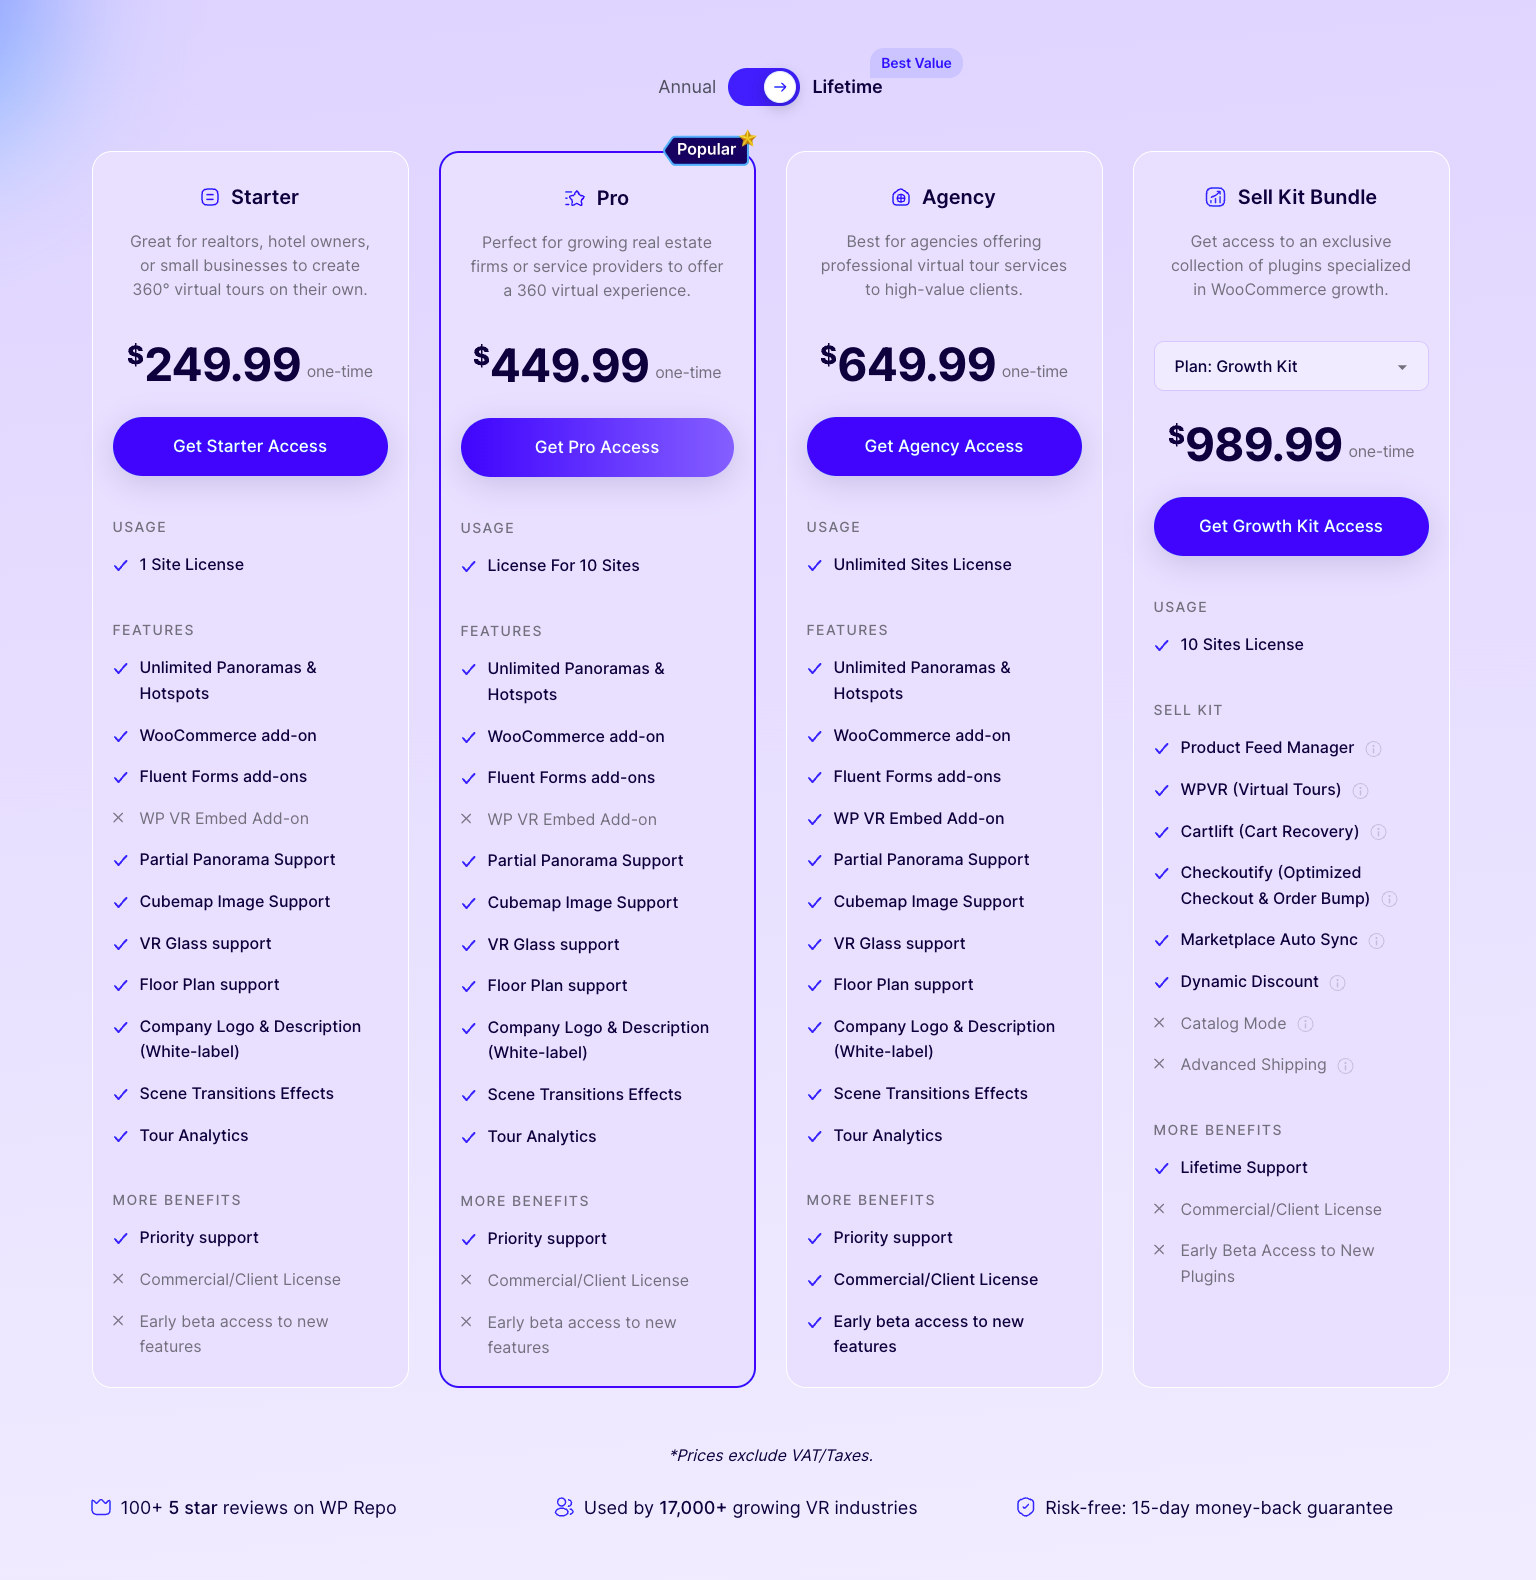
3. Click on the toggle option above to see the Lifetime Pricing Plans.
4. Select the plan that is most suitable for you and click on the “Get Access” button on that plan.
Once you have selected your plan and choose to purchase it, you will be taken to the checkout page.

5. Provide your personal information on this page and click on the Upgrade Now button.
6. Provide the payment information for your preferred Payment Method.
Once you are done with this process, you will have the WPVR PRO plugin.
You will be notified when you have successfully completed the purchase. You will also get an email from us which will contain your purchase details, your license key, and the 2 most latest versions of WP VR Pro.
Step 2. Collect WP VR License Key #
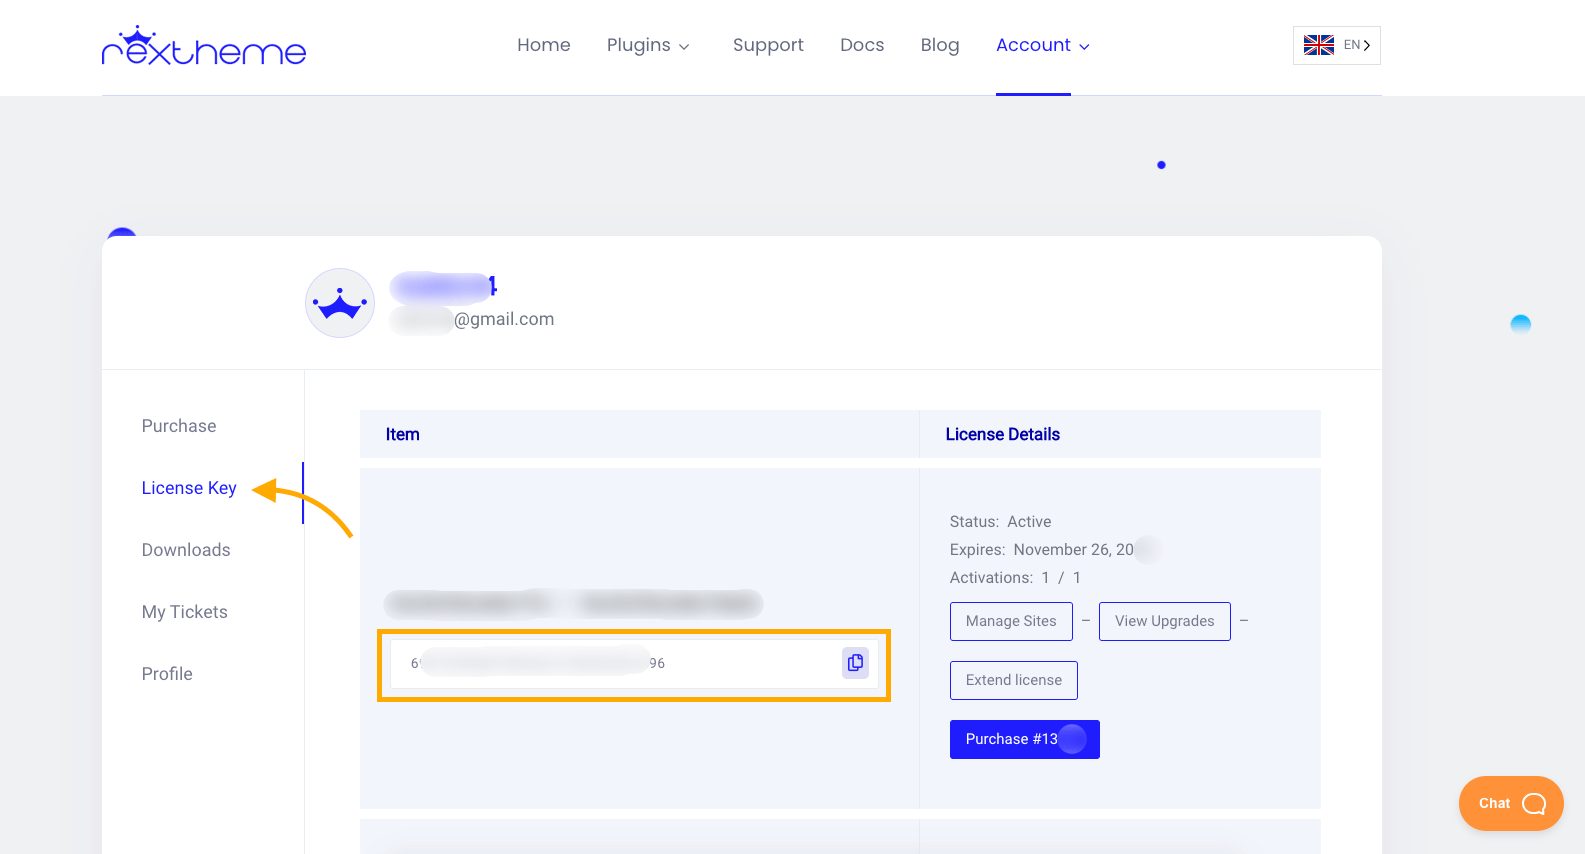
If you couldn’t find the email containing your license key, you can manually get it from your RexTheme account.
1. Go to the RexTheme homepage here.

If you are not logged in, you will need to log in with the ID and Password that you set at the time of purchase.
Otherwise, you will be taken to your account page.
2. Click on the License Key section and you’ll find the license key for your WPVR PRO.
Step 3. Activate WP VR License Key: Upgrade to Pro #
Once you have the WP VR PRO Zip file and the License Key, you are ready to upgrade to Pro.
**Make sure you have the WP VR Free version installed and activated on your site.
1. Go to your Dashboard> Plugins > Add New.
2. On the top left corner, you will get the option to Upload Plugin. Click on that and upload the WP VR-Pro zip file.
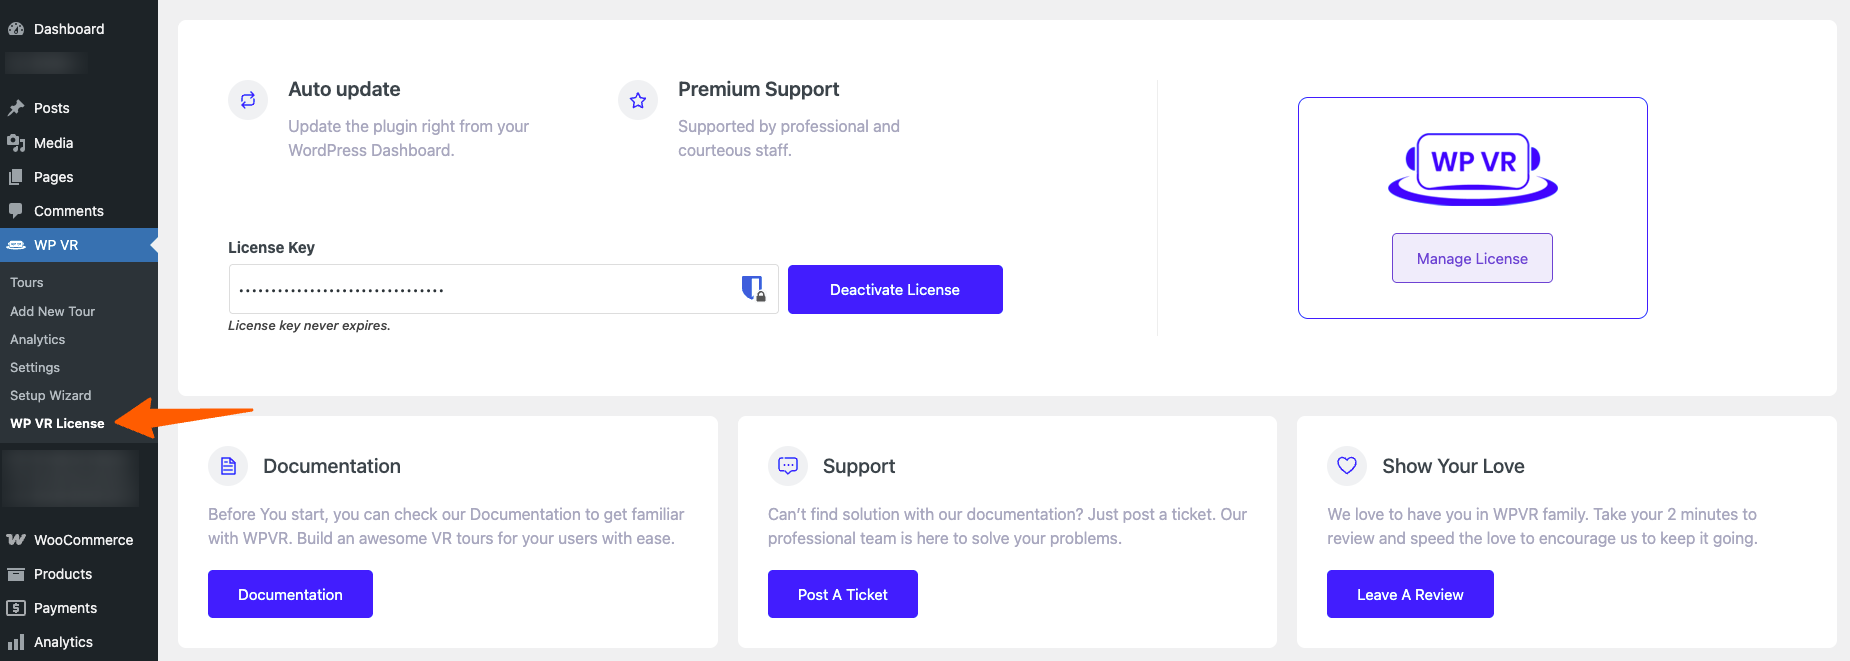
3. Once you upload, install, and activate WP VR Pro, you will notice on your dashboard, a new tab has been added below WP VR called WP VR License.
4. Click on this option and It will take you to the License Key page.
5. In the License Key field, set the license key of your WP VR Pro and click on the Activate License button.
The page will reload.
And that’s it! You license key will be activated.