In this guide, I will show you how to create a Target product feed for Target Marketplace.
Step 1: Create a New Feed and Map Your Product Attributes #
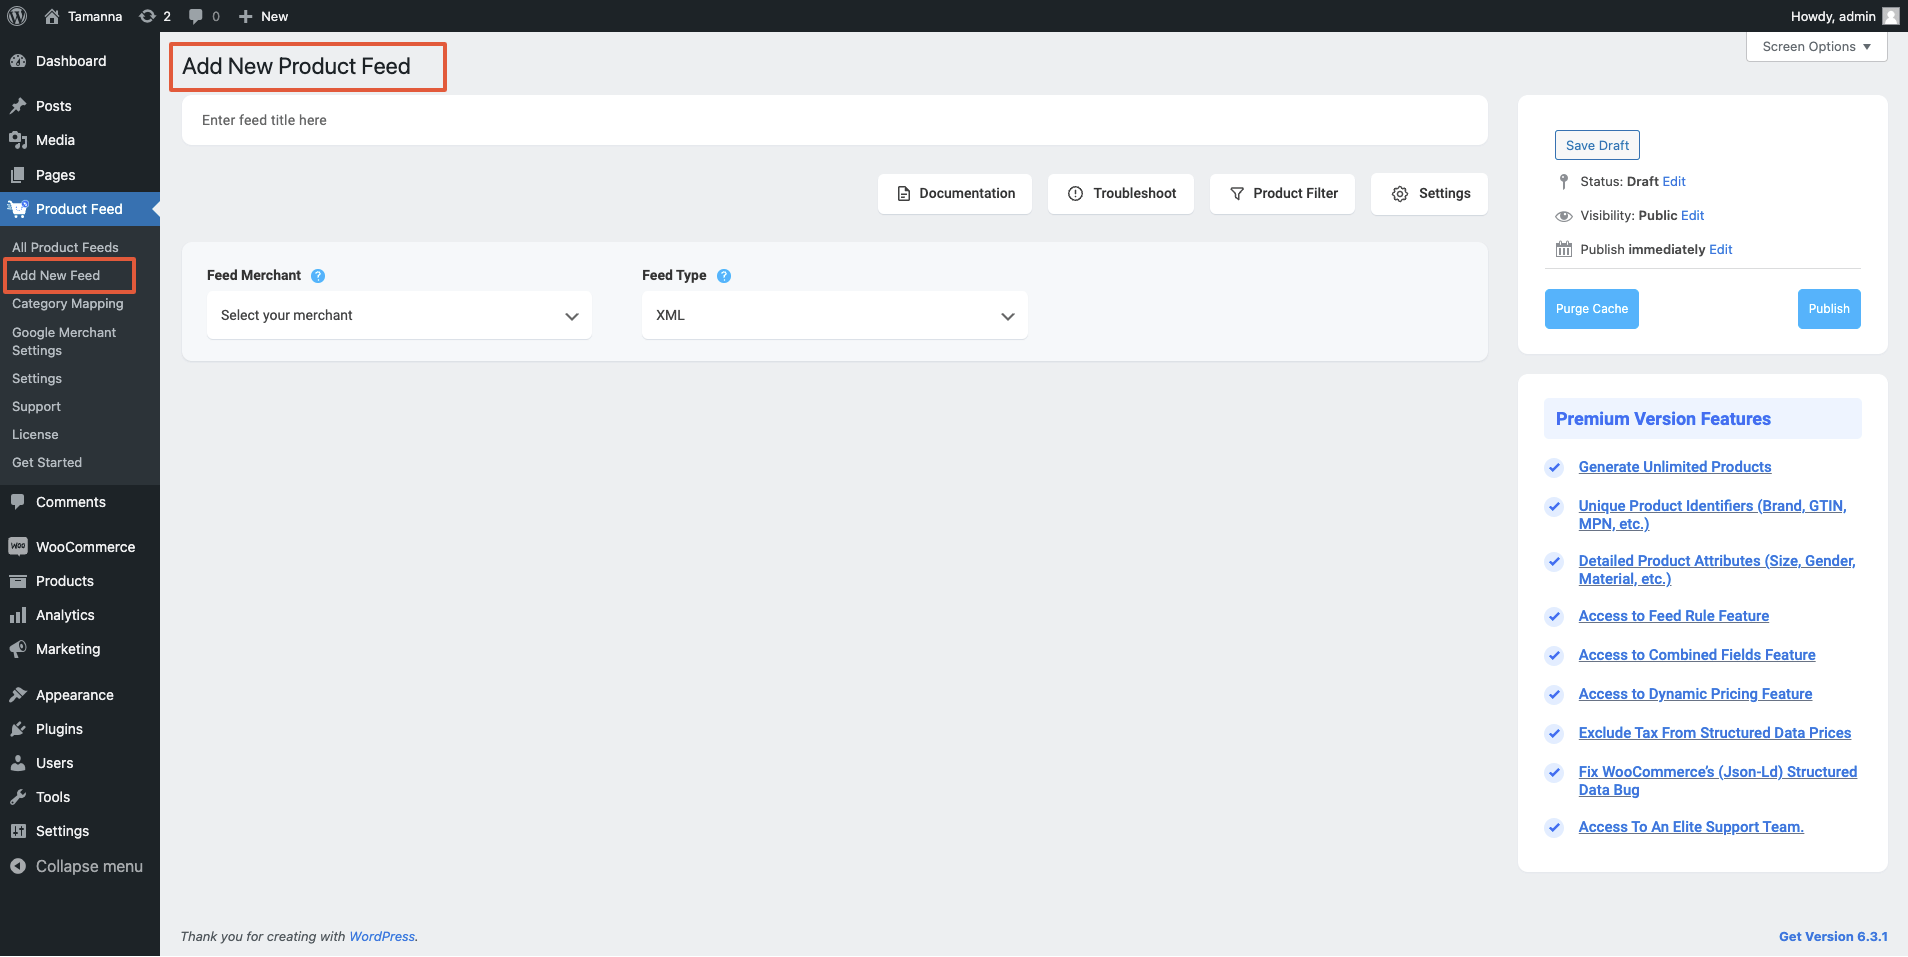
Go to your product feed dashboard.
Click on the Add New Feed button.
It will take you to the feed creation page.

Now, here,
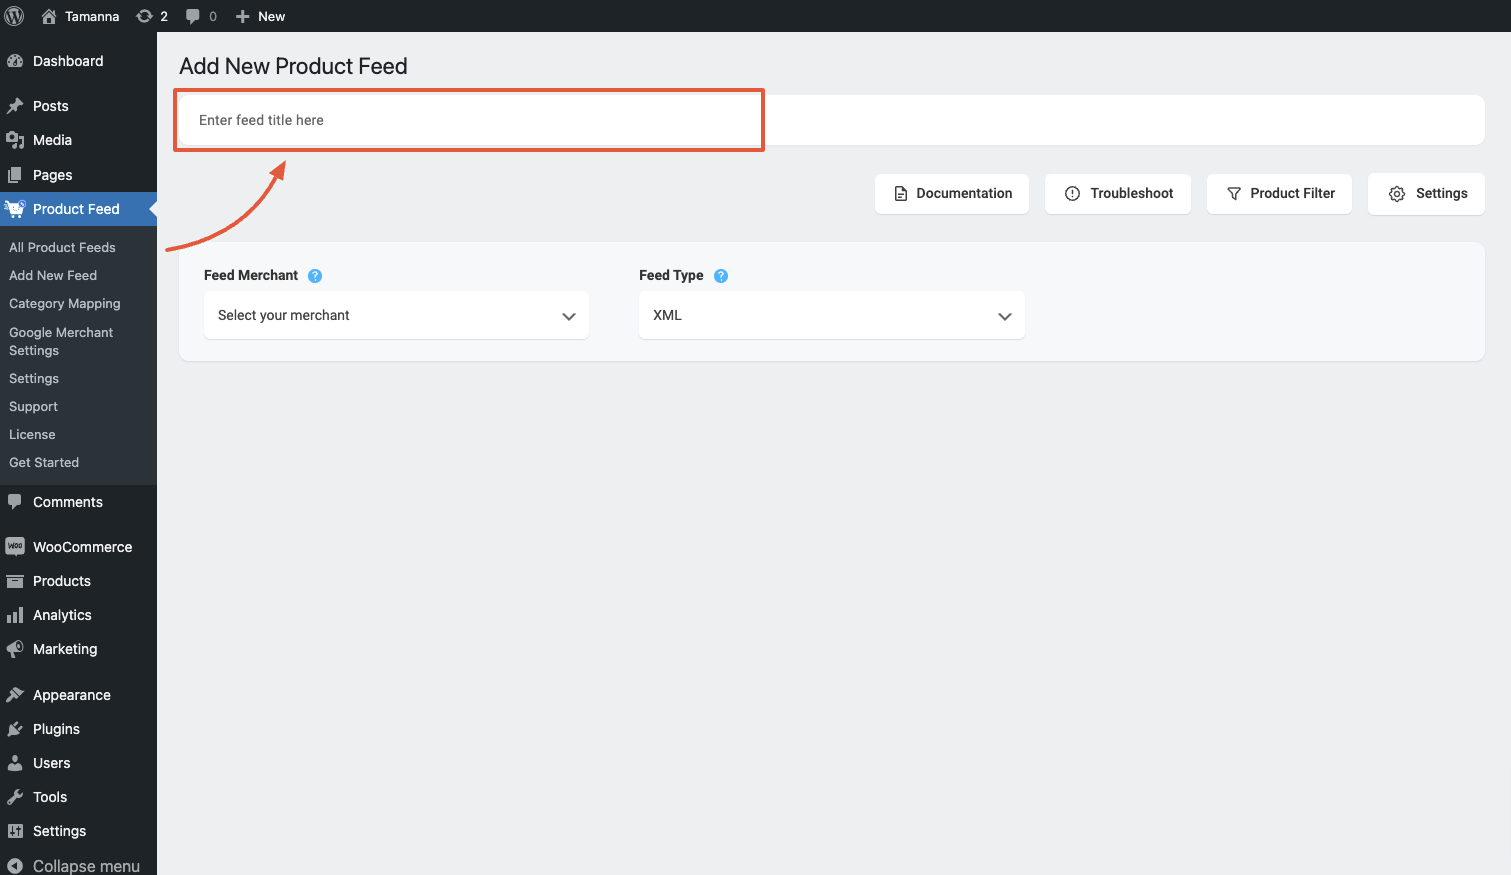
1. On top, you will get the option to add a title to the feed. Give your feed a name.

2. Just under the title, you will see an option to select your preferred merchant. Simply click on the Feed Merchant dropdown button and select your preferred merchant from the dropdown or you can search in the dropdown box.
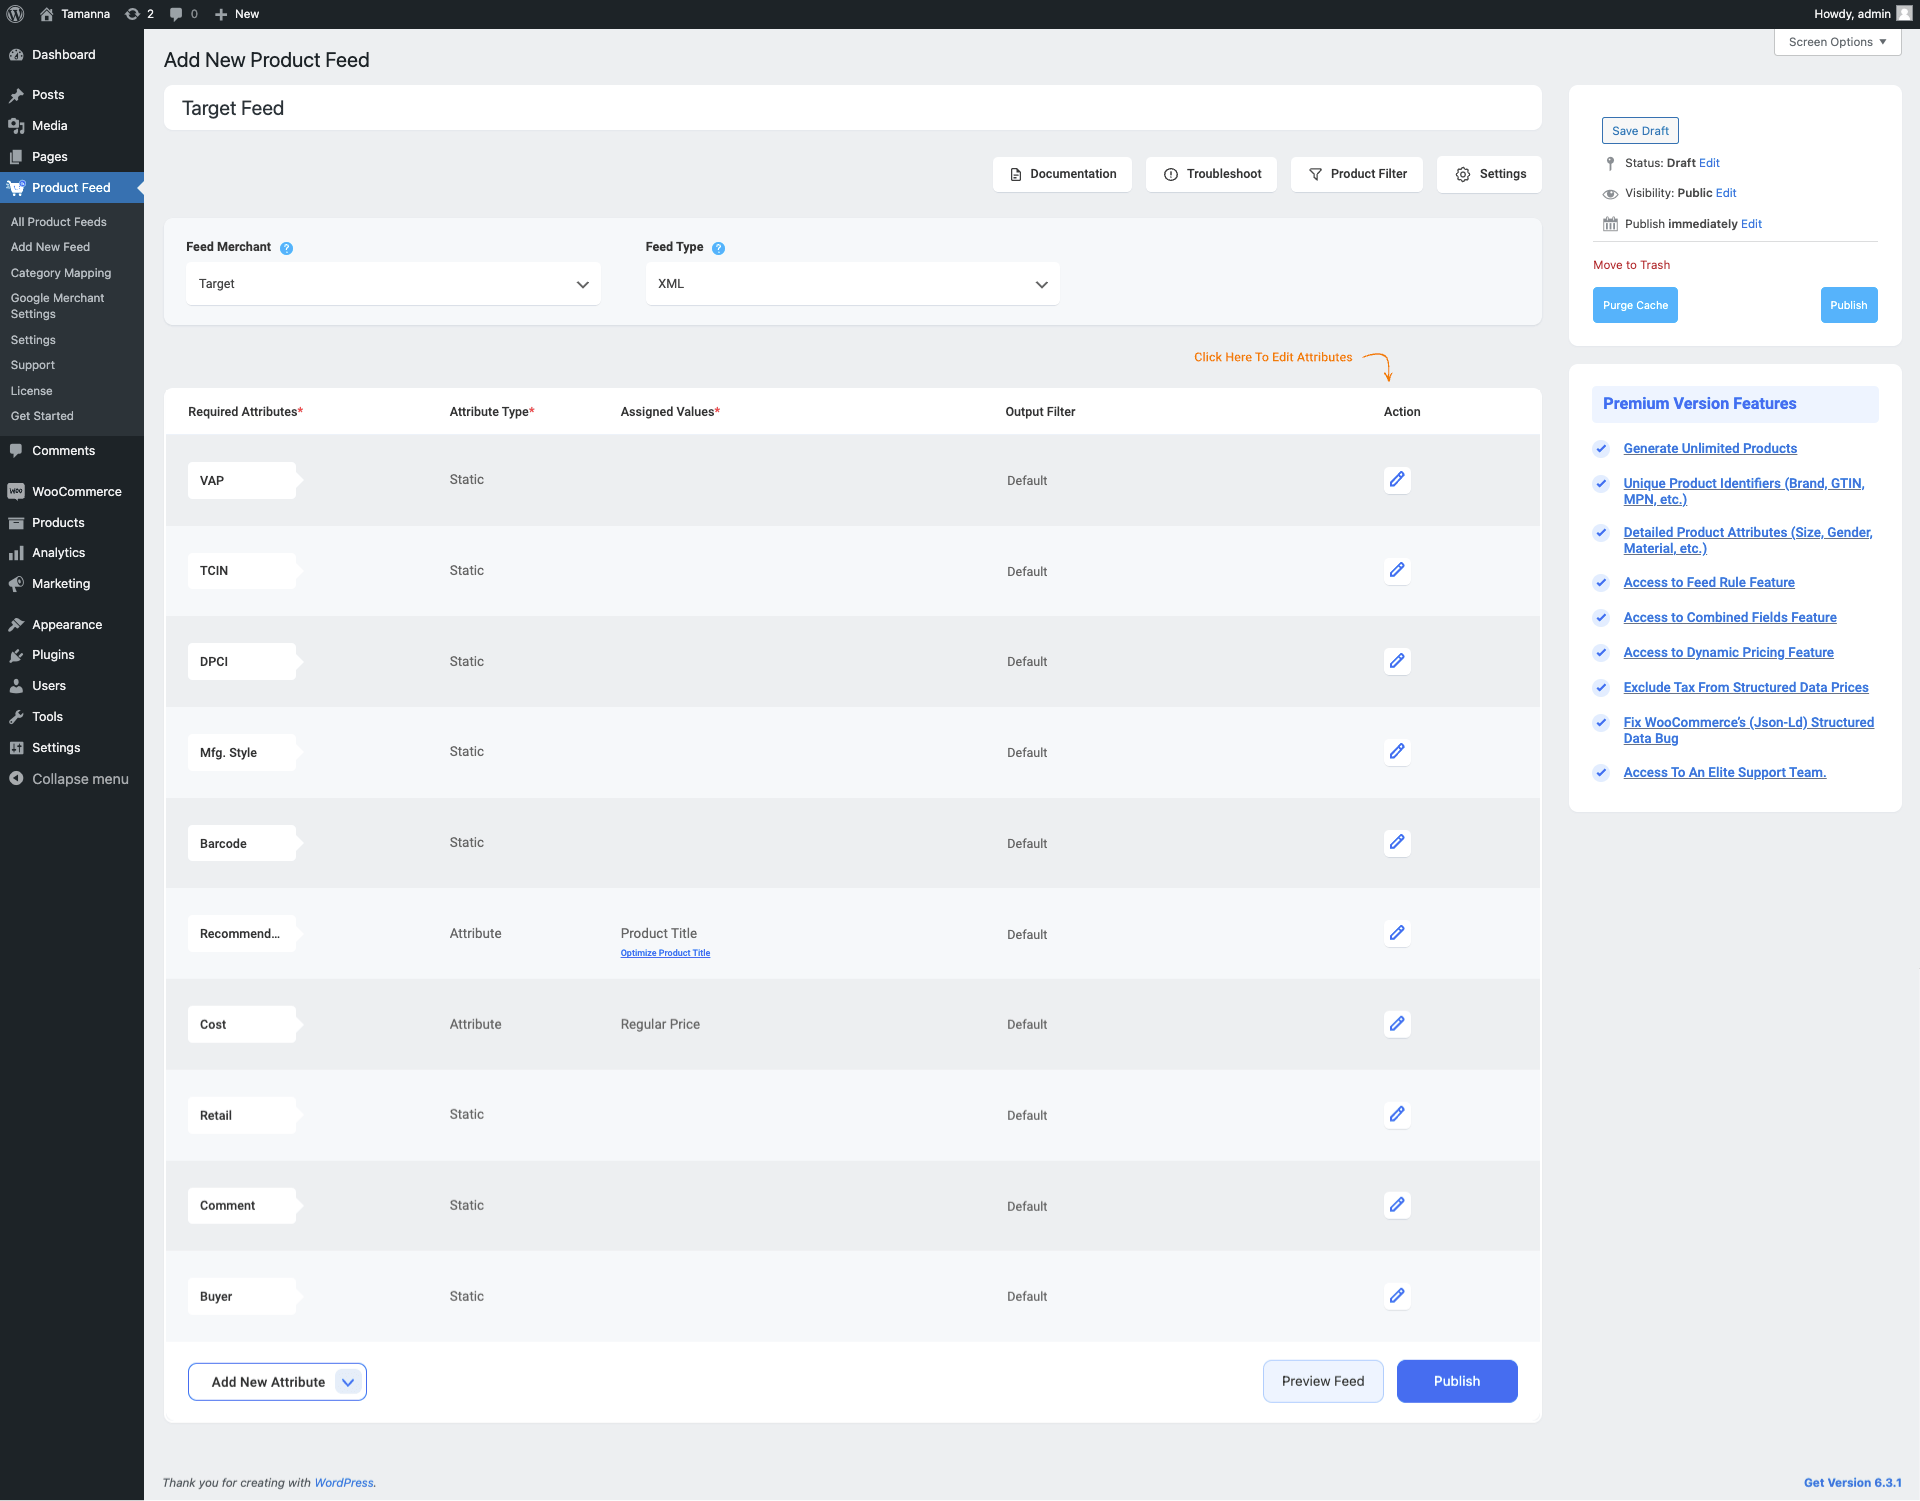
Select your preferred merchant and all the required attributes will be loaded below.
Select Target from the dropdown list.

3. You can see that some of the attributes are already configured – their values are assigned properly, You can change the assigned values as per your need or you can keep them as it is.
However, you need to assign the rest of the attribute values manually.
For Target, you need to assign values for the following attributes:
- VAP
- TCIN
- DPCI
- Mfg. Style
- Barcode
- Retail
- Comment
- Buyer
Step 2: Feed Configuration #
1. Scroll up to the top and here, you will see that there are Four options:
- Documentation
- Troubleshoot
- Product Filter
- Settings

2. First, let us configure the features in the Feed Settings. Click on the Settings button, and a drawer will open from the right side of the screen.
For more in depth knowledge about the setting refer to this doc: Understanding The Basics Of Feed Settings
3. Now, close the drawer and click on the Product Filter option. A new drawer will open from the right.
On the top, you will get the option to use the Custom Filter or the Feed Rules feature (PRO).
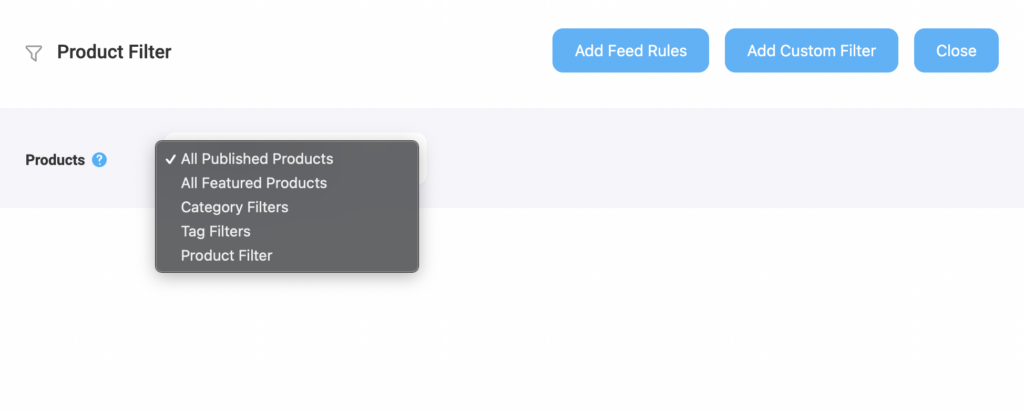
And you will get the feed filter options from the Filter dropdown menu.

Choose the Products you want to include in the feed using any filter. “All Published Products” is selected by default
You may use any other filter options, Custom Filter, Category Filter, and Tag Filter, to include the products you require (or exclude the ones you do not want to include).
For a basic feed, you can keep it as it is.
Step 3: Publish WooCommerce Product Feed For Target Marketplace #
Now, that you’ve configured your feed, it is time to publish the feed.
Scroll back to the top, and you will find a Publish button on the right.
Click on the Publish button, your feed will be generated.
Once your feed generation is complete, you will be able to view or download the feed.
That’s it. Your WooCommerce CSV product feed for the Target marketplace is generated.
Now, log in to your merchant center, and there you will get the option to upload your feed to the Target marketplace to list your products.