You can easily create a Multi-Step WooCommerce checkout page using Checkoutify – Checkout Field Manager for WooCommerce.
Since you are already familiar with the Express Layout Single Step Checkout, We will start by creating a Checkout from Scratch
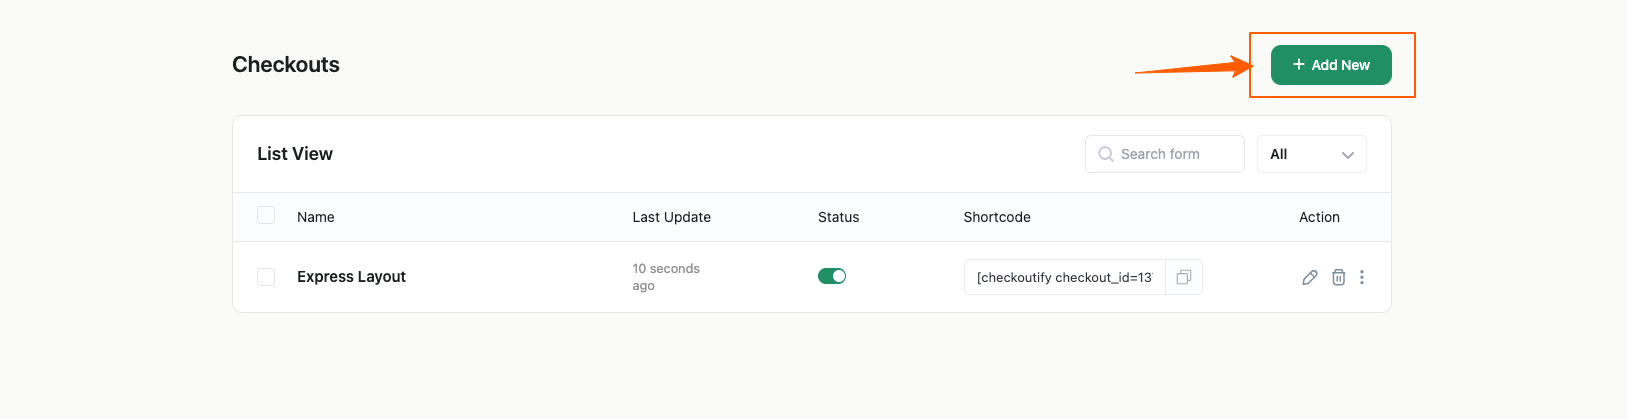
Step 1: Click on the Add New at the top right corner in your Checkouts
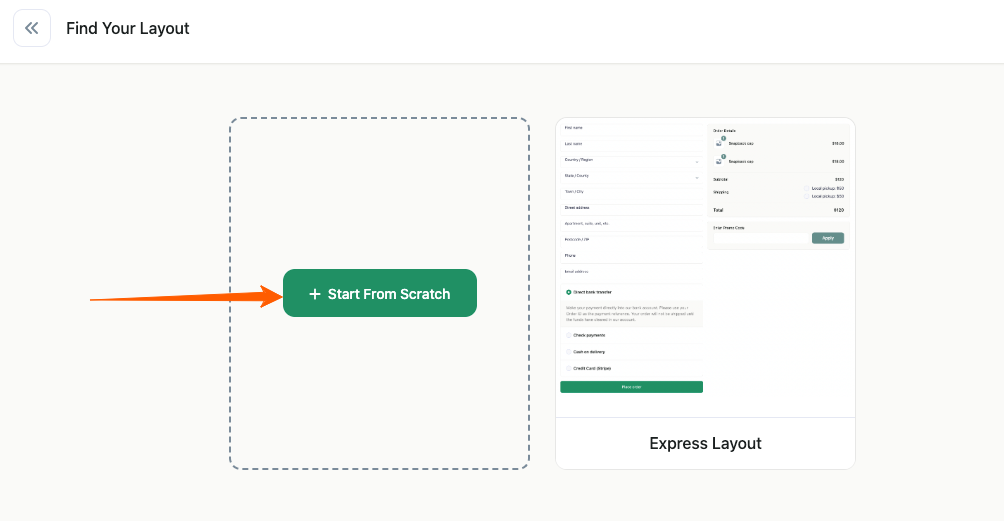
Step 2: Select “Start From Scratch”
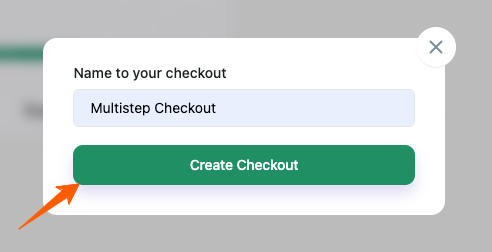
Step 3: Give a Name for your Checkout and click on “Create Checkout”
Step 4: After Clicking on “Create Checkout”, you will be redirect to a Checkout with already prebuilt Billing Section for Step 1.
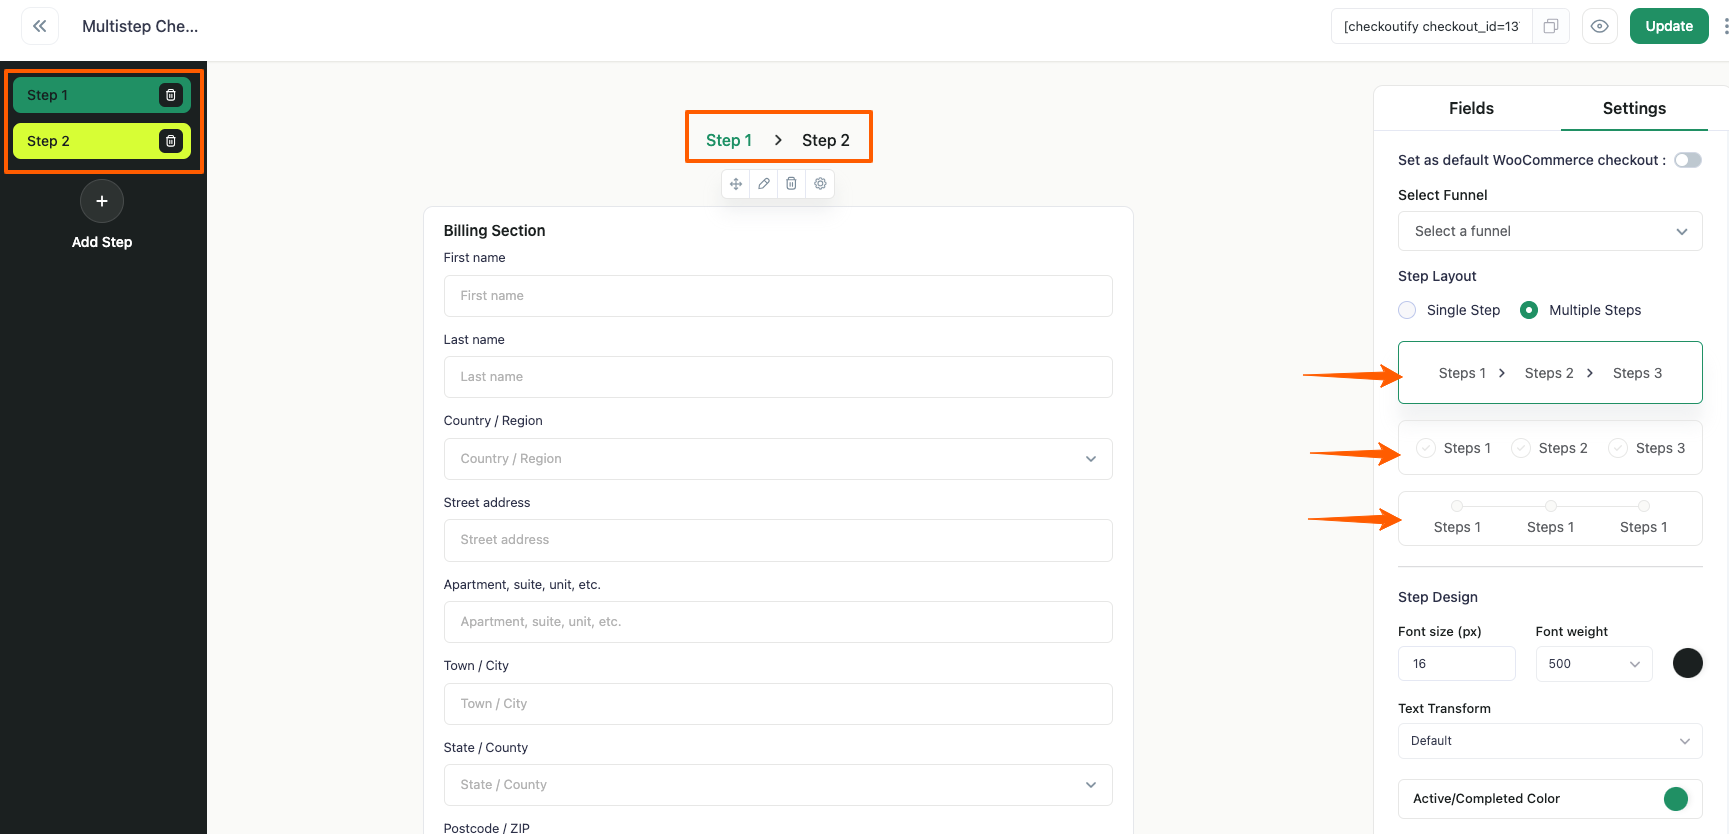
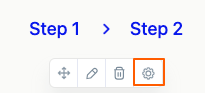
Now if you want to create a Multi-Checkout Page, Go to Setting > Step Layout > Multiple Steps. Then click on the Add Step icon on the left
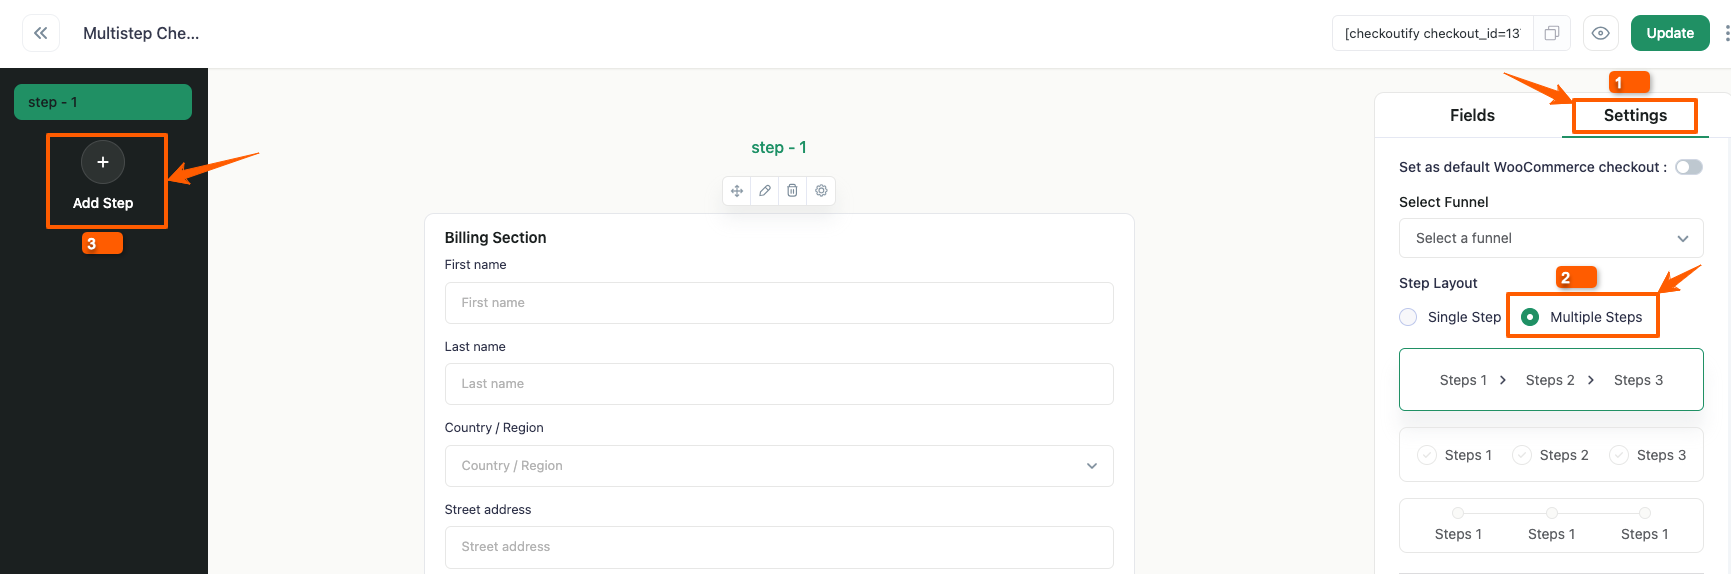
Step 5: After you have created a new step, rename the Step. You can also change the Layouts of the Steps, Currently there are 3 Step layouts. Select the Step layout you like from the Settings
Step 6: After you have chosen your preferred Step Layout, you will directed to an empty page
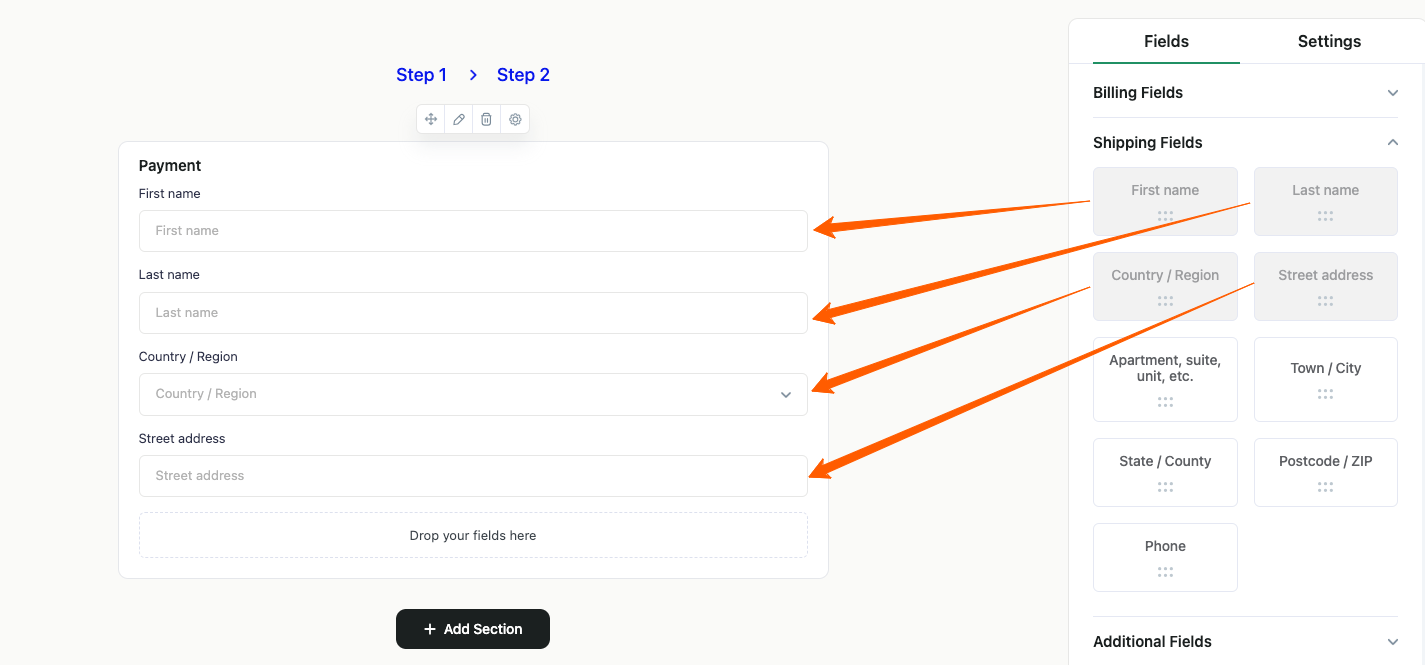
Add a New Sections and Rename it with a Class Name.
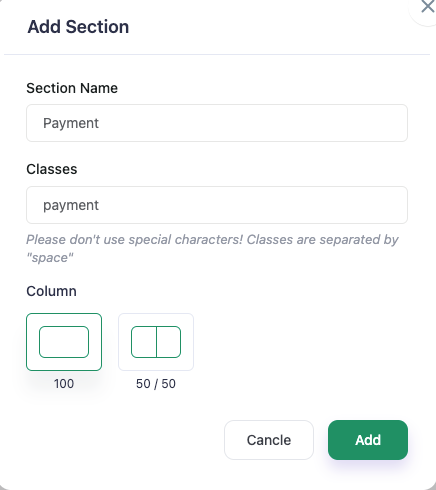
There are two types of Section Layout Currently:
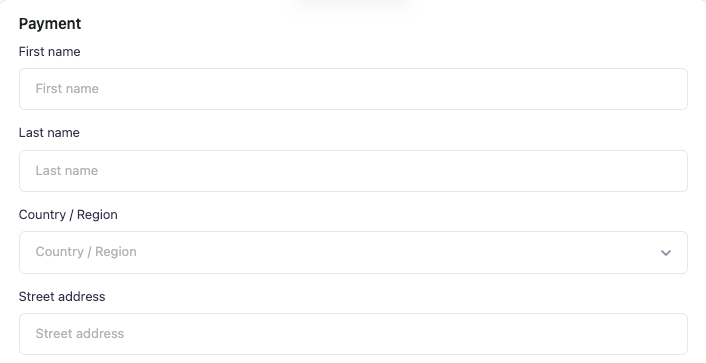
- 100 (Full Width): The fields will cover the full width of the page
- 50/50: The fields will be divided into two columns
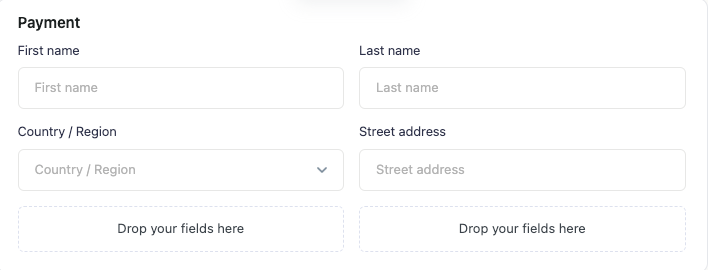
Step 7: Create as many Sections you want and just Drag and Drop your Required Fields from the Fields TemplateYou can create as many sections as needed and simply drag and drop your desired fields from the Fields Template to customize your checkout layout.
Customizing the Section #
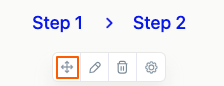
Drag Section: You can drag and rearrange the section within the Step. Just the Marked Icon and Drag and Rearrange the Section according to your preference.
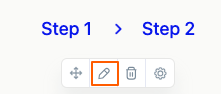
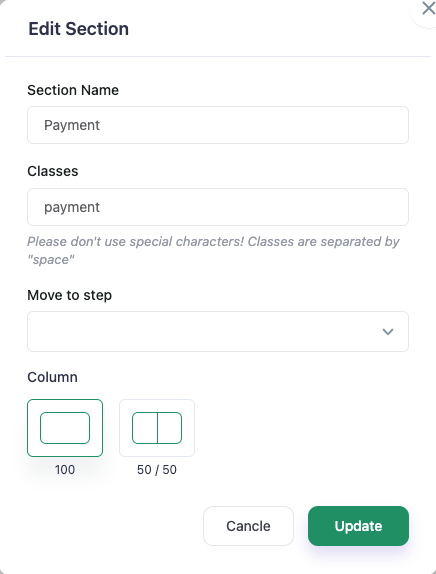
Edit Section: You can edit a section using the following options:
- Rename the section.
- Rename the section class.
- Move the section to a different step within the checkout page.
- Change the section layout by adjusting the number of columns.
Delete Section: Delete the section

Section Settings:
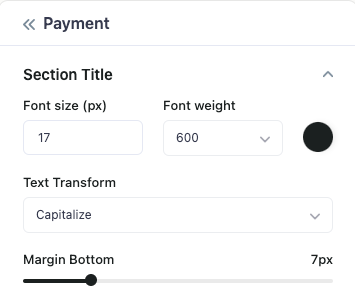
Section Title: You can customize the Section Title by adjusting the following properties:
- Font size
- Font weight
- Text color
- Text transform
- Bottom margin
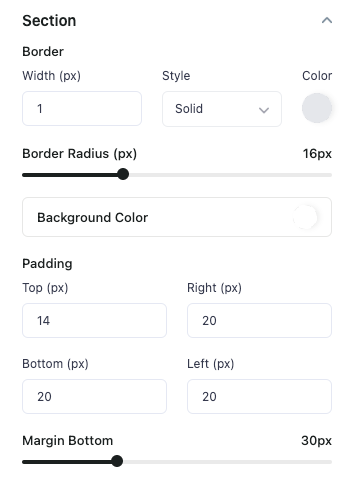
Section Border: You can modify the Section Border and overall styling of the Section by configuring:
- Border width, style, and color
- Border radius
- Section background color
- Section padding
- Section bottom margin
Customizing the Field
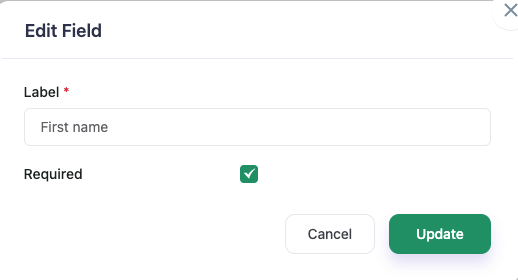
Hover on the Field you want to edit, there will be an edit icon appearing
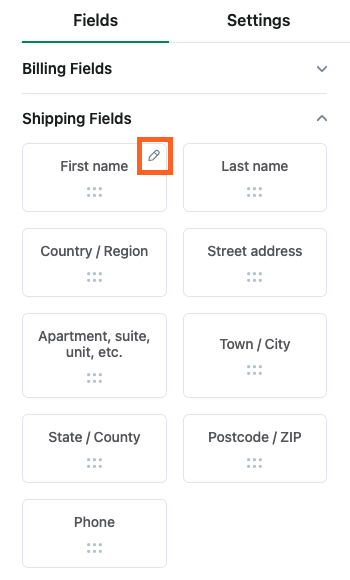
You can change the Label of the Field and Make it a required Field by the checking the “Required Box”. Then Click on Update
After you have dragged the field into the Section, hover on the field box and click on it. You will see the Field Settings option on the Right
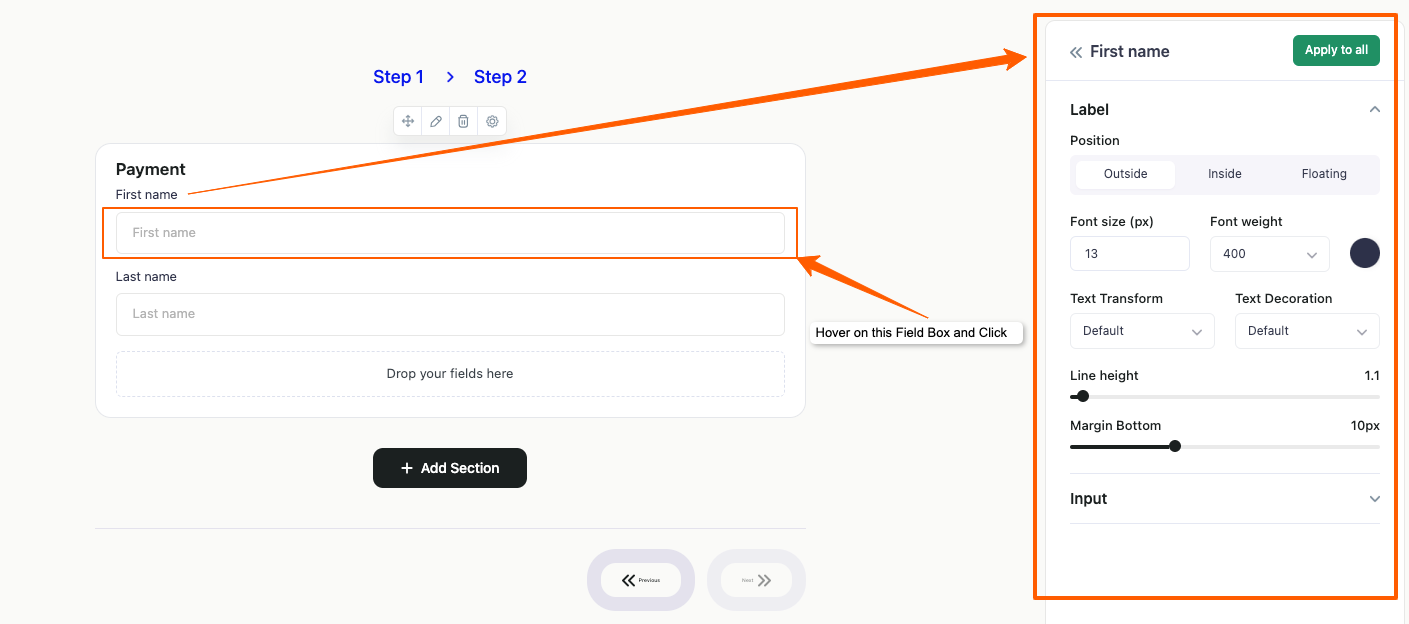
Customize Field Label
You can modify the field label using the following options:
- Label position
- Font size and font weight
- Text transform and text decoration
- Line height
- Bottom margin
Customize Field Input
You can style the field input by adjusting:
- Font size and font weight
- Text transform
- Line height
- Input border (width, style, and color)
- Border radius
- Background color
- Padding
If you want to apply this customization to all the fields in your section, click on “Apply to All”
Settings #
Set as Default Woocommerce Checkout
Enable this option to make this checkout page the default WooCommerce checkout page. Once activated, all checkout processes will automatically use this Checkout page by default.
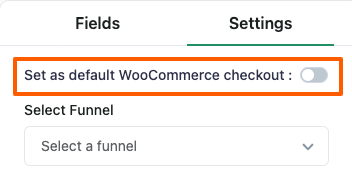
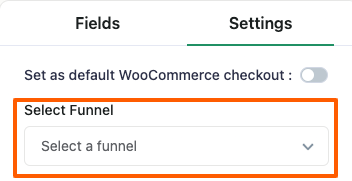
Select Funnel
Choose the funnel that you want to link with the checkout page. This determines which sales funnel the checkout process will be linked to.
Step Layout
You can also change the Layouts of the Steps, Currently there are 3 Step layouts. Select the Step layout you like
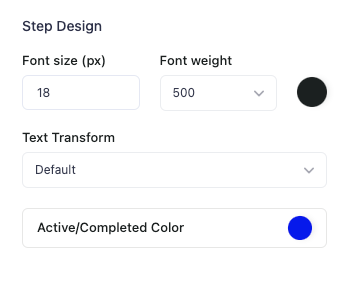
Step Design
You can customize the Font Size and Font Weight for the Step Layout. Additionally, you can configure the Text Transform option and define the color of the steps that will be displayed after completion
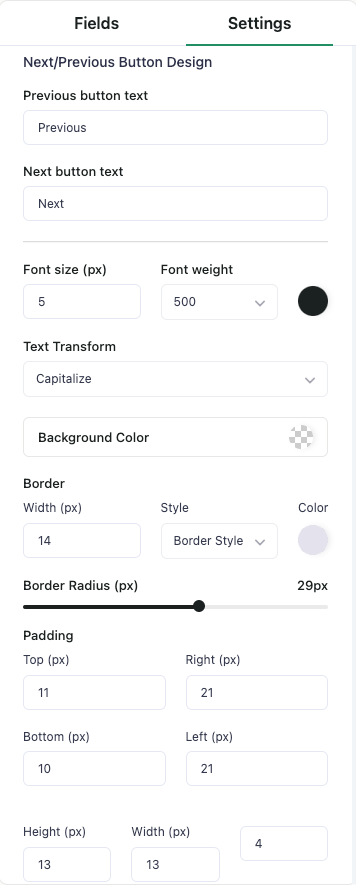
Next/Previous Button Design
- You can customize the Previous and Next buttons with the following options:
- Specify the height and width of the buttons to fit your layout design.
- Rename the button labels.
- Adjust the font size and font weight.
- Configure the Text Transform option.
- Change the background color of the buttons.
- Modify the border by setting its width, style, and color.
- Define the border radius to create rounded corners.
- Set the padding for internal spacing.
Step 8: After you have completed customizing your Multi-Step Checkout Page, Click on Update and make you enable “Set as Default Woocommerce Checkout” from the settings.
Step 9: Embed the Checkout on any of your page.
Short Code

Copy the Short Code and Embed this Checkout on any of your page.
Preview

Click on the preview icon to have a quick preview of your checkout to check if everything is good.