
If you’re building stunning pages with Elementor page builder, embedding immersive 360° virtual tours is seamless thanks to the dedicated WP VR Elementor widget. WP VR – the leading free and Pro 360 panorama and virtual tour plugin for WordPress – integrates perfectly with Elementor, allowing you to add interactive tours to any section without coding.
This method is ideal for real estate websites, travel blogs, hotel showcases, or e-commerce product views. Embedding WP VR virtual tours via Elementor enhances user engagement, increases dwell time, and boosts SEO through rich interactive content.
Why Use the WP VR Elementor Widget to Embed Virtual Tours? #
- Drag-and-Drop Simplicity: No shortcodes needed – just search and drop the widget.
- Full Customization: Easily control width, height, radius, and responsiveness.
- Mobile-Responsive: Tours adapt perfectly to all devices.
- SEO-Friendly: Interactive 360° elements improve on-page time and user experience signals.
- Compatible with Free & Pro: Works with both versions of WP VR.
Once you create a virtual tour, follow the steps below to embed a virtual tour using WPVR Elementor Widget.
1. After creating the tour, remember the Tour ID.
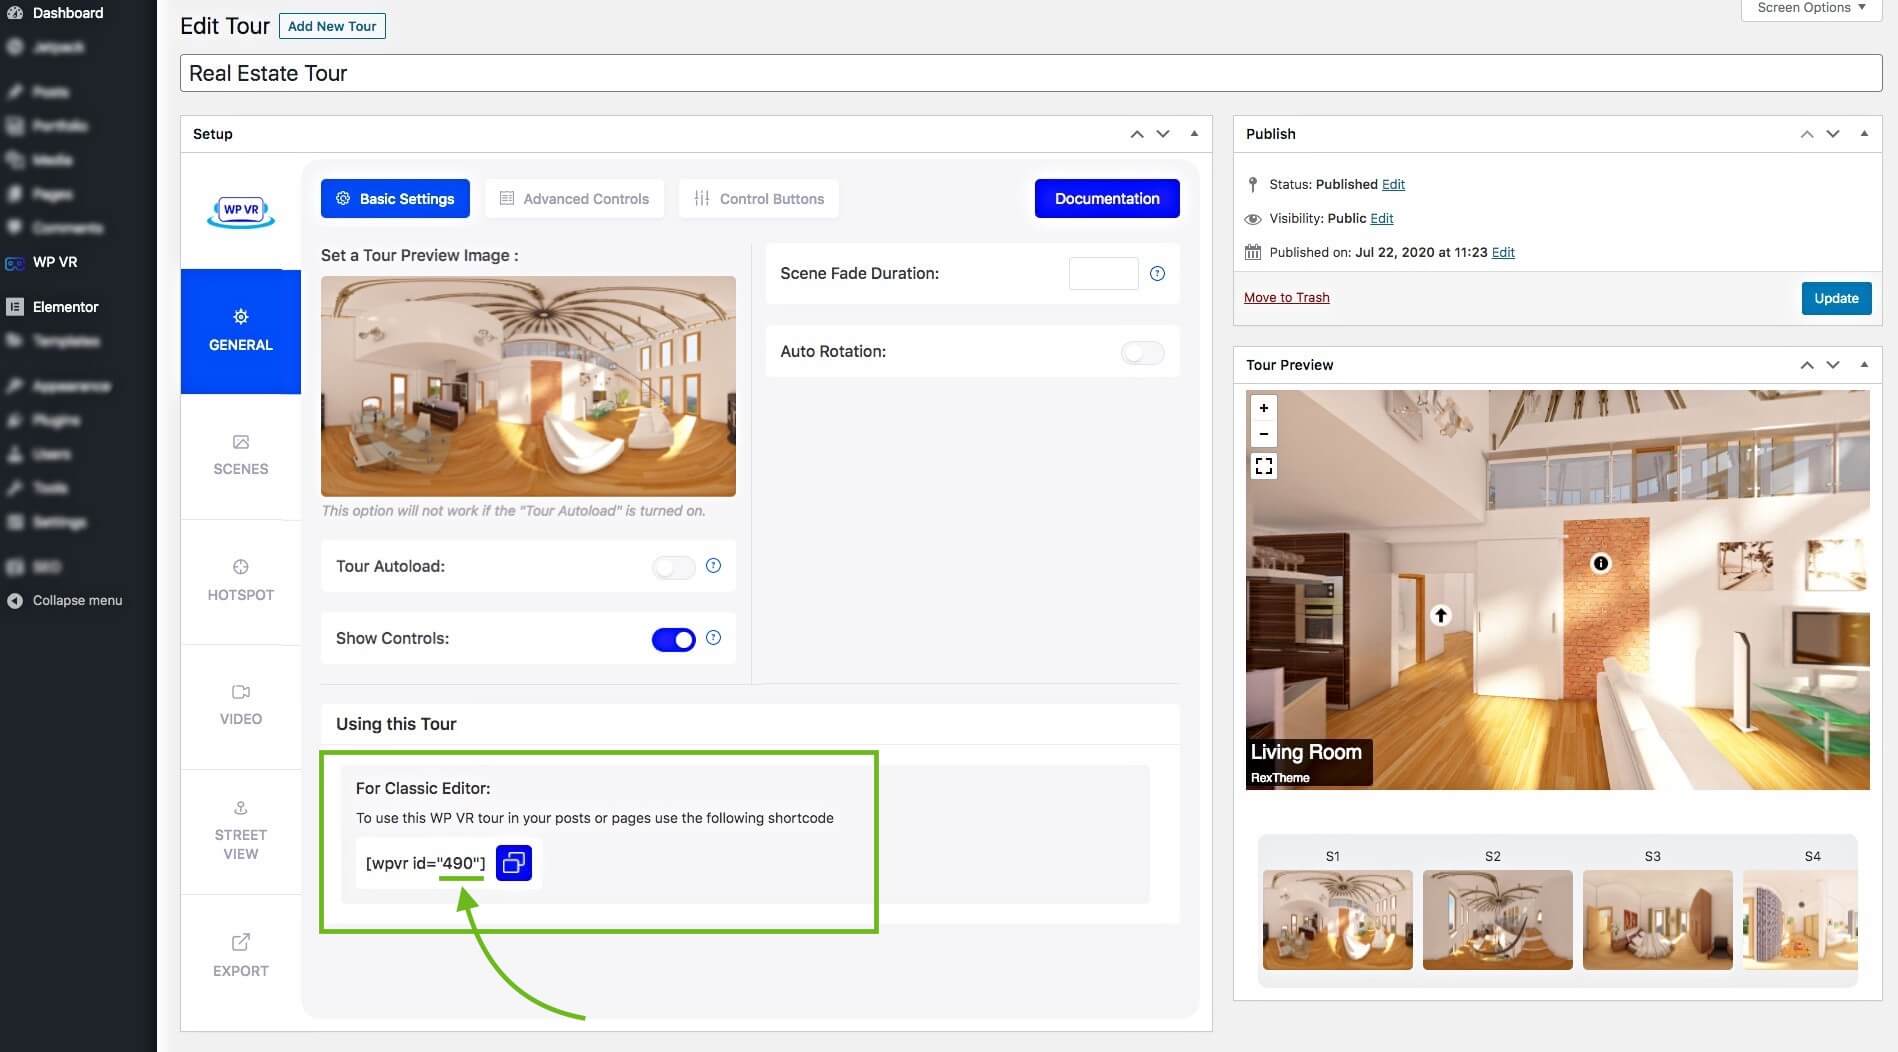
**You can also collect it from the Dashboard > WPVR > Tours.
2. Edit the page/post using Elementor Page Builder, where you want to embed this virtual tour.
3. On the widget area of Elemenor, search for the WPVR widget.
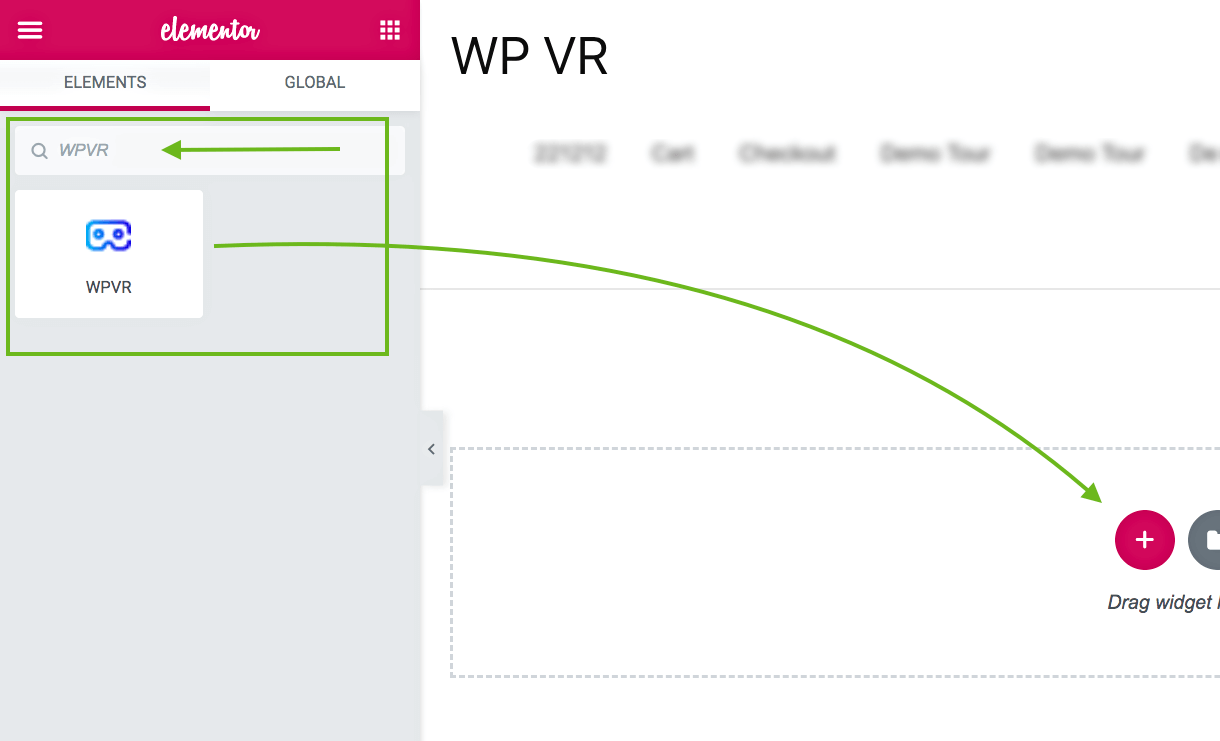
4. Drag-and-drop the WPVR widget to whichever section you want.
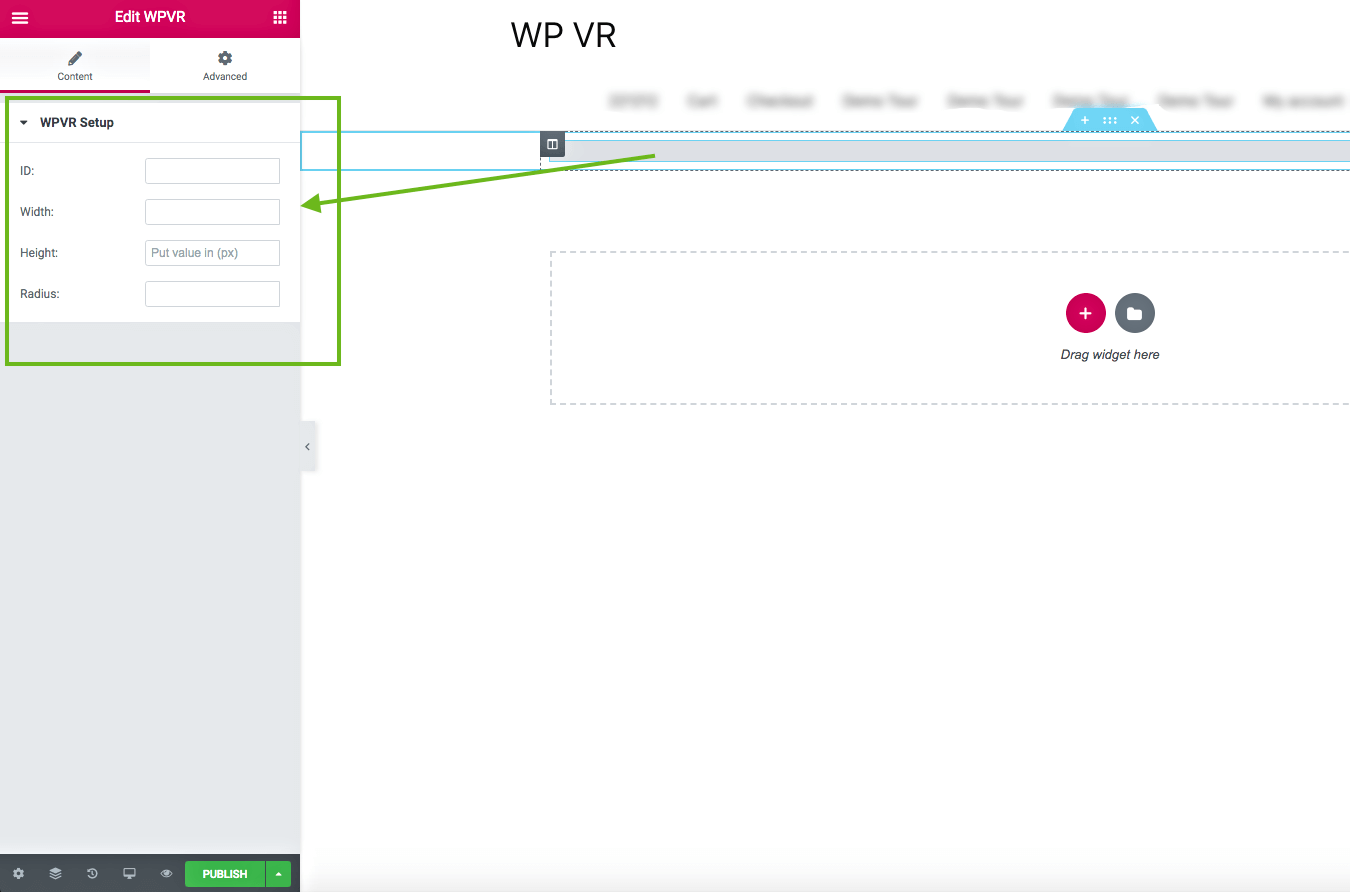
It will add the widget and you will be required to provide “Id”, “Width”, “Height”, and “Radius”.
- Id –
– Insert the Id of your desired WPVR tour that you wish to embed.
– Do not input the Tour name.
- Width –
– Assign a positive numeric pixel value. For example: 600px.
– Or, you can use a percentage that will take the percentage width of the container of the page. Example: 90%.
– If you wish the tour to be full-width of the whole page, then input the text “100vw”.
- Height –
– Only assign a positive numeric pixel value. For example – 400px
– Do not use percentage or any text
- Radius –
– Assign a positive numeric pixel value. For example – 10px
– Or you can use a percentage. For example – 10%
5. Once you provide the required data, you will get a preview of the tour on your web page.
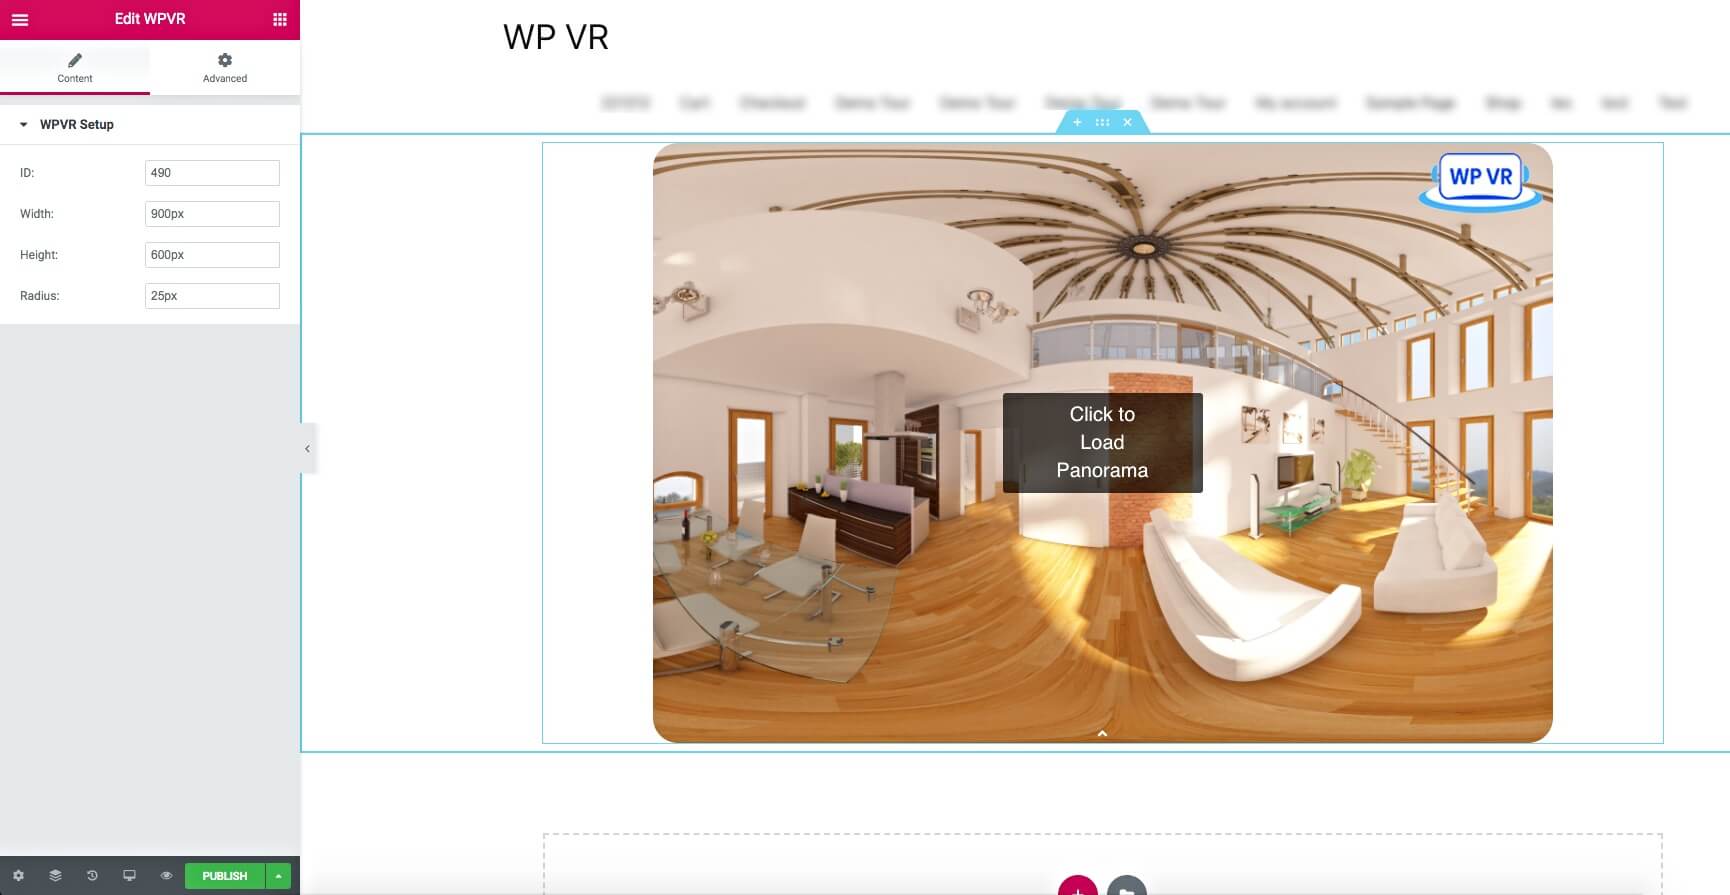
6. Now, you can preview or publish the page, and you will see that a virtual tour has embedded on your site.
Pro Tips for Embedding WP VR Tours in Elementor #
- For hero sections: Use 100vw width + fixed height (e.g., 600px) and zero radius.
- Add mobile-specific height (Pro feature) via advanced options if needed.
- Combine with Elementor sections, backgrounds, or animations for stunning layouts.
- Test on mobile devices for perfect responsiveness.
The WP VR Elementor widget makes adding professional 360 virtual tours effortless – elevate your WordPress site today!
More WP VR Tutorials: