You require 360 panoramic images to create virtual tours. But to take a professional 360 panoramic image, you require expensive tools such as DSLR, or digital 360 cameras, tripods, and so on.
These are not always possible to purchase.
Again, a panoramic image taken by a smartphone is not usable. Or is it?
What if you could rather take panoramic images using your smartphone and create a virtual tour out of them?
Well, yes. That’s exactly what you can do using WPVR.
You can now create virtual tours for your website, using panoramas taken with your mobile phone, with WPVR.
WPVR comes with a special feature called “Partial panorama” that makes it easy for you to upload and turn normal panoramas into stunning virtual tours.
This could be really handy for important cases such as, if you are trying to quickly create a virtual tour of your property for sale, or your hotel for rent, or simply creating a virtual tour of your personal office.
Today I will show you how you can easily create beautiful virtual tours simply using panoramas taken using your smartphone.
Dus laten we beginnen.
Step 1 – Capture Panoramas With Your Mobile Phone #
Nowadays, even the most basic smartphones have a panorama option and you can easily use it.
Suppose you are taking a panorama of your office room. Find a suitable spot from where you can get a good view of your office in all directions.
Then turn on the Panorama mode on your mobile camera and take a couple of panoramas. You can do the same from more spots in your office room if you want to add multiple scenes in your tour.
**It will be even better and stable if you have a monopod.
Choose the best image from each spot for your virtual tour and transfer them to your PC. (Or, if you want to access your website from mobile, then you can keep it in your phone gallery.)
Here’s a guide you can follow to capture 360-degree photos with your smartphone.
Step 2 – Install And Activate WPVR #
You need to have both the free version and the paid version of WPVR to do this.
If you already have both of the plugins installed and activated on your site, you can directly go to step 3.
Here are instructions for installing WPVR:
Step 3 – Go To WPVR To Create A Virtual Tour #
Once you have successfully installed and activated both the plugins, go to your WordPress Dashboard > WPVR > Add New Tour.
Here, first, give a name to the tour.
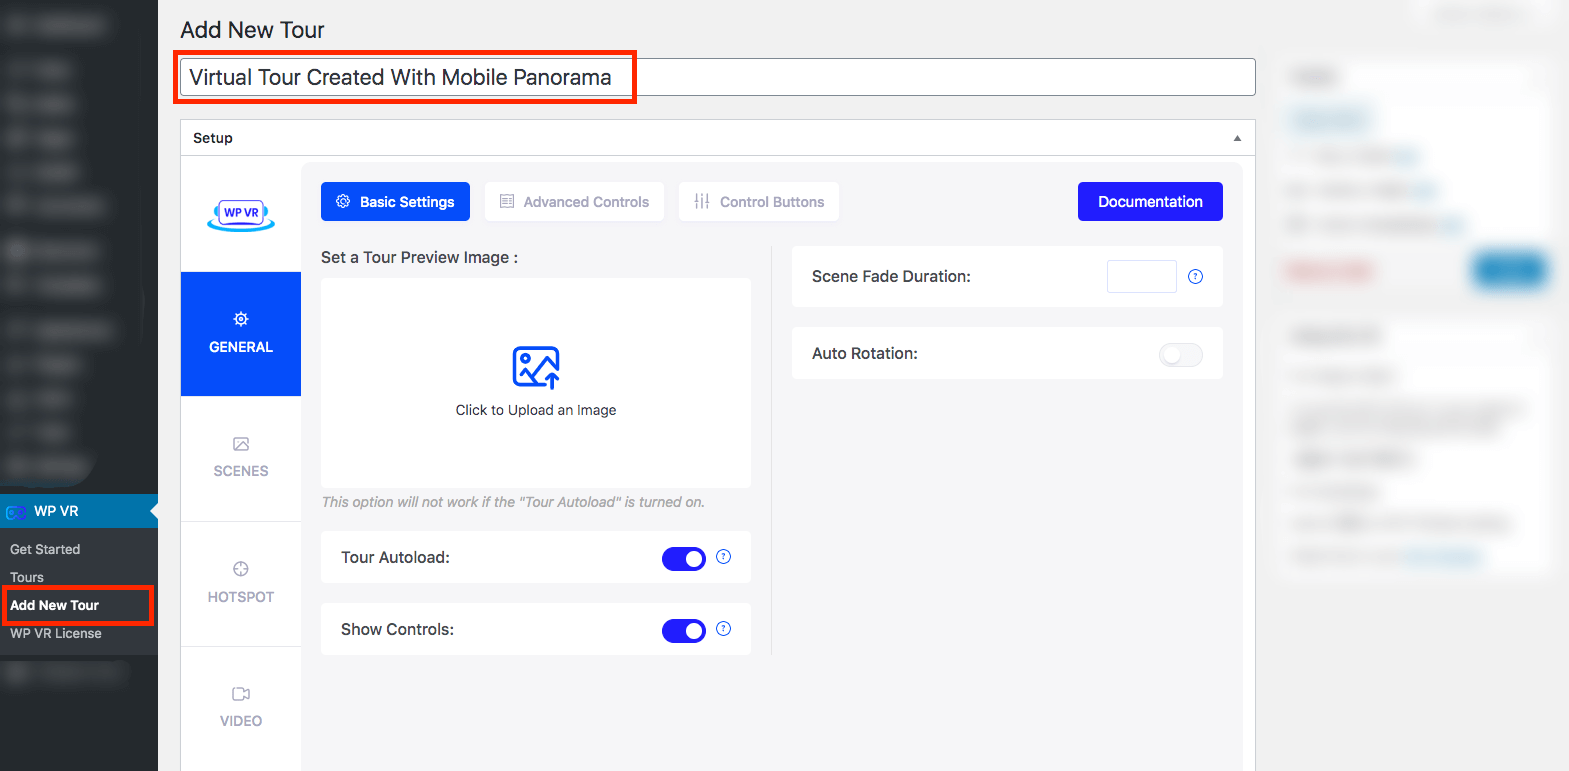
Then on the left, you can see several sections. Initially, you will be in the General Section.
Step 4 -Upload Your Panorama To Create A Scene #
Just below General Tab, you can see the Scenes tab. Click on it.
Here, assign a Scene ID and choose Yes for the option Set as Default.
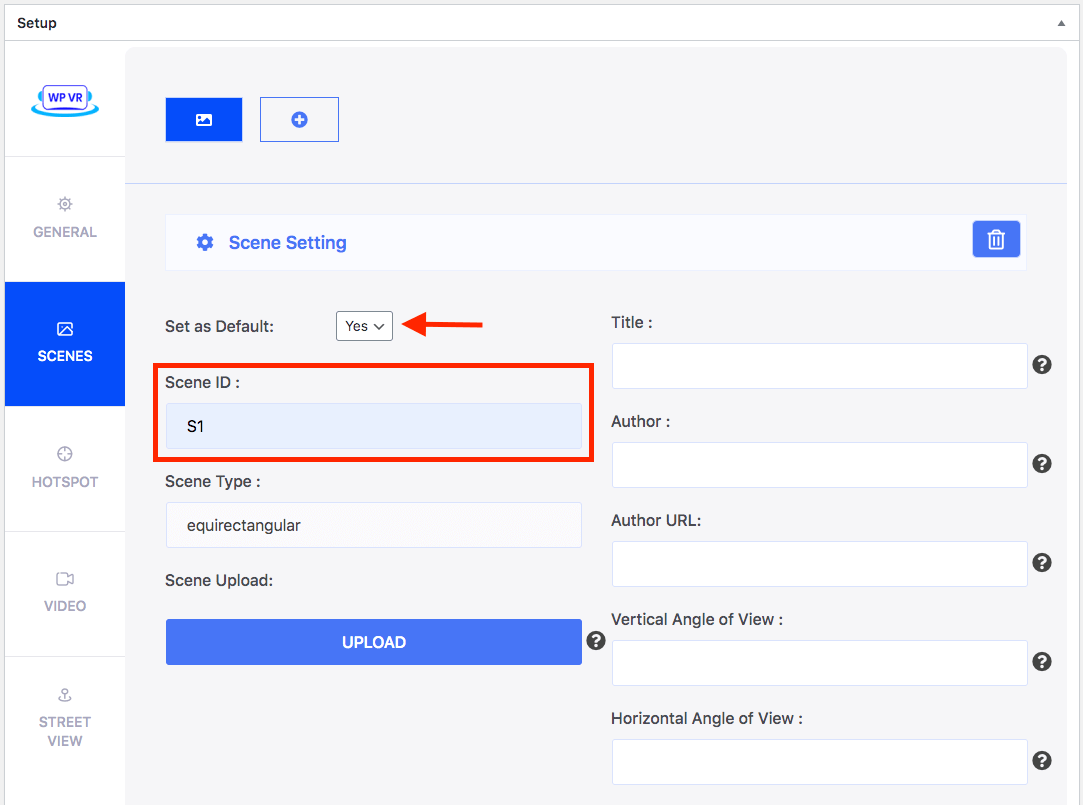
Then, click on the Upload button and upload your desired panorama.
For this guide, I will create a simple virtual tour with only one scene. You can add multiple scenes if you want to.
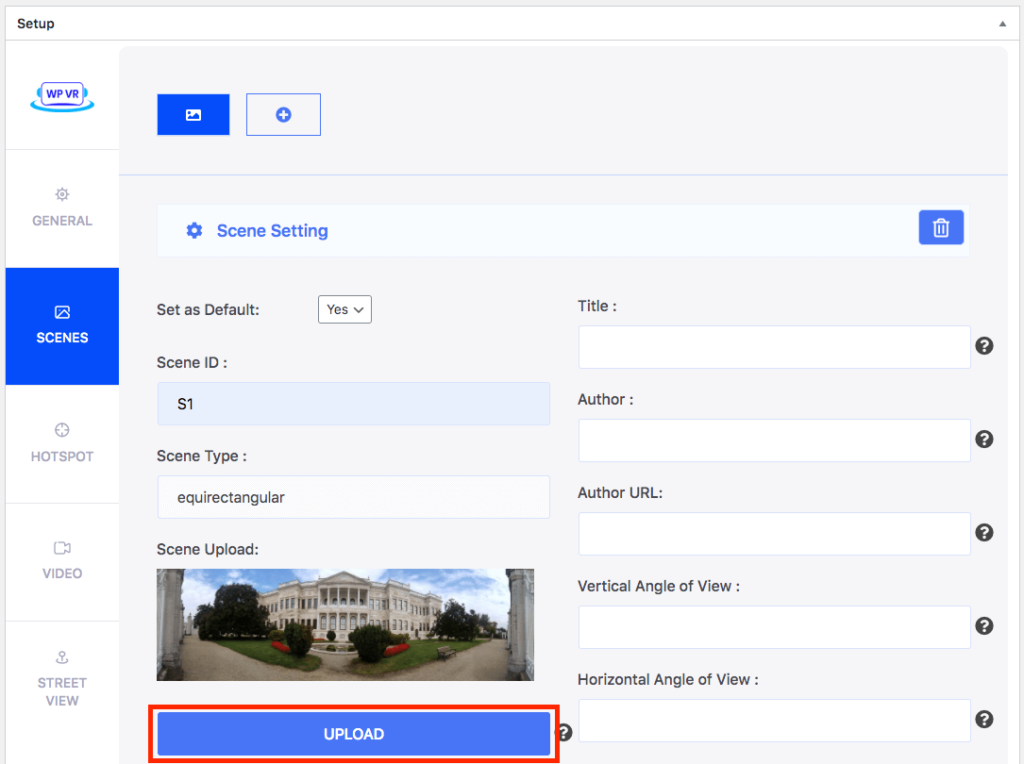
Once the image is uploaded, now it’s time to set the Partial panorama effect on the image you uploaded to turn it into a virtual tour.
Now, if you click on the Preview button, a messed up preview of the tour will show up.
But don’t worry, follow the next step to fix it.
Step 4: Use Proper Angle View For Partial Panorama Effect #
On the right side, look for the following two options:
- Vertical Angle of View
- Horizontal Angle of View
Turn On the Vertical Angle of View option. This controls how much of your image will be visible on tour vertically.
By default, it’s set at 180, change it to 90.
Now, turn On the Horizontal Angle of View option. This controls how much of your image will be visible on tour horizontally.
By default, it’s set at 360, change it to 180.
On the Scenes section and go to Limit Vertical Scene Grab and Limit Horizontal Scene Grab options.
Turn the Limit Vertical Scene Grab option On.
The default value on the Max Pitch field is 90. Set it to 45.
The default value on the Min Pitch field is -90. Set it to -45.
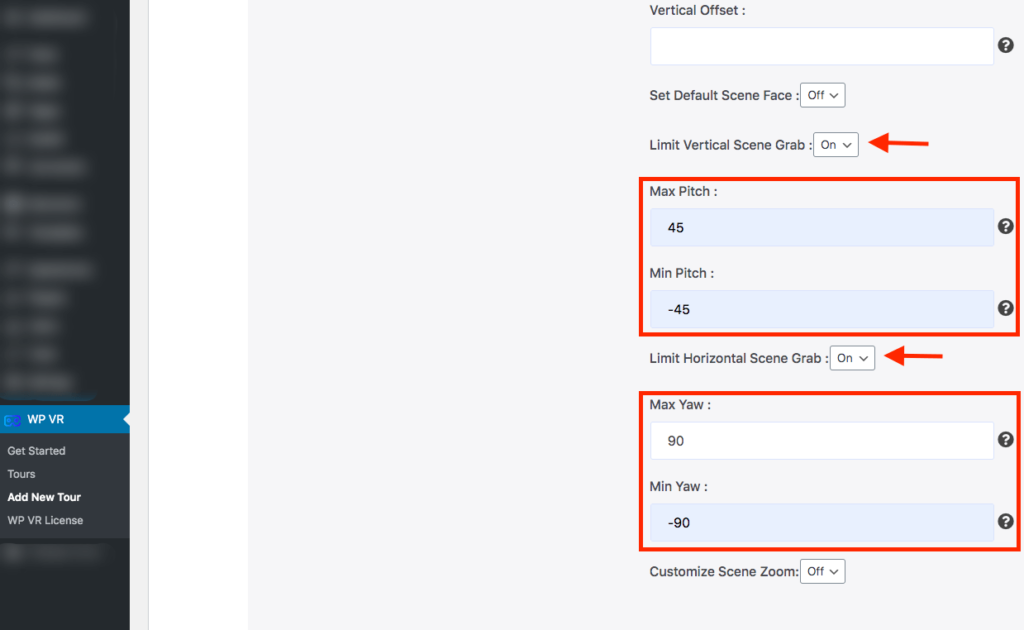
Now, Turn the Limit Horizontal Scene Grab option On.
The default value on the Max Yaw field is 180. Set it to 90.
The default value on the Min Yaw field is -180. Set it to -90.
That’s it. You’ve just created a virtual tour using a panorama image that was captured by a mobile phone.
You can now click on the Preview button to have a live preview of your tour.
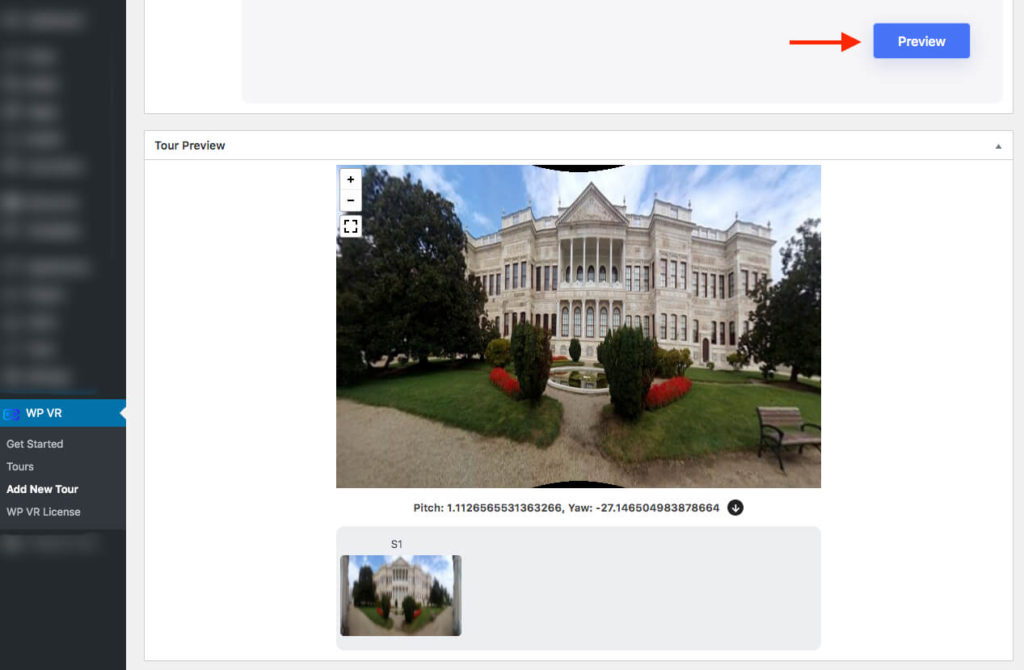
**Remember to click on the Publish button on the upper right corner of your WordPress dashboard to save the tour.
Once you’ve saved the tour, you can publish it on your website.
You can use the WPVR Gutenberg block, WPVR Elementor Widget, or shortcode to publish the tour.
Follow this documentation to publish and customize your virtual tour.
To learn more about WPVR and its amazing features, click here.