Marketplace Auto Sync is a versatile plugin that simplifies the process of managing product listings across multiple platforms. It automatically syncs your product details, ensuring consistency across all connected marketplaces.
This overview guide will introduce the key features and benefits of the plugin, helping you understand how it can streamline your online store management and boost efficiency.
Laten we beginnen.
Marketplace Auto Sync Plugin Overview #
After you have installed and activated the plugin, click on the Marketplace Auto Sync menu on your dashboard.

As you can see, under the Marketplace Auto Sync, you will get the following sub-menus:
- All Syncs
- Add Sync
- Categorie Kartering
- Google Merchant Instellingen
- Instellingen
- Licentie
- Ondersteuning
- Setup Wizard
1. All Syncs #

Here, you will find all the Syncs you generated, listed in one place.
2. Add New Syncs #
Clicking on this option will take you to the page where you can select the Marketplace.

- Here’s a guide to learning How To Generate A New Sync.
3. Category Mapping #

Some marketplaces require you to submit product categories according to their own set category values.
So, rather than changing categories in your store, you can map your categories accordingly using the Category Mapping page.
Here’s a complete guide on using the Category Mapping feature.
4. Settings #

In this menu, you will find several useful features to use the plugin more efficiently.
Initially, you will be on the Controls tab.
However, there you will see more tabs on top:
- Besturingselementen
- Available Marketplaces
- Systeemstatus
- Logboeken
i. Controls Tab #
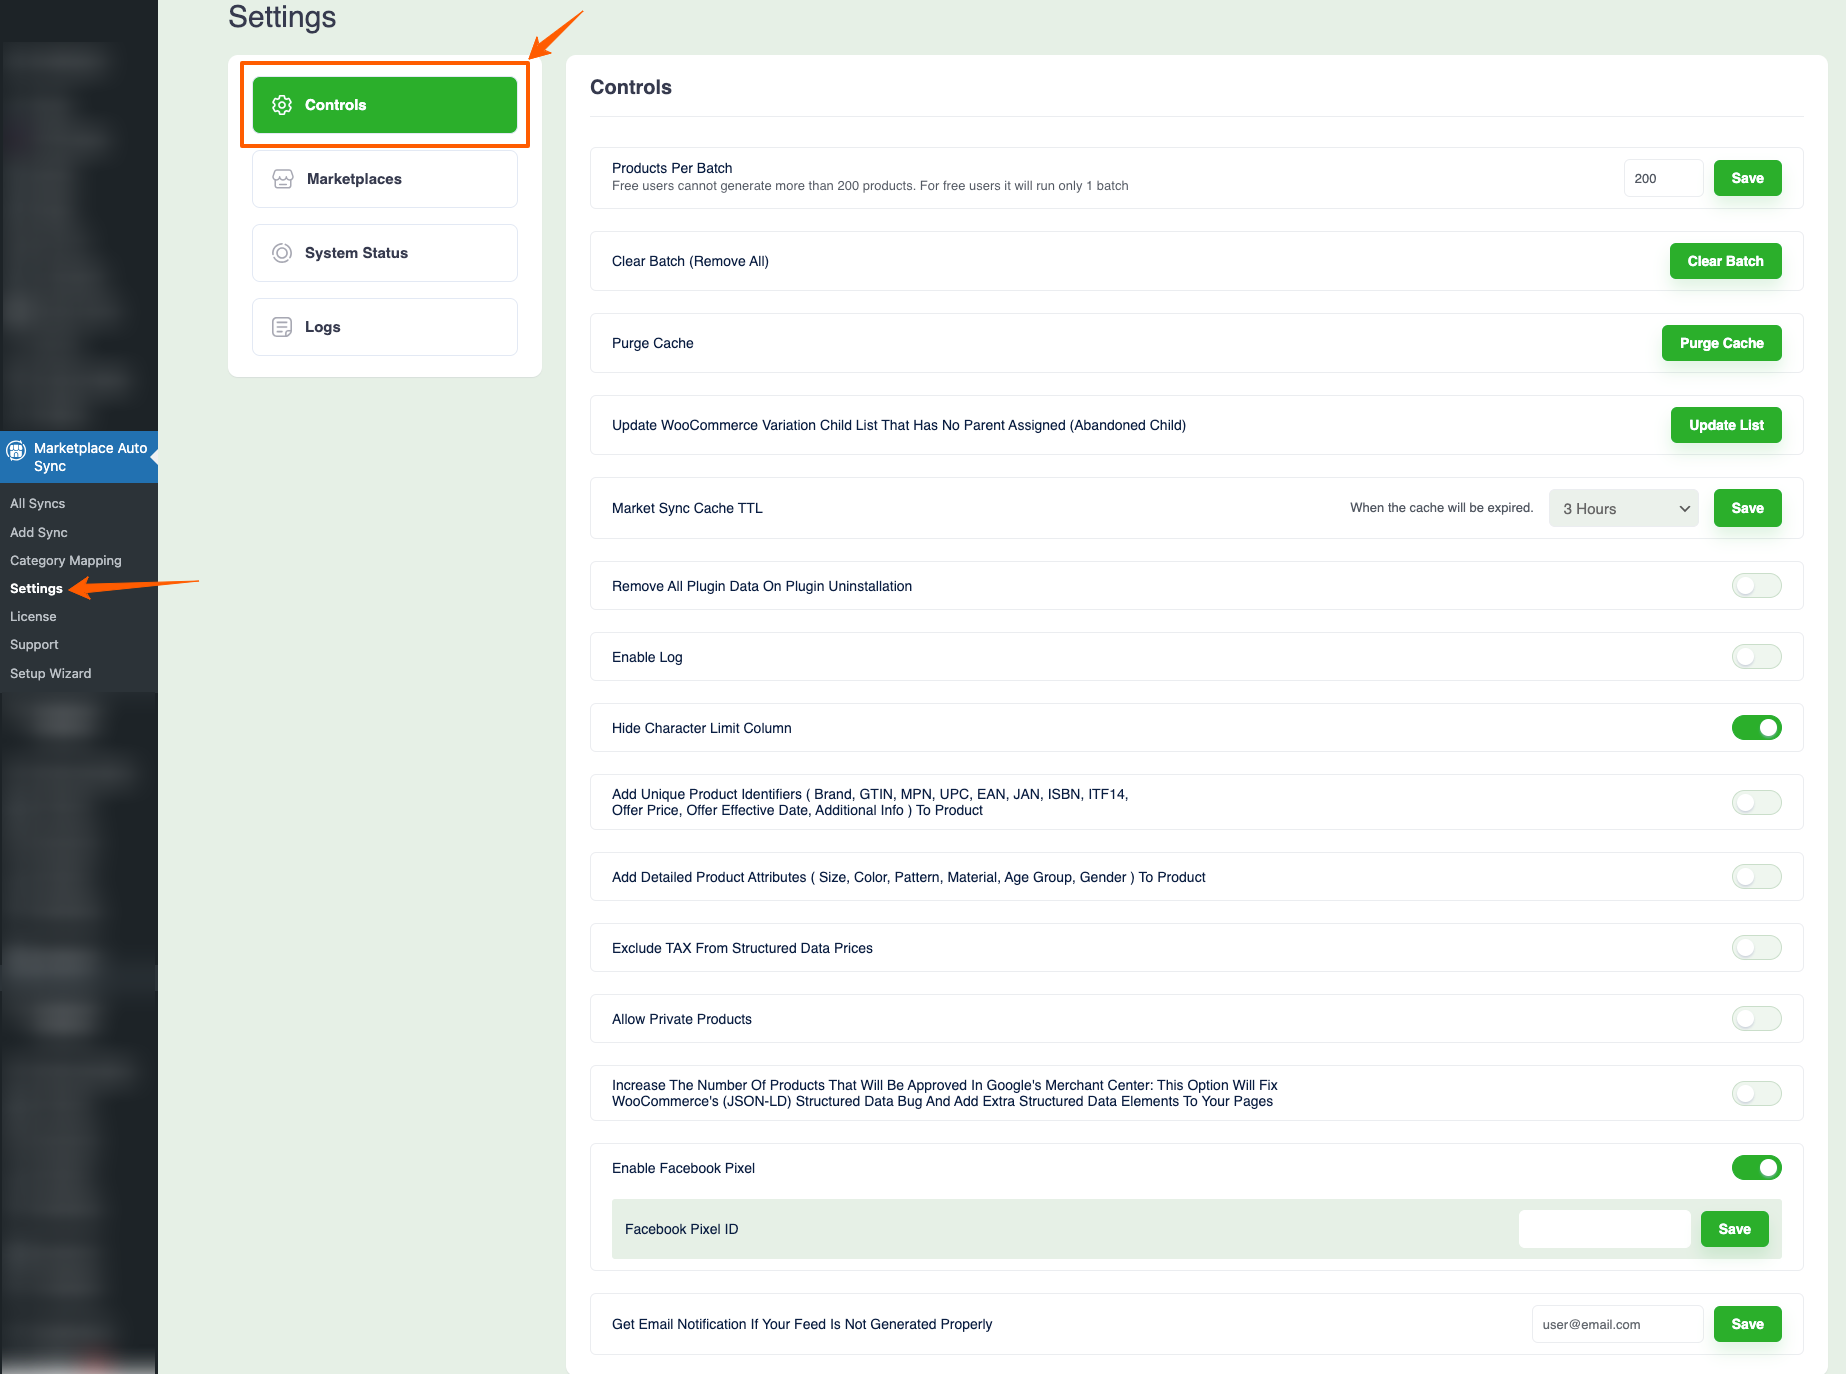
This section includes several useful features such as batch control, enabling essential custom fields, JSON-LD structured data fixes, and many more.
ii. Available Marketplaces #
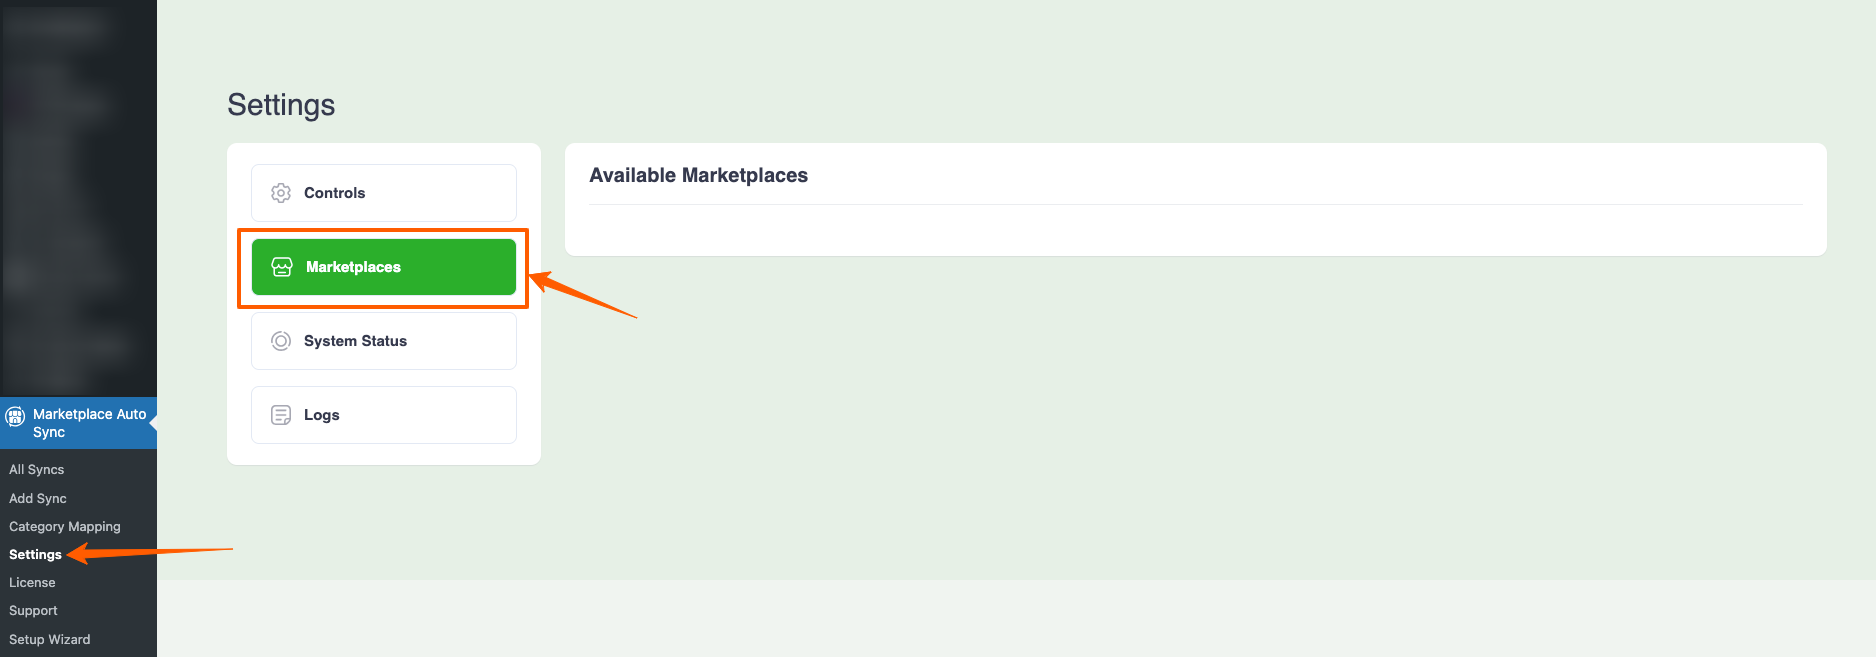
This section includes all the Marketplaces that are available
iii. System Status #
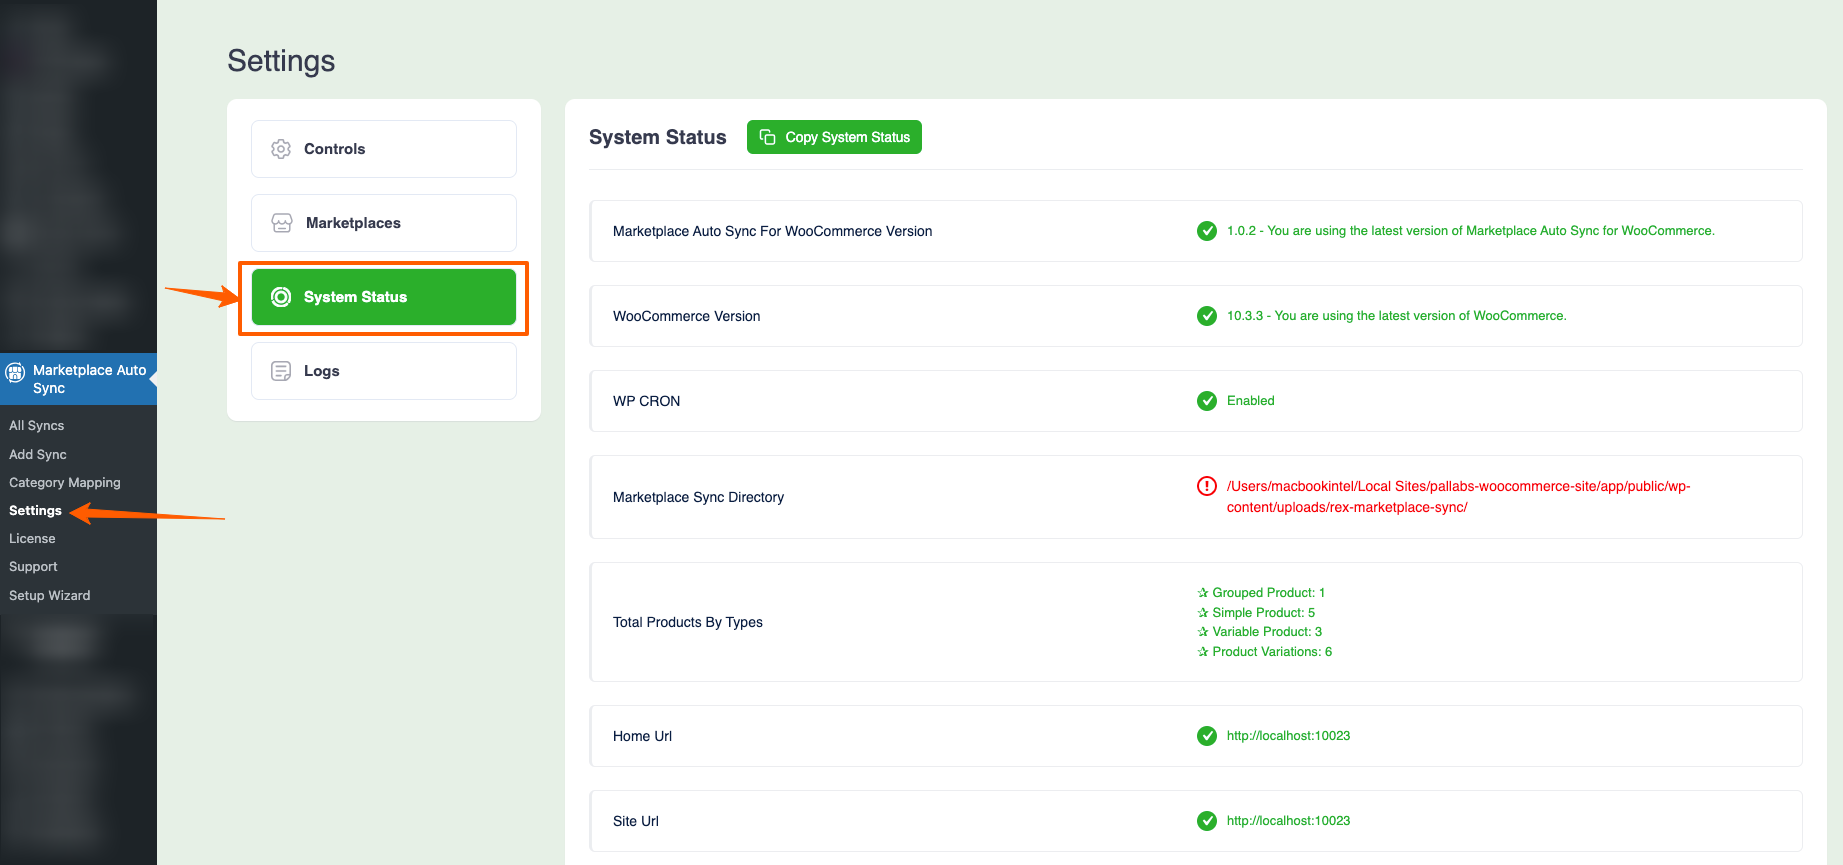
In the “System Status” section under the settings, you will find all the the plugin’s processes and system information. It depends on a few things to run properly. You will be able to find out if your site meets the minimum requirements here.
iv. Logs
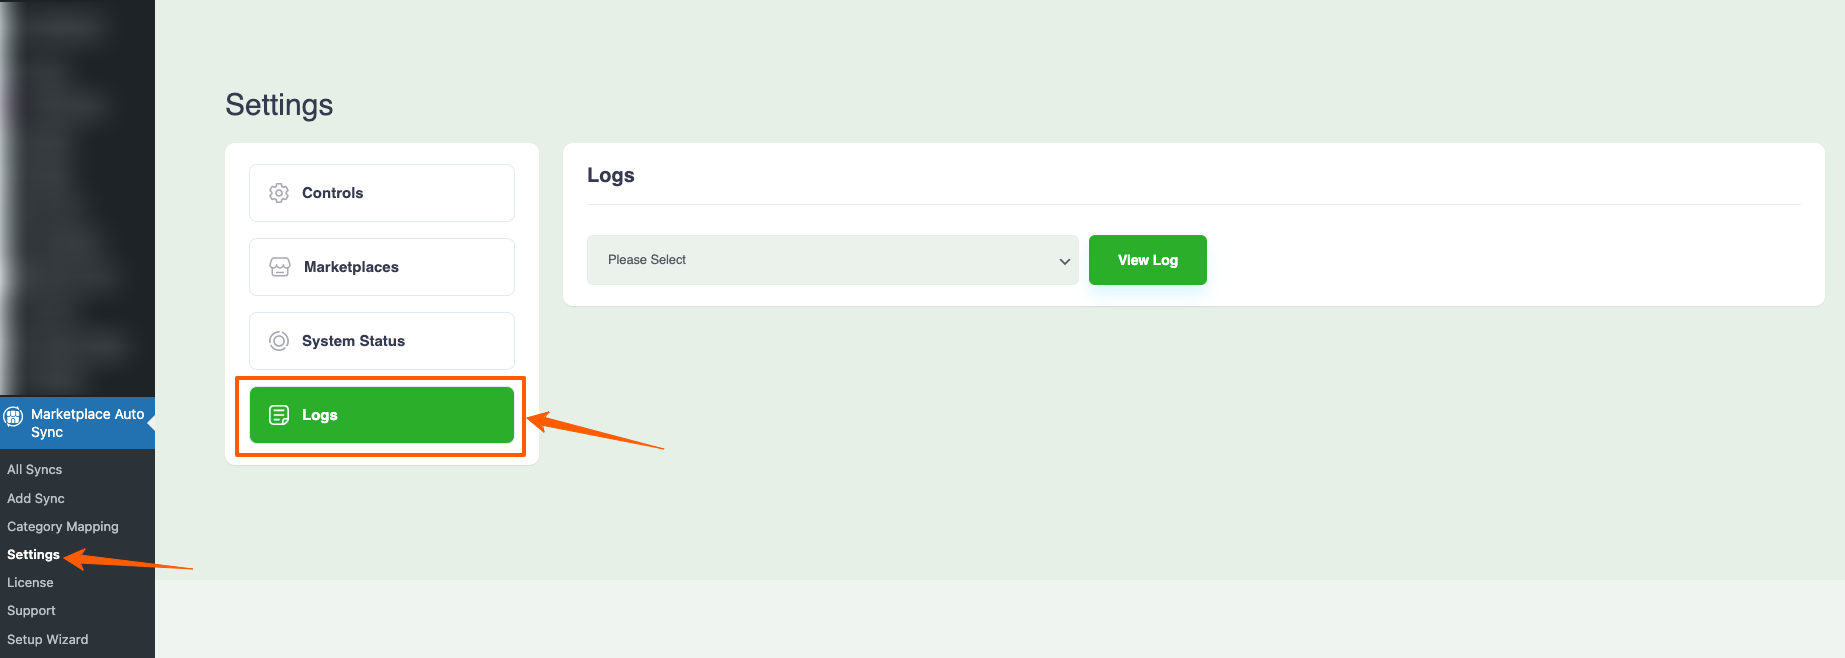
In the Log section under the Settings, you will find all the logs of all activities with the plugin.
5. License #

Once you activate the Pro plugin, you have to input the license key here and activate it to use all the Pro features of the plugin.
6. Support #
Clicking on the Support menu will take you to our site where you can open a ticket for any issues you may face.
7. Setup Wizard #
The setup wizard helps you quickly configure the plugin right after installation. It guides you through the essential steps. It’s designed to make the initial configuration simple and error-free.
Now, that you got an overview of the plugin, now let us move on to our next guides to learn about all the features that are available in the plugin.