With WP VR, you can easily create professional virtual tours on WordPress websites on your own.
Today, you will learn how to install and activate WP VR.
Install And Activate WP VR #
Follow the simple steps below to install and activate the free version of WPVR.
1. Go to your WordPress Dashboard and select Plugins. Click on the Add New button.
2. On the Keyword field, search for ‘wpvr’, and the plugin will appear.

3. Click on the Install Now button. Once the plugin is installed, the Activate button will appear.
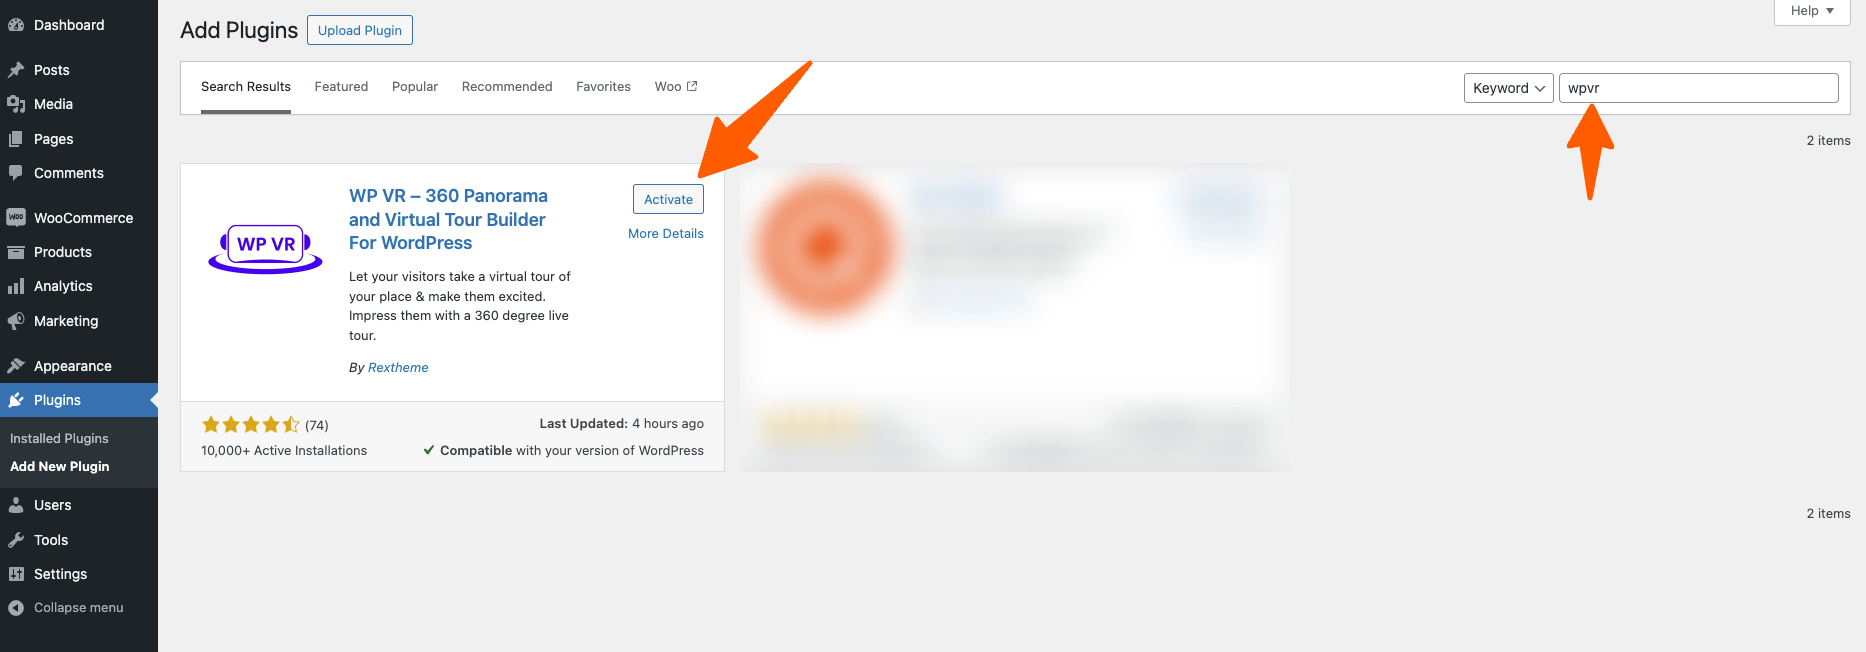
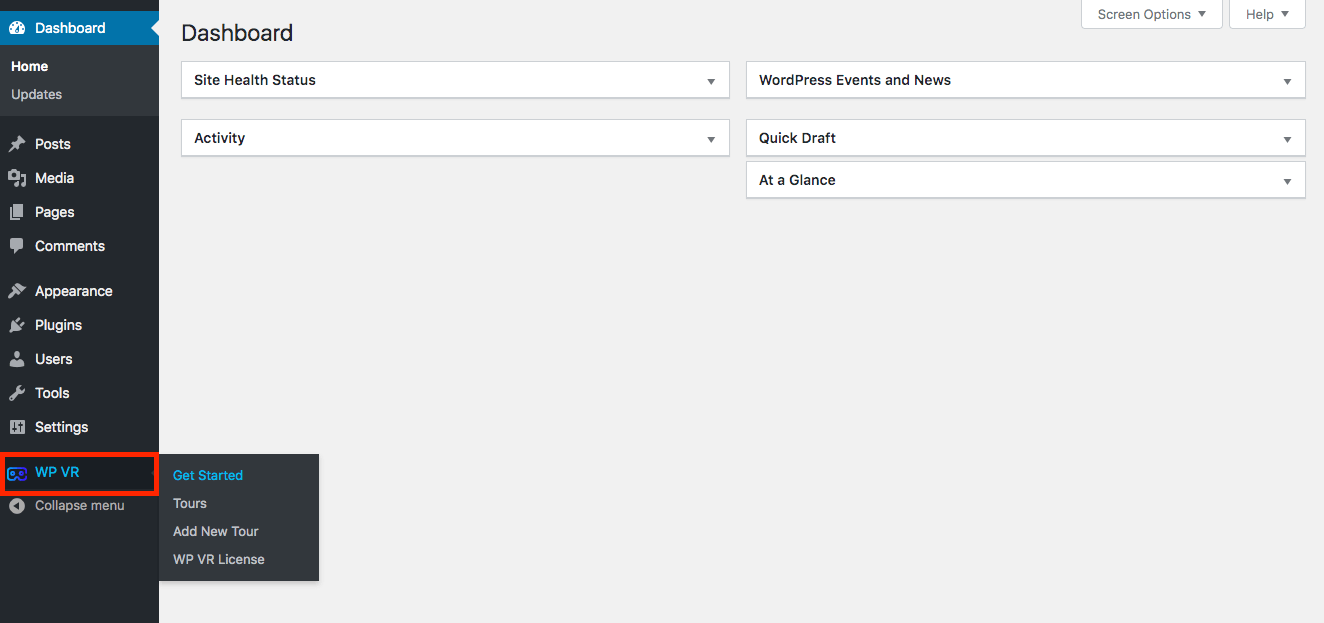
4. Click on it to activate the plugin on your site. Once the plugin is activated, a WPVR menu will appear on the left side of the Dashboard.
That’s it. You now have WPVR installed on your site.
You can also get WPVR in the following ways:
- The free version in the WordPress repository at: https://wordpress.org/plugins/wpvr/
- And for the premium version here: https://rextheme.com/wpvr/
If you download from the WordPress repository, then go to Dashboard > Plugins > Add New and on the top left side, you will see an ‘Upload’ button. Click on it. Then upload the plugin file, Install and Activate it.
Install And Activate WP VR Pro #
After using the WP VR free version, chances are, you will want to upgrade to WP VR Pro to create even better virtual tours for greater results.
Now, let us learn how you can install and activate WP VR Pro.
1. If you haven’t got WPVR Pro yet, the first Upgrade to Pro. Here’s how.
2. Make sure you have the free version install and activated before you install the pro version. You will need both versions for the plugin to work.
3. Once you upgrade to WPVR Pro, you’ll have to collect your license key and download the latest Pro plugin from your account on Rextheme.
4. Go to Dashboard > Plugins > Add New and click on the Upload Plugin button.
5. Upload the downloaded WPVR Pro plugin zip file that you just downloaded.
6. Click on Install Now. Then click on the Activate Plugin button.
7. Next, you need to activate your license. Go to WPVR > WP VR License.
8. On the License Key field, input the license key that you collected. Click on the Activate License button.
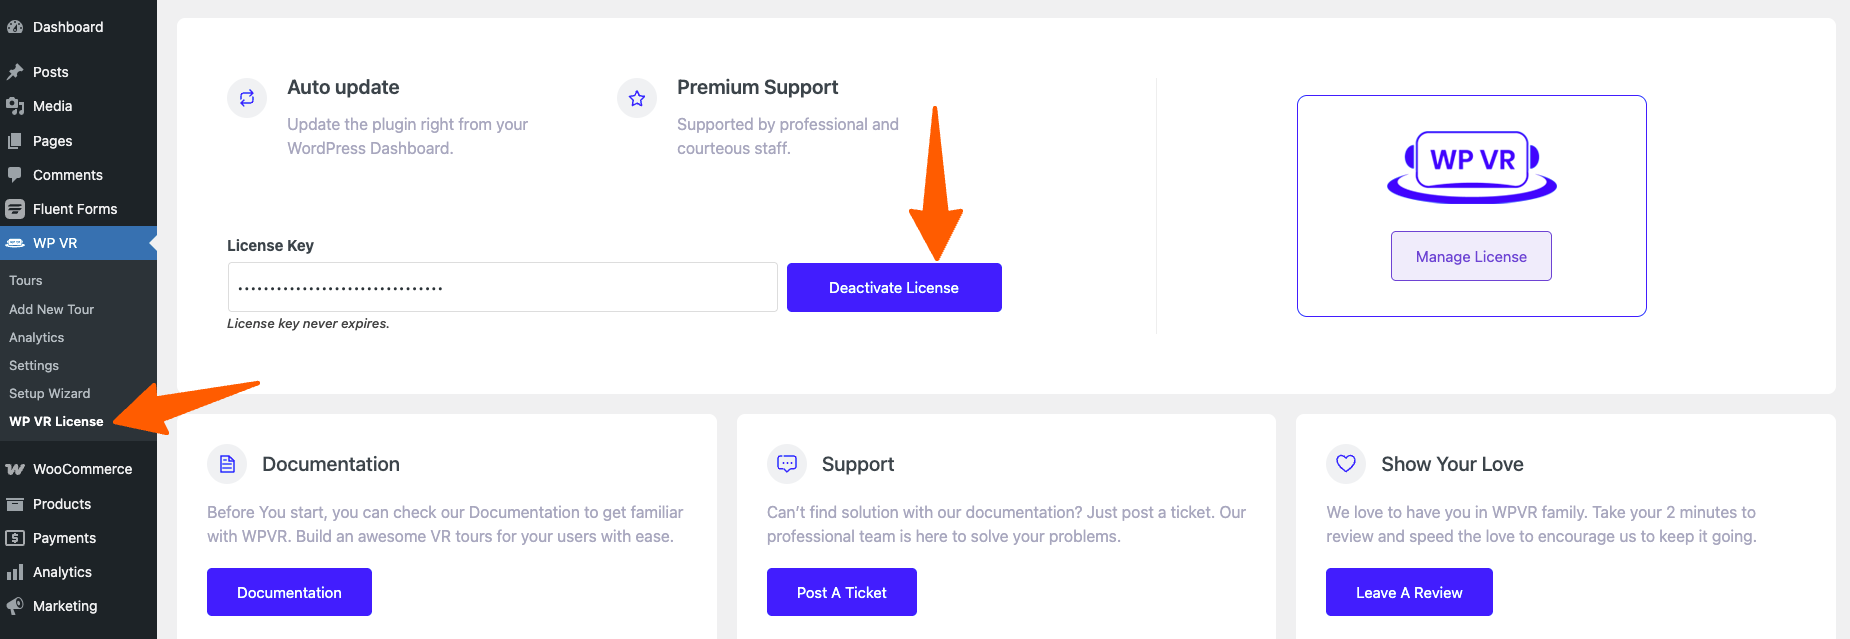
After activating the license it will be like the screenshot above.
That’s it. Now you will be able to access all the Pro features of WPVR.
You’re now ready to create stunning virtual tours using WPVR.
Now that you have the plugin installed, now, let’s start off by creating a simple virtual tour real quick, in the next guide.