In this guide, I will show you how to create a WooCommerce product feed for Wish.com.
Step 1: Create a New Feed and Map Your Product Attributes #
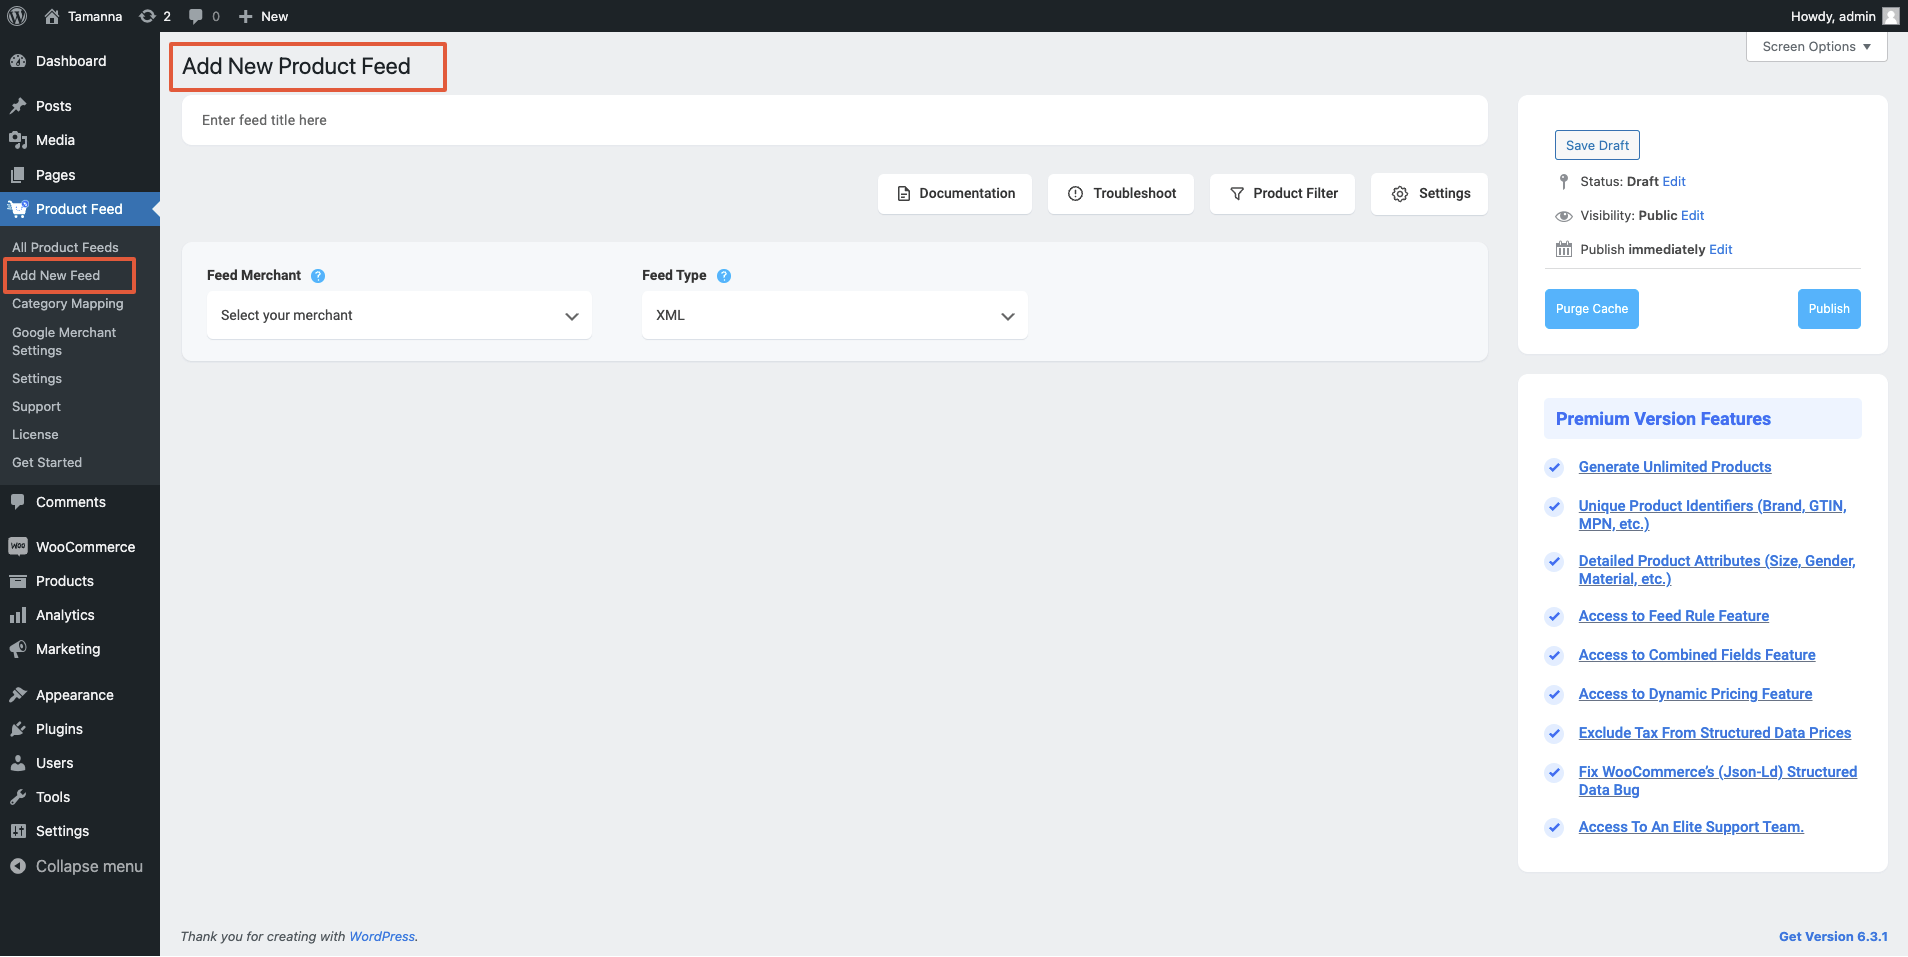
Go to your product feed dashboard.
Click on the Add New Feed button.
It will take you to the feed creation page.
Now, here,
1. On top, you will get the option to add a title to the feed. Give your feed a name.
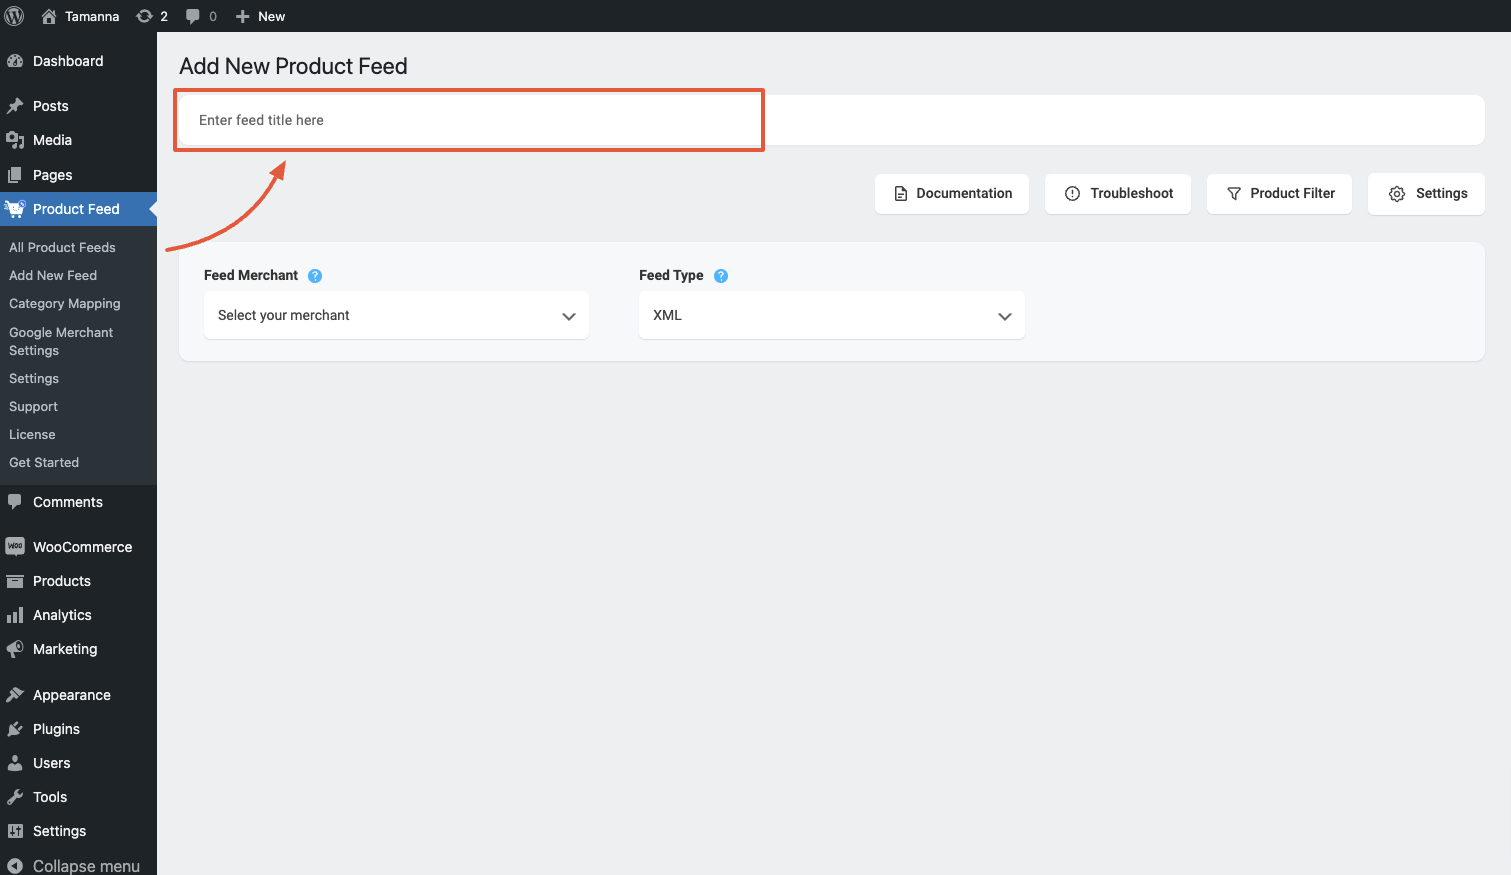
2. Just under the title, you will see an option to select your preferred merchant. Simply click on the Feed Merchant dropdown button and select your preferred merchant from the dropdown or you can search in the dropdown box.
Select your preferred merchant and all the required attributes will be loaded below.
Select Wish.com from the dropdown list.

3. You can see that some of the attributes are already configured – their values are assigned properly, You can change the assigned values as per your need or you can keep them as it is.
De rest van de attribuutwaarden moet u echter handmatig toewijzen.
For Wish.com, you need to assign values for the following attributes:
**Please note that Wish.com only accepts CSV feed file submissions. So you cannot change the feed format type from the Feed Type dropdown.
3. You can see that some of the attributes are already configured – their values are assigned properly, You can change the assigned values as per your need or you can keep them as it is.
De rest van de attribuutwaarden moet u echter handmatig toewijzen.
For Wish.com, you need to assign values for the following attributes:
- Currency Code
This is your local currency code – the currency you have used for all of your products.
This must match your assigned currency.
Examples:
- Acceptable: USD
- Acceptable: CNY
- Unacceptable: Chinese
- Default Shipping Price
This is the default shipping price of your product. This will automatically apply as the shipping price for any new or unset countries in this warehouse.
Examples:
- Acceptable: 100.99
- Acceptable: 10.99
- Unacceptable: 49.99 + S/H
- Inventory
This is the amount of an SKU that is in stock.
Examples:
- Acceptable: 1200
- Acceptable: 0
- Acceptable: 4
- Unacceptable: In-stock
- Unacceptable: Out of Stock
- Warehouse
Here, you need to provide the unique warehouse name that you use internally to identify a warehouse. Shipping price and the inventory are applied to the specified warehouse only.
If you do not define one, they are applied to the default warehouse attached to your account.
Examples:
- Acceptable: US_94132
- Acceptable: SZ_CN
- Unacceptable: 2
- Unacceptable: a
Step 2: Feed Configuration #
1. Scroll up to the top and here, you will see that there are two options, Product Filter and Product Settings.
- Producten Instellingen
- Product Filter

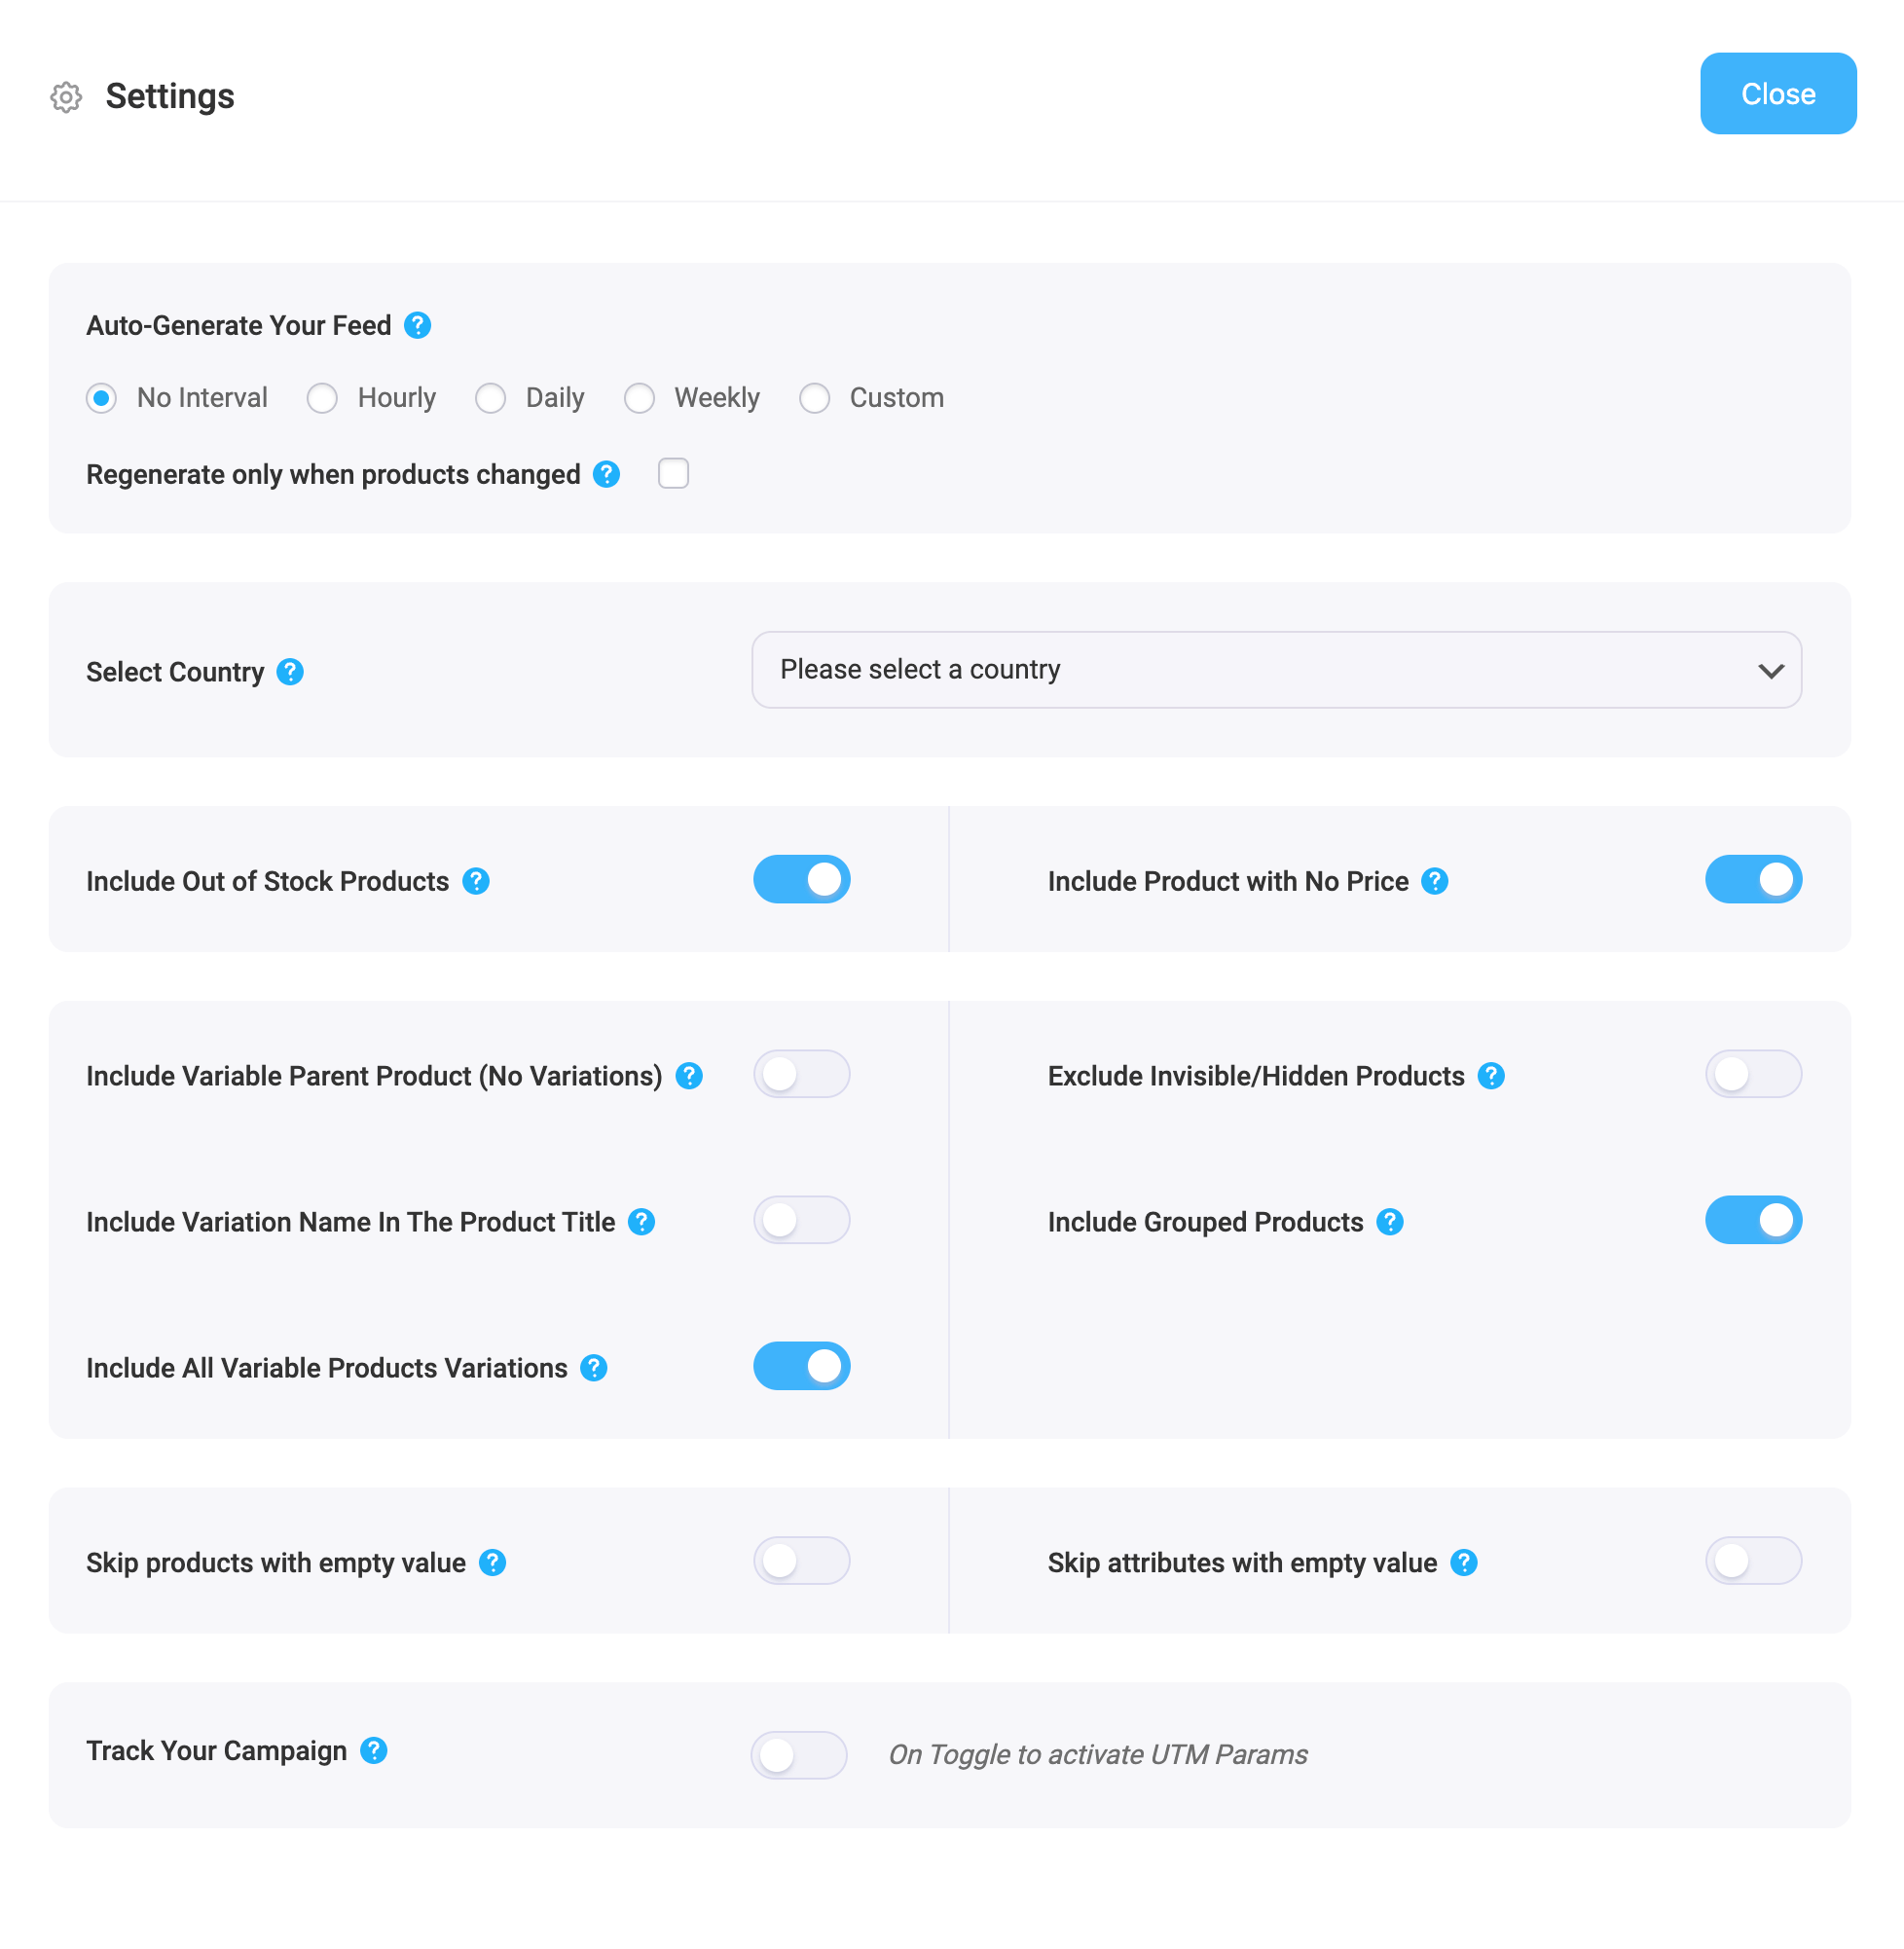
2. First, let us configure the features in the Feed Settings. Click on the Settings button, and a drawer will open from the right side of the screen.
For more in depth knowledge about the setting refer to this doc: Understanding The Basics Of Feed Settings
3. Now, close the drawer and click on the Product Filter option. A new drawer will open from the right.
Bovenaan krijgt u de optie om het Aangepaste filter of de functie Feed Rules (PRO) te gebruiken.
En u krijgt de feed filteropties uit het Filter dropdown menu.
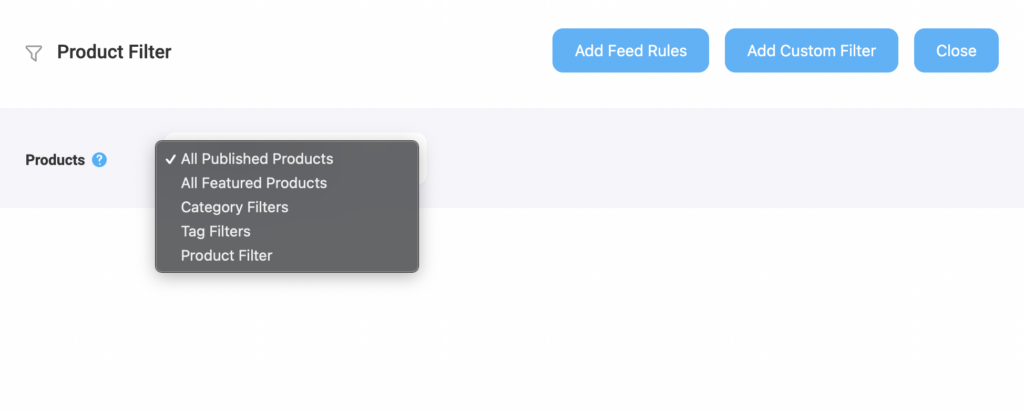
Choose the Products you want to include in the feed using any filter. “All Published Products” is selected by default
U kunt alle andere filteropties, Aangepast filter, Categoriefilter en Tagfilter, gebruiken om de producten die u nodig hebt op te nemen (of uit te sluiten die u niet wilt opnemen).
Voor een basisvoeding kun je het houden zoals het is.
Step 3: Publish WooCommerce Product Feed For Wish.com #
Now, that you’ve configured your feed, it is time to publish the feed.
Scroll terug naar boven, en u vindt rechts een knop Publiceren.
Klik op de knop Publiceren, uw feed wordt gegenereerd.
Zodra het genereren van uw feed voltooid is, kunt u de feed bekijken of downloaden.
That’s it. Your WooCommerce CSV product feed for Wish.com is generated.
Now, log in to the Wish.com marketplace, and there you will get the option to upload your feed file to list your items.