If you’re using Oxygen Builder to build and design your website, WP VR has a dedicated WP VR Oxygen Element for you to embed virtual tours.
Using this WP VR Oxygen Element, you can embed virtual tours on your website easily.
Here is how you can embed a WP VR virtual tour using WP VR Oxygen Element.
Embed A Virtual Tour Using WP VR Oxygen Element #
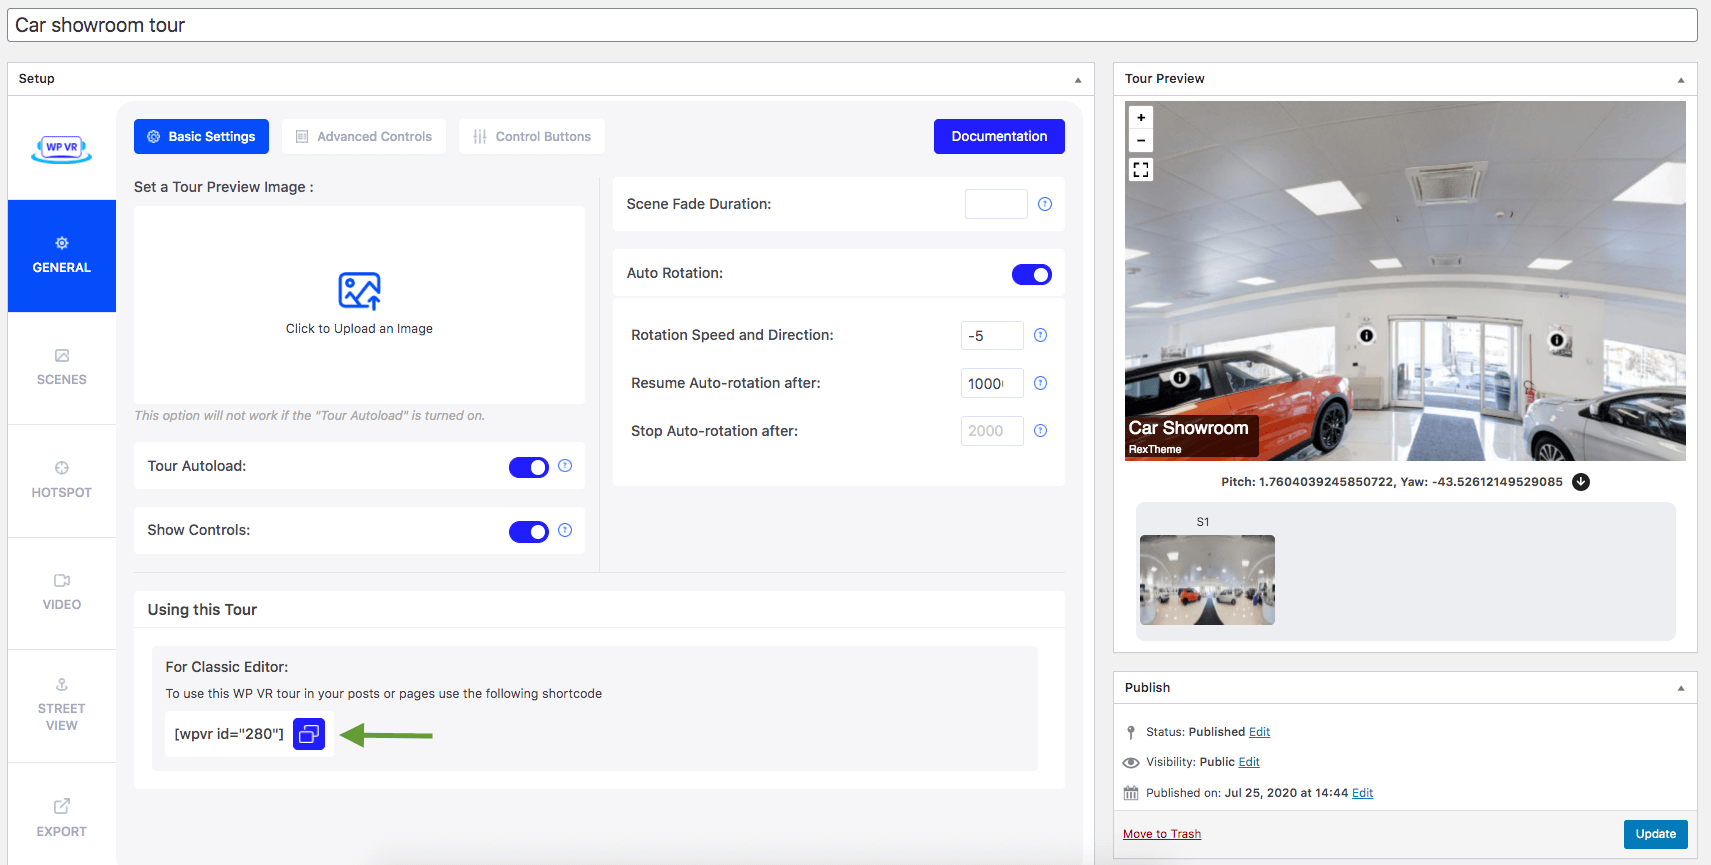
First, create and publish a tour and remember the Tour name and the Tour ID. You can find the Tour ID below the features when editing a tour.
Then follow the steps below to use WPVR Oxygen Element and embed a virtual tour on your site.
1. Go to the page or post where you want to embed a virtual tour and click on Edit With Oxygen.
**Make sure you’ve already saved or published the page/post.
2. It will take you to the Oxygen Builder edit mode.

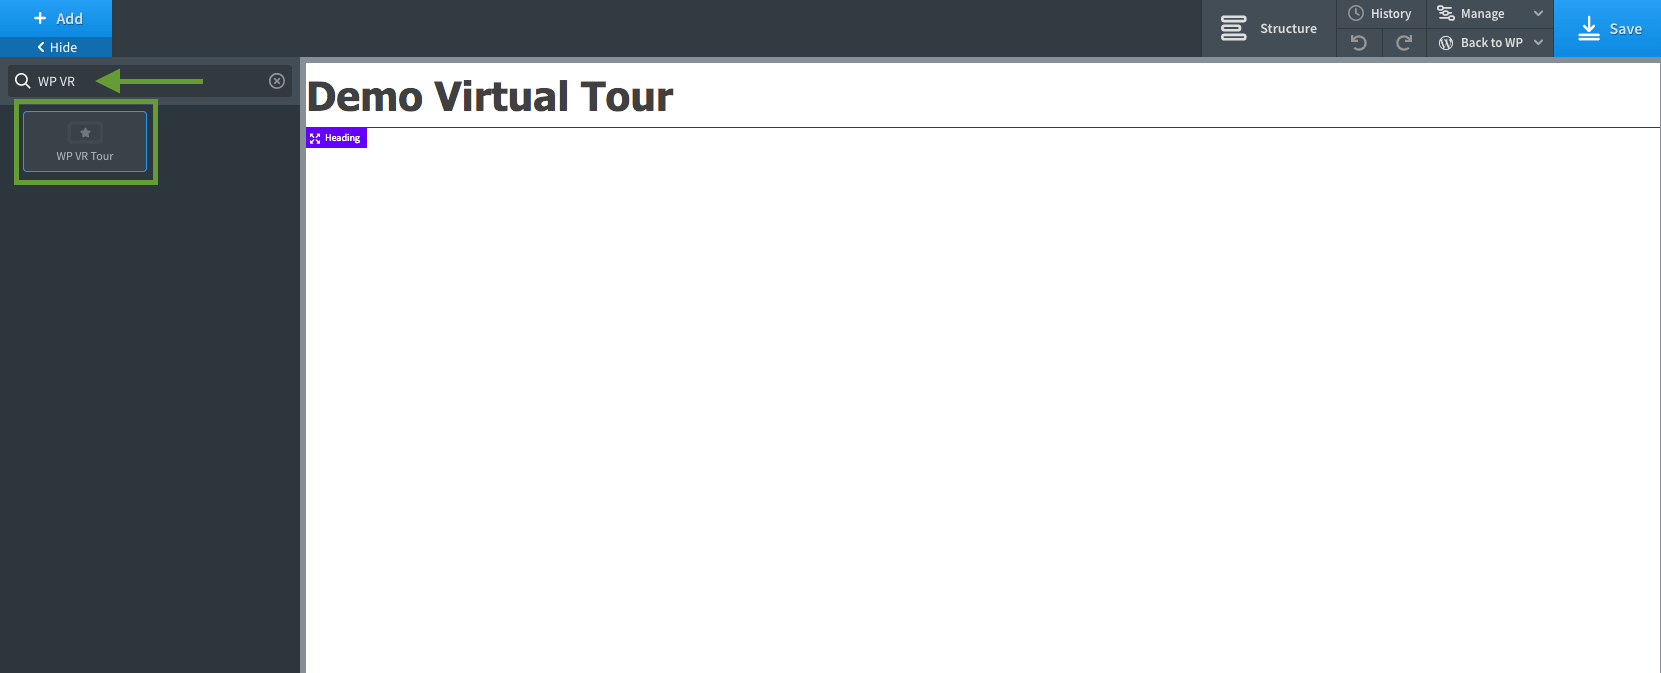
3. Click on the ‘+ ADD’ button on the top left.
4. On the search field, type ‘WP VR’ or ‘wp vr’. The WP VR Oxygen Element will appear. Click on it.
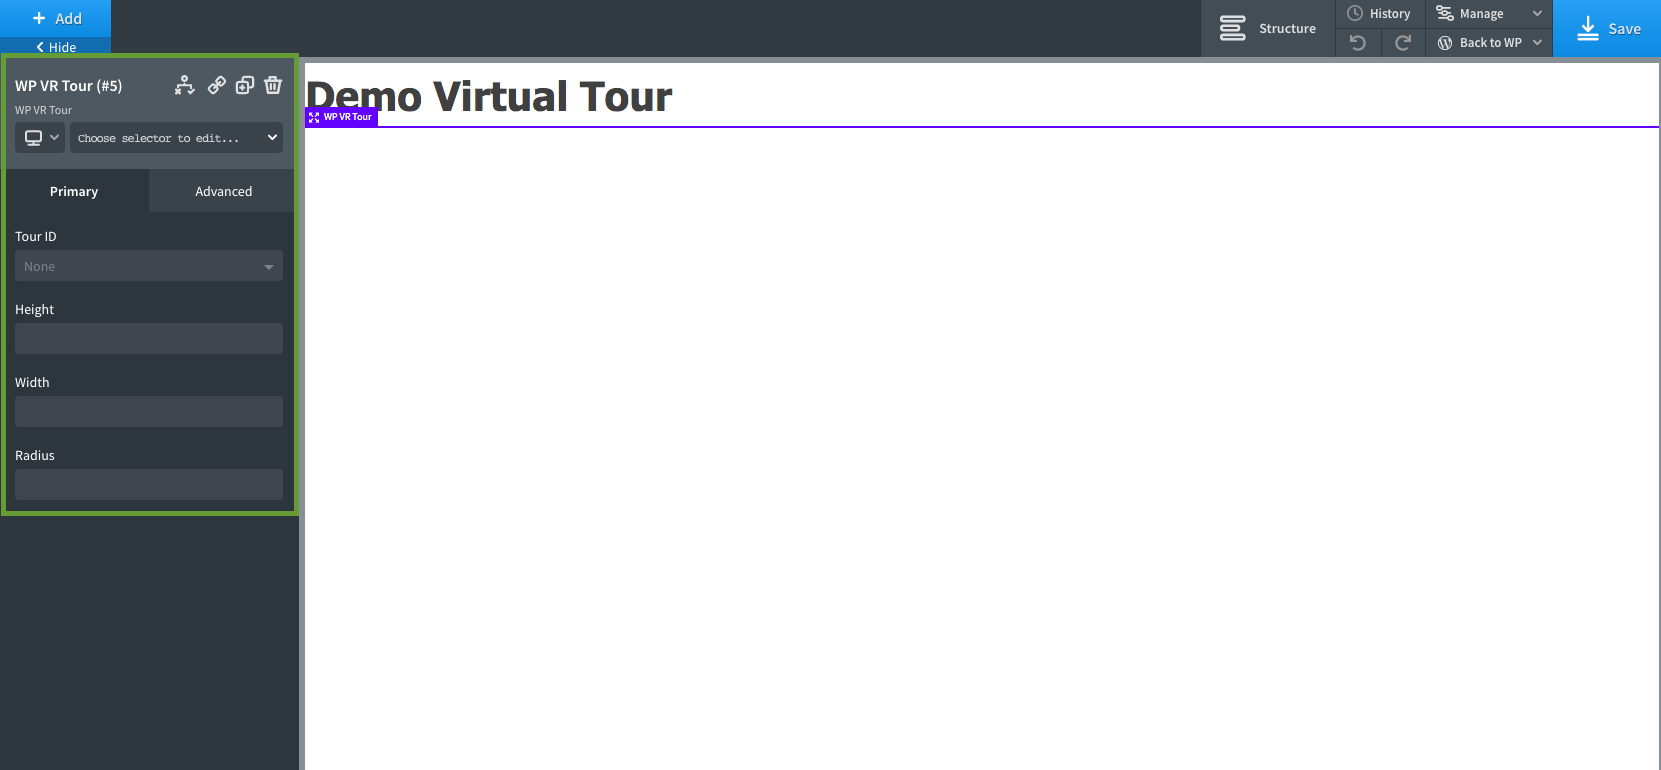
5. The element will be added and you will need to provide the Tour ID. Plus you will get the options to customize the Height, Width and Radus.
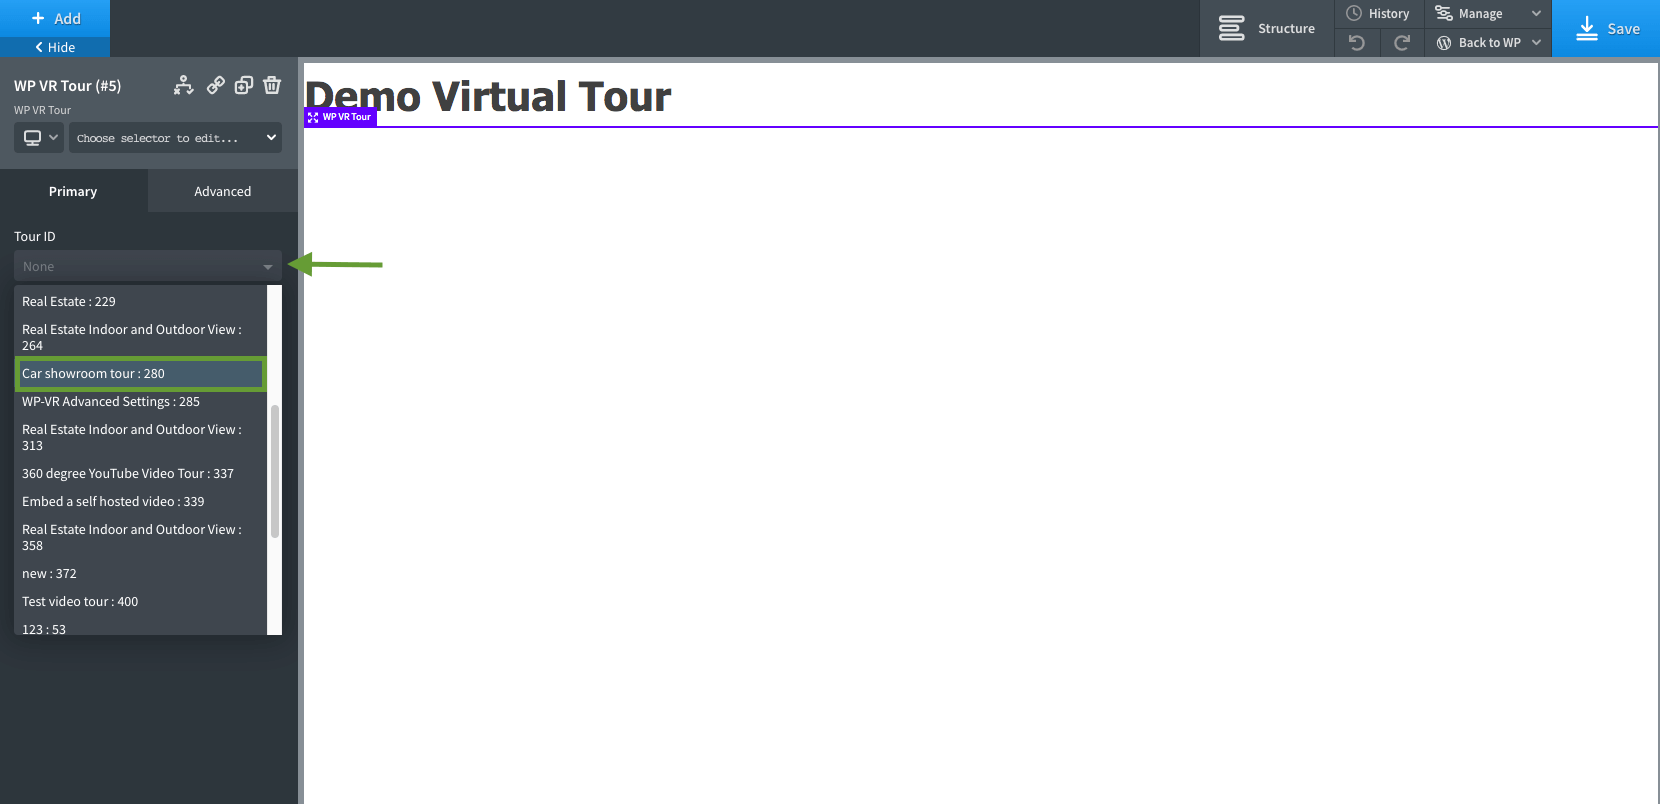
6. On the field for Tour ID, click on it and you will find the names and ids of all the virtual tours you created, listed here. Choose your desired tour.
7. Next customize the tour size – height and width – and the radius.

- Height
– Only assign a positive numeric value along with px. For example, 500px.
– Do not use percentage or any text.
- Width
– Assign a positive numeric value along with a px. For example, 600px.
– Or, you can use a percentage value, such as “100%”.
– If you want the tour to take up the fullwidth of the page, use type the text “fullwidth” as the width.
- Radius
– Input a value here if you wish to create round edges of the tour.
– Only assign a positive numeric value along with a px. For example, 10px.
– Do not use percentage or any text.
8. Once you input the size, click on the Apply Params button on the bottom left corner.
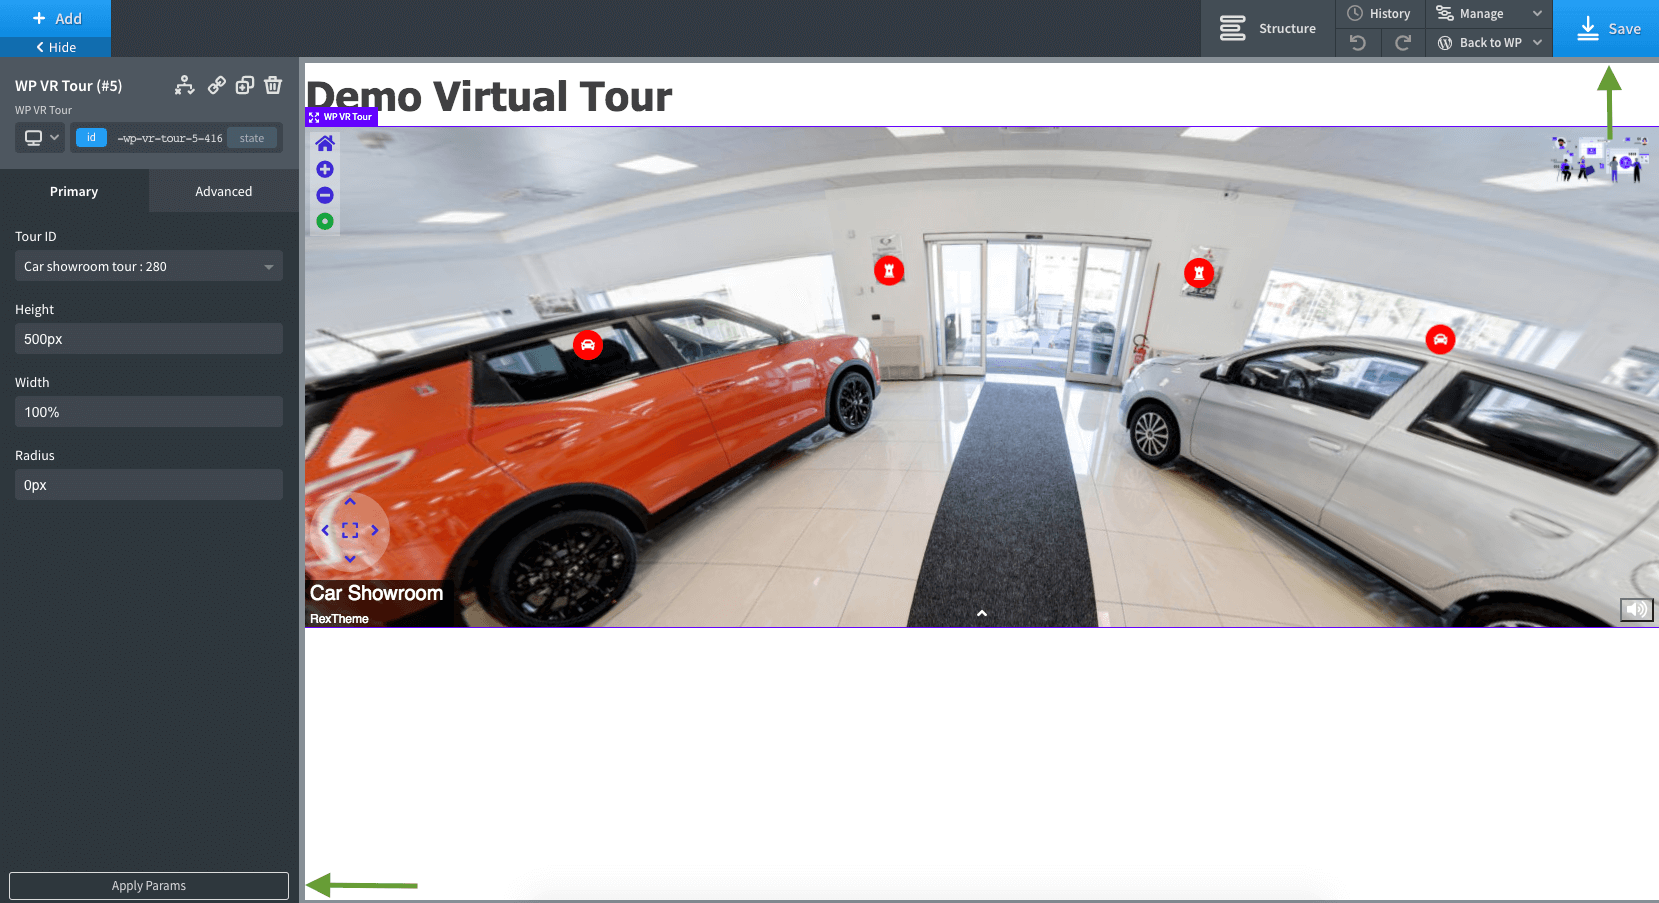
You’ll see the preview of your the tour.
9. Now click on the Save button to save the settings.
10. Now click on the Back To WP option and choose Frontend to view the page.

And that’s it. The tour will be embedded on your website.
Tips for Embedding WP VR Tours in Oxygen Builder #
- Use fullwidth width for hero sections with impactful tours.
- Test responsiveness – WP VR tours are mobile-optimized out of the box.
- Combine with Oxygen’s advanced styling for unique layouts.
- For mobile enhancements, use WP VR Pro features like custom mobile height.
The WP VR Oxygen Element makes adding professional 360° virtual tours to Oxygen-built sites effortless.
Explore more integrations: