---
title: "How To Auto-sync with Google Merchant Center"
url: "https://rextheme.com/docs/how-to-auto-sync-with-google-merchant-center/"
updated: "2025-11-04"
category: Getting Started
---

# How To Auto-sync with Google Merchant Center

With our [Marketplace Autosync For WooCommerce](https://rextheme.com/best-woocommerce-product-feed/) plugin, you can list your products on the Google Merchant Center using the Auto Sync method.

In this guide, we’ll show you the Auto-Sync method to send your Products to GMC.

However, to use this method, you need to authorize with the Google Merchant Center first, and to do so, you will need the following information:

1. Client ID
2. Client Secret
3. Merchant ID
4. Redirect URL

 [![How To Auto-sync with Google Merchant Center 1](https://rextheme.com/wp-content/uploads/2025/11/2-1.png)](https://rextheme.com/wp-content/uploads/2025/11/2-1.png)

You will find out that the Redirect URL is already added, but you need to collect the Client ID, Client Secret, and Merchant ID to authorize with the Google Merchant Center.

Follow the steps below to learn how to auto-sync product feed to Google Merchant Shop:

## Step 1: Create a Project

**1.**Go to [https://console.developers.google.com/](https://console.developers.google.com/) or [https://console.cloud.google.com/](https://console.cloud.google.com/)

**2.**Choose an existing Project or create a new one.

 [![How To Auto-sync with Google Merchant Center 2](https://rextheme.com/wp-content/uploads/2025/11/3.png)](https://rextheme.com/wp-content/uploads/2025/11/3.png)

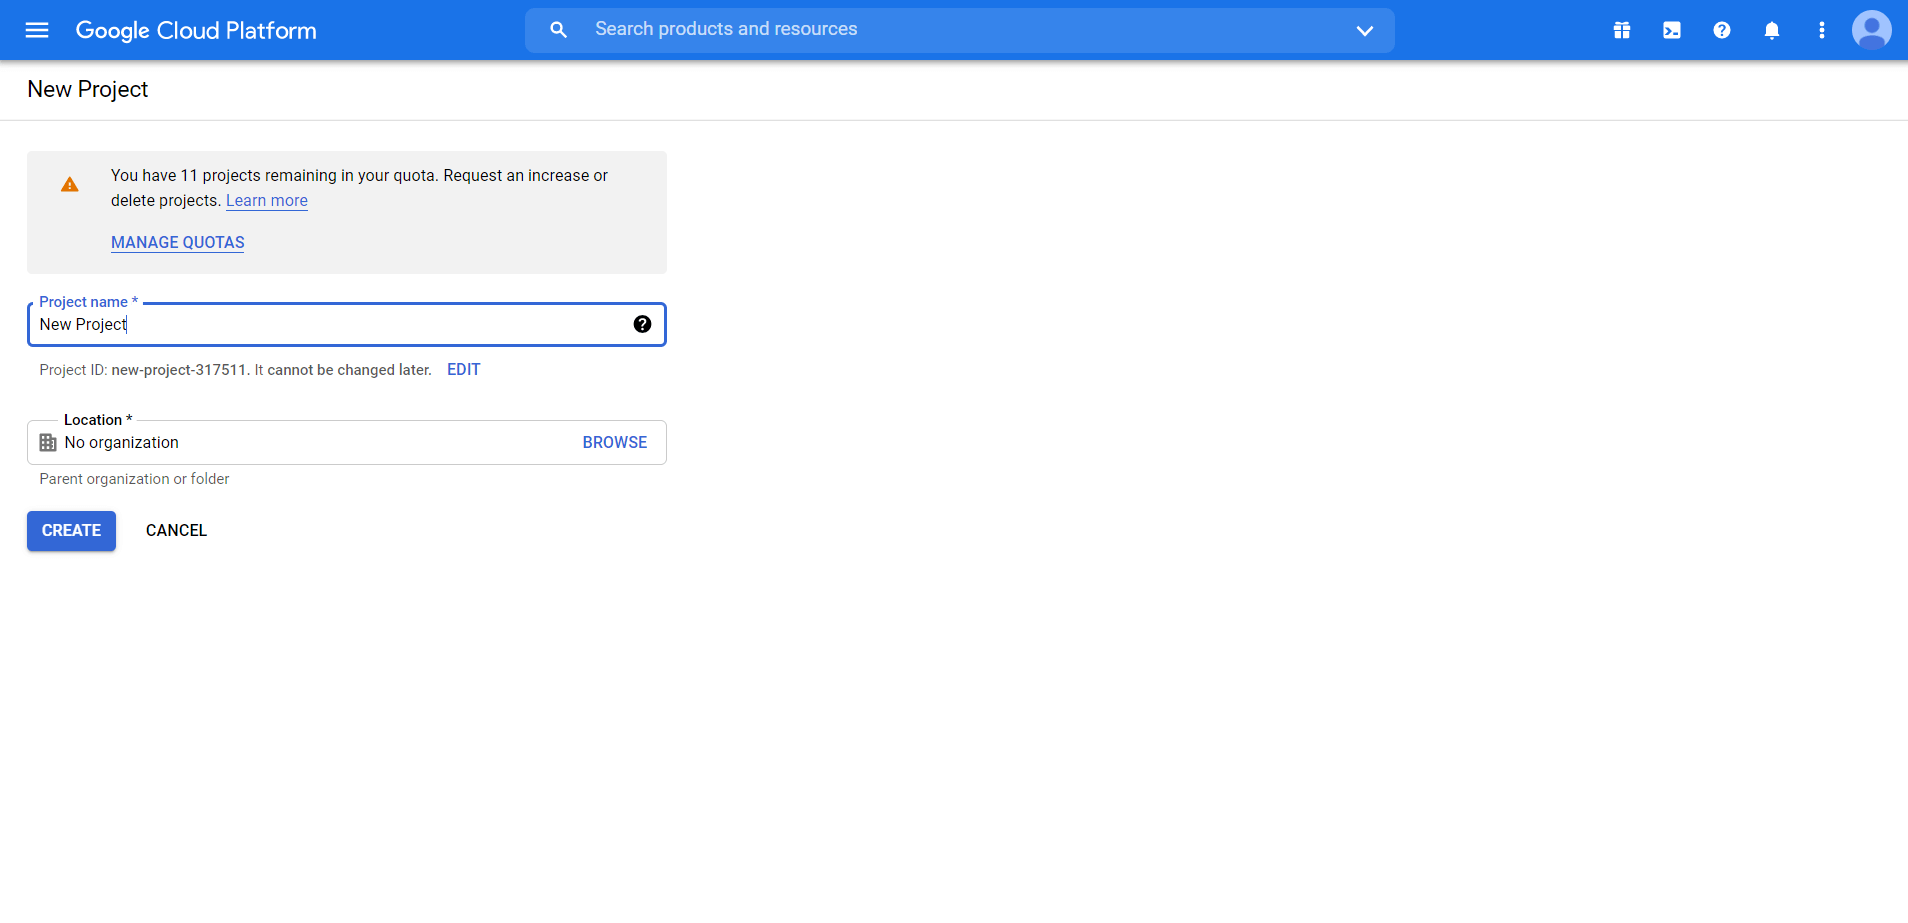
**3.** If you choose to create a Project, it will take you to New Project Page.

**4.** Here choose Project Name, and Organization (if you have a G-suite acc). If you want you can edit the project Id as well, (which cannot be changed once the project is created).
 [![Google Cloud Platform - Create New Project](https://rextheme.com/wp-content/uploads/2023/08/3-5-edited.png)](https://rextheme.com/wp-content/uploads/2021/08/3-5.png)

## Step 2: Enable Content API for Shopping

**1.** Once the Project is created, it will take you to the project dashboard. On the left Menu panel, click on **APIs & Services**.

**2.** Here, click on **Enable APIs and Services**. It will take you to the API library.

 [![How To Auto-sync with Google Merchant Center 3](https://rextheme.com/wp-content/uploads/2025/11/5.png)](https://rextheme.com/wp-content/uploads/2025/11/5.png)

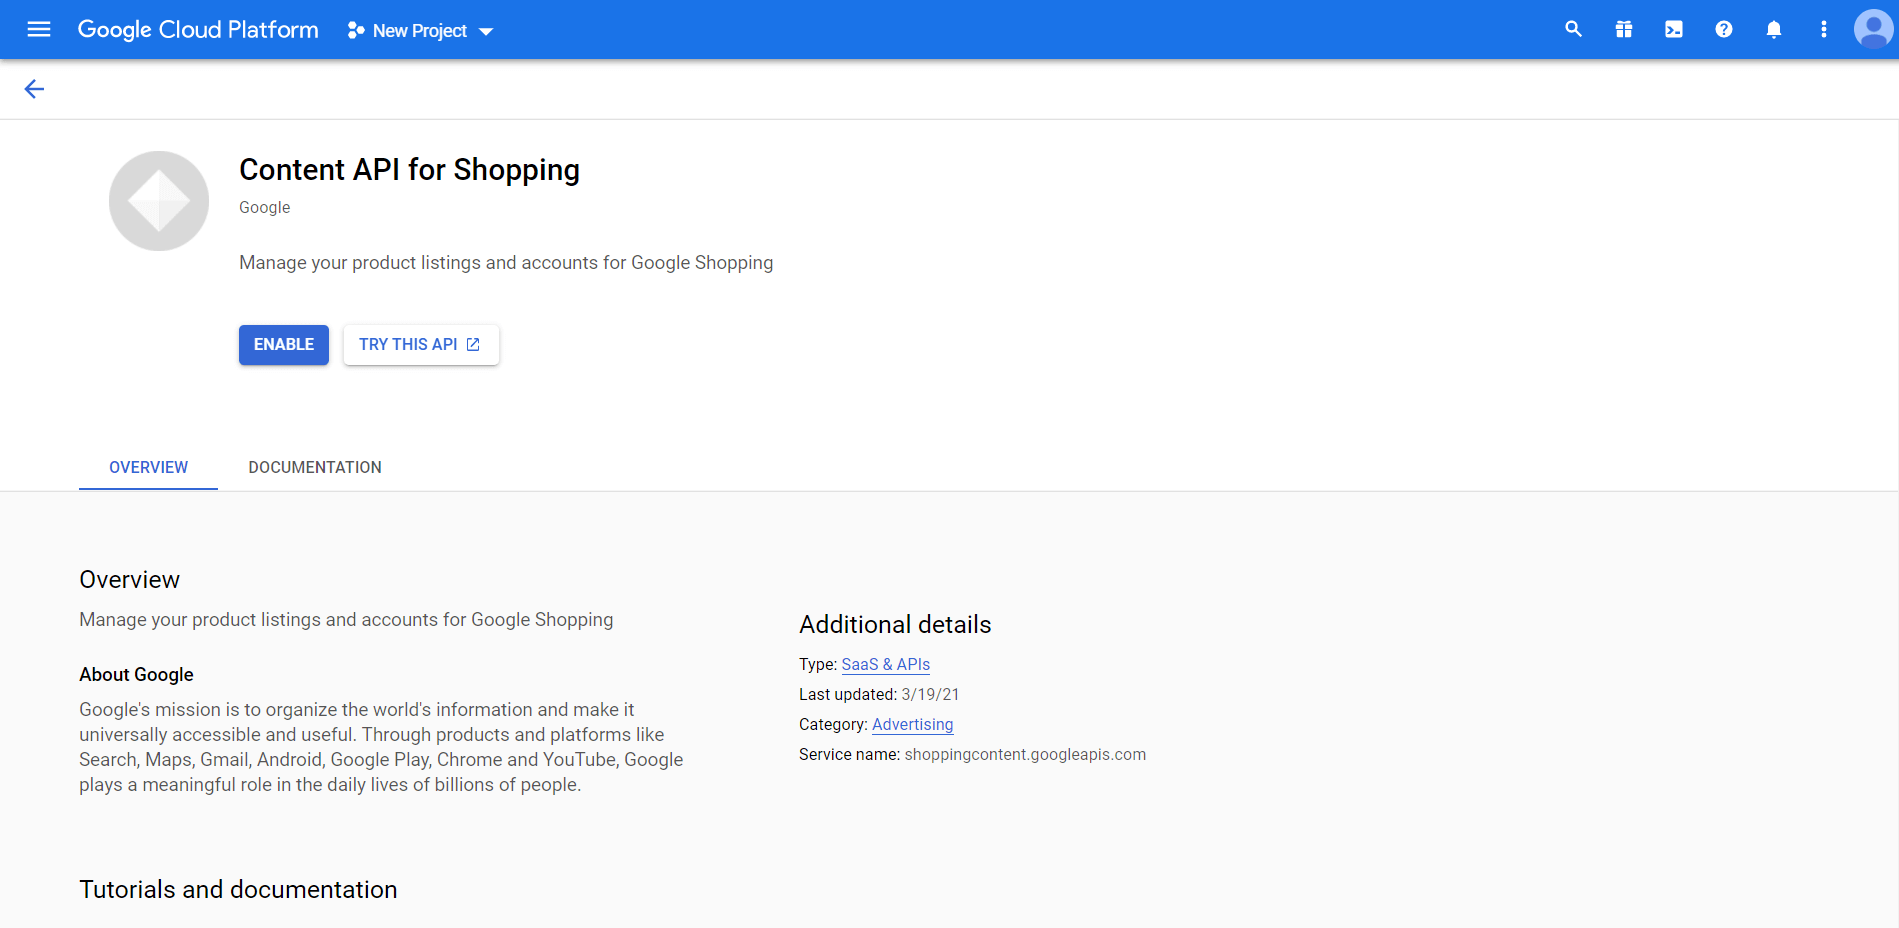
**3.** Search with “**Content API for Shopping**” and you will find an API service with the same name.

 [![How To Auto-sync with Google Merchant Center 4](https://rextheme.com/wp-content/uploads/2025/11/image.png)](https://rextheme.com/wp-content/uploads/2025/11/image.png)

**4.** Click on it to view the API service overview and Enable it.
 [![Enable Content API for Shopping](https://rextheme.com/wp-content/uploads/2021/08/6-5.png)](https://rextheme.com/wp-content/uploads/2021/08/6-5.png)

## Step 3: Configure OAuth Consent Screen

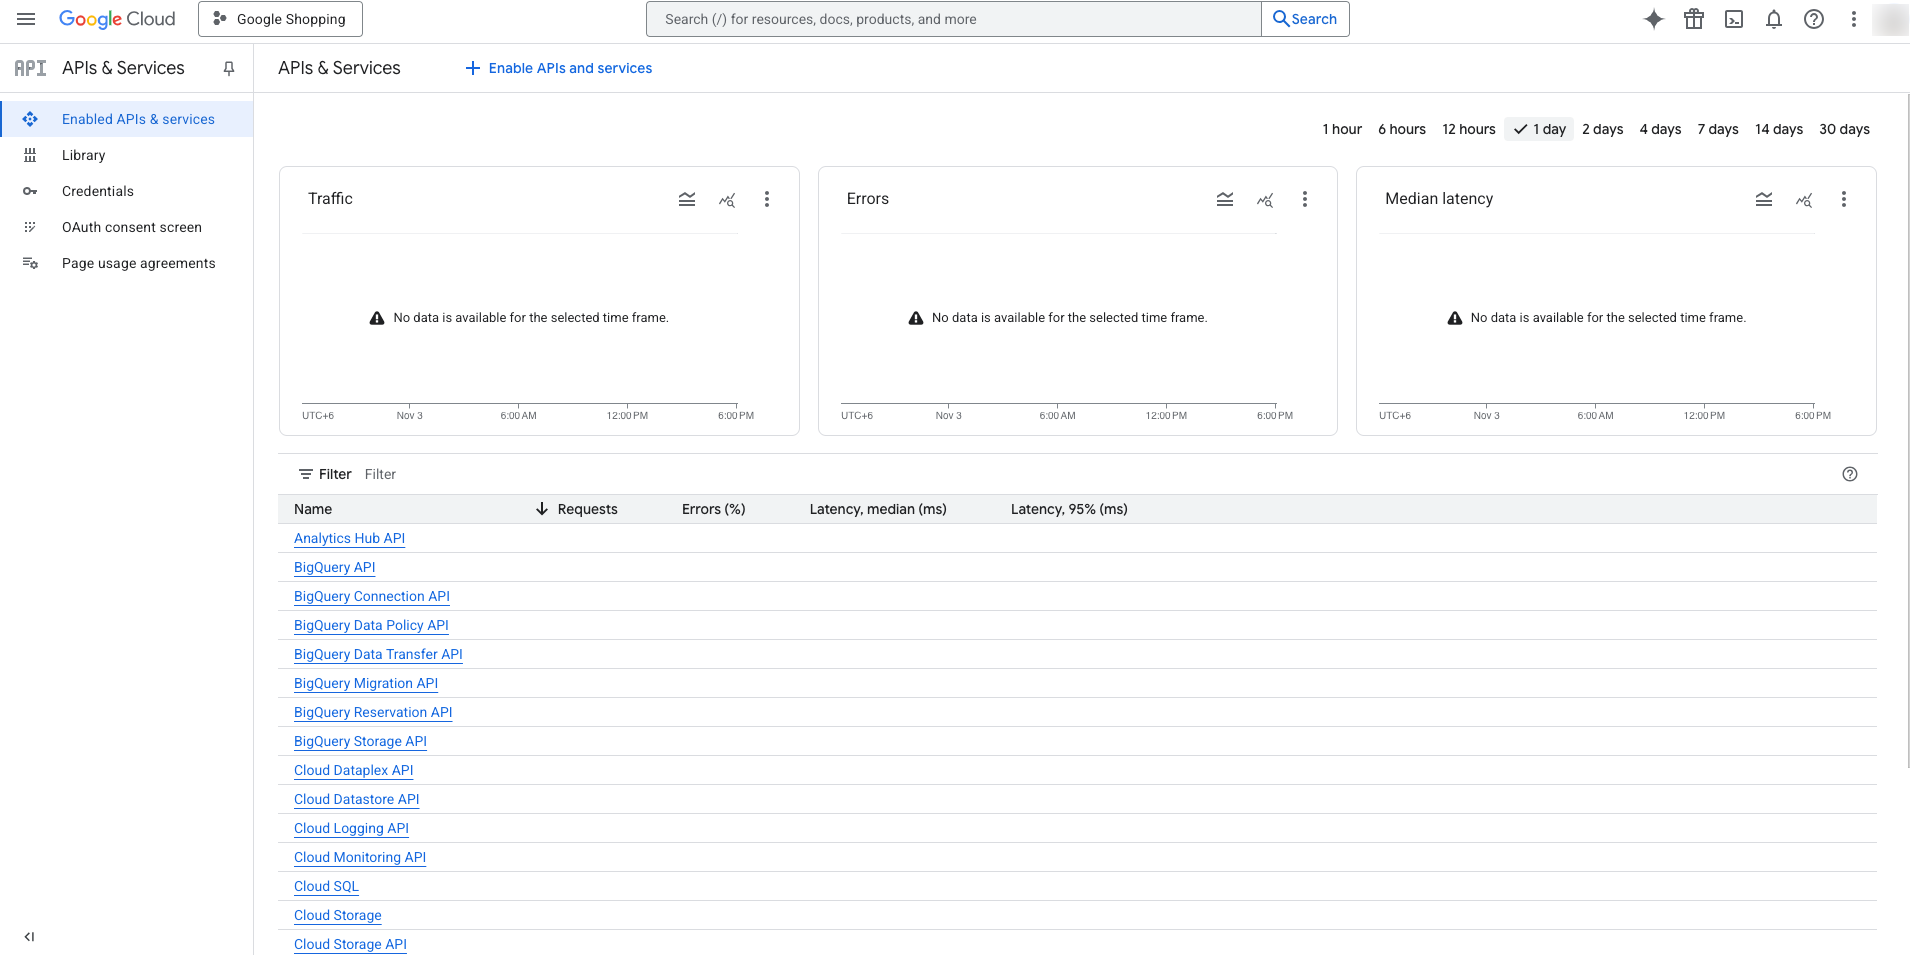
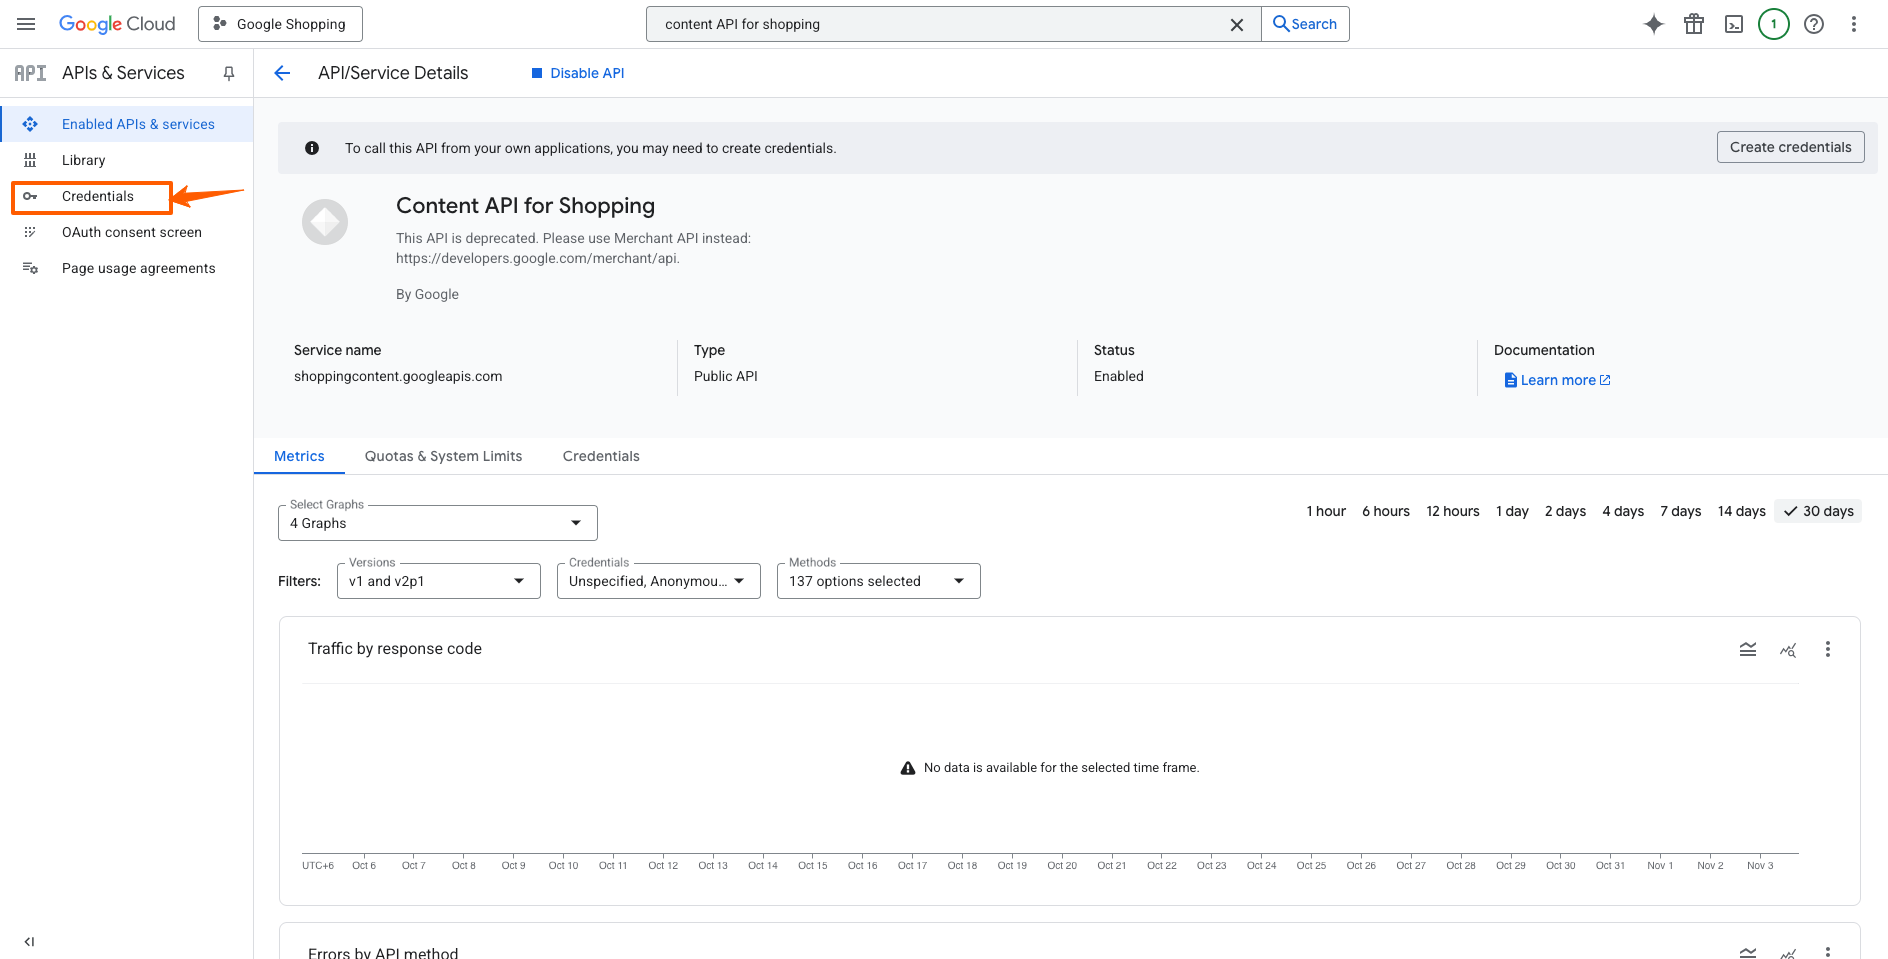
**1.** Once you enable the Content API for Shopping, it will take you to the Content API for the Shopping Overview dashboard. Here click on the **Credentials** menu option from the left side of the window
 [![How To Auto-sync with Google Merchant Center 5](https://rextheme.com/wp-content/uploads/2025/11/10.png)](https://rextheme.com/wp-content/uploads/2025/11/10.png)

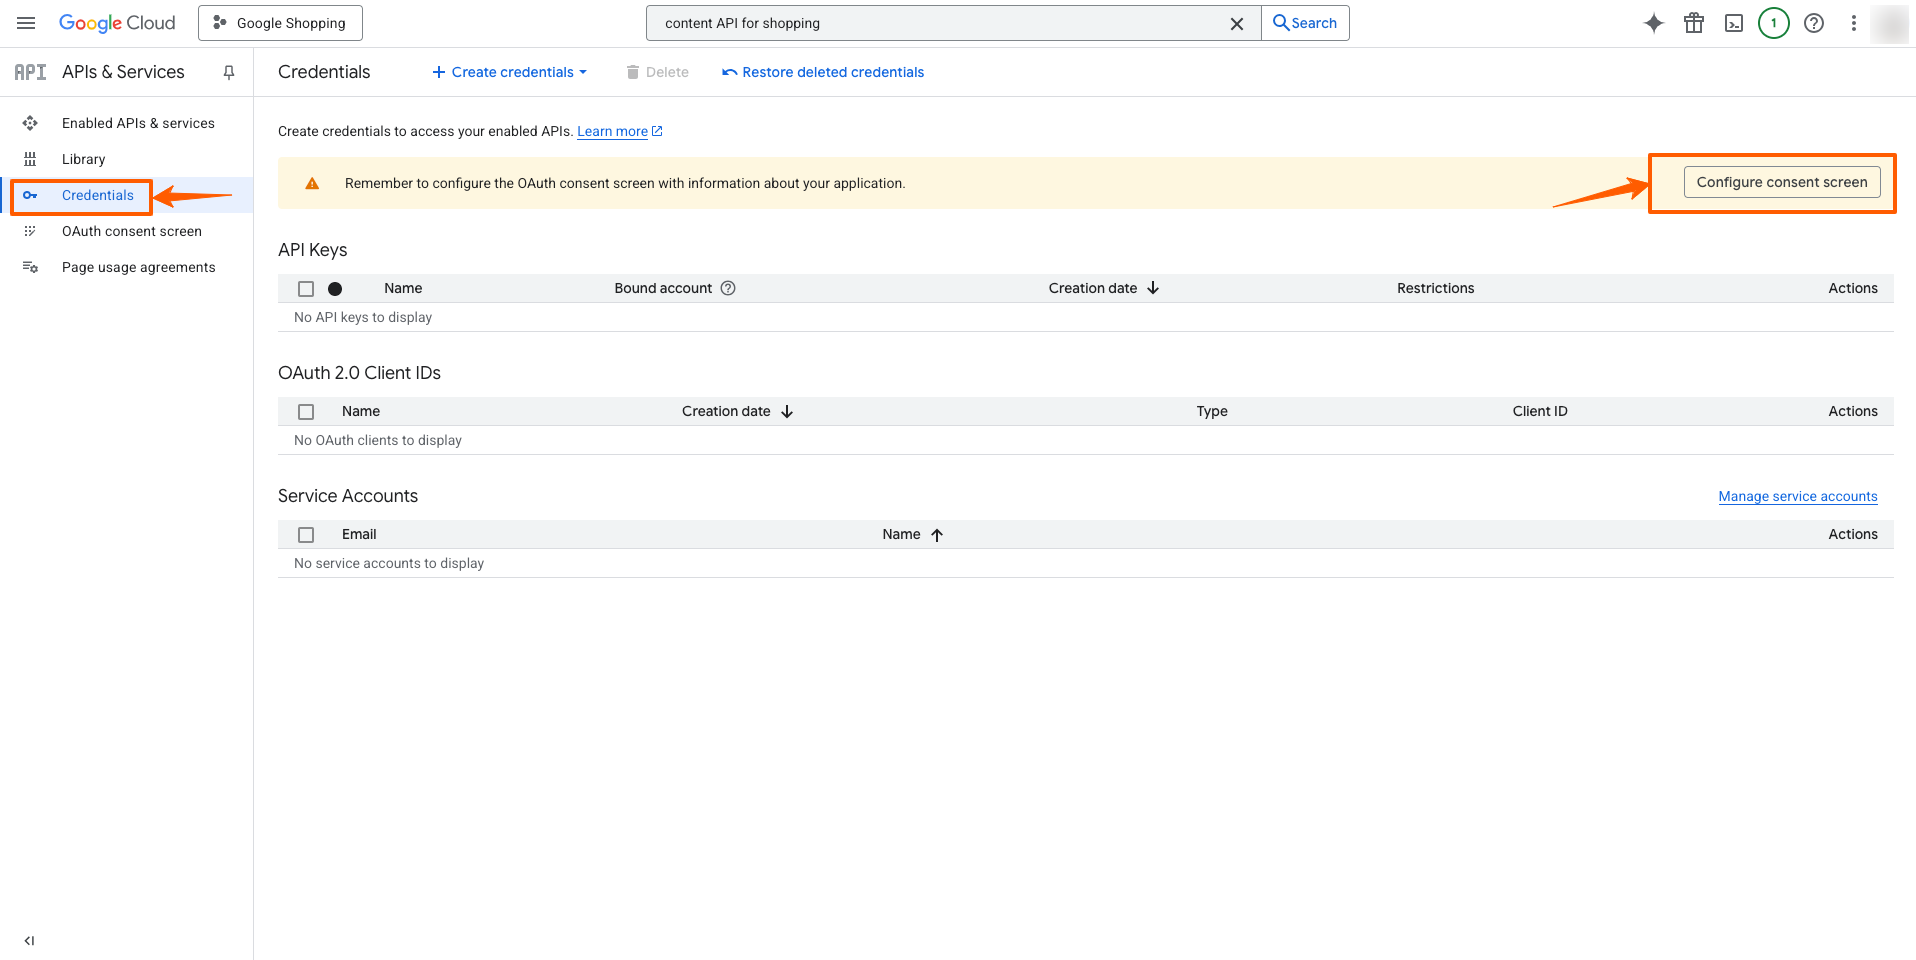
**2.** Click on the “**Configure Consent Screen**” button on the right side.

 [![How To Auto-sync with Google Merchant Center 6](https://rextheme.com/wp-content/uploads/2025/11/20.png)](https://rextheme.com/wp-content/uploads/2025/11/20.png)

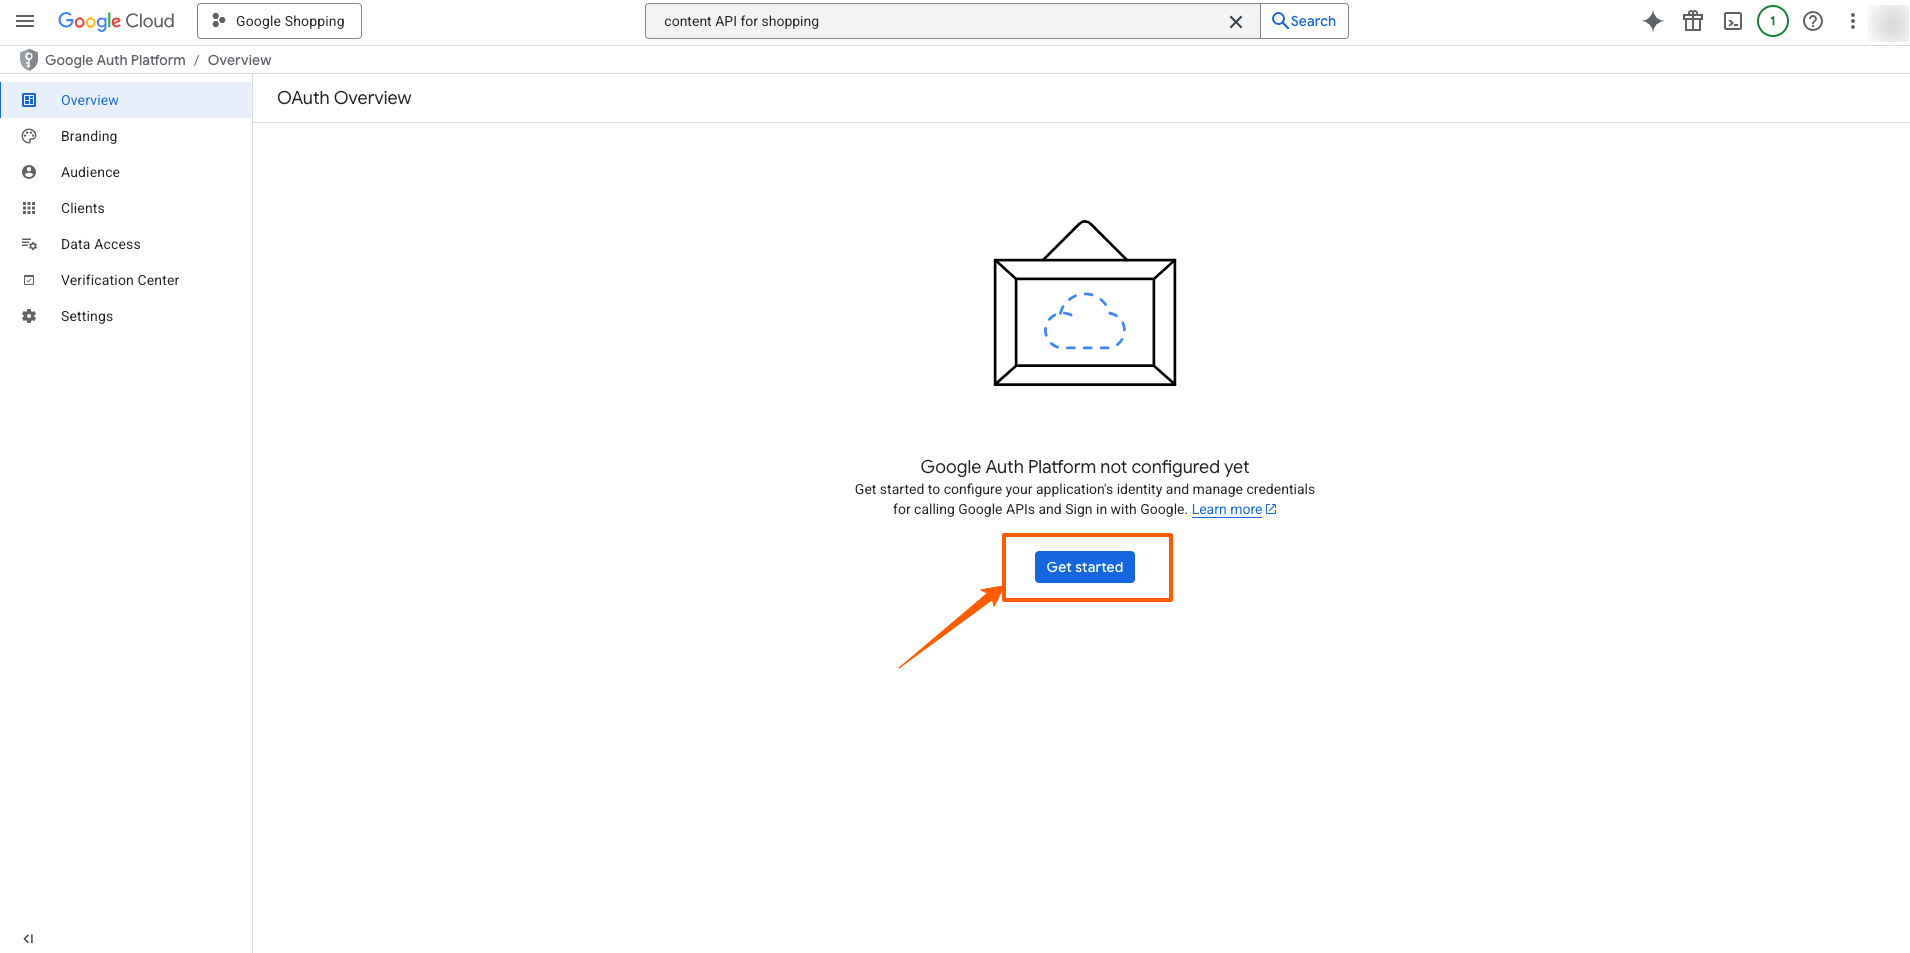
**3.** If you see that the Google Auth Platform not configured yet. Click on **“Get Started”**

 [![How To Auto-sync with Google Merchant Center 7](https://rextheme.com/wp-content/uploads/2025/11/30.png)](https://rextheme.com/wp-content/uploads/2025/11/30.png)

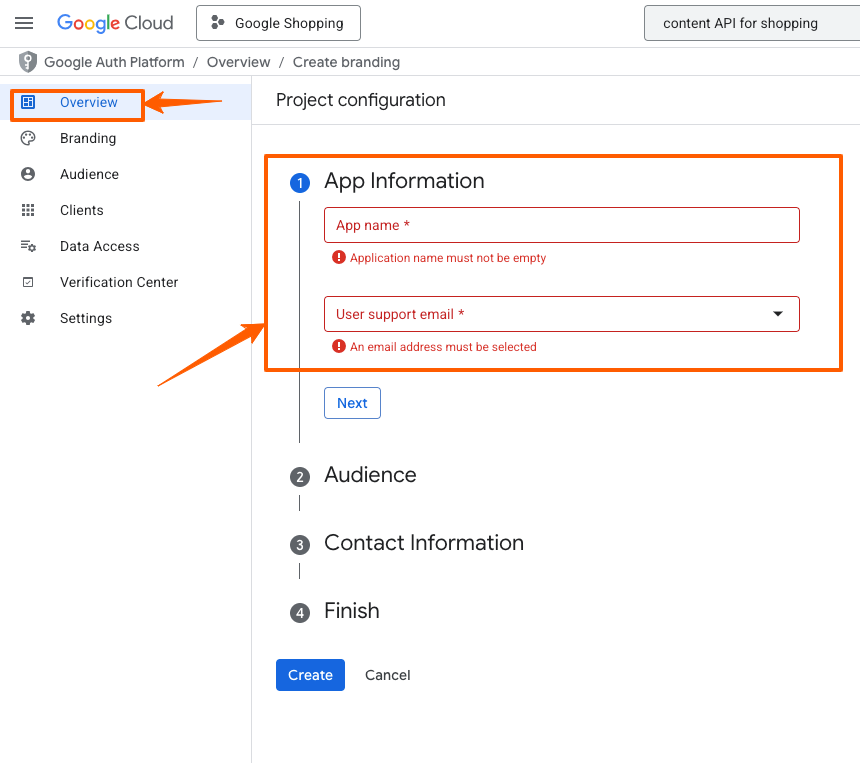
**4.**In the Overview Section, Provide you App Information and User Support email and click on next
 [![How To Auto-sync with Google Merchant Center 8](https://rextheme.com/wp-content/uploads/2025/11/40.png)](https://rextheme.com/wp-content/uploads/2025/11/40.png)

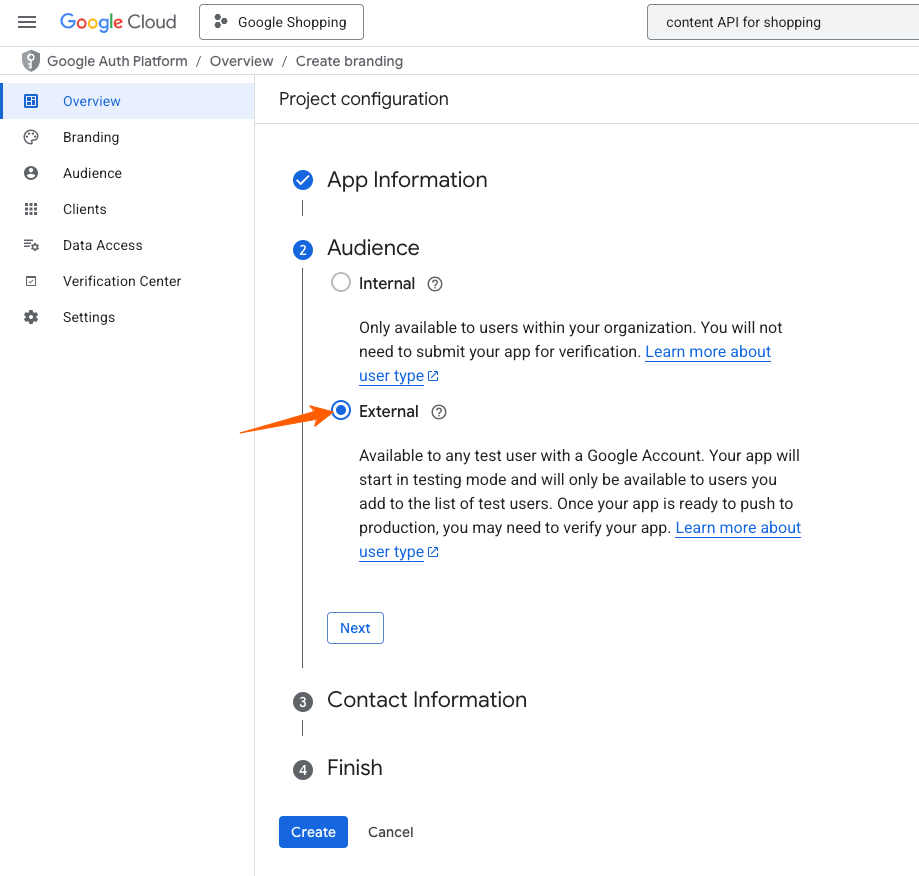
**5.** Now choose **External**and click on Next

 [![How To Auto-sync with Google Merchant Center 9](https://rextheme.com/wp-content/uploads/2025/11/60.png)](https://rextheme.com/wp-content/uploads/2025/11/60.png)

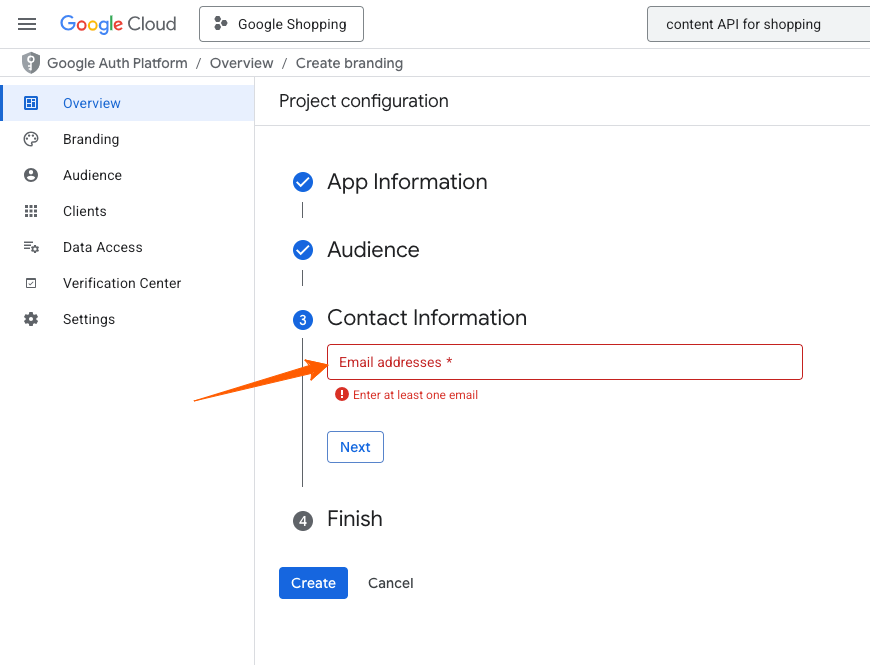
**6.** Now provide the Contact Information (Email)
 [![How To Auto-sync with Google Merchant Center 10](https://rextheme.com/wp-content/uploads/2025/11/80.png)](https://rextheme.com/wp-content/uploads/2025/11/80.png)

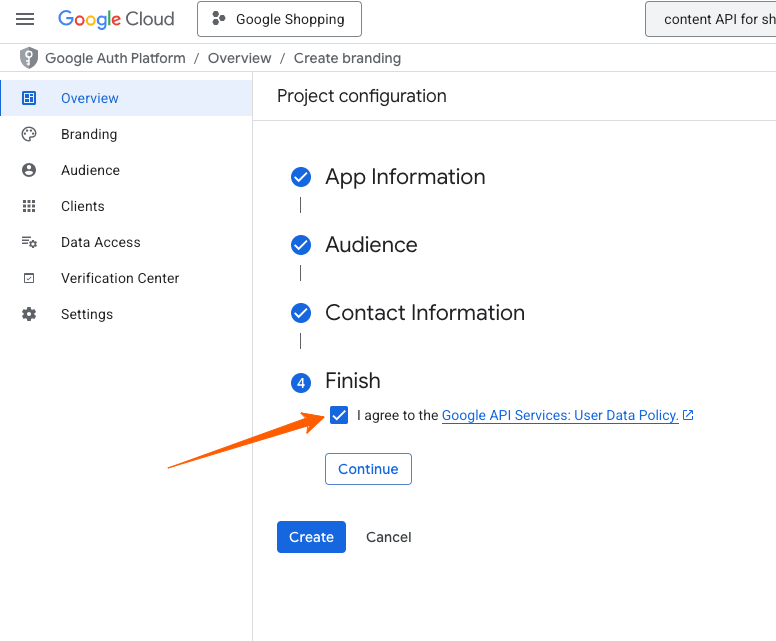
**7.** Now check the terms and condition and click “Create”
 [![How To Auto-sync with Google Merchant Center 11](https://rextheme.com/wp-content/uploads/2025/11/100.png)](https://rextheme.com/wp-content/uploads/2025/11/100.png)

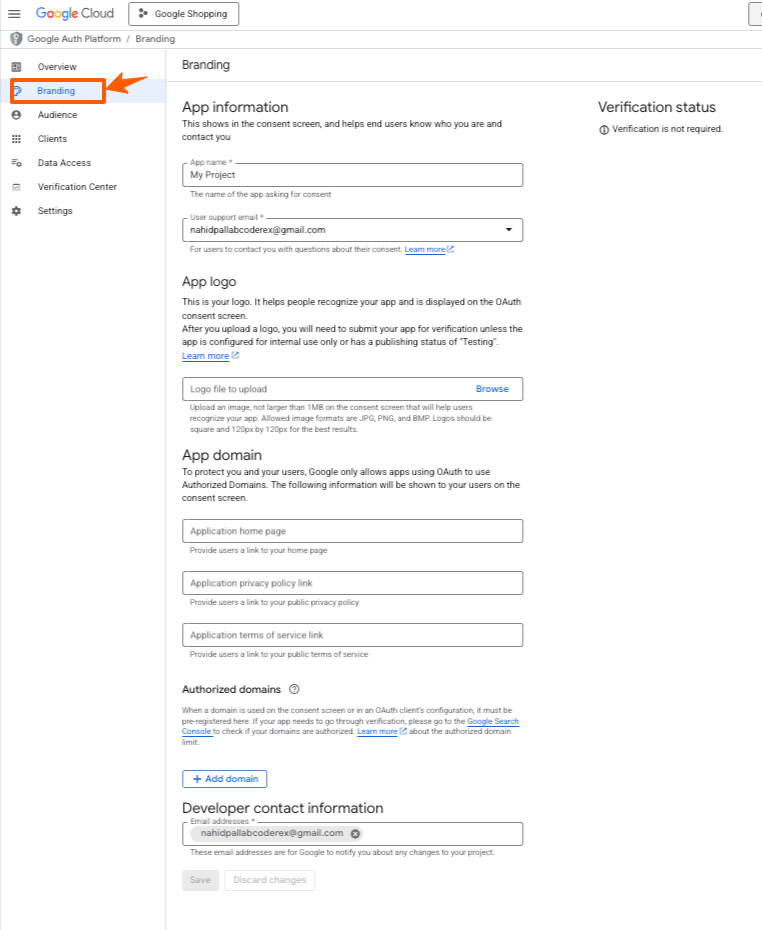
**8.** Now on the Branding Section

 [![How To Auto-sync with Google Merchant Center 12](https://rextheme.com/wp-content/uploads/2025/11/120.png)](https://rextheme.com/wp-content/uploads/2025/11/120.png)

Here you will need the following information:

–**App Information** – Give a name to your app and provide your support e-mail address. You may
also, upload a logo for your app.

**-App domain**– Here you may provide links to your site’s home page, privacy policy page, and Terms of
Service page. Then click on the Add Domain button and submit your website’s domain name without ‘“https://www.”. (If you have an authorized domain, then this may already be added by default). FYI: The domain you submit here must be a top-level domain, I.e. it should be a normal domain with a .com, .org, or other such cases. So a dev server domain such as “dev.website.com” will not be accepted.

**-Developer contact information** – Here you may use a personal e-mail to get Google notifications.

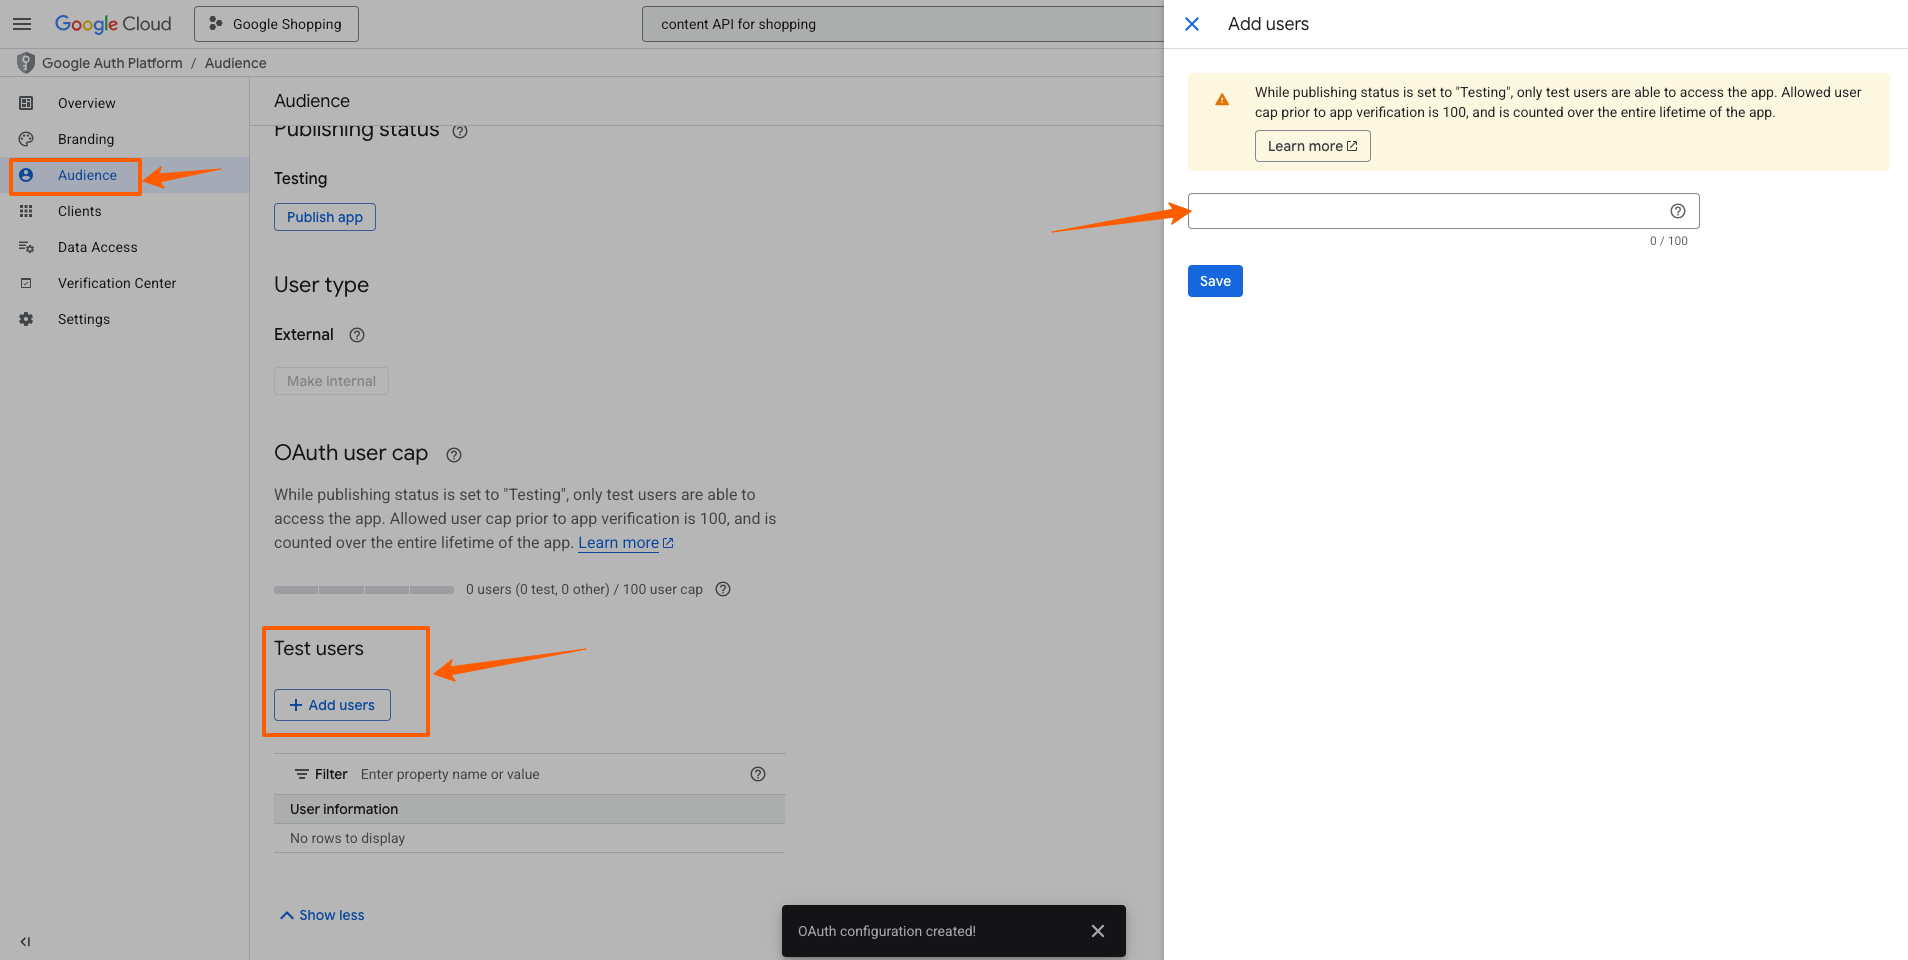
**9.** In the Audience Section, you can set up test users
 [![How To Auto-sync with Google Merchant Center 13](https://rextheme.com/wp-content/uploads/2025/11/130.png)](https://rextheme.com/wp-content/uploads/2025/11/130.png)

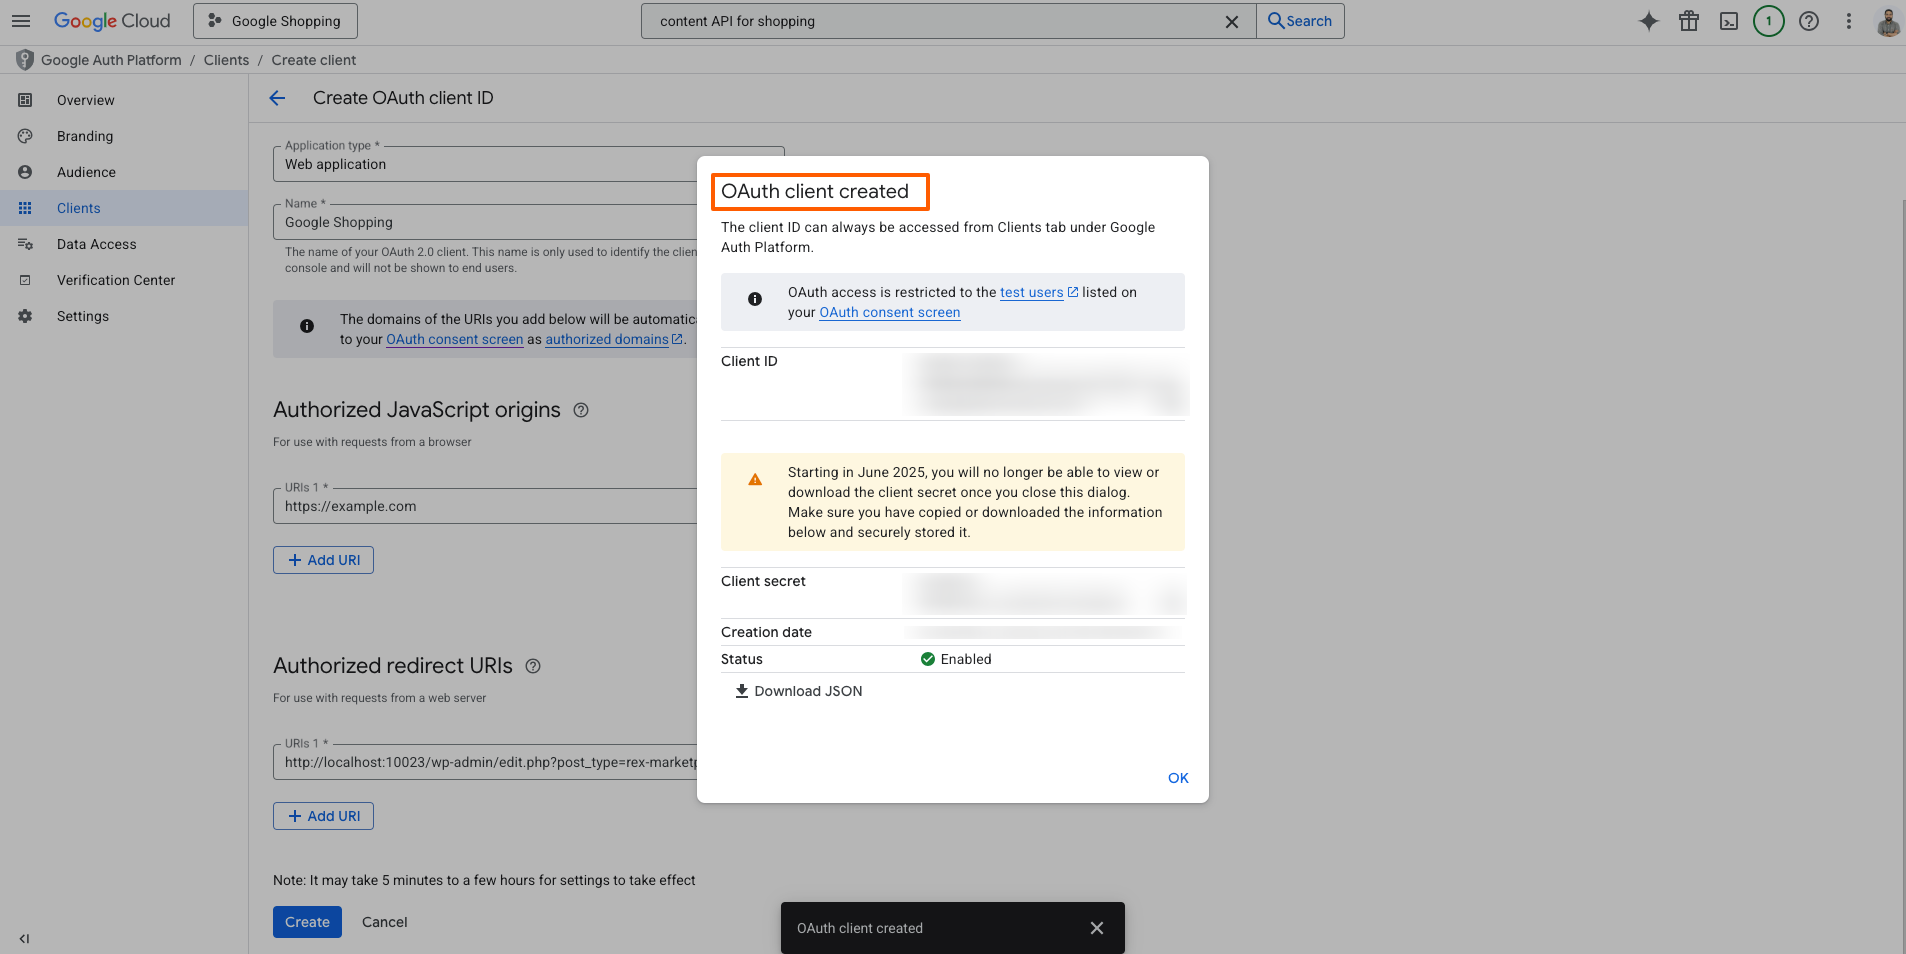
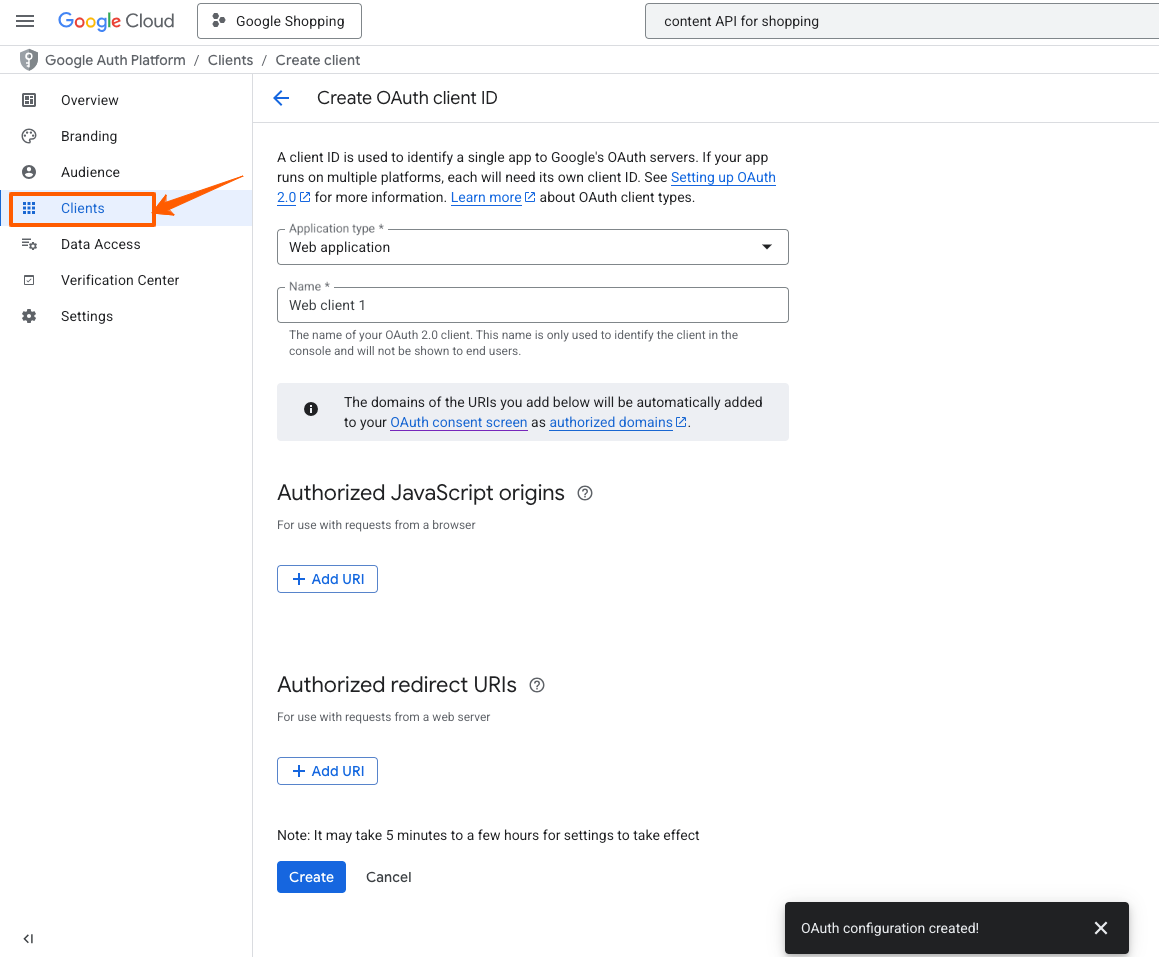
**10.** Now in the Client Section, you need to Create OAuth client ID
 [![How To Auto-sync with Google Merchant Center 14](https://rextheme.com/wp-content/uploads/2025/11/150.png)](https://rextheme.com/wp-content/uploads/2025/11/150.png)

Choose Application type Name

Put in the Authorized JavaScript origins

Put in the Authorized redirect URIs

For Marketplace Auto Sync, you can find the Authorized redirect URIs from the Authentication Tab. Copy the paste Authorized redirect URIs

 [![How To Auto-sync with Google Merchant Center 15](https://rextheme.com/wp-content/uploads/2025/11/190.png)](https://rextheme.com/wp-content/uploads/2025/11/190.png)

**11.** Click on Create

You will find your:
**Client ID
Client secret**

 [![How To Auto-sync with Google Merchant Center 16](https://rextheme.com/wp-content/uploads/2025/11/200.png)](https://rextheme.com/wp-content/uploads/2025/11/200.png)

And you can find your **Merchant ID** from [Google Merchant Center Account](https://merchants.google.com/mc/overview?a=5627533182)

 [![How To Auto-sync with Google Merchant Center 17](https://rextheme.com/wp-content/uploads/2025/11/300.png)](https://rextheme.com/wp-content/uploads/2025/11/300.png)

**12.** Now it will show you an overview of your App and that it is still under testing mode. Here, under Publishing Status, click on **Publish App**.

 [![How To Auto-sync with Google Merchant Center 18](https://rextheme.com/wp-content/uploads/2025/11/310.png)](https://rextheme.com/wp-content/uploads/2025/11/310.png)

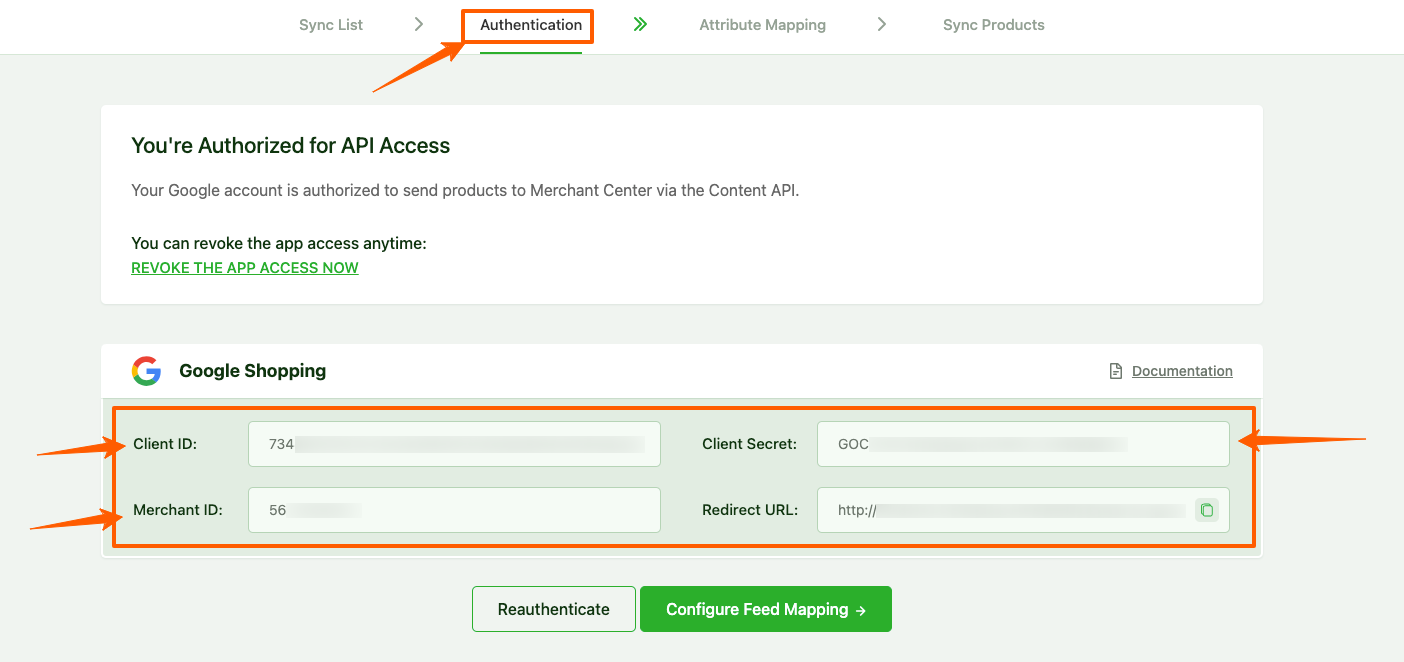
**13.** Then Go back to **Market Place Autosync** open and paste **Client ID**, **Client Secret**, and the **Merchant Id** in the respective fields in the Authentication Tab, like shown in the screenshot below:
 [![How To Auto-sync with Google Merchant Center 19](https://rextheme.com/wp-content/uploads/2025/11/1-1.png)](https://rextheme.com/wp-content/uploads/2025/11/1-1.png)

That’s is, now you have set up your first auto sync.