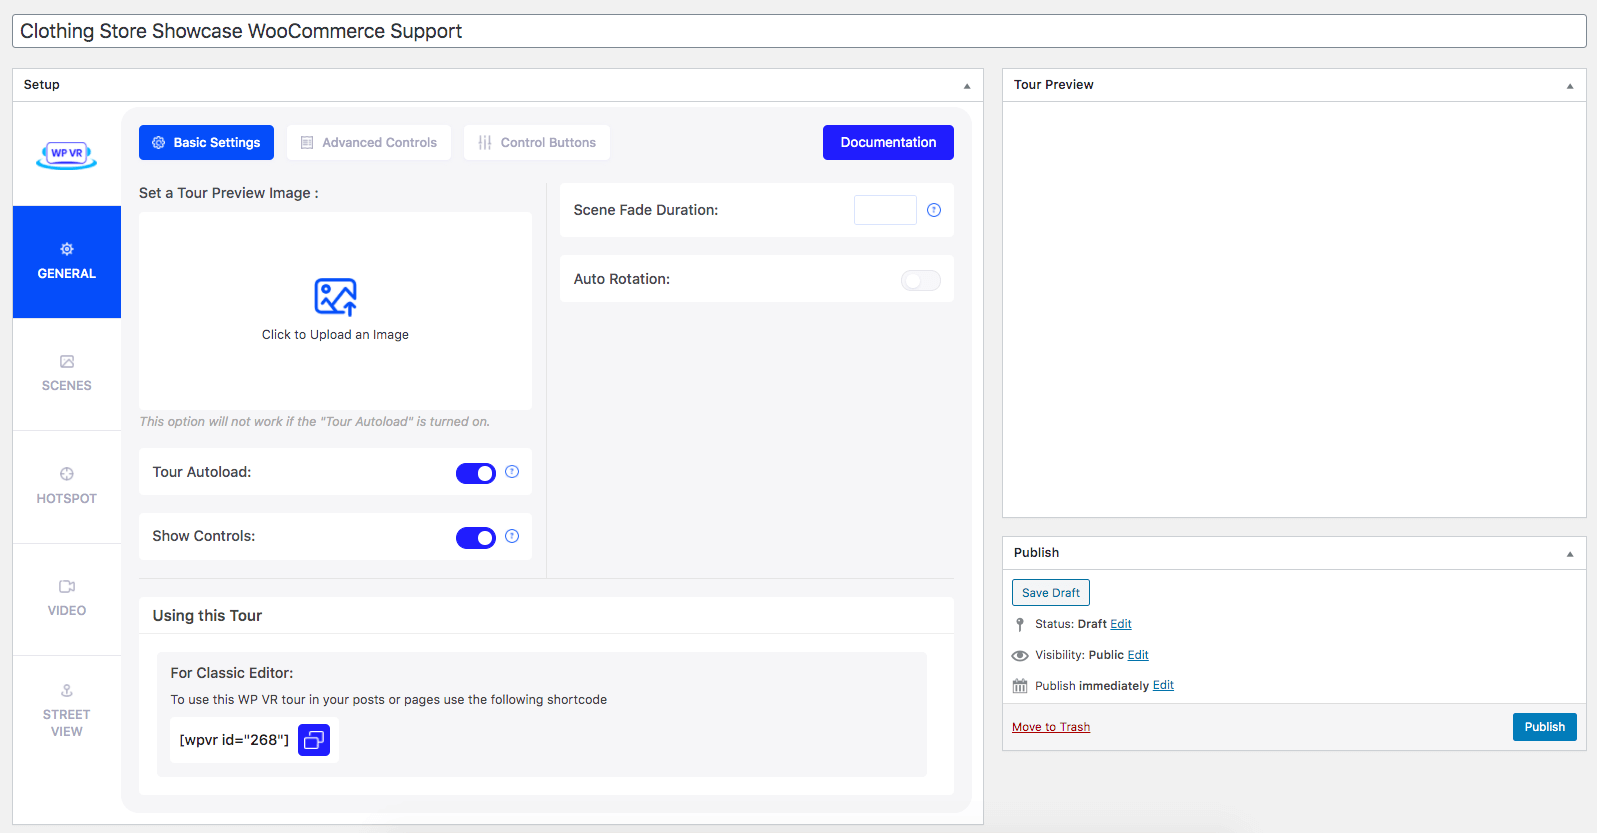
If you own a departmental store or maybe a clothing showroom, then you can greatly benefit from a virtual tour on your site.
But what if a person taking the virtual tour could order a product right away from within the tour?
Well, it’s easily possible now.
With the latest WP VR Addon for WooCommerce, you can now allow people to preview a product and add products to the cart, directly from within your the virtual tour of your WooCommerce store.
This means that a buyer will get a real-life shopping experience even while sitting at home.
It’s really simple. Let me show you how you can do that.
Adding WooCommerce Products on A Virtual Tour #
First, create a virtual tour of your showroom or store on your WooCommerce site.
**Make sure you have WPVR, WPVR Pro, and WPVR WooCommerce Add-on installed and activated on your site.
Now, follow these steps to view WooCommerce products on a virtual tour.
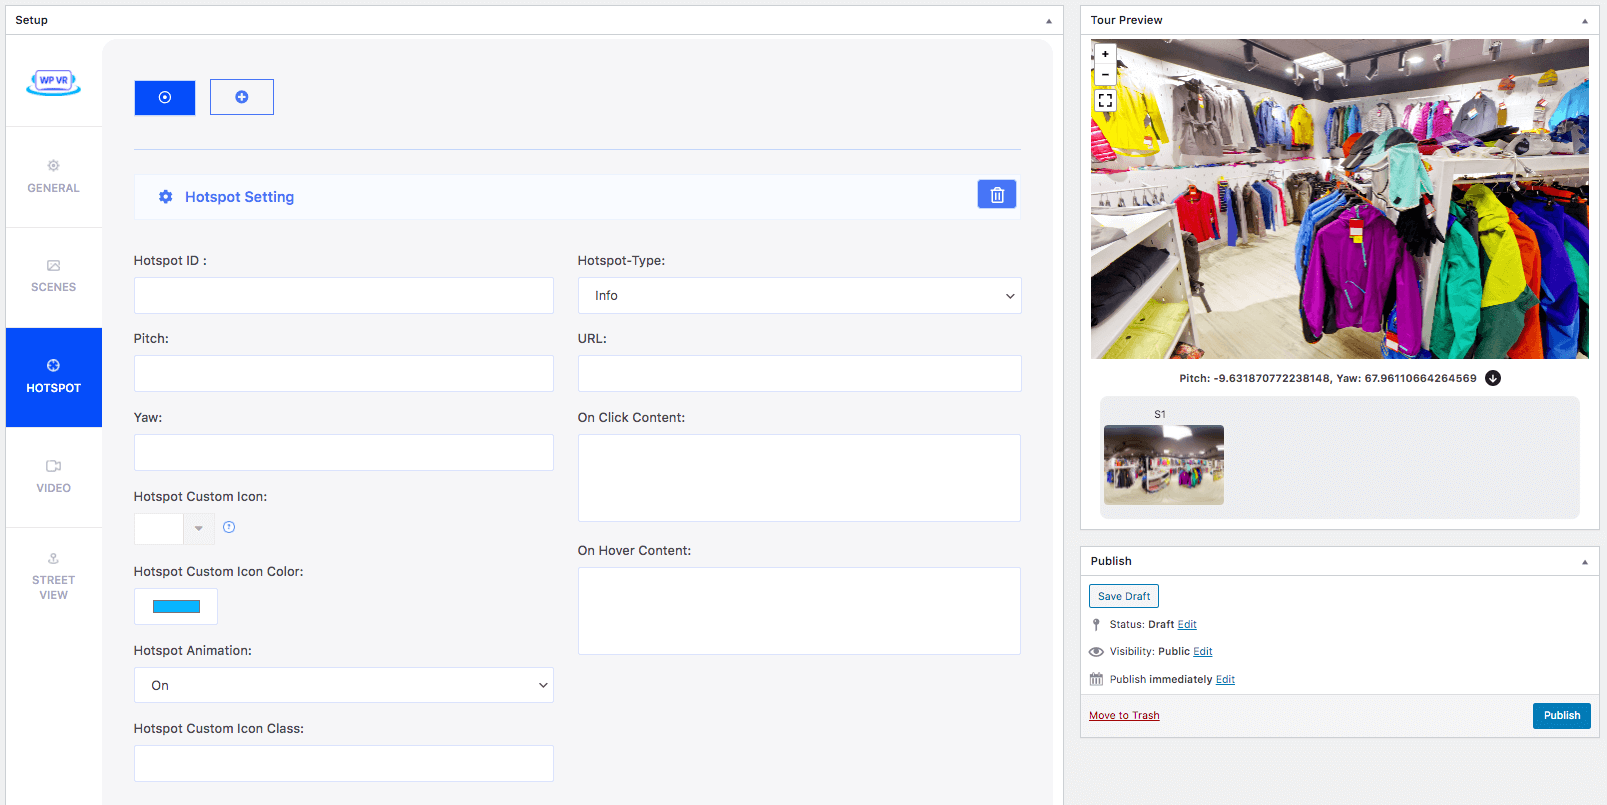
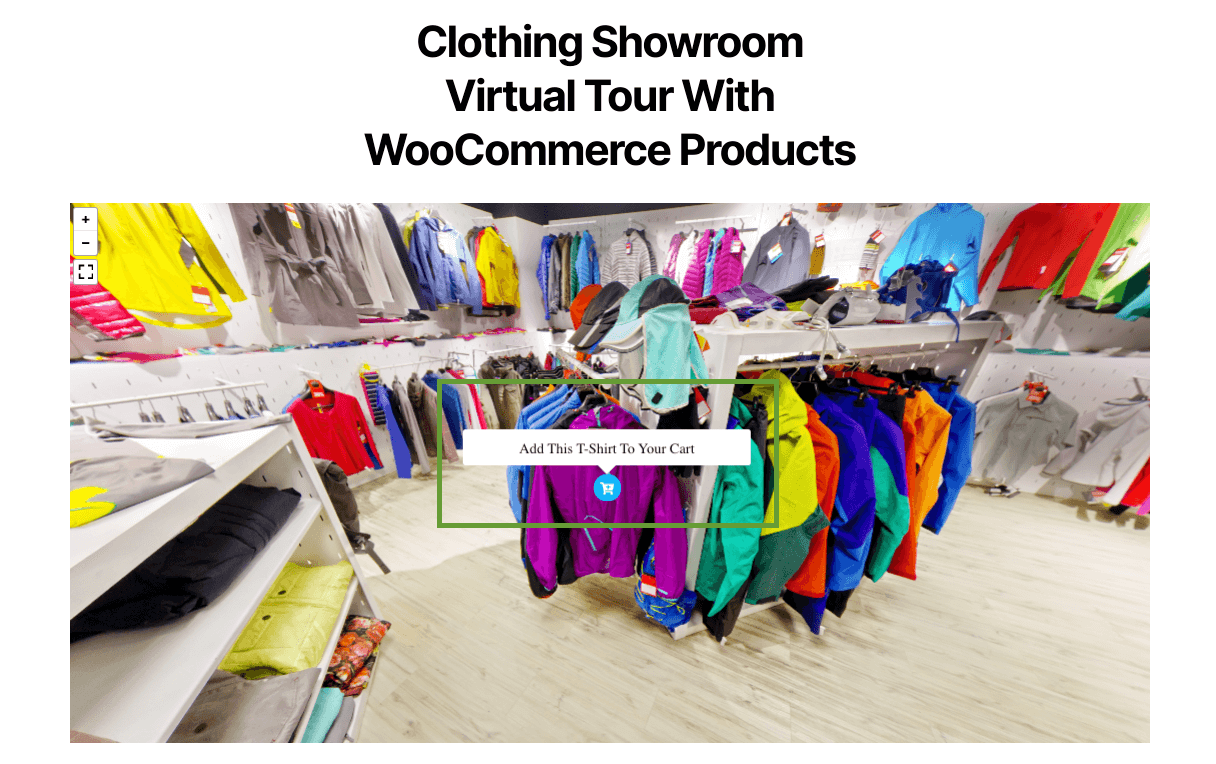
1. Edit your virtual tour and select the scene where you want to add WooCommerce products.
2. Create a new hotspot on top of the product where you want people to click to preview it.
3. Choose the hotspot type as WooCommerce Product
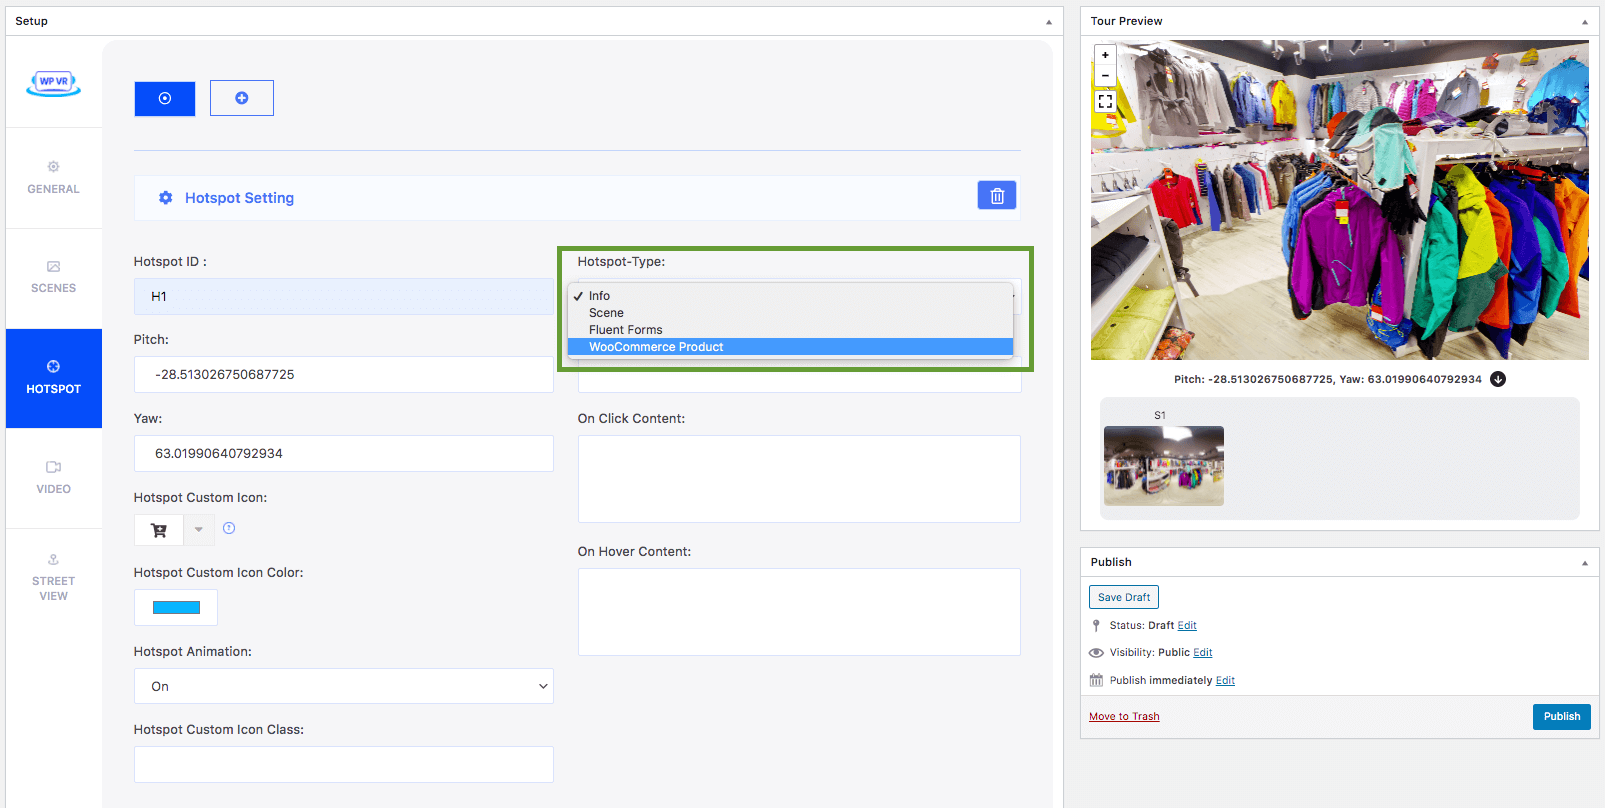
You’ll find 2 options for it.
- Product
- On Hover Content
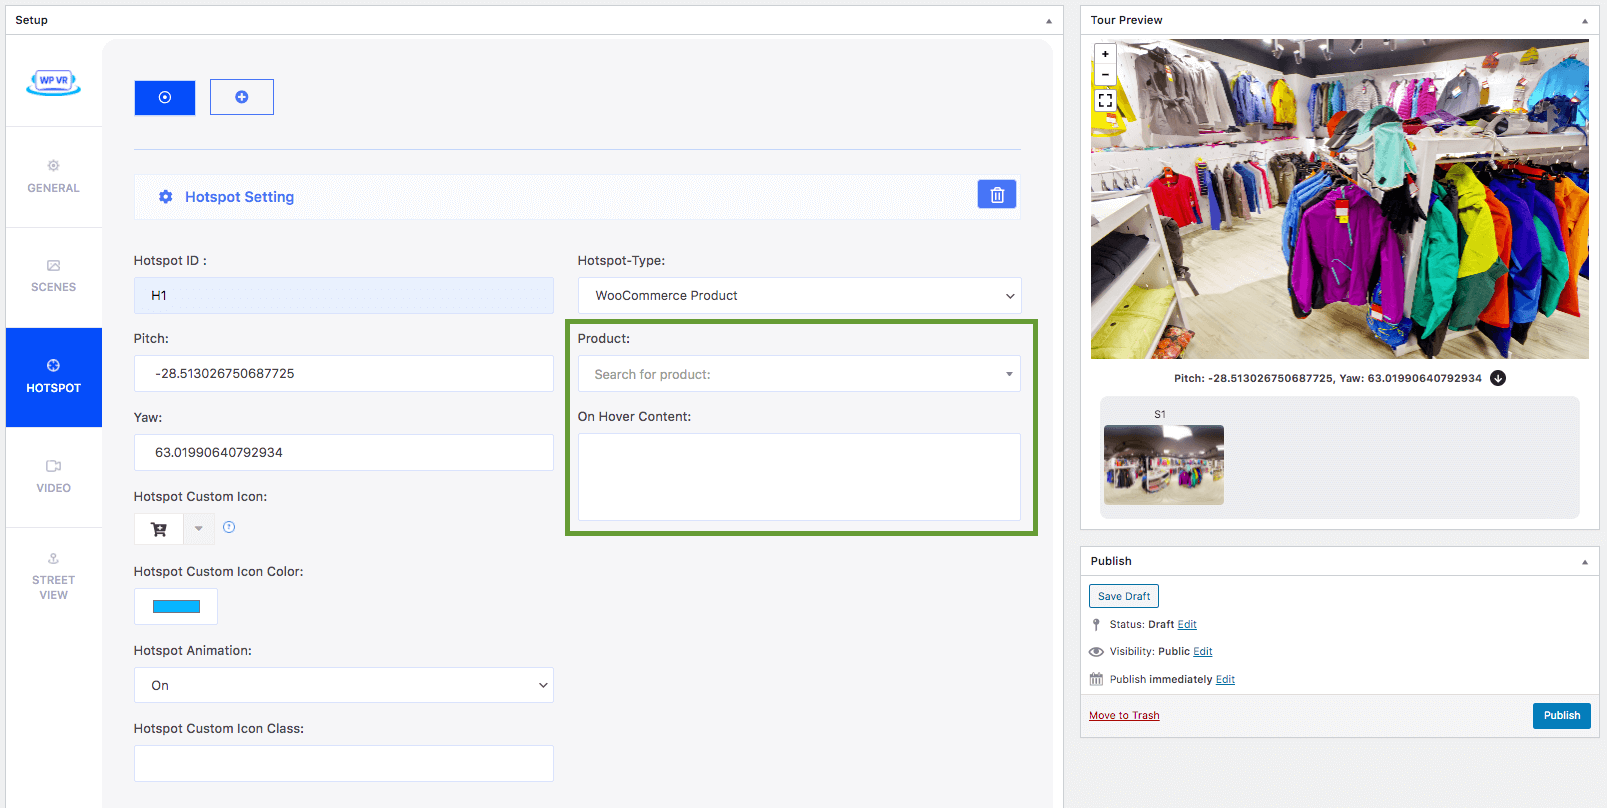
4. Type the name of your product on the Product field and you will find it in the drop-down suggestions.
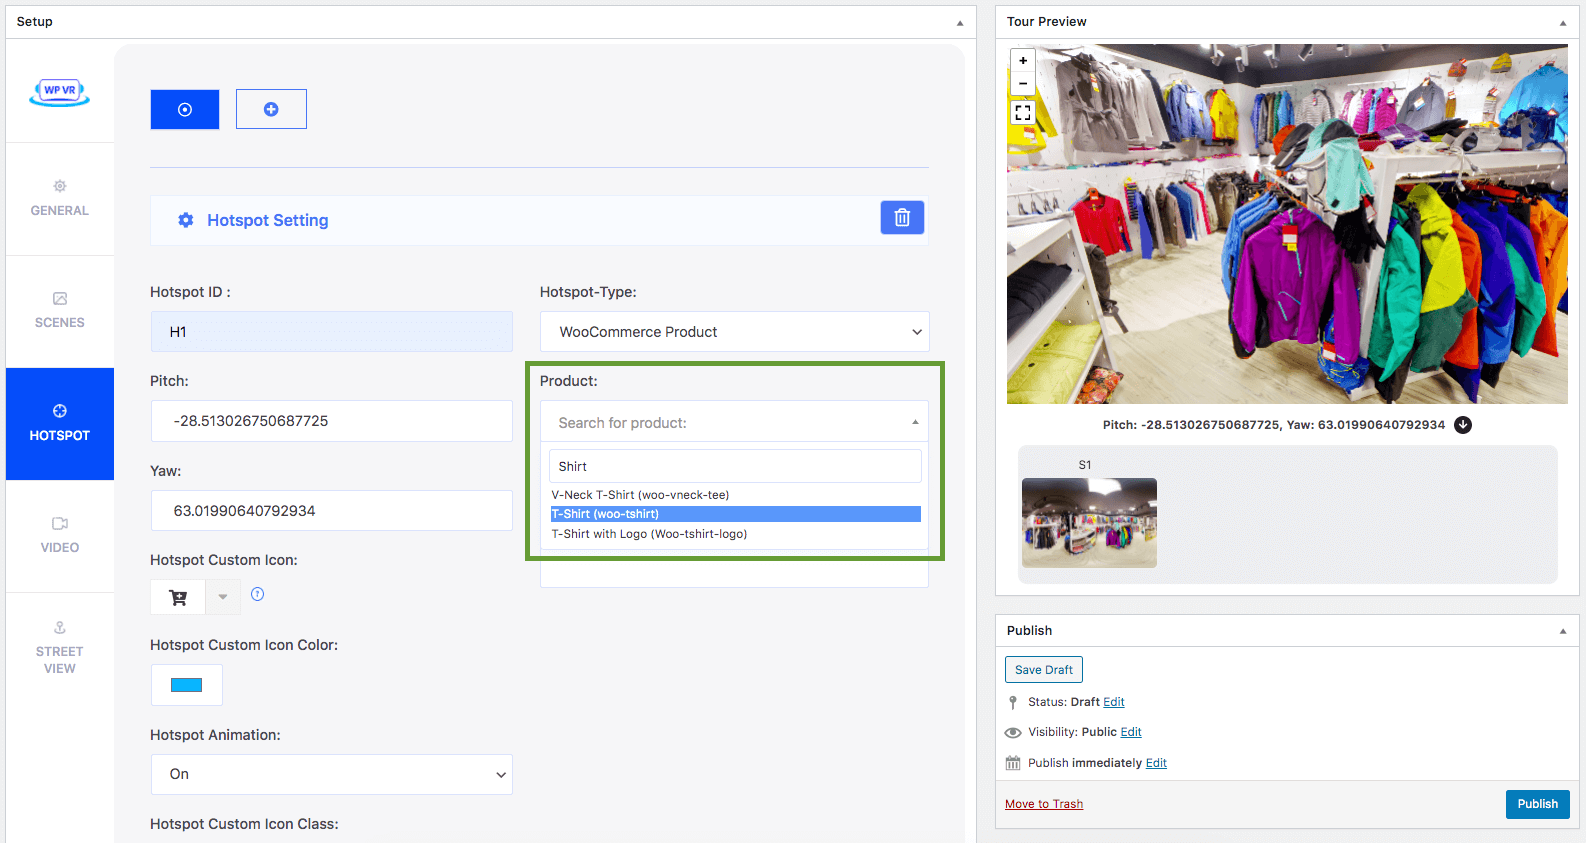
Once you choose your desired product, it will be set for this hotspot.
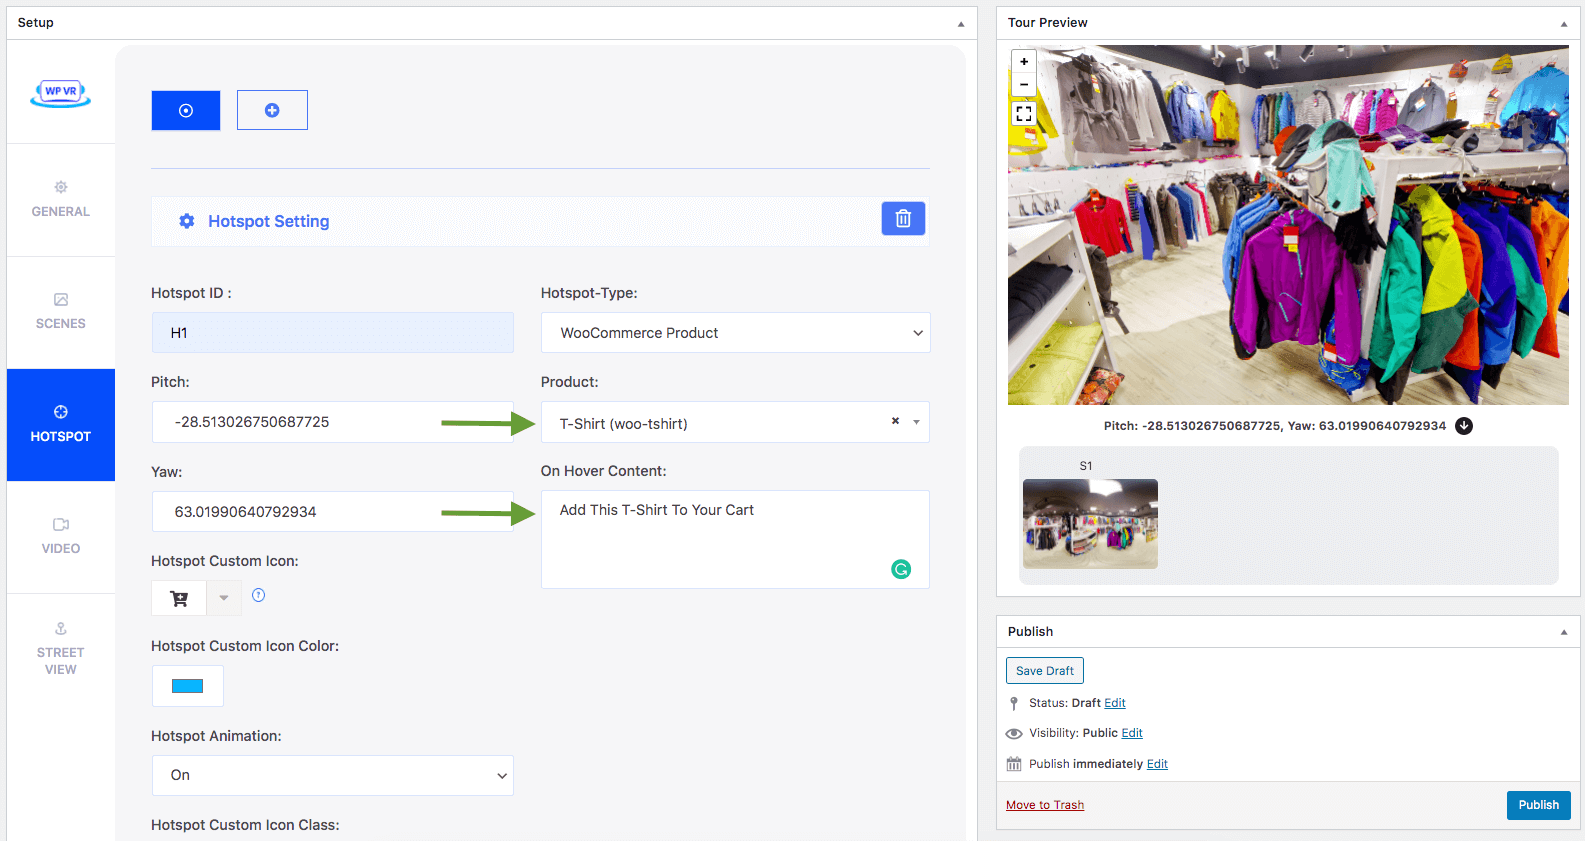
You may add an on-hover text if you want to.
5. Update/Publish the tour and preview it.
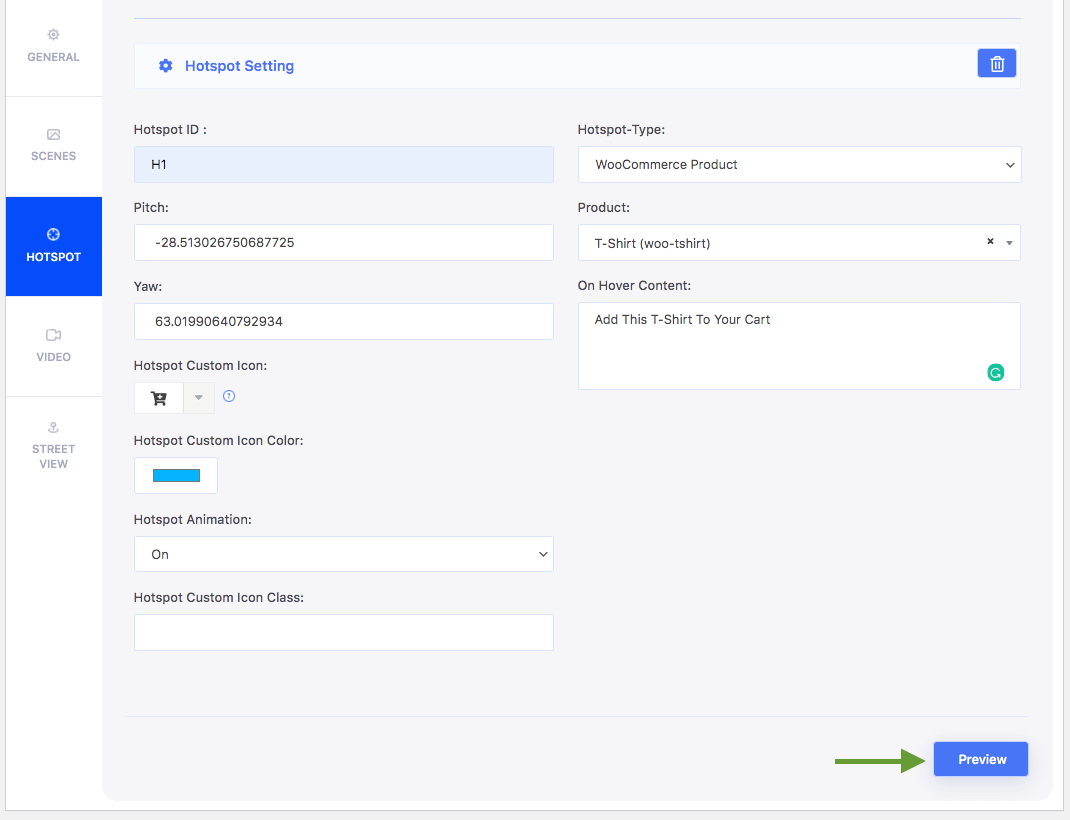
**You need to Update/Publish the tour to be able to see this feature take effect on the Preview.
6. Click on the hotspot for which you selected a product.
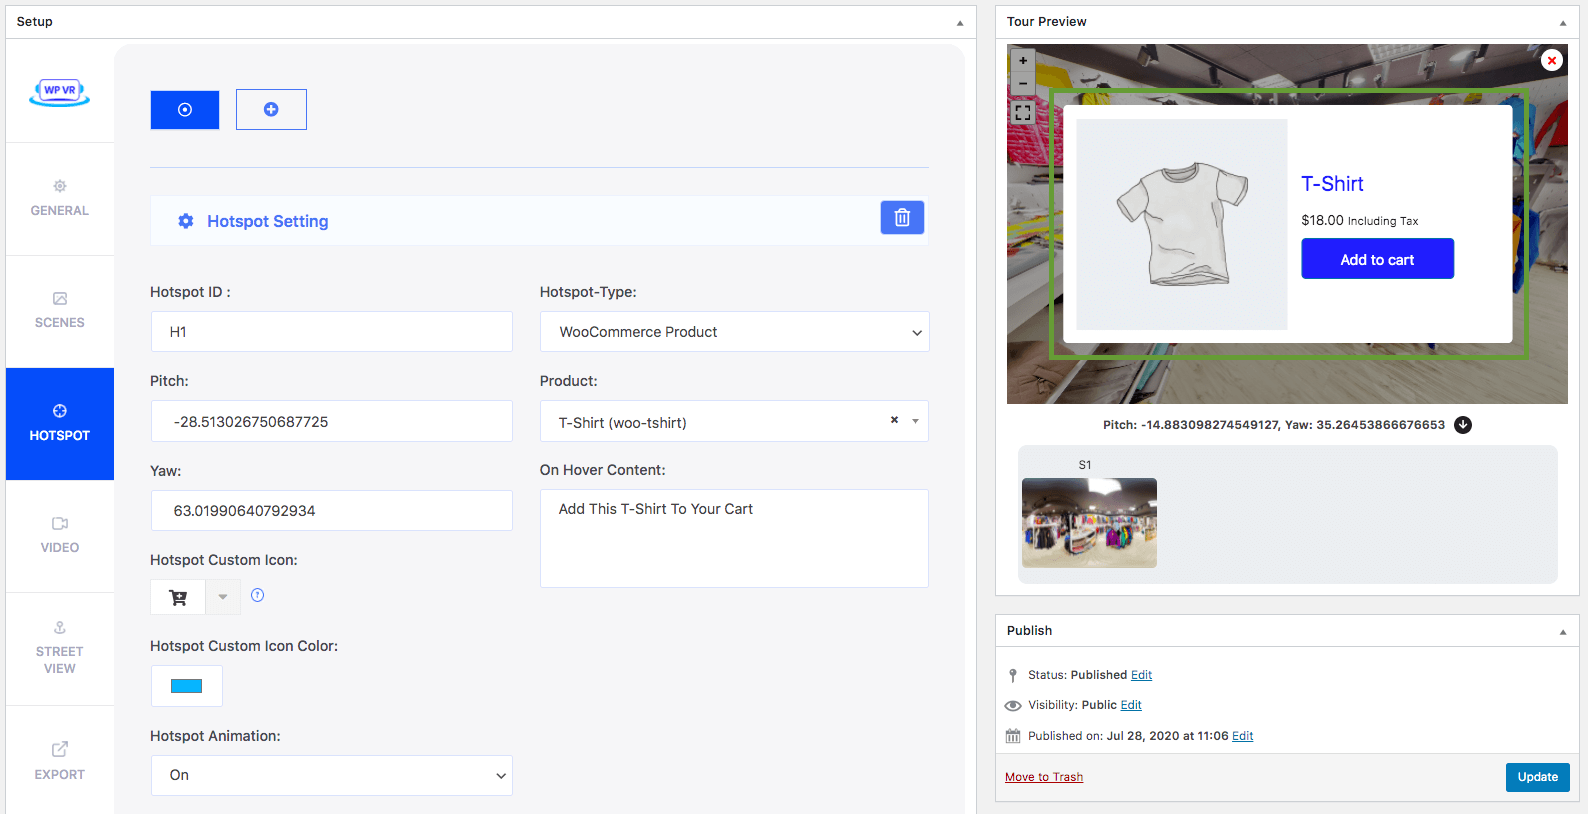
A product preview will appear with an Add To Cart Button.
That’s how you connect a product to a hotspot. You can then use custom hotspot icons to customize it further.
You can do the same for other products on your tour. The next thing to do is to embed it on your site.
Embed the tour on your site and see how it works #
1. Collect the tour ID and embed the tour on a page or a post, then preview it.
(Click here to learn how to embed a tour)
2. The hotspot will appear on the product. Click on it to get a product preview.
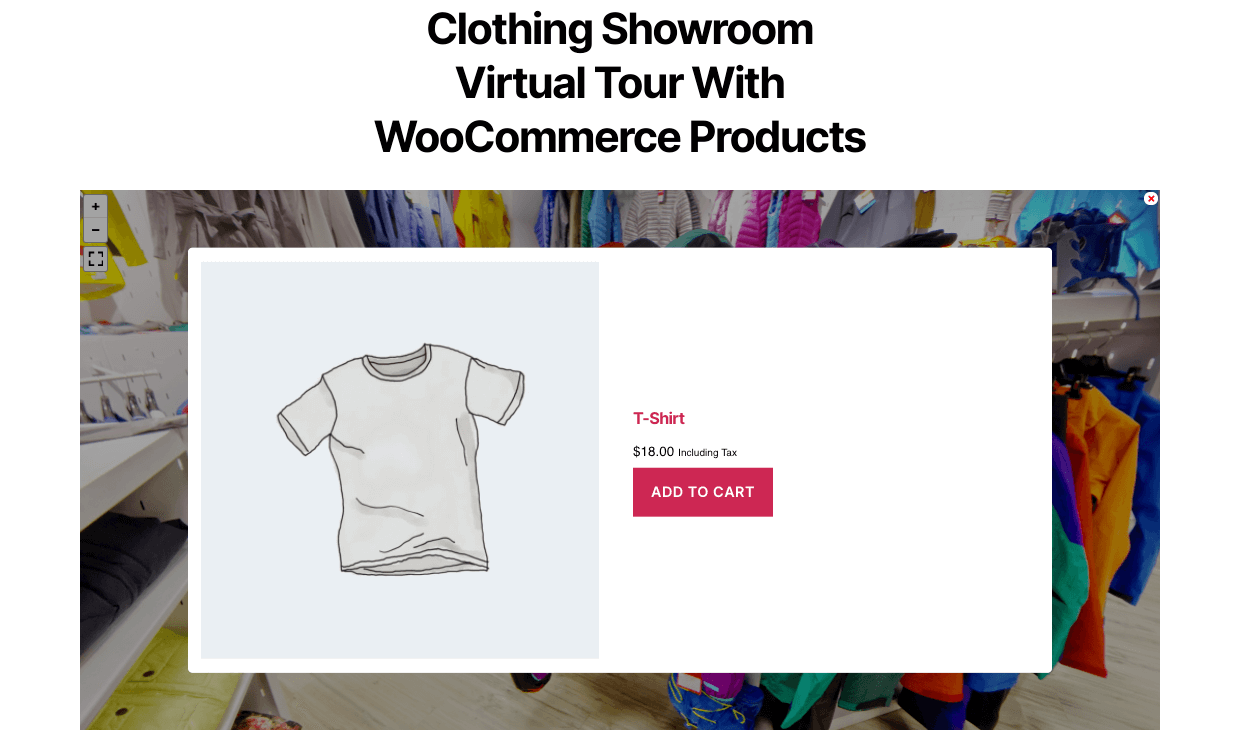
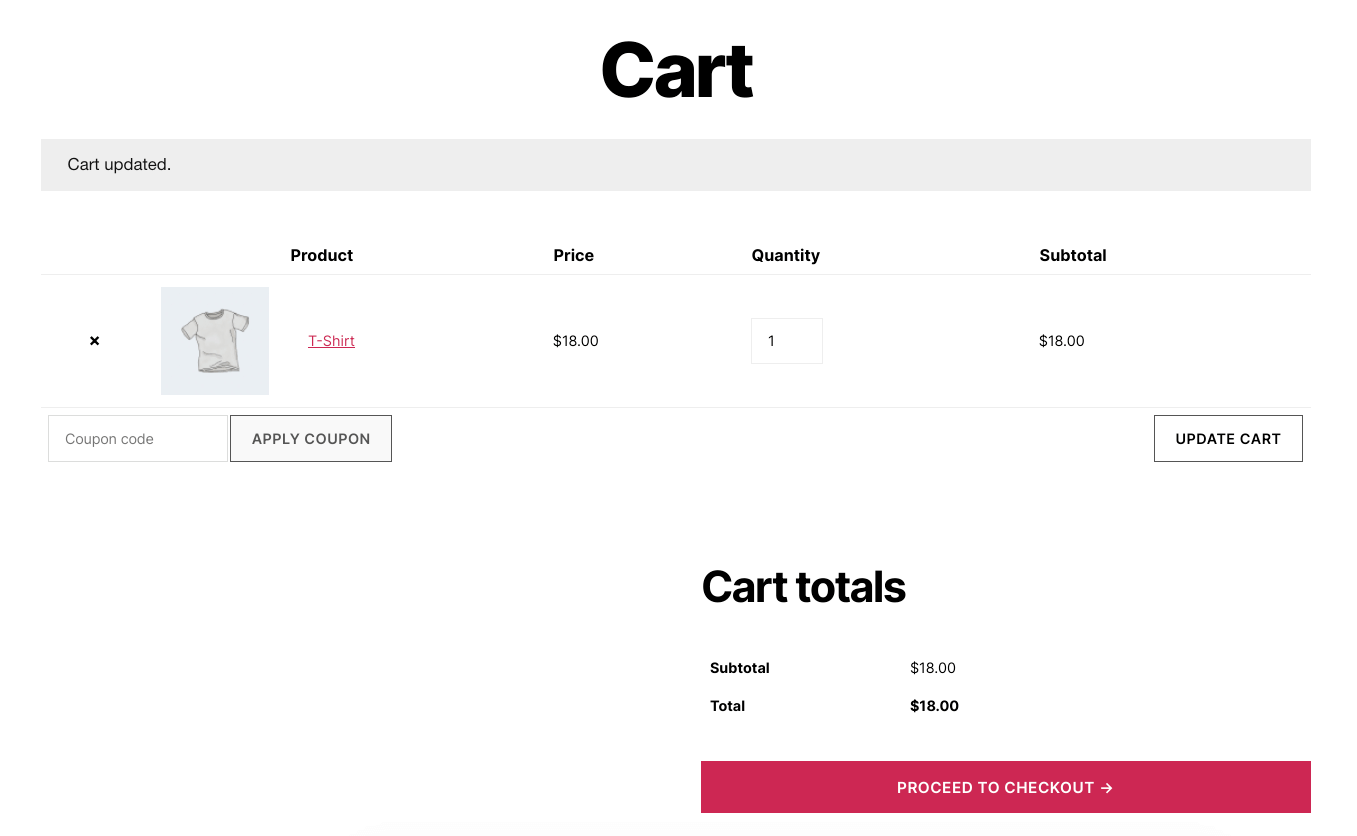
3. Click on the Add To Cart button and the product will be added to the cart.
4. Then a View Cart button will appear, which can be clicked to take the buyer to the cart page.
That’s it. Now you have a virtual tour on your website where people can get a real-life shopping experience remotely.