Once you have added scene(s) to your virtual tour, you can then add hotspots to make the tour more engaging.
In this WP VR lesson, you will get a step-by-step guide on how you can add hotspots to a scene.
Add Hotspots To A Scene #
Volg de onderstaande stappen.
1. Select the scene on which you want to add hotspots.
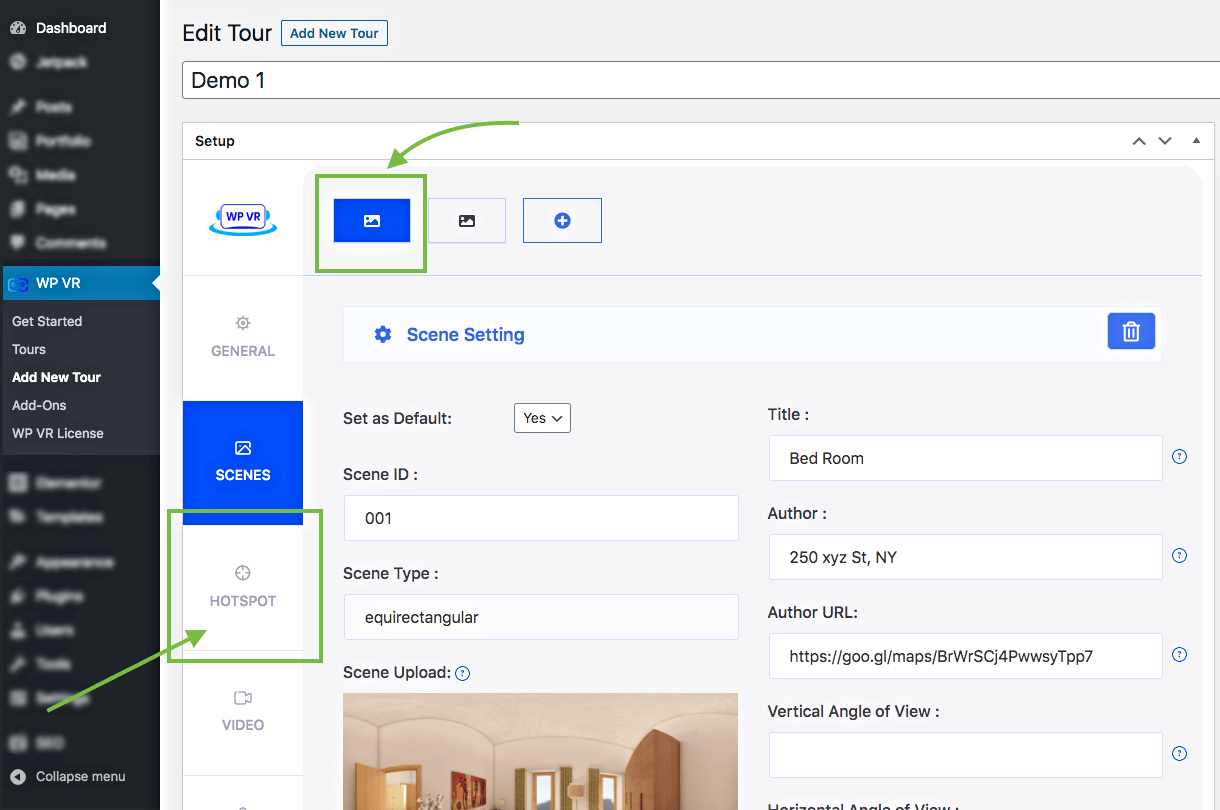
2. Click on the Hotspots tab on the left.
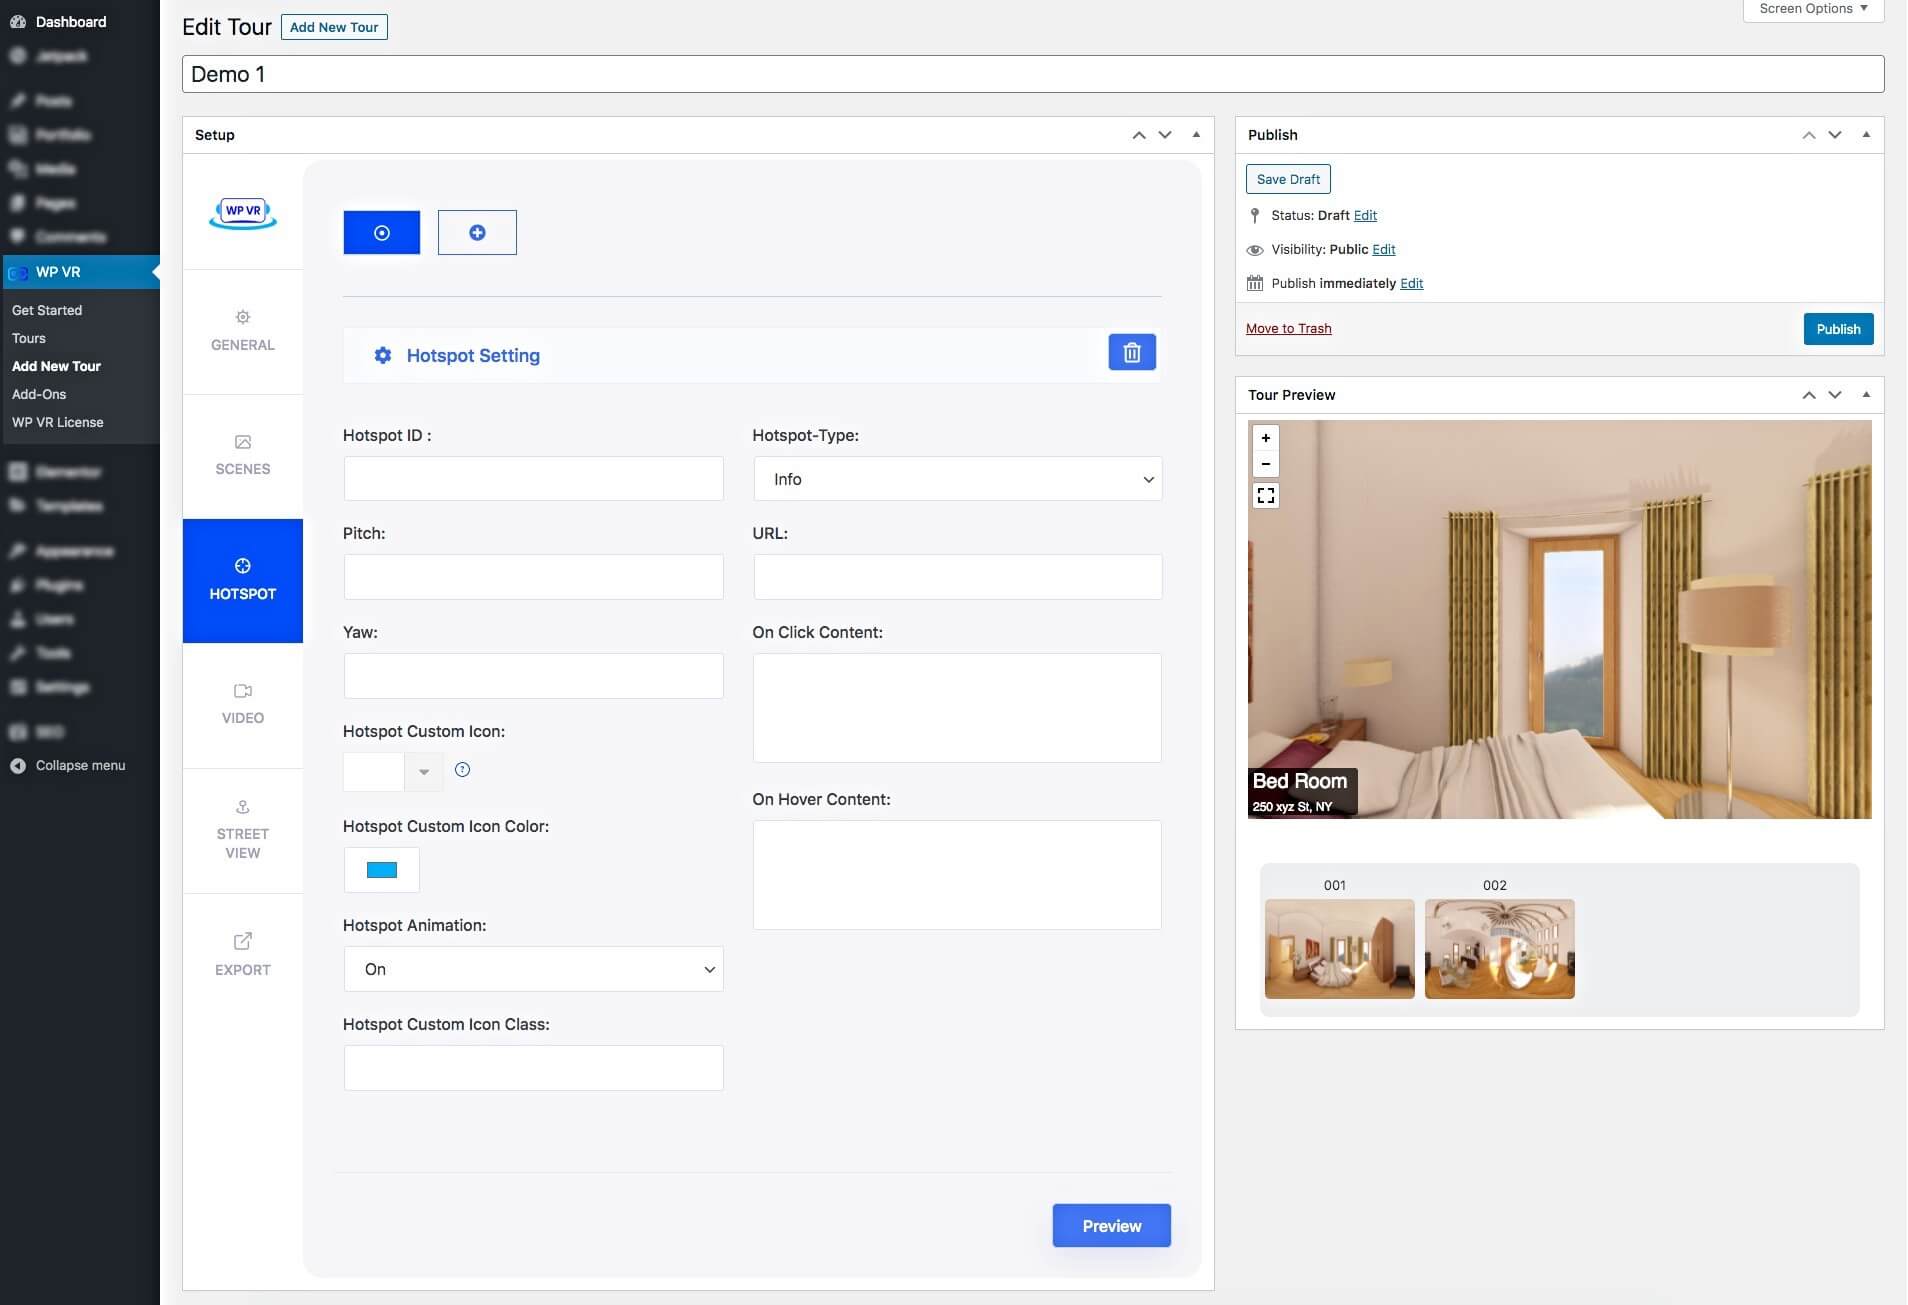
This tab will show you hotspots for the scene that you selected.
3. Now on the Tour Preview, click on the spot where you want to place this hotspot.
4. You will see below the Tour Preview, the coordinates of Pitch and Yaw will change. These coordinates indicate the spot where you clicked.
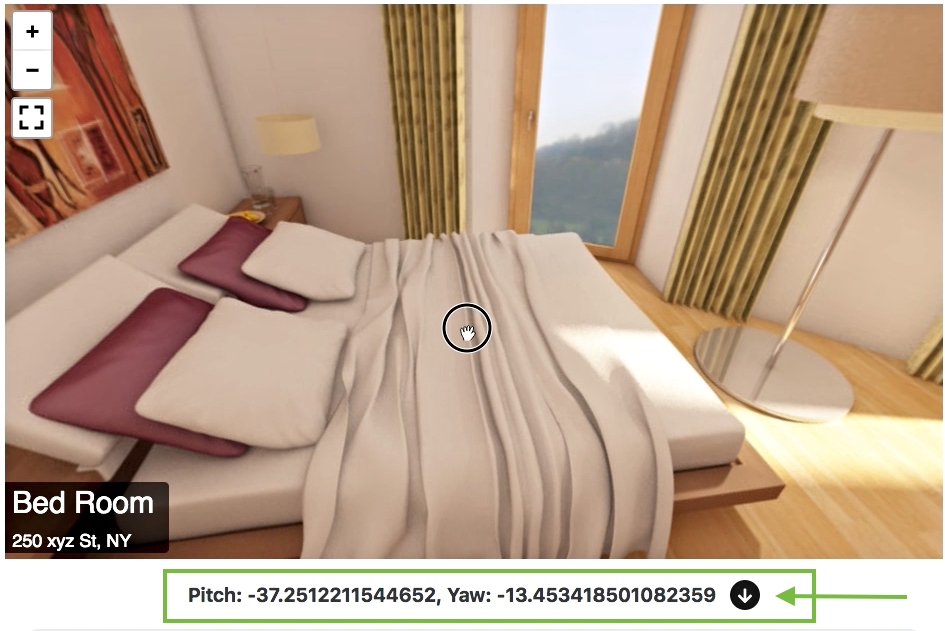
5. Now, click on the small button beside the Pitch and Yaw.
You will see, the coordinates have been placed on the Pitch and Yaw fields below the Hotspot ID.

6. Now click on Preview and on the tour preview, you will see the hotspot is placed in the spot you wanted.
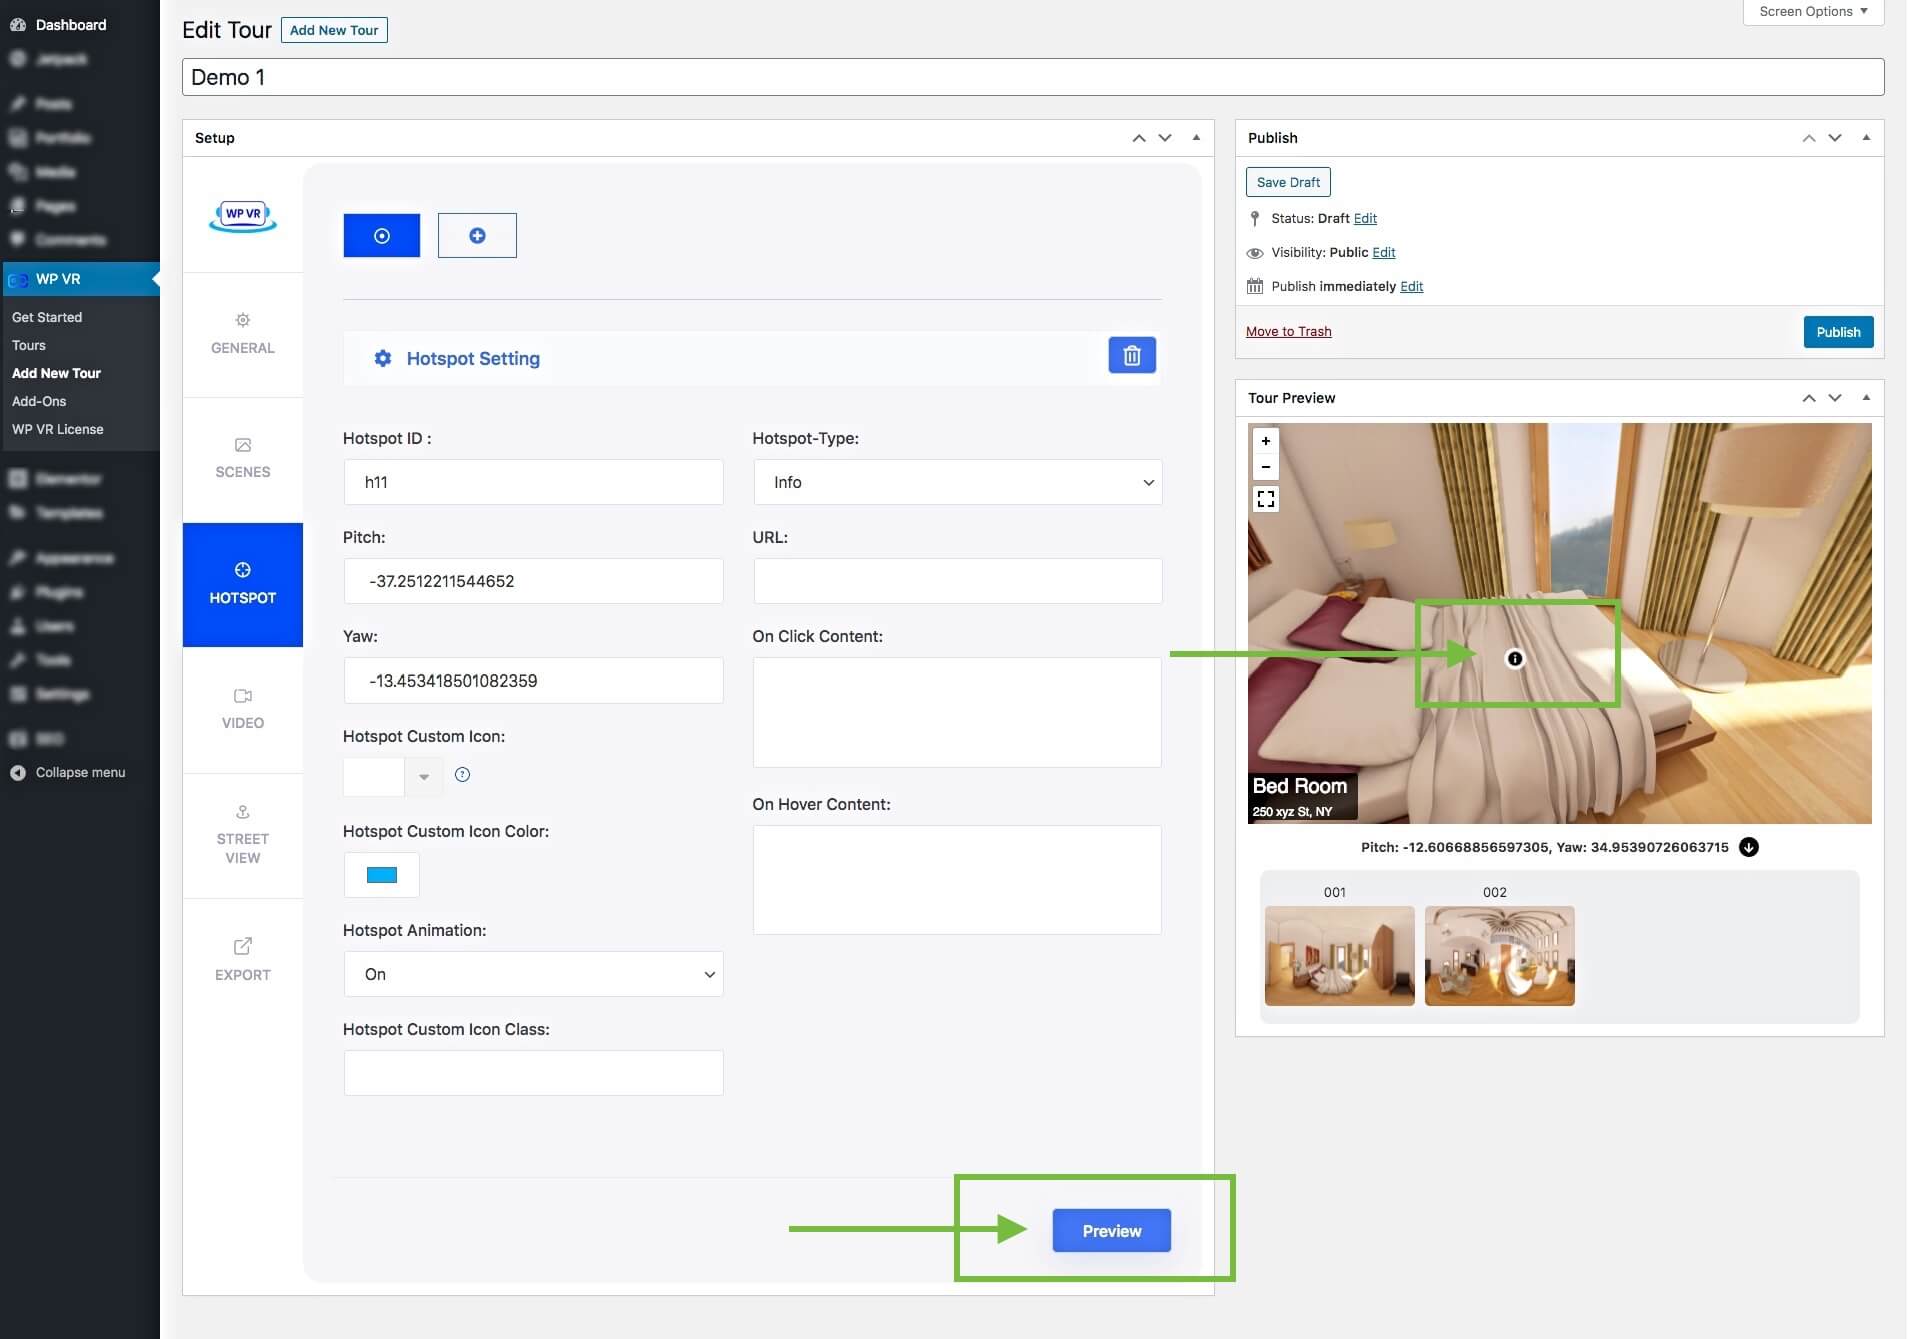

That’s it. You have successfully added a hotspot to the scene.
7. If you want to add another hotspot to this scene, you can simply click on the (+) plus button above to add a blank hotspot page.
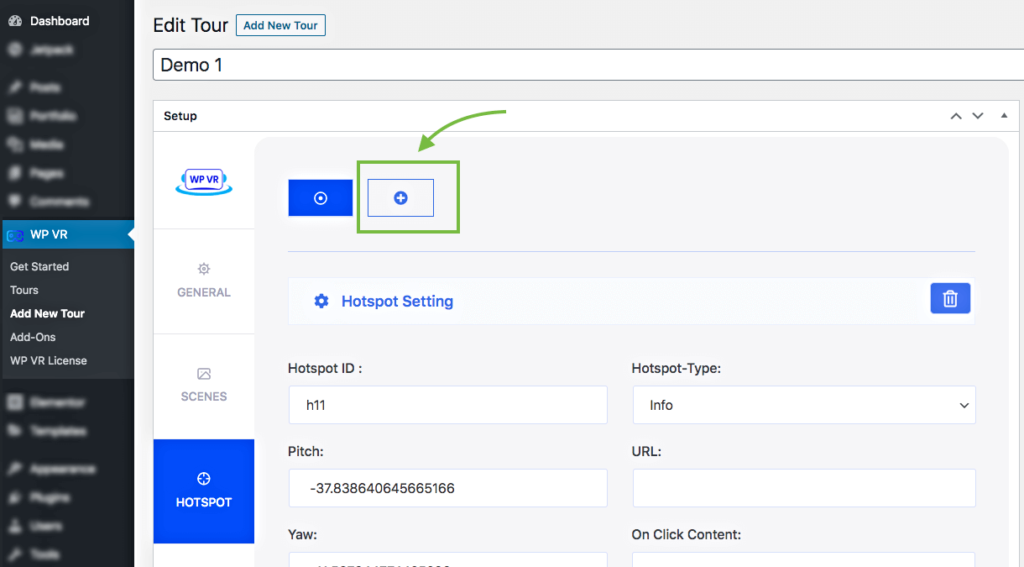
9. Then follow the steps above from 3 to 7 and a second hotspot will be added.
**In the next lessons, you will learn about how you can use this hotspot to display images, text, or videos, or how you can connect multiple scenes.
Adding Hotspots To A Second Scene #
In the steps above, I showed you how you can add hotspots to a scene.
To add hotspots to a second scene, follow the steps below.
1. Go back to the Scenes tab and choose the second scene.
2. Now, go back to the Hotspots tab, and now, here you will find the hotspots for the second scene.
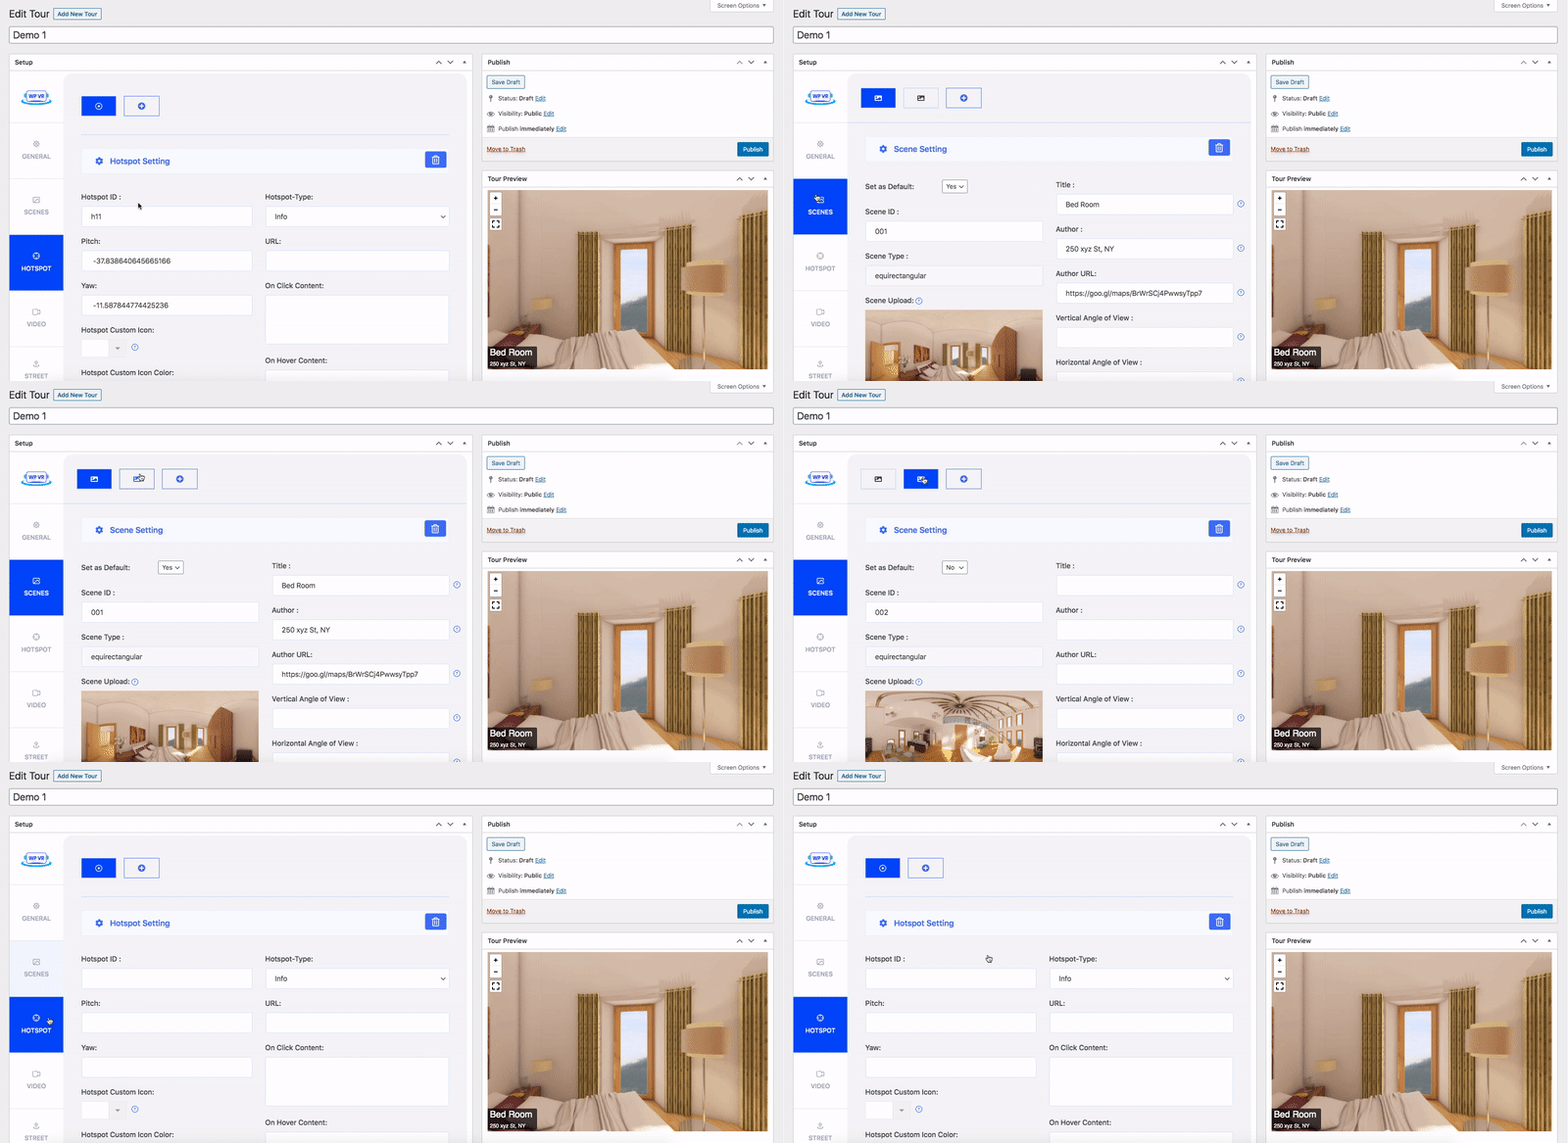
So basically, the Hotspots tab will display the hotspots for the scene you selected earlier.
3. Then you can follow the same steps as explained in the previous section of this lesson to Add hotspots to a scene.
In the next lessons, you will learn about how you can use this hotspot to display images, text, or videos, or how you can connect multiple scenes.