
The Inquiry Form settings allow you to decide how customers will contact you when purchasing is disabled. You can choose where the form appears, which form to use, and how it is displayed on the product page. Follow this guide to configure everything step by step.
1. Go to WordPress Dashboard > Catalog Mode > Settings > Inquiry Form
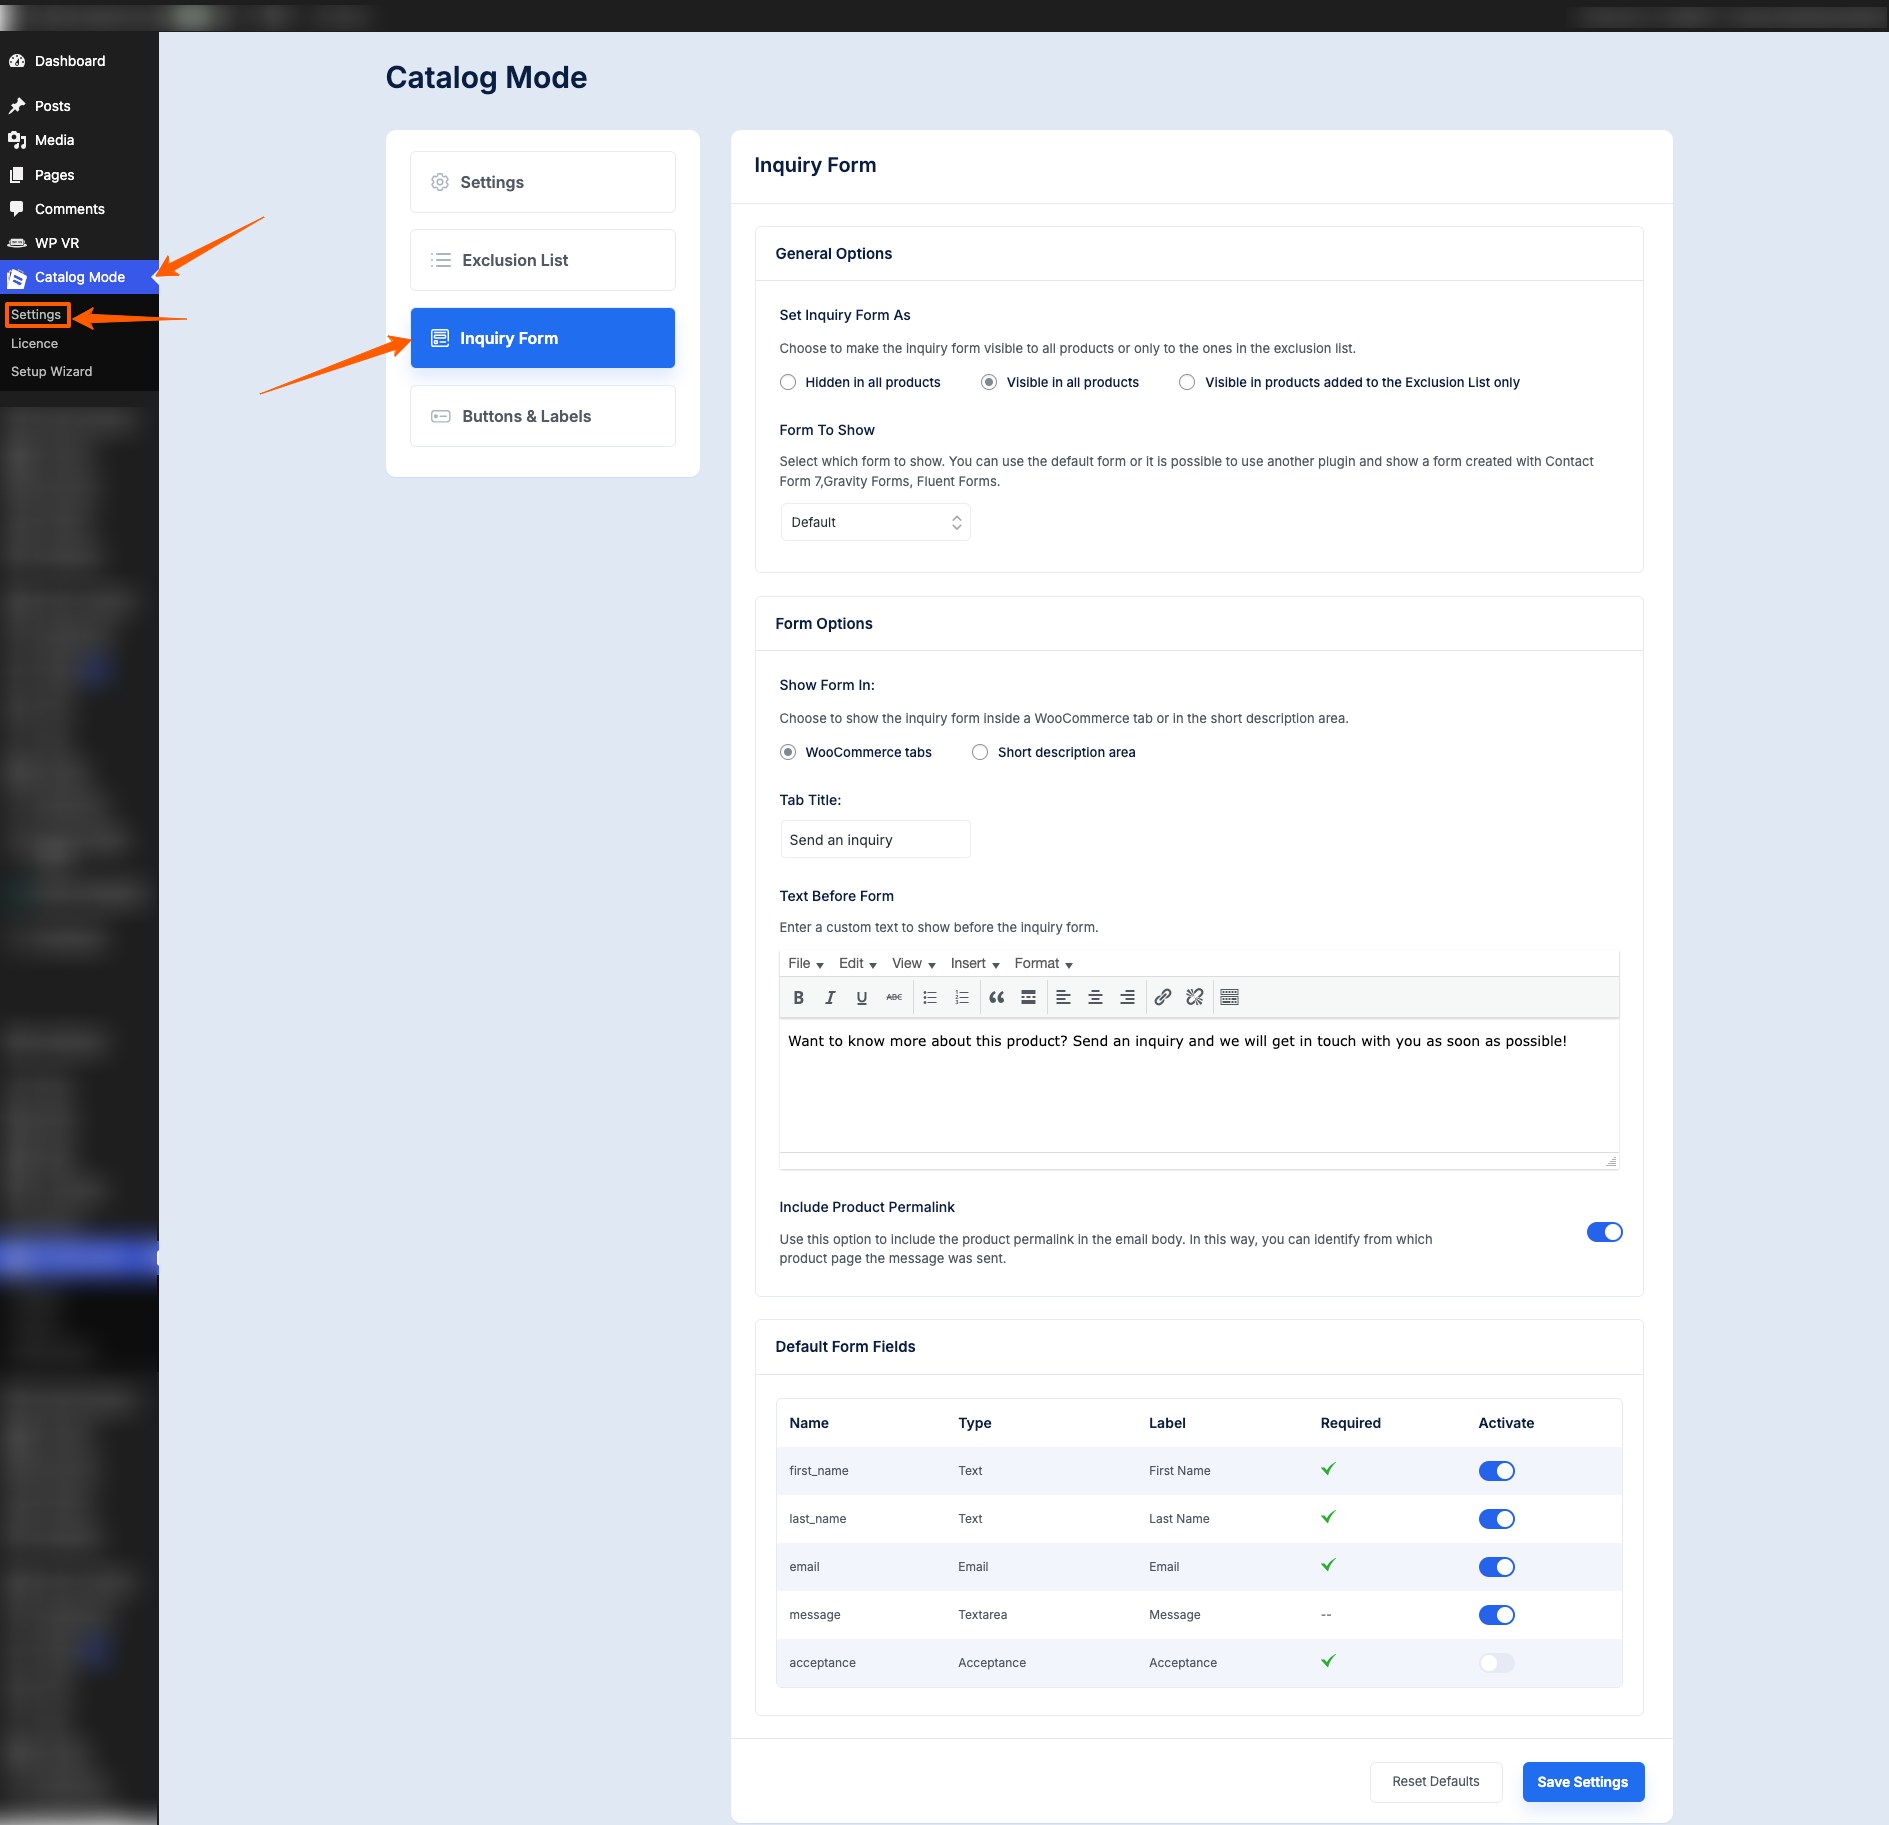
Inquiry Form #
General Options
1. Set inquiry form as
Choose where the inquiry form should appear on your product pages. You can hide it completely, show it on every product, or show it only for items in your exclusion list.
Options:
- Hidden on All Products
- Visible on All Products
- Visible in products added to the Exclusion List only
2. Form to show
Choose which form to display on the product page. You can use the built-in default inquiry form or select a form created with supported plugins such as Contact Form 7, Gravity Forms, or Fluent Forms.
Options:
- Default
- Any form from supported plugins
Supported Plugins are:
- Contact Form 7
- WPForms
- Ninja Forms
- Forminator
- Vloeiende vormen
- Formidable Forms
- Gravity Forms
Form Options
1. Show form in:
Decide where the inquiry form will appear on the product page. You can display it inside the WooCommerce product tabs or place it in the short description area.
i. WooCommerce Tab
If you choose to place the form in the WooCommerce tabs, you can set a custom name for the tab:
- Tab Title
ii. Short Description Area
If you choose the short description placement, you can select the exact form position:
- After Price
- After Short Description
- After “Add to Cart” Button
You can also choose how the form will appear on the page:
- Classic
- Hidden in Toggle
If you choose Classic, you can set the Tab Title here as well.
2. Text before form
Add any message or short text that should appear above the inquiry form on the product page. This helps guide your customer before they submit their inquiry.
3. Include product Permalink
If enabled, the email sent from the inquiry form will automatically include the product permalink. This makes it easy to identify the exact product page the customer submitted the form from.
4. Default form fields
Here you can review and edit the fields included in the default inquiry form. These fields appear when the default form option is selected.
Once you have configured the inquiry form settings, the form will appear exactly as you set it on your product pages. This allows you to collect customer inquiries efficiently while keeping full control over placement, visibility, and content. That’s how easy it is!