This guide will teach you how to use the custom filter to generate product feeds with your desired products only using Product Feed Manager WooCommerce.
By default, when you create a new feed, no filters are applied. It is set up to include All Published Products.
However, you might wish to include only specific products in the feed. In such cases, you can use a Custom Filter.
Using Custom Filter #
Follow the steps below to use Custom Filter properly.
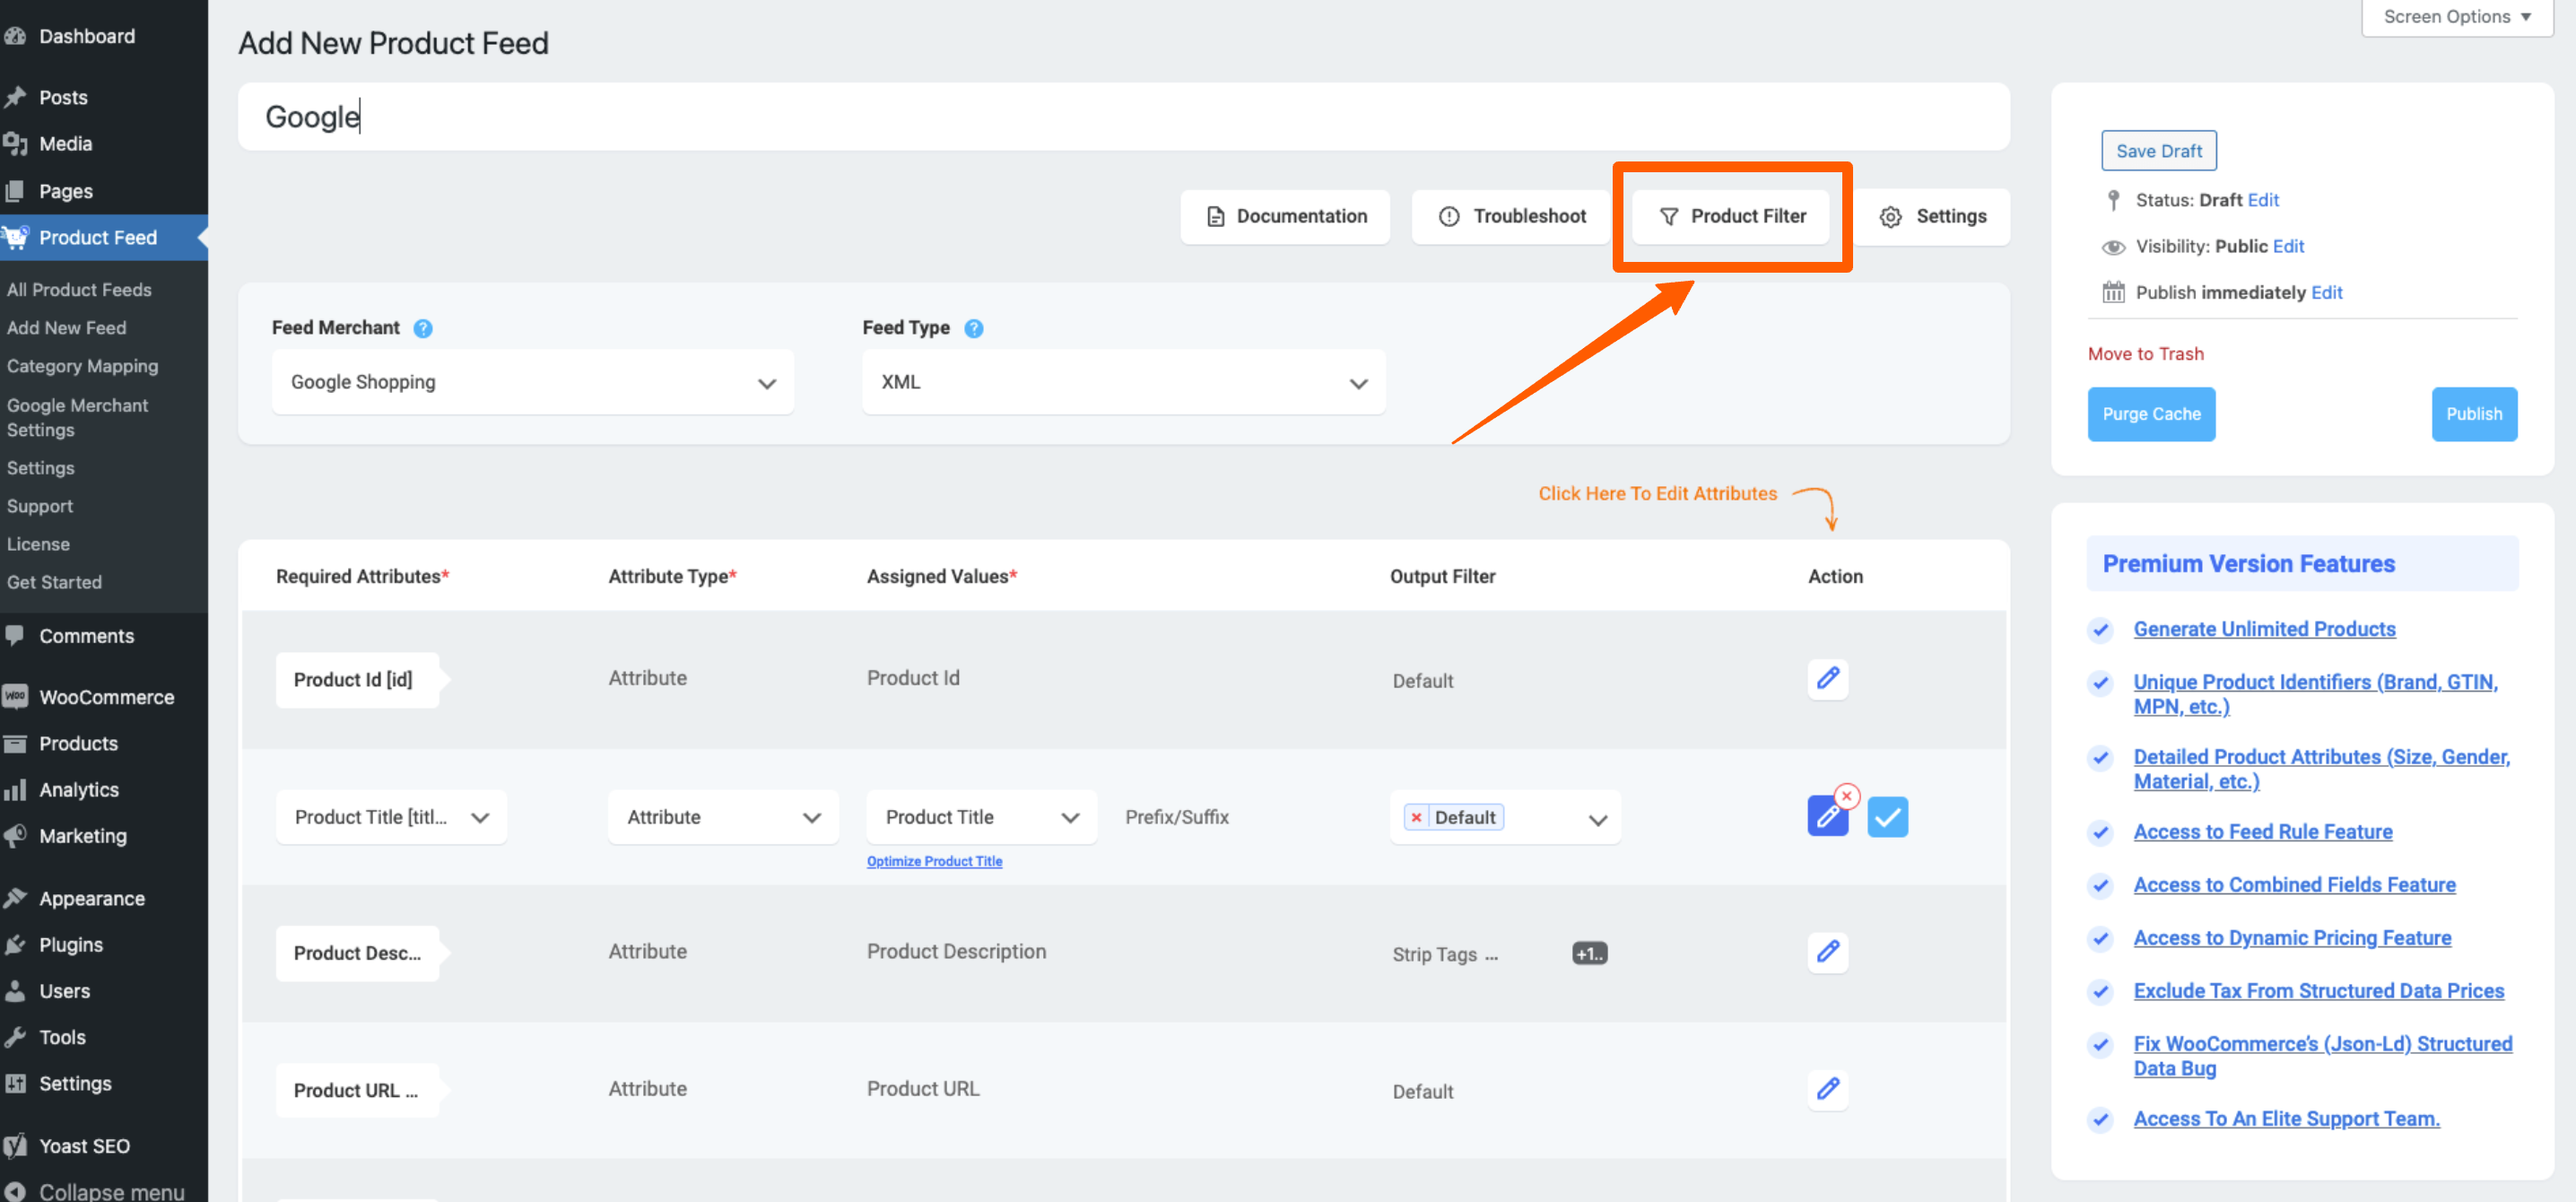
1. Click on the Product Filter button.
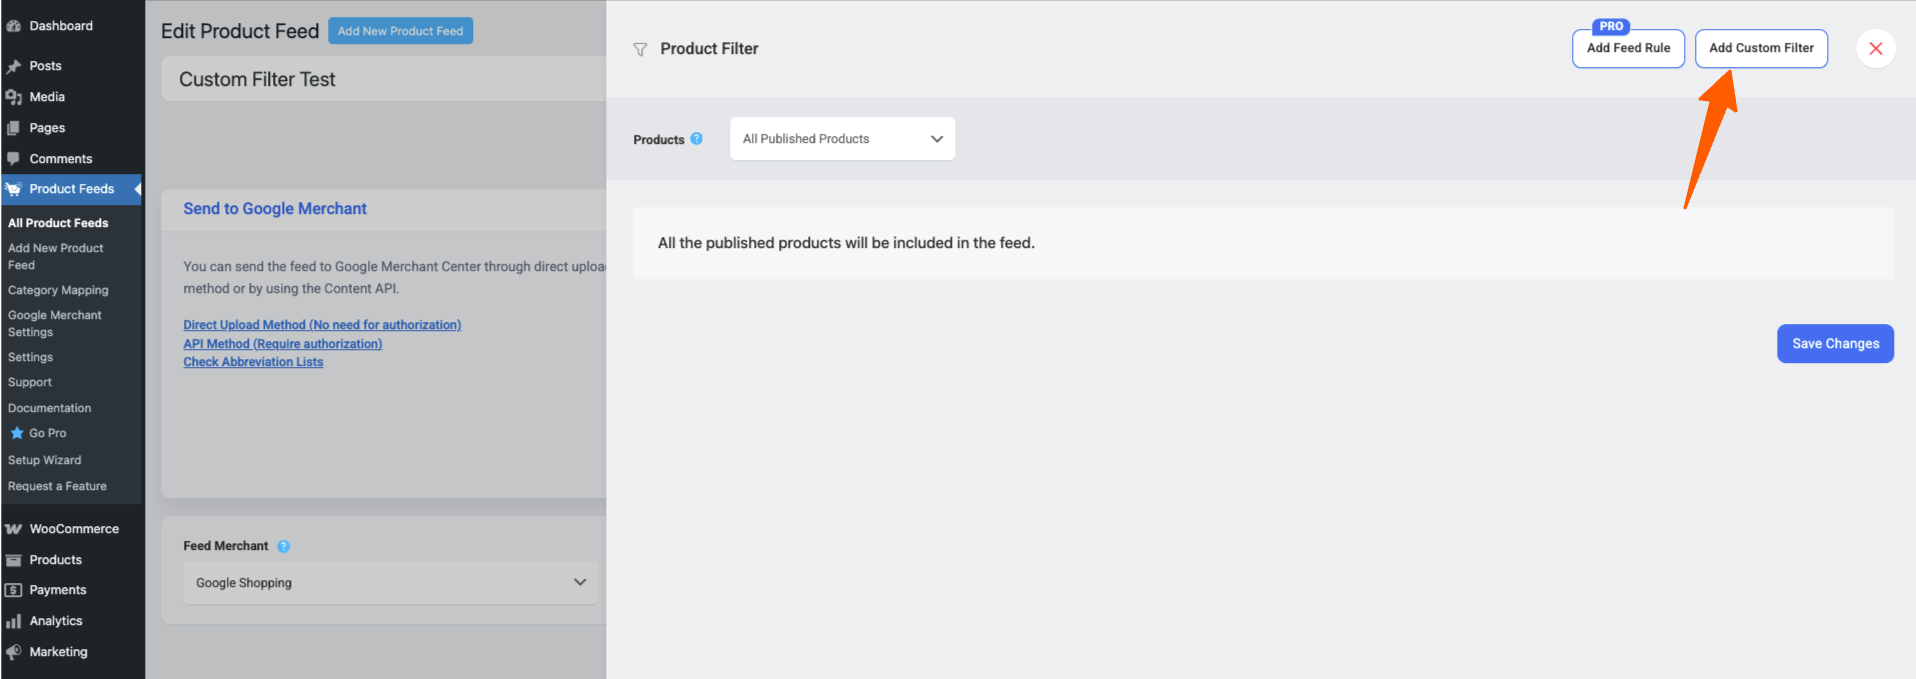
2. Clicking on the “Product Filter” button, the Product Filter drawer slides in from the right side of the window.
By default, it is set to All Published Products. Click on the Add Custom Filter.
3. It will let you create custom conditions.
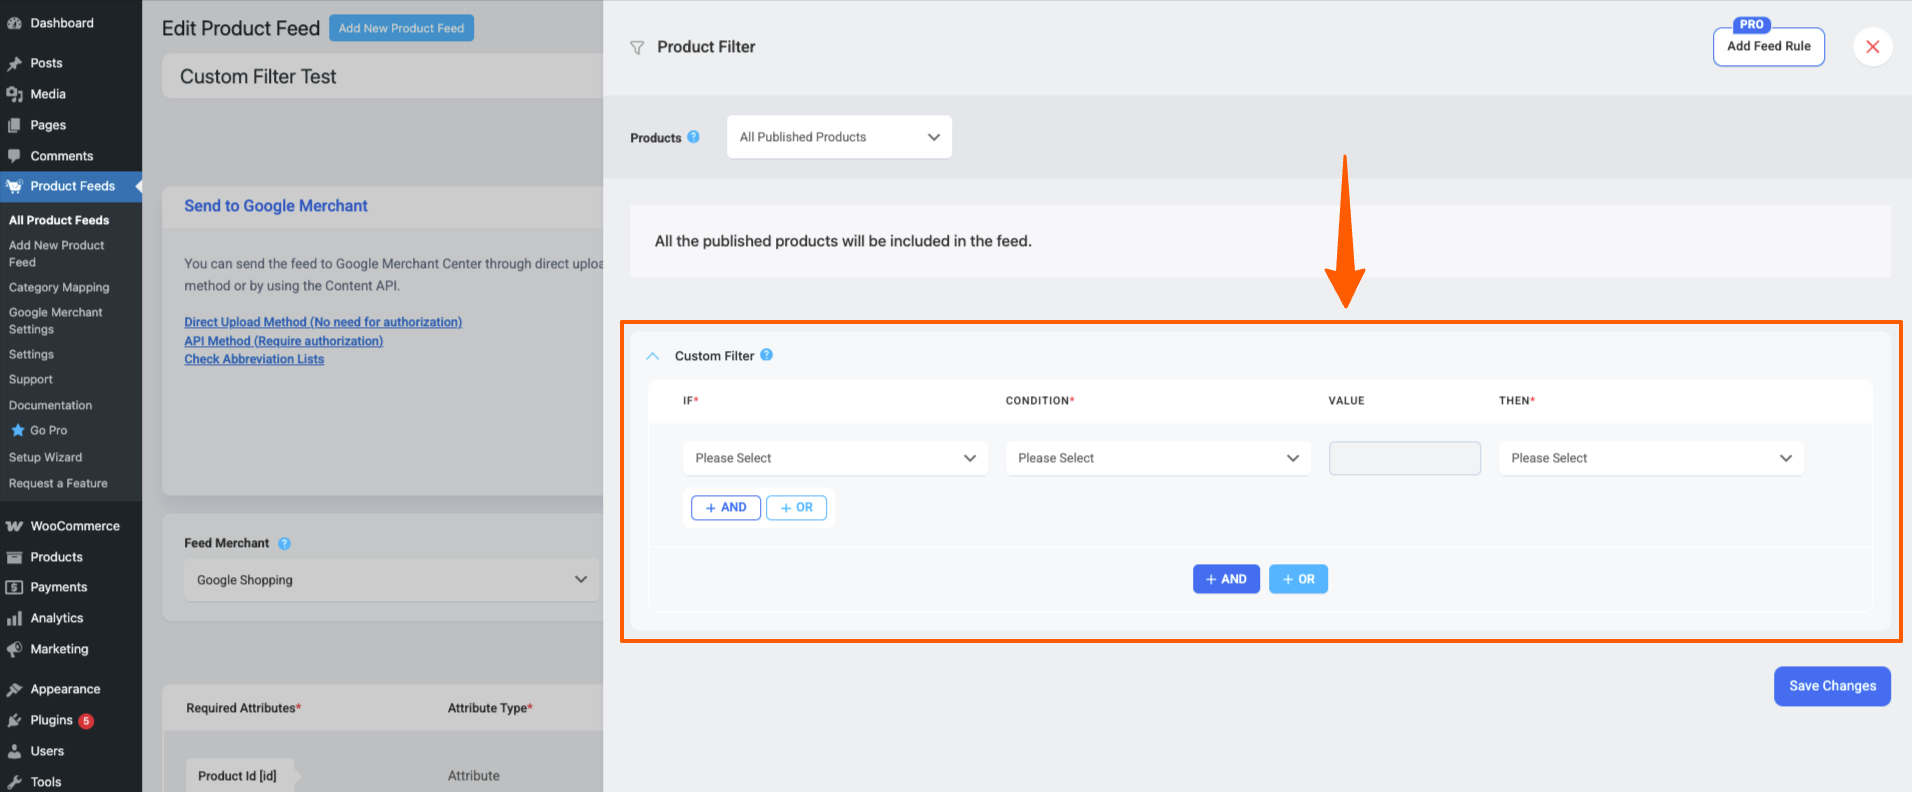
Let’s explain the process with an example.
Example Use Case: #
Let’s say you might want to add all products that include the text “Vintage” in their Title. Also in the Price range between $140 – $200.
1. Under ‘If’, select a product attribute that you wish to use to apply a custom filter. As per the example, let’s select “Product Title” here. Next, set an appropriate Condition from the following options:
- Contains
- Does not contain
- Is equal to
- Is not equal to
- Greater than
- Greater than or equal to
- Less than
- Less than or equal to
- Is empty
- Is not empty
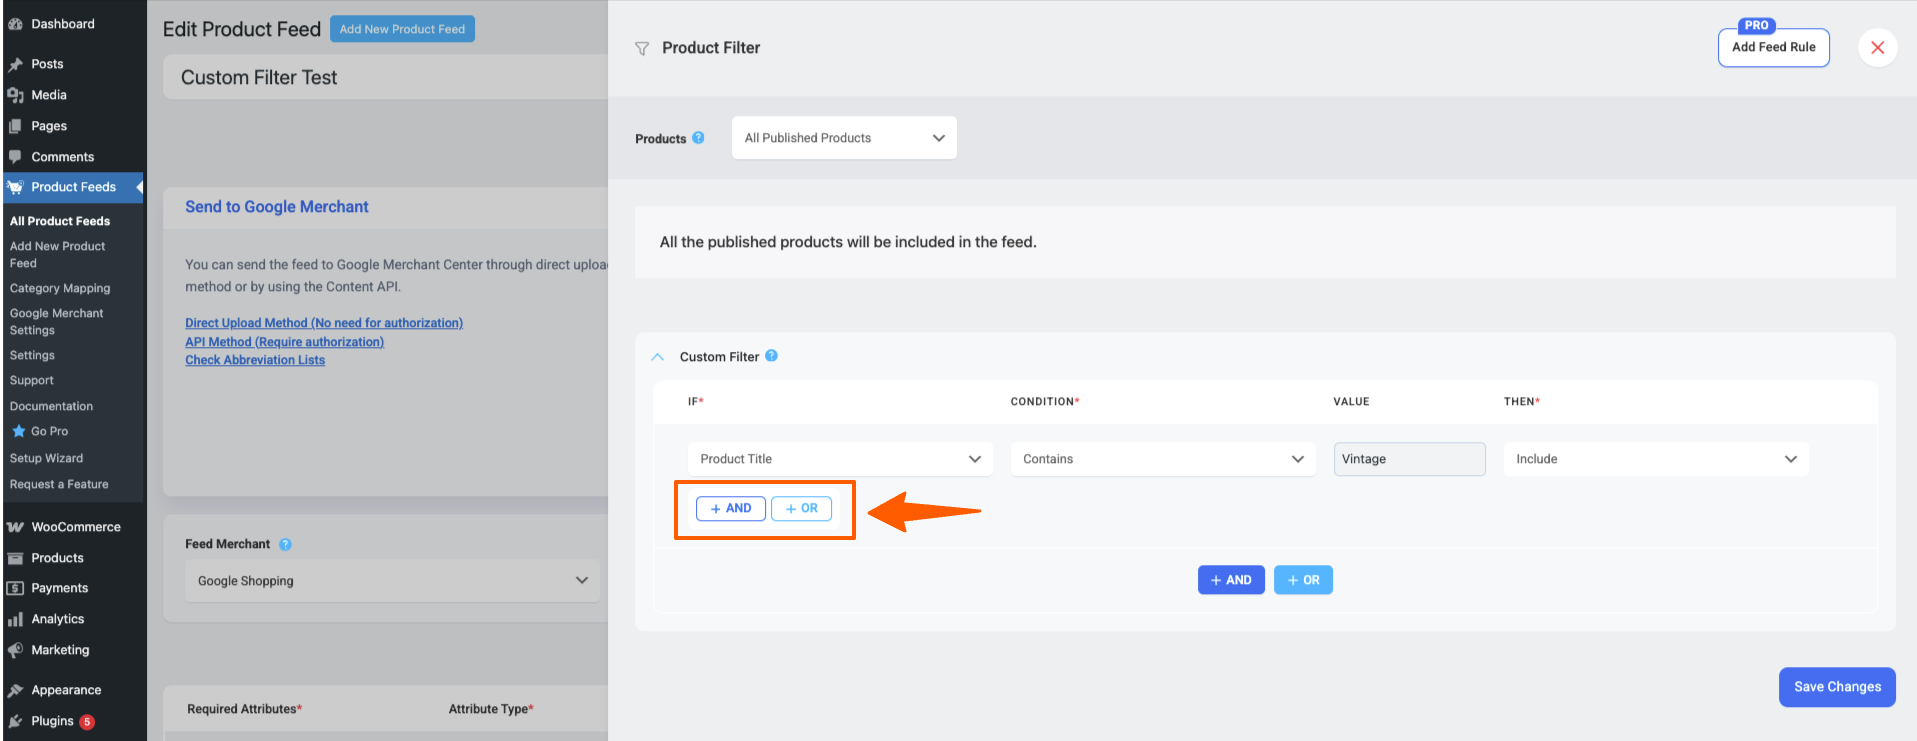
As per the example, now you need to choose the condition, Contains. Assign a value based on which you wish to set the condition. In the case of the example, you need to assign the value “Vintage” here. Choose to Include or Exclude the products that meet your set condition. As per the example, choose Include Only.
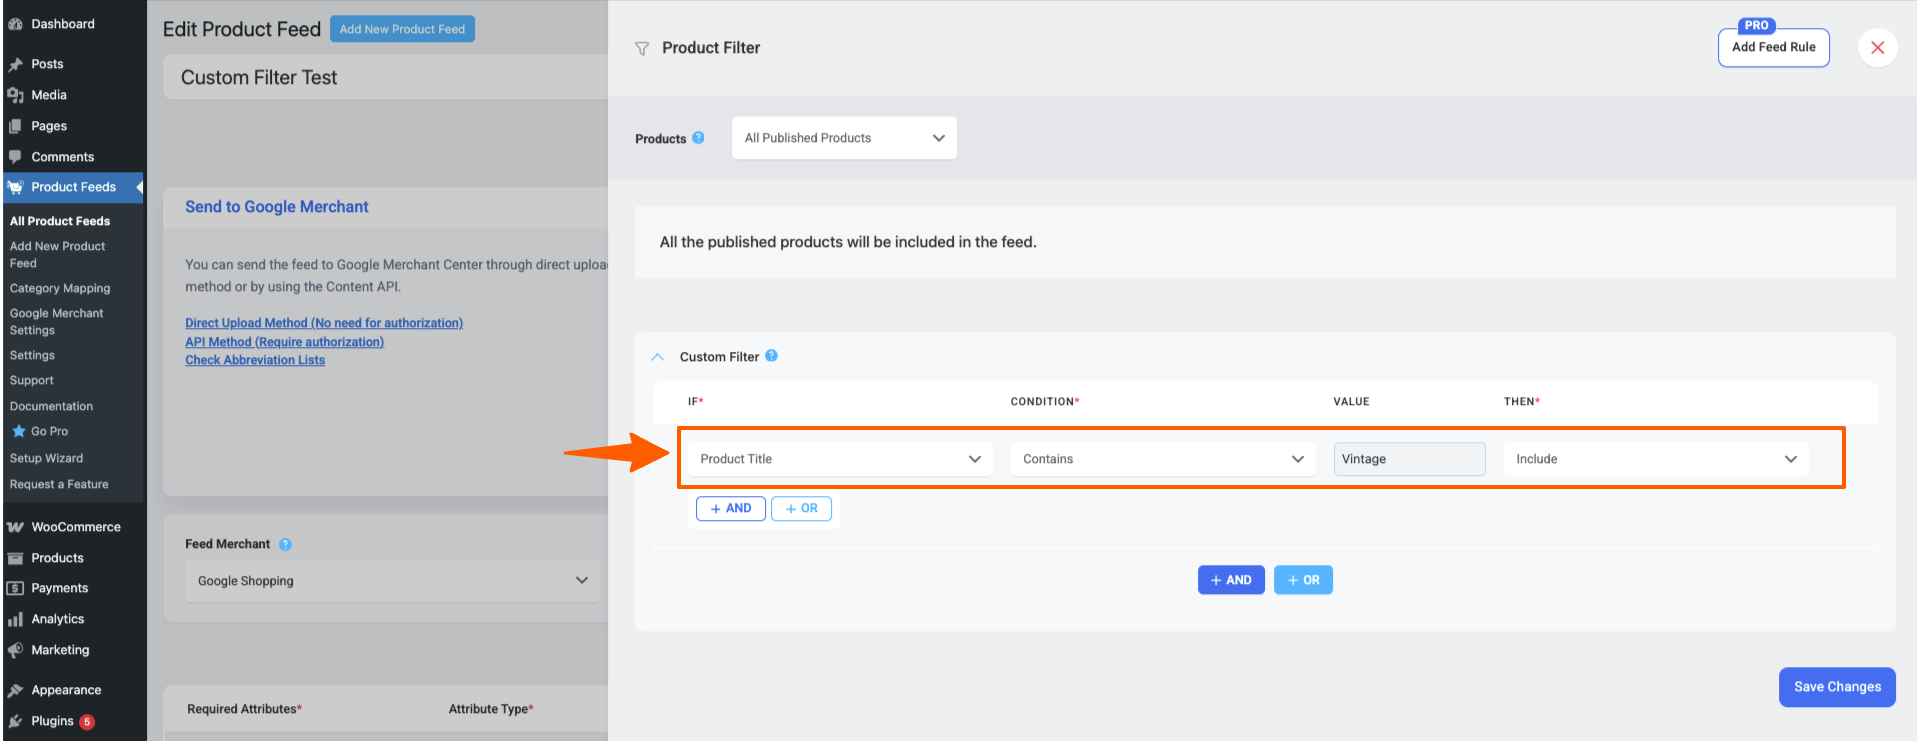
So, now the products that include the text “Vintage” in their Title will only be included in the feed.
You can add multiple custom filters by clicking on the AND button or the OR button.
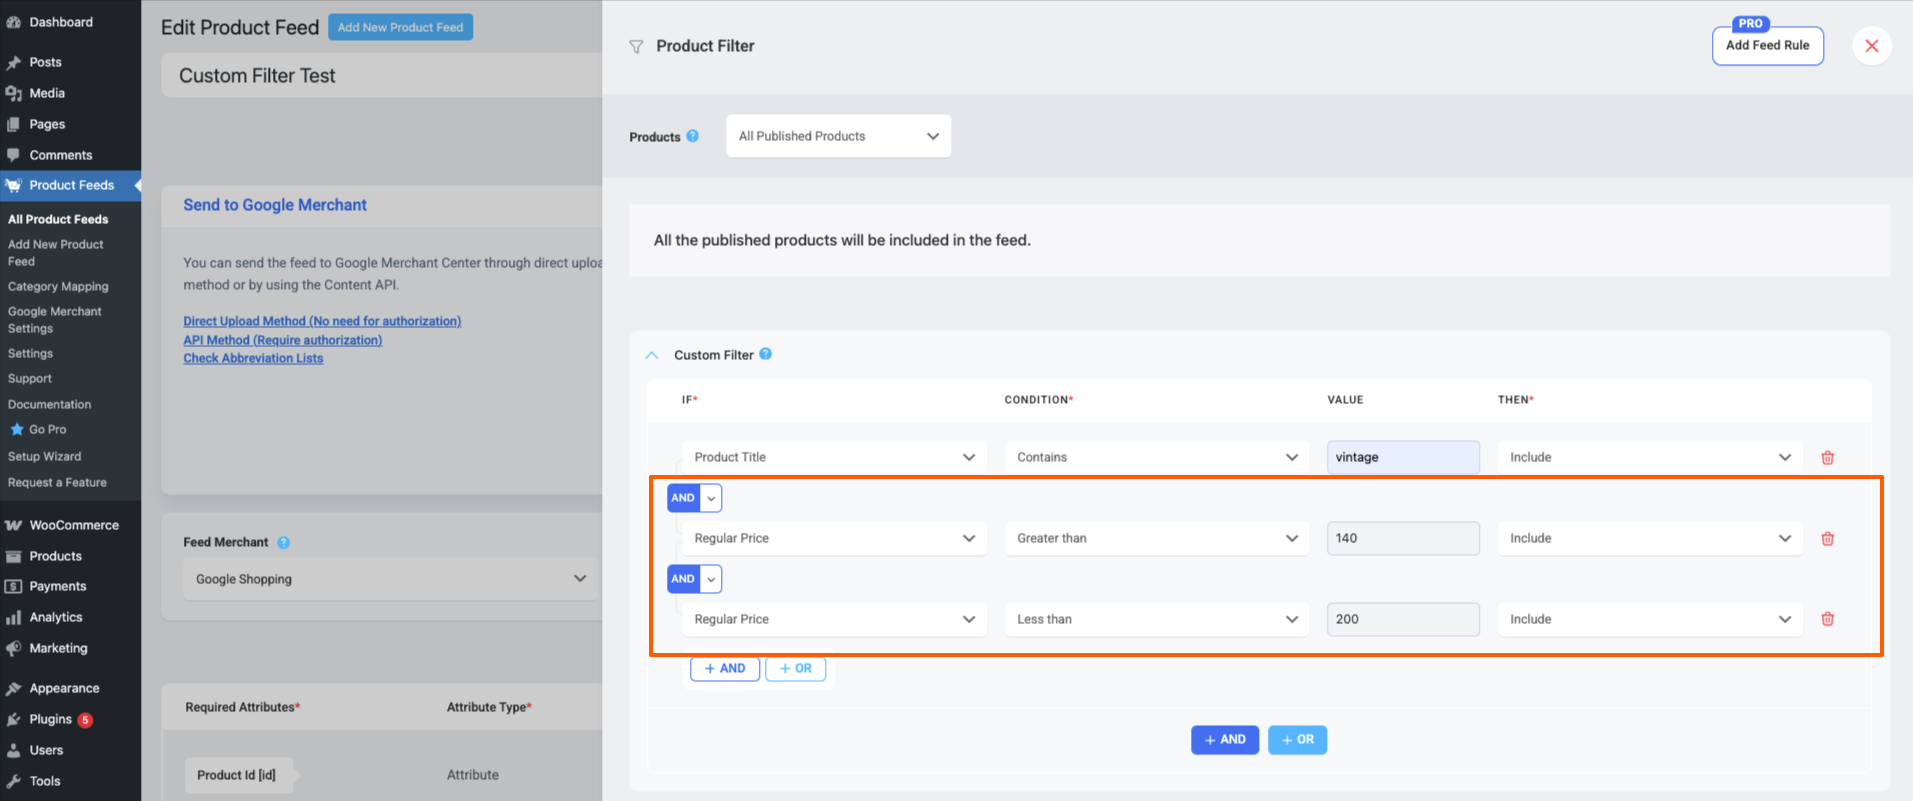
2. Now, let’s set another rule for configuring the price range, where in the feed product’s regular price is greater than $140 and regular price is less than $200
Next, configure the feed and publish it.
You will see that the feed includes all the products that fall under the condition you set.
Be aware that selecting the “AND” button and incorporating a new filter implies that both filters will be applied to your generated feed. Conversely, opting for the “OR” button and adding a new filter signifies that either of the filters will be applied in your generated feed.
This provides you with flexibility in how you want your filters to interact and affect your feed results.
That’s how easily you can use the Custom filter to generate your feed.