If you are new to Product Feed Manager For WooCommerce (PFM), then the first thing to do is to learn to generate product feed before learning about all the other features of the plugin.
Here, you will learn how to generate a product feed to understand how it works, and I will show you how you can get the feed link or download the feed.
Later, on upcoming documentation, you will get instructions on using all the other exclusive features to make the feed proper and acceptable on your desired marketplaces.
So let’s take the first step.
Learn To Generate Product Feed #
Follow the steps below to create your first product feed.
1. Go to Dashboard > Product feed > Add New Feed
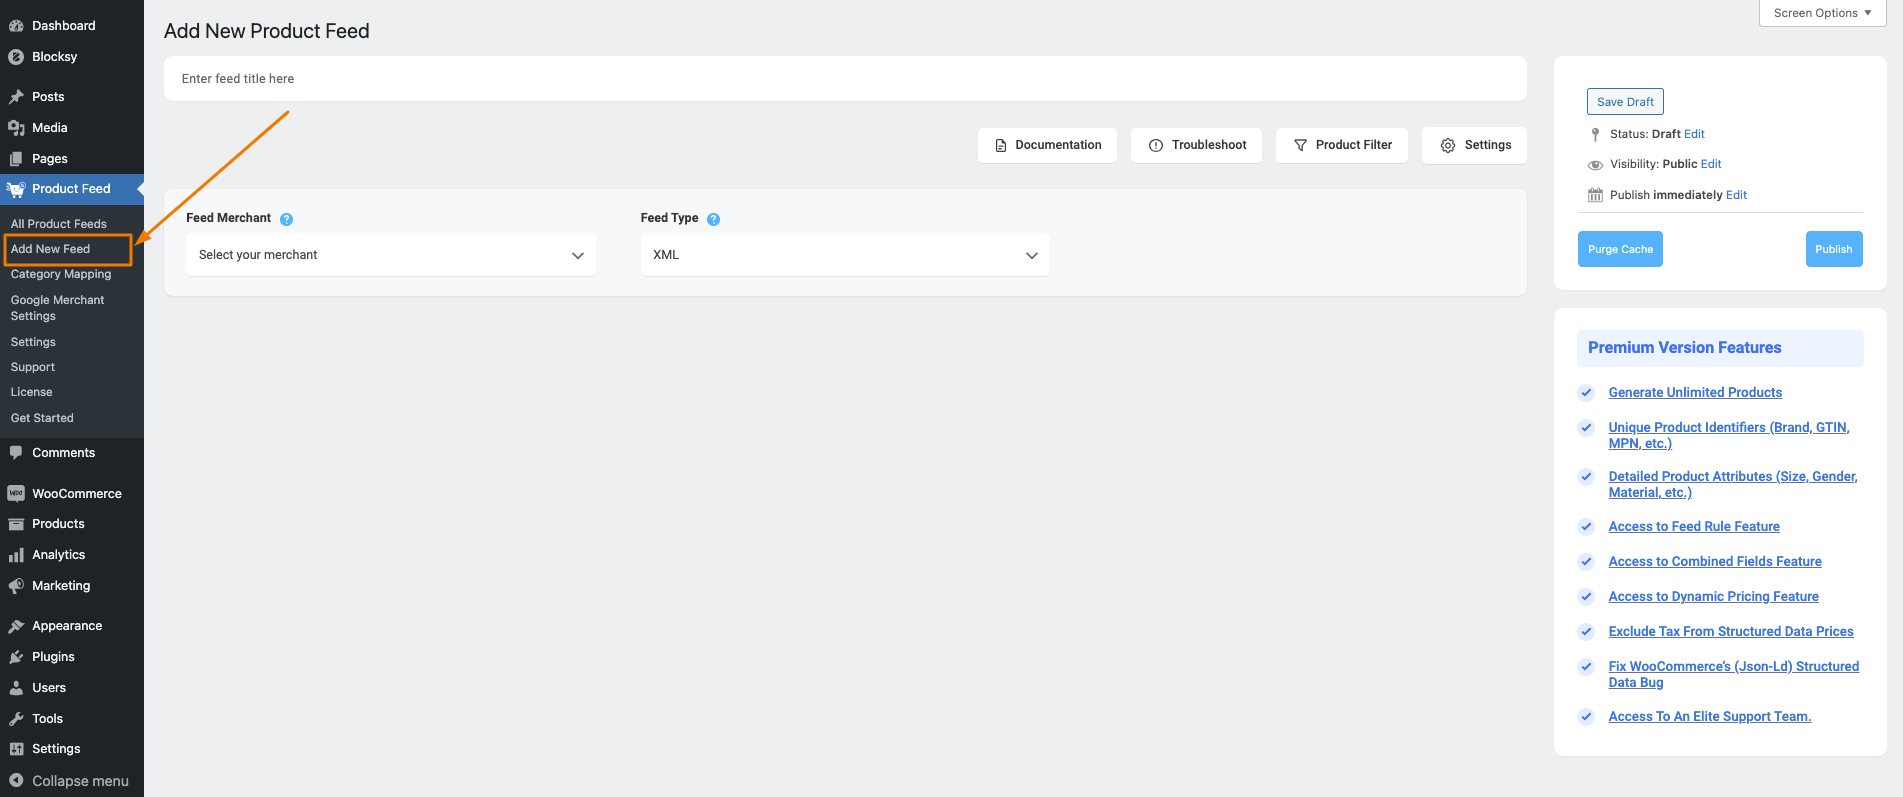
As you can see, it will take you to the page where you can start configuring a product feed.
2. On top, you will get the option to add a title to the feed.
3. Just under the title, you will see an option to select your preferred merchant. Simply click on the Feed Merchant dropdown button and select your preferred merchant from the dropdown or you can search in the dropdown box.
Select your preferred merchant and all the required attributes will be loaded below.
Let’s choose Google Shopping for this feed.
**Please note that Google Shopping only accepts XML feed submissions, so you will not get an option to choose the file format. However, for other merchants, you will get to choose a File Format next to the Feed Merchant option.

4. Once you select the merchant, all the mandatory fields required for submitting a product feed to the selected merchant will be listed below.
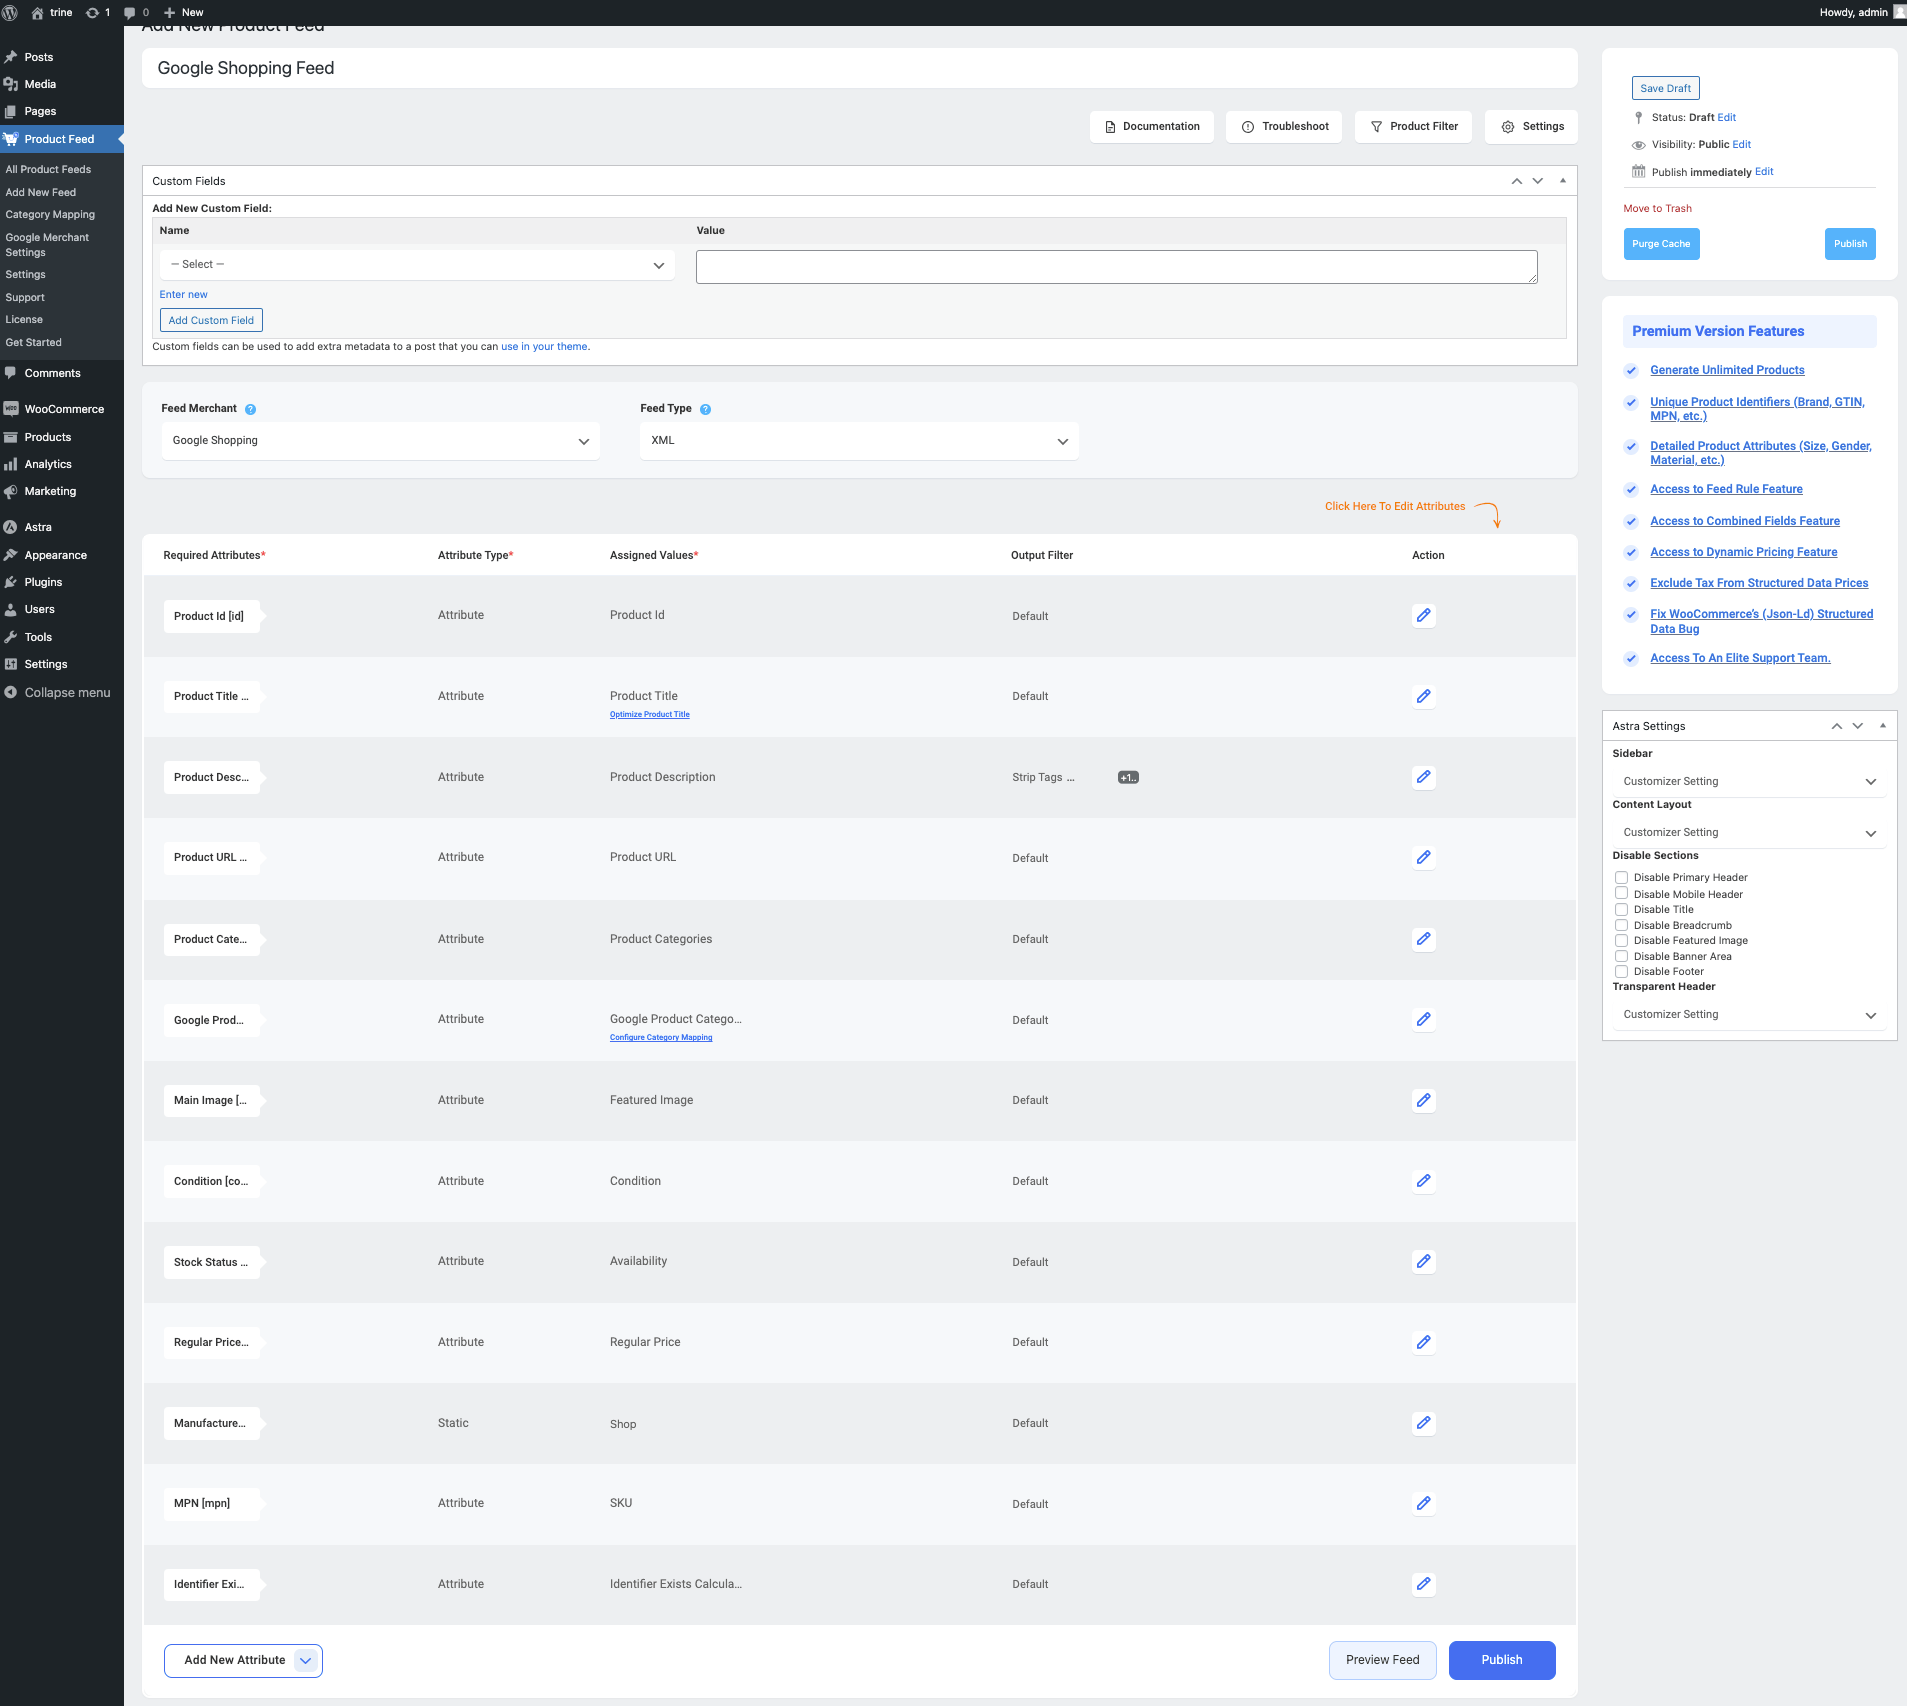
5. In most cases, this template is already configured and values are assigned properly, so you won’t have to do much work with this.
However, depending on the merchant you are generating a feed for, there may be some attributes for which you need to assign values manually.
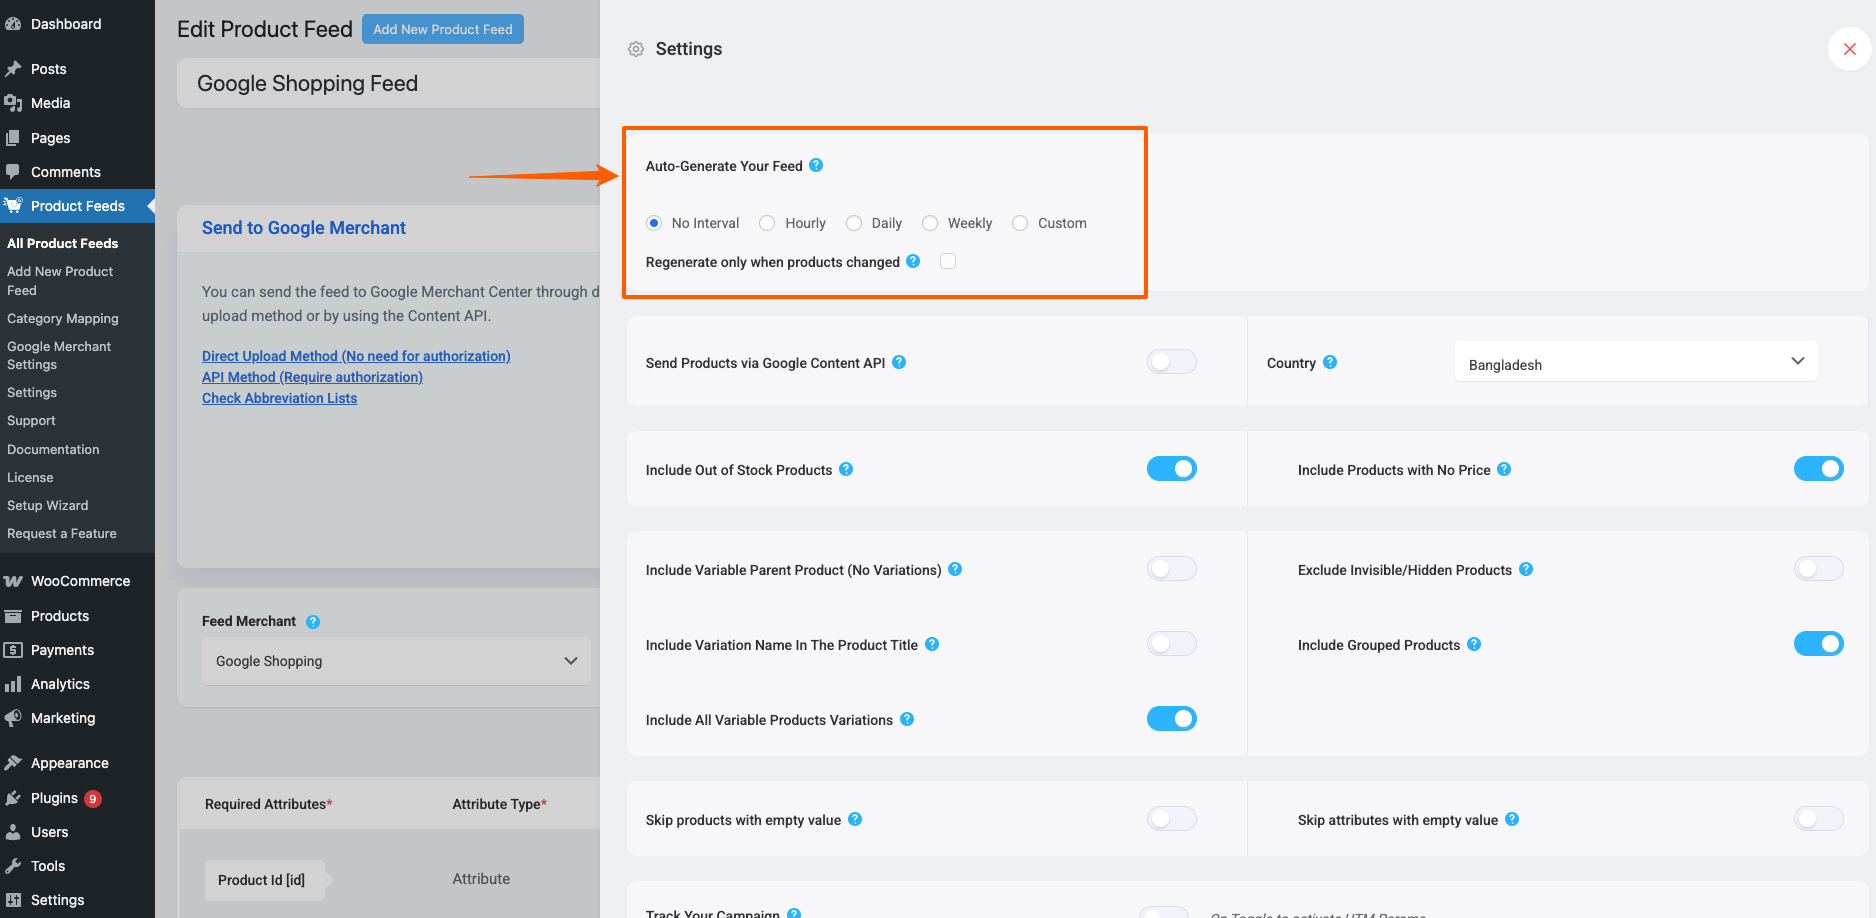
6. Now, let us configure the features in the Product Settings. Click on the Settings button, and a drawer will open from the right side of the screen.
For more in depth refer to this doc: Understanding The Basics Of Feed Settings
7. Now, close the drawer and click on the Product Filter option. A new drawer will open from the right.
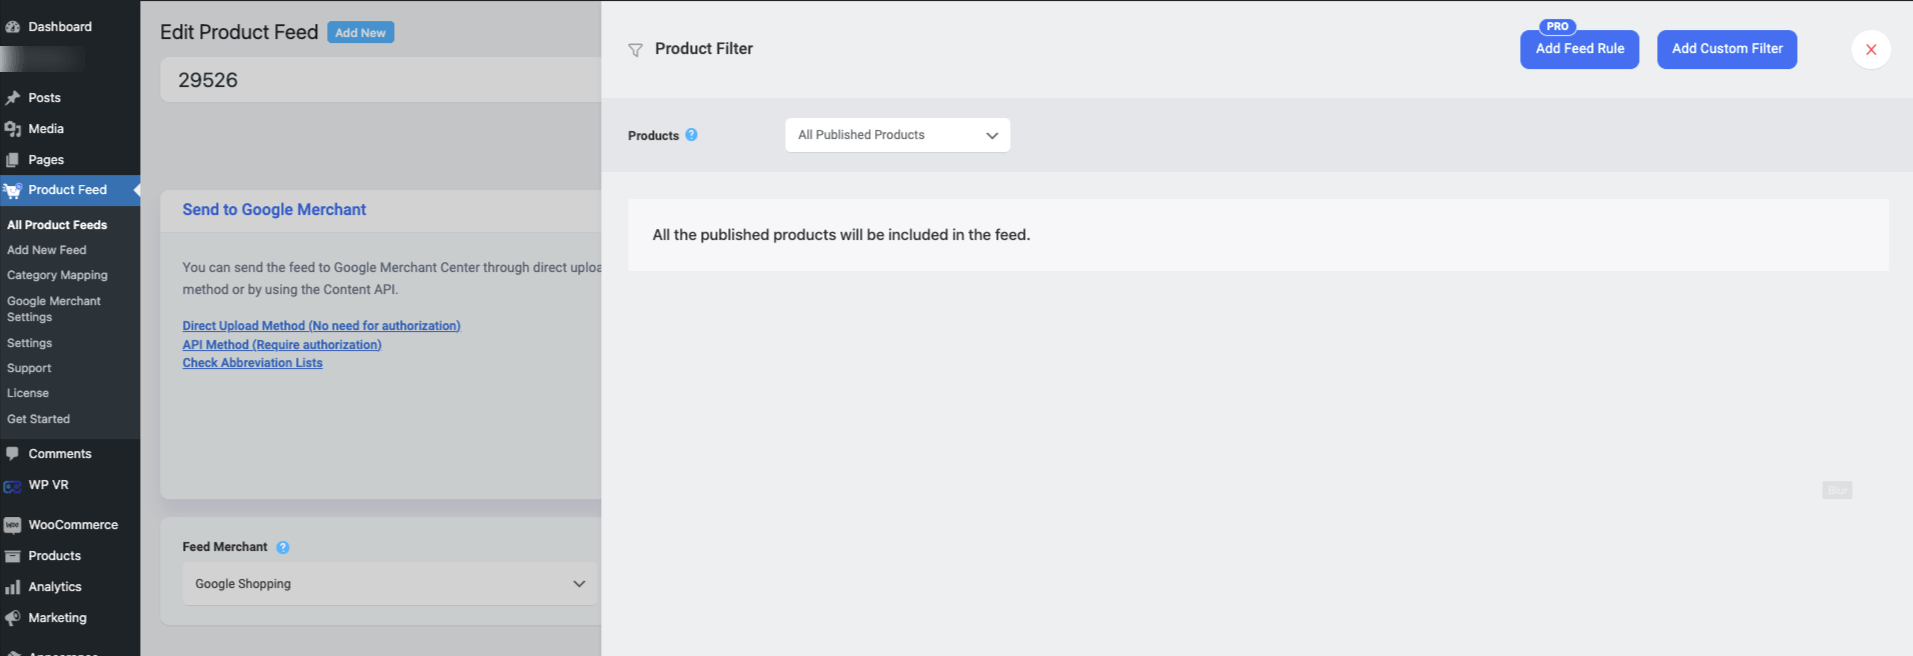
Click on the dropdown, and You will get the following options:
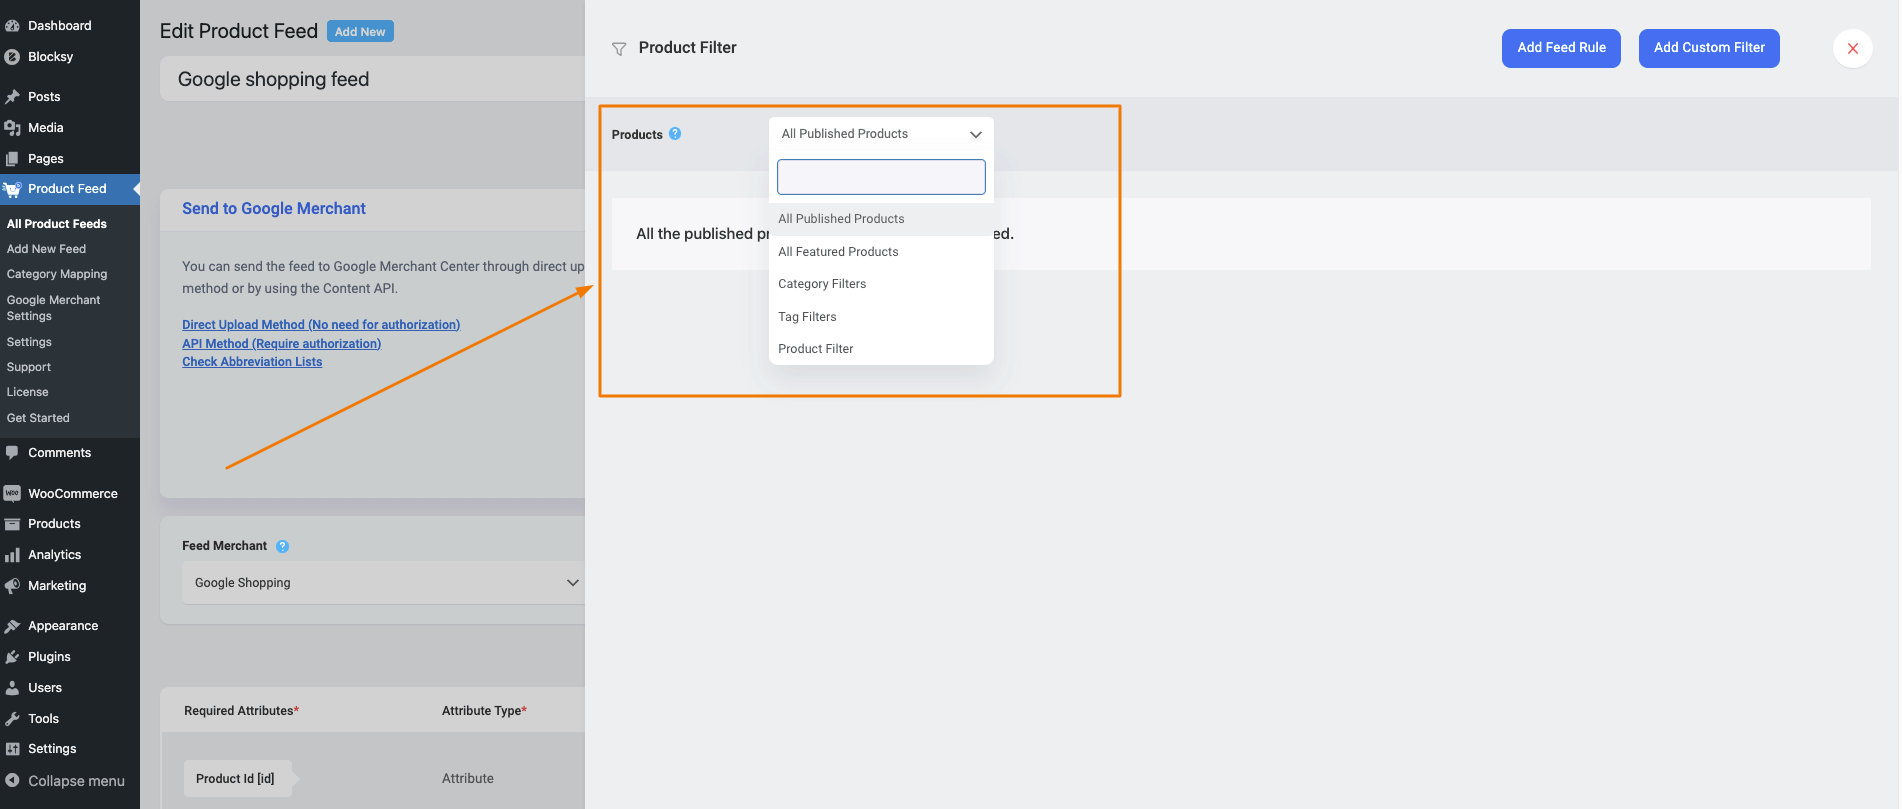
Choose the Products you want to include in the feed.
You may choose to include All Published Products in your store, All the Feature Products in your store, or you may use one of the listed filtering options: Category Filter, Tag Filter, Brand Filter, Product Filter and Custom Filter to include the products you require (or exclude the ones you do not want to include).
For the first feed, let us choose All Published Products.
8. Now, scroll up and Publish the feed.
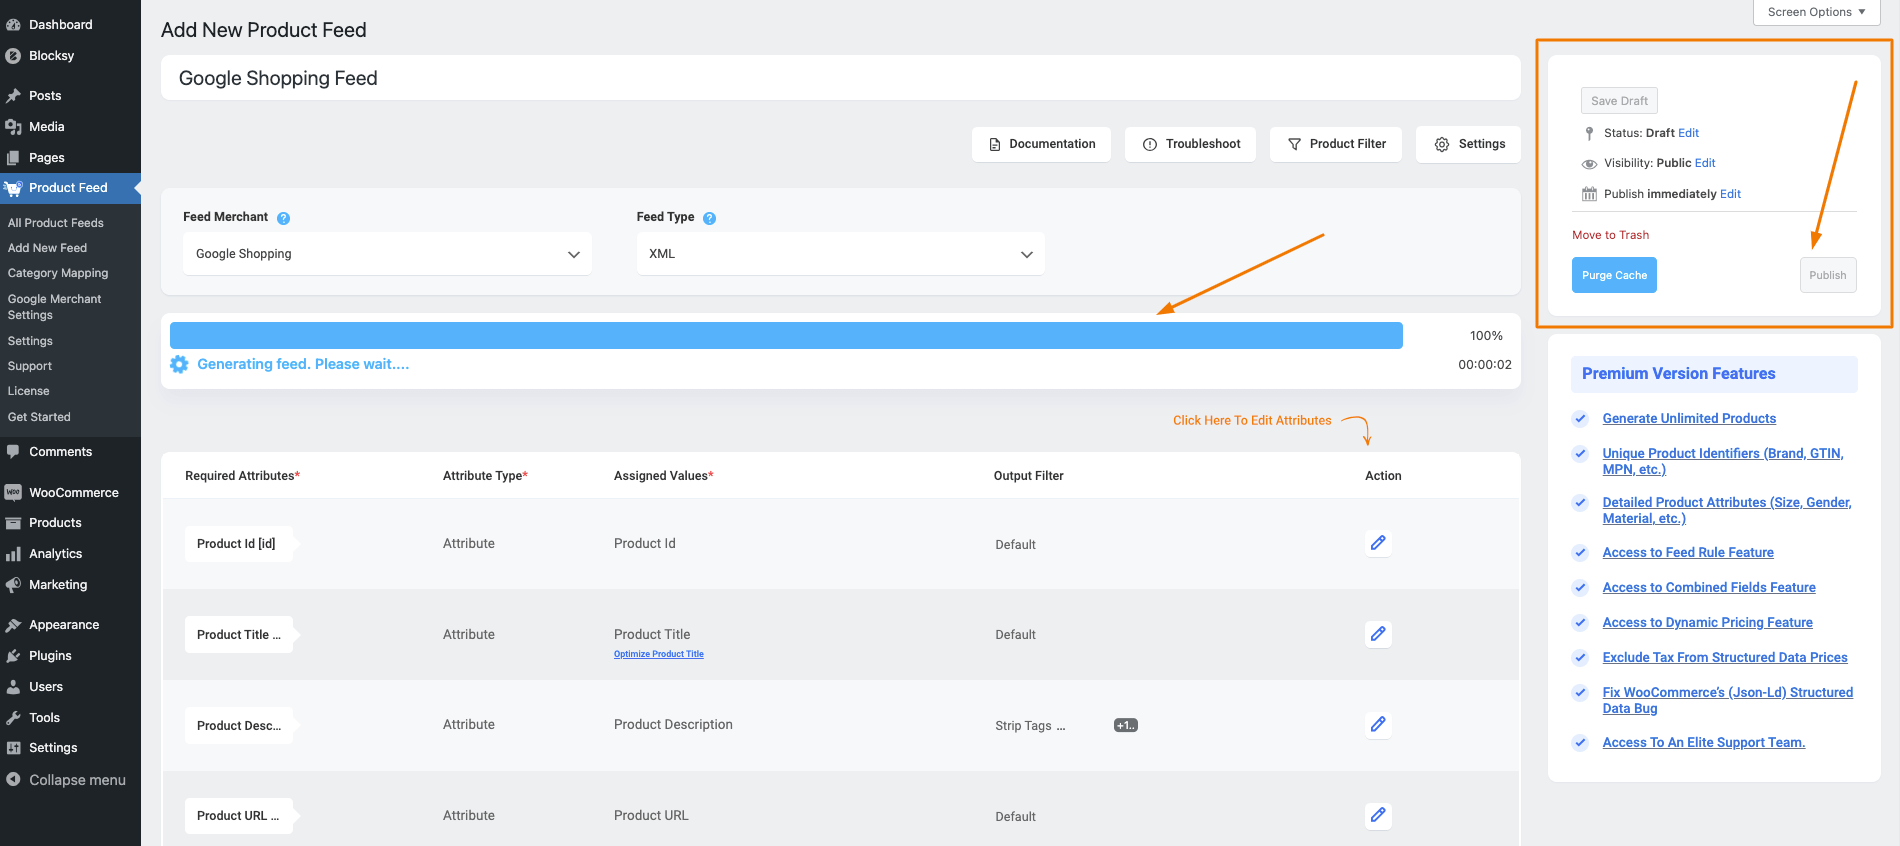
You will see a progress bar.
9. Once complete, the page will reload, and you will find the Feed link or download button just below the Update button.
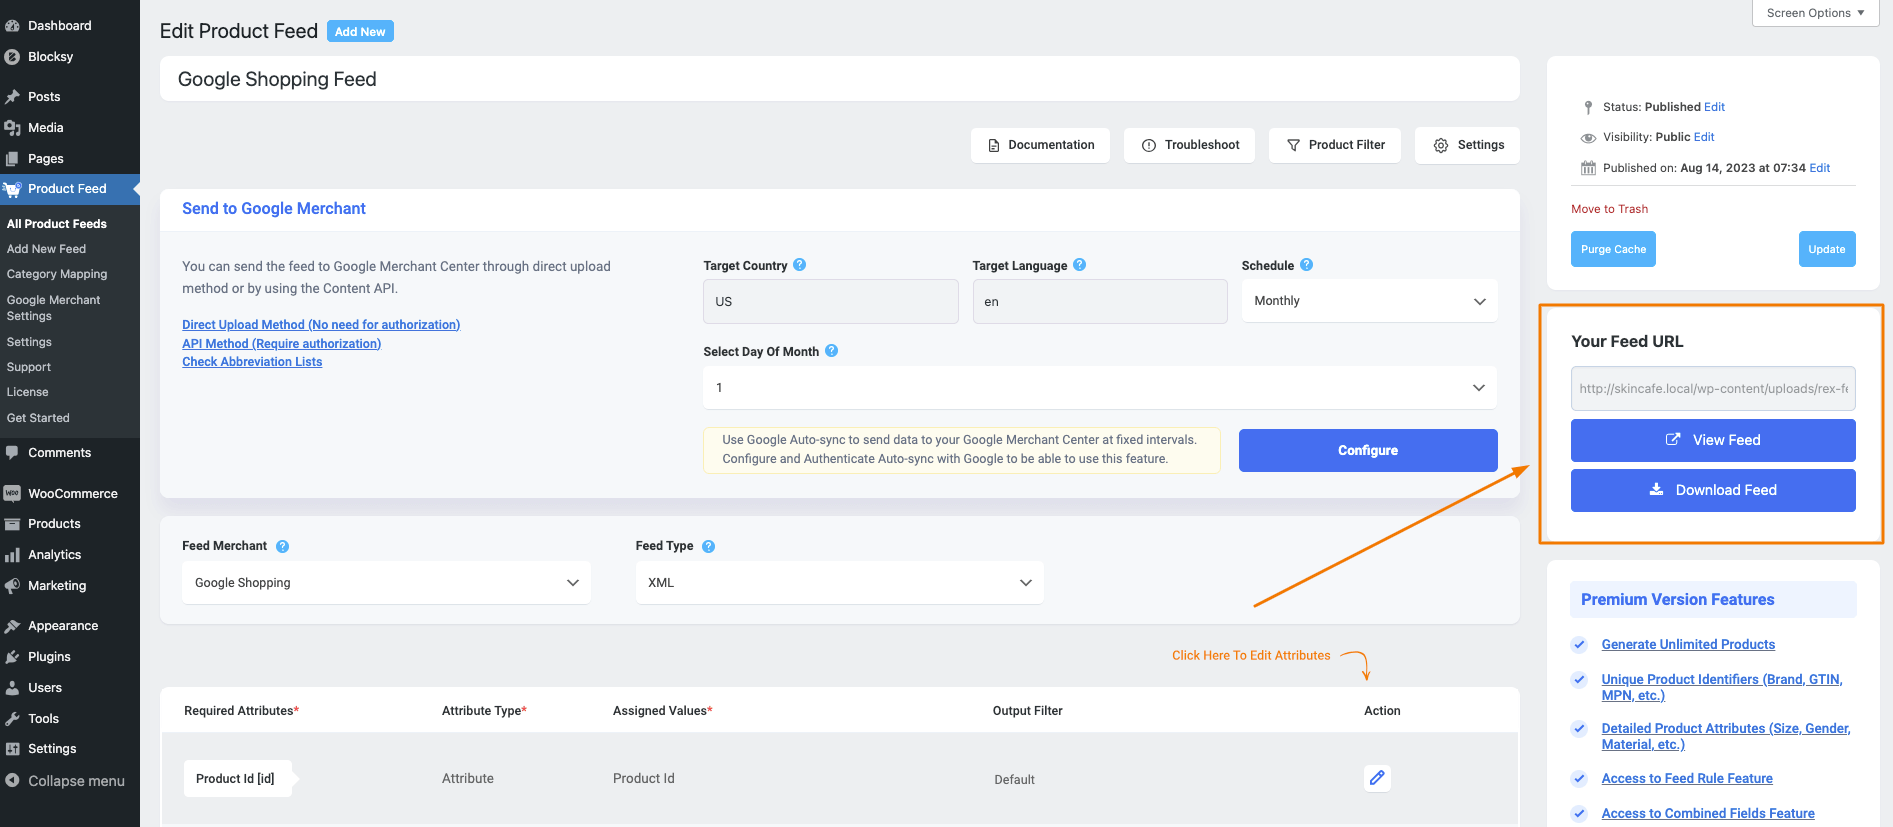
**In case you don’t see the feed link section, go to the Screen Options and enable the visibility of the Feed URL section.
That’s it. You have generated your first feed. You can use the link or download the file to upload the products to your desired marketplace.
Collecting Feed Link Or Editing A Published Feed #
If you have created feeds, they will be listed under Dashboard > Product Feed > All Product Feeds.
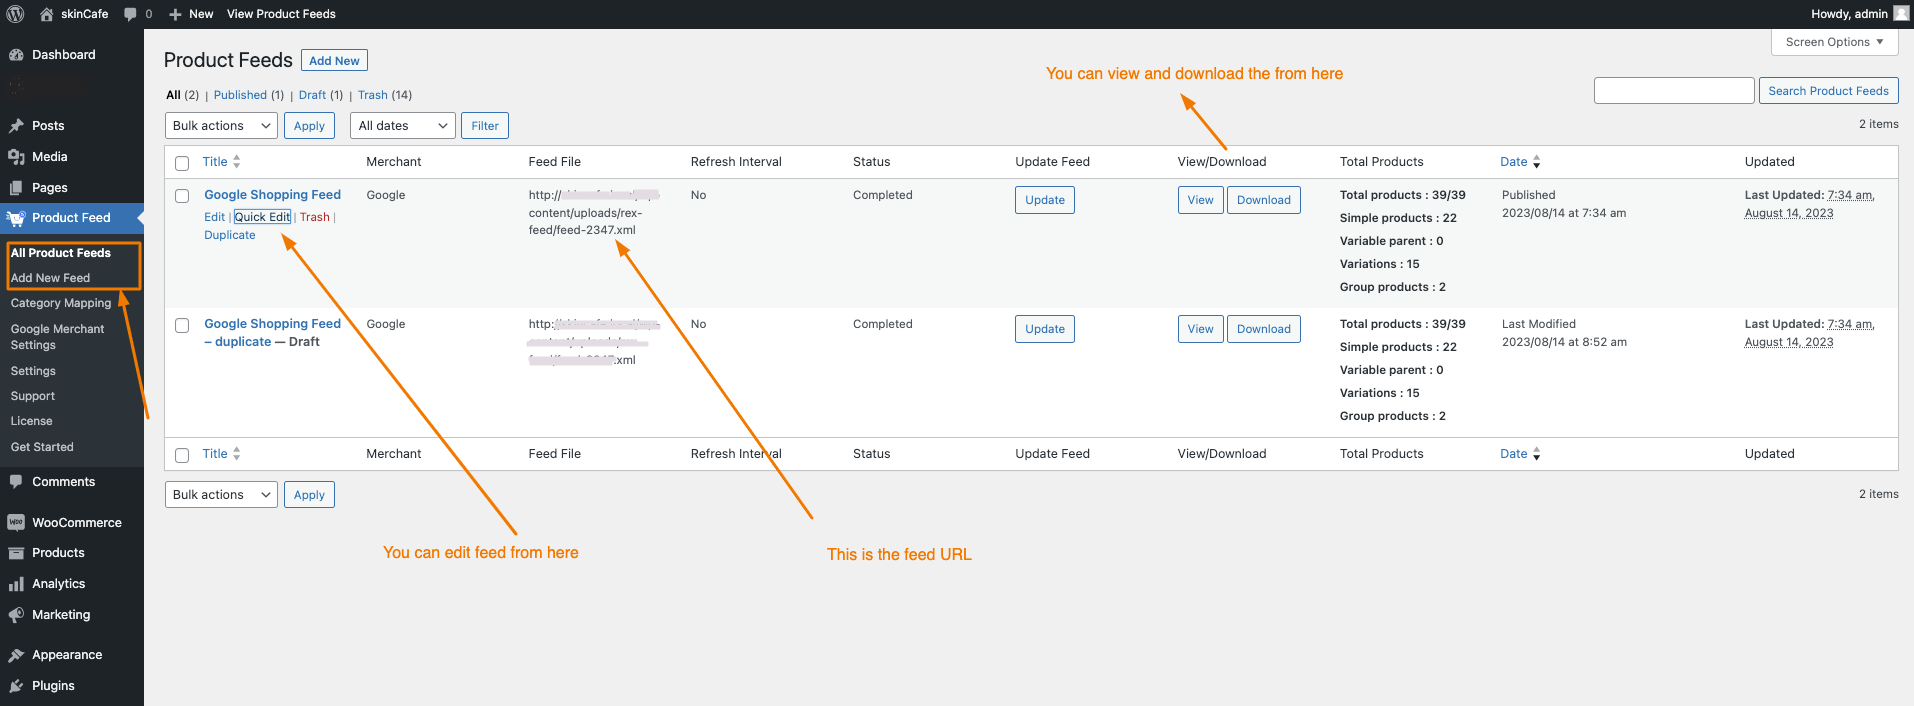
Here, you will be able to collect the feed link, download the feed, or edit the feed.
Now that you are familiar with how the feed generation process works, now let’s take a quick overview of the plugin, and then we can move on to learn about all the useful features and create a complete product feed that can be uploaded successfully on your desired marketplaces.