Since you are here this means you’ve already generated a feed for Facebook and now you are ready to Upload your WooCommerce Products to the Facebook Store.
You can have a look at this doc to learn more about how to create a product feed for Facebook.
Also, you can check this doc for a better understanding of the Facebook required attributes.
In this guide, I will show you how you can upload your products on Facebook Marketplace.
Now, once your feed is ready, now it’s time to upload the feed on Facebook Commerce Manager.
Follow the steps below to start uploading products on Facebook with the Facebook catalog.
Step 1:
Login to your Facebook account.
Step 2:
Go to Facebook Commerce Manager.
Click on the Get Started button.
Step 3:
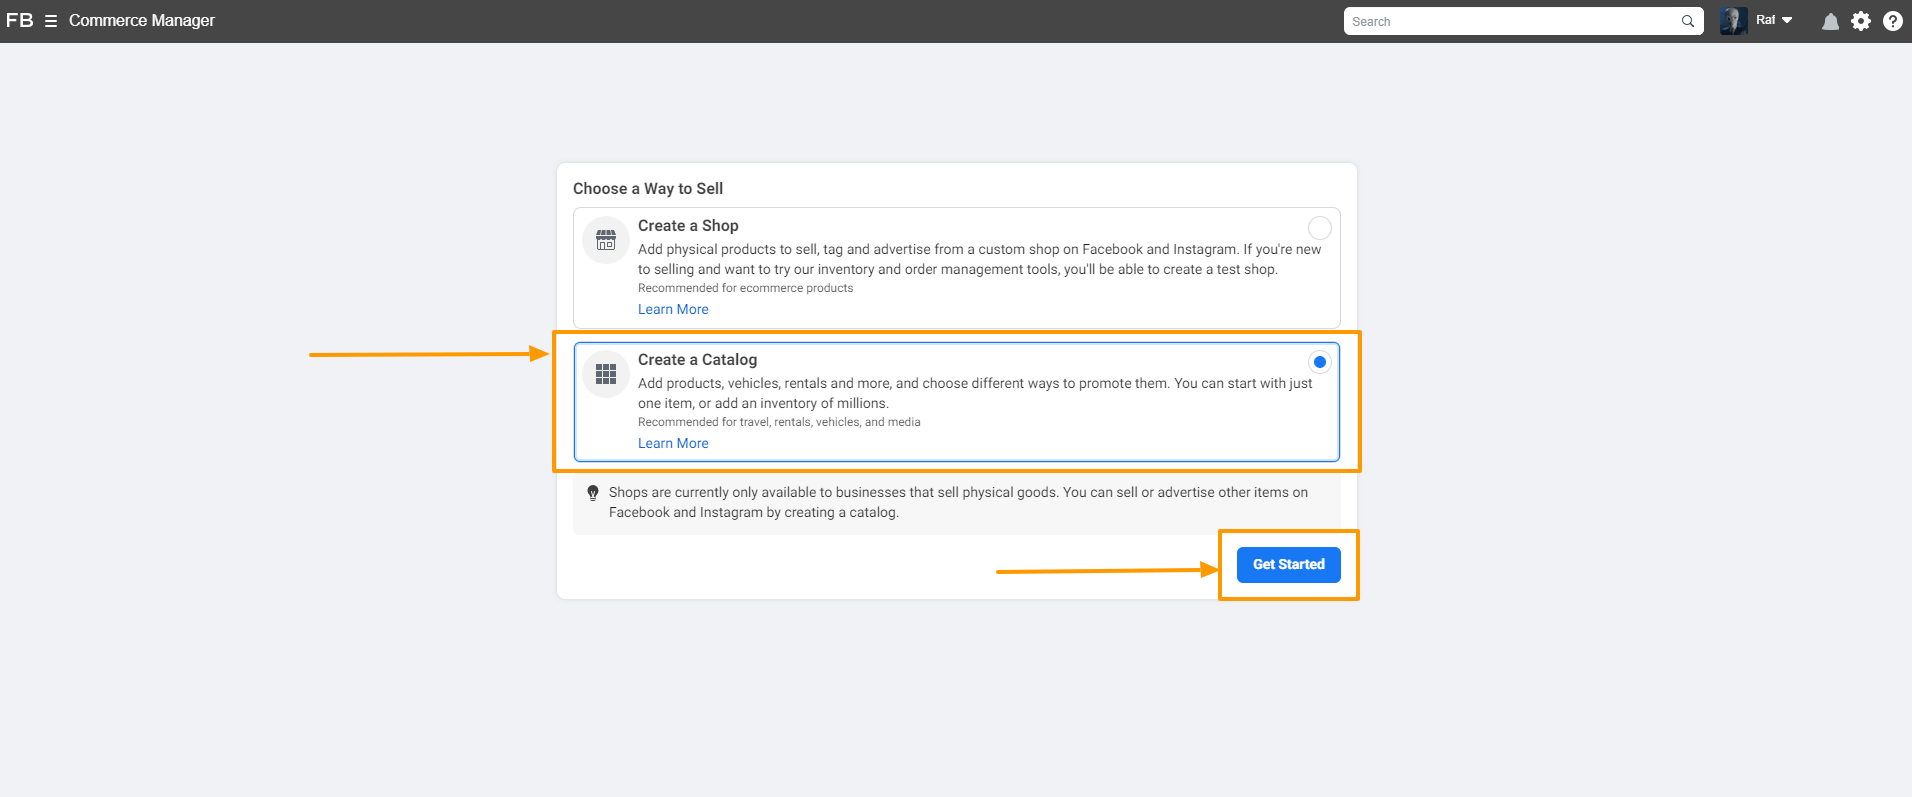
Once you click on the Get Started button, it will take you to a new window, and here you need to select in which way you want to sell your products on Facebook.
Since we want to sell our products through Facebook Catalog, select Create a Catalog option and click on the Get Started button
Step 4:
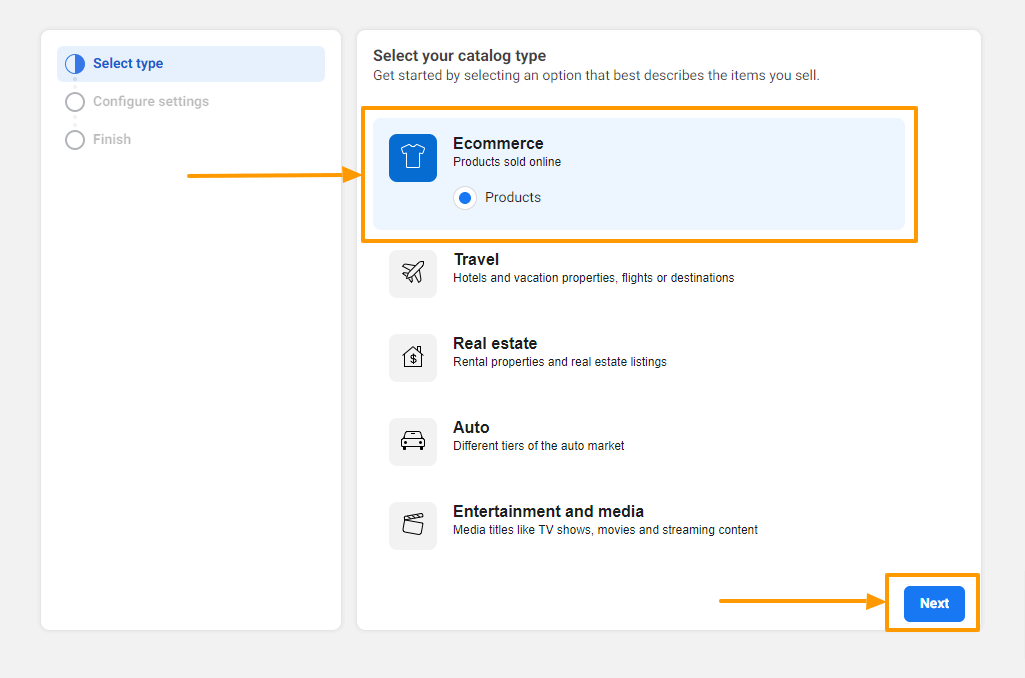
Once you select the Catalog option, It would take you to three steps Catalog settings.
The first step is to select your catalog type.
To sell WooCommerce products, select Ecommerce and click on the Next button.
Step 5:
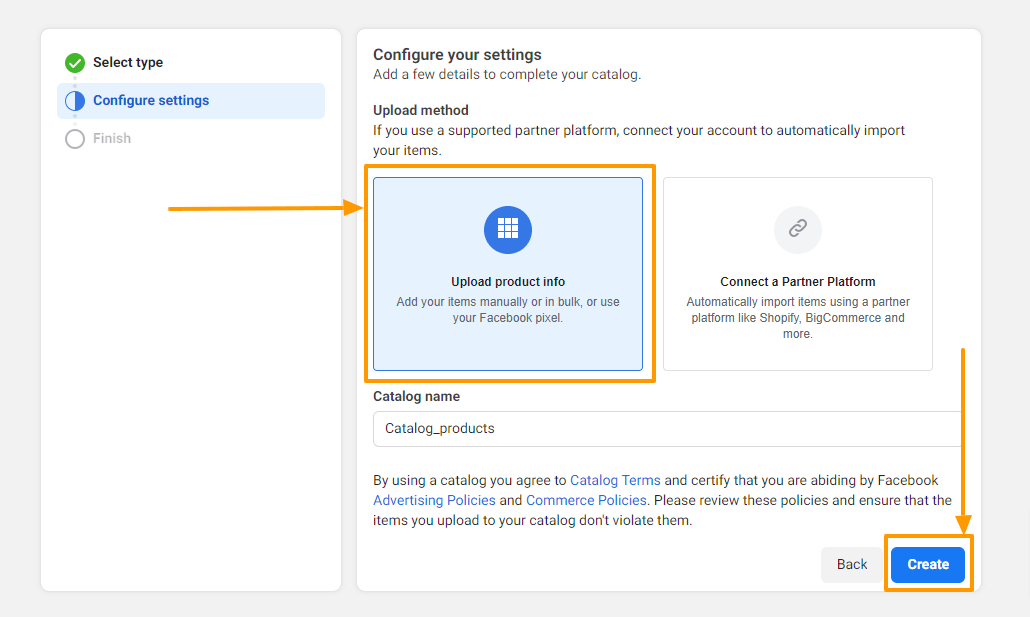
Now you are in the Configure Settings window, select how do you want to upload your products.
Select the Upload product info option and then click on the Create button.
Step 6:
You are now in the Finish step, and this step is kind of a confirmation step. If everything’s alright, you will see a message “Catalog created”.
Click on the View all catalogs button to see all the previously created catalogs, or click on the View catalog button to see the catalog you’ve just created.

Let’s click on the View catalog option, and it will take you to the Facebook Commerce Manager Product Catalog Dashboard.

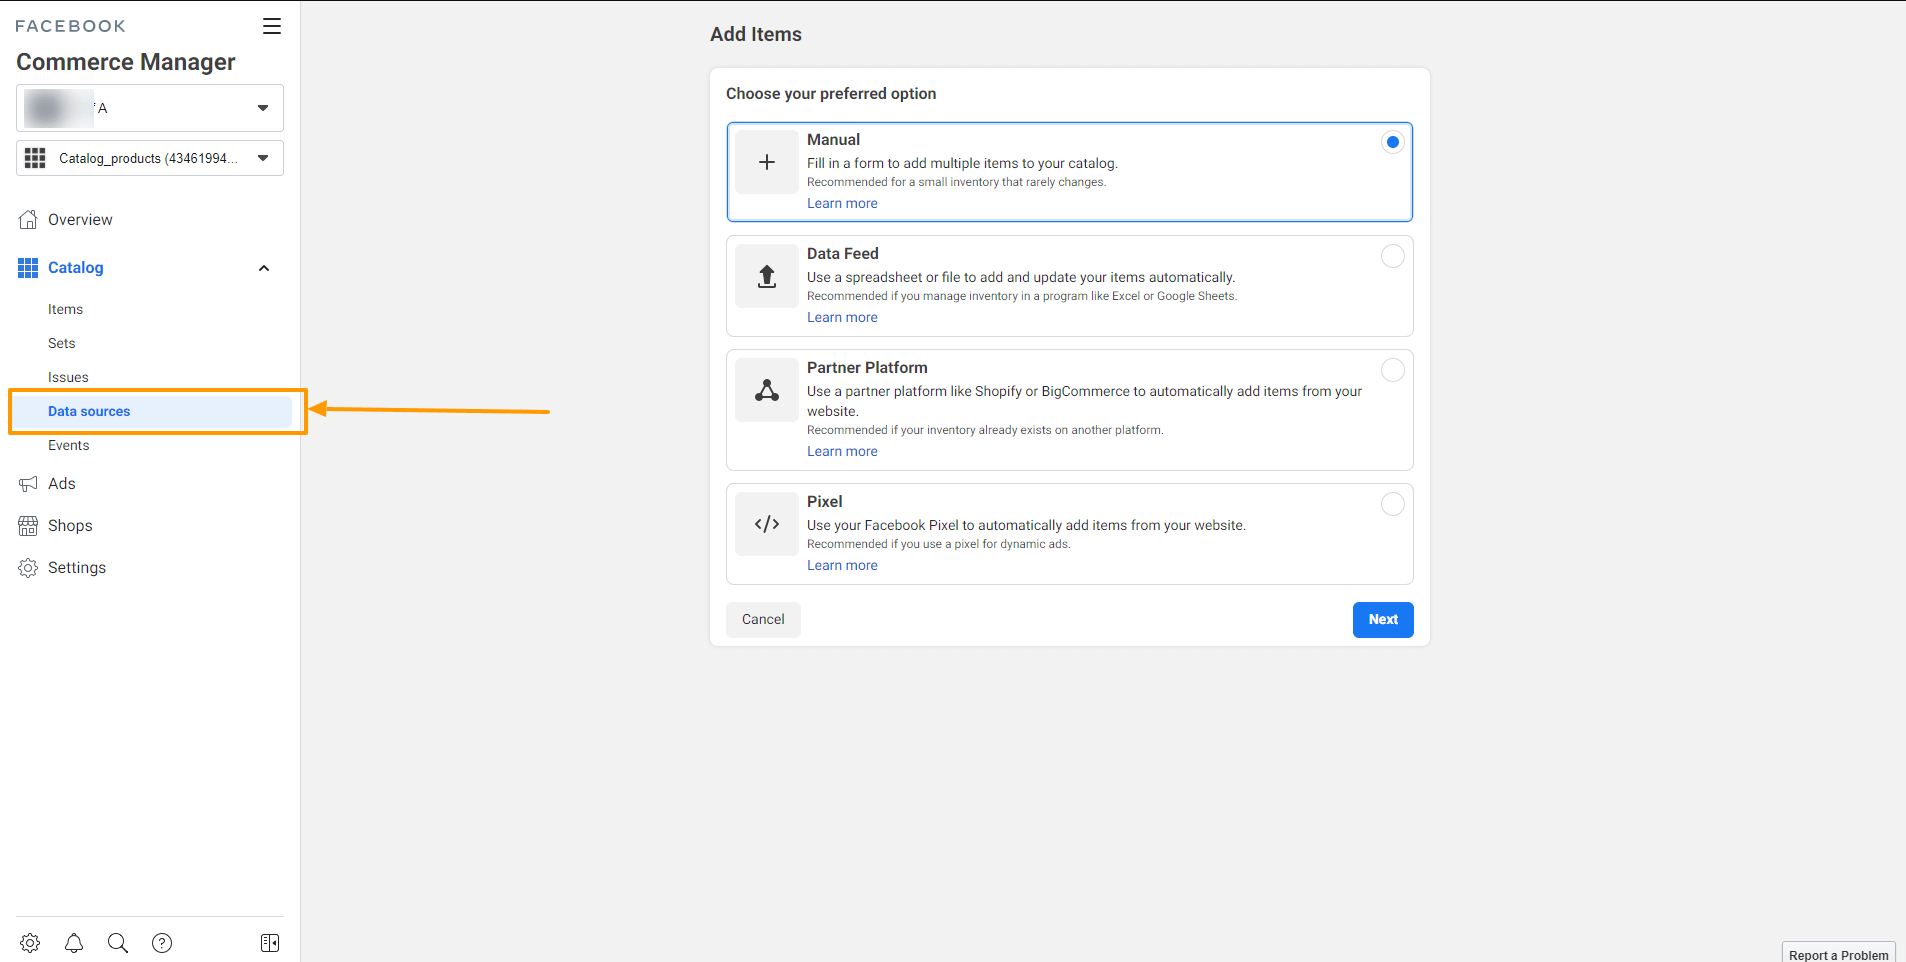
Step 7:
To start adding products to your Facebook Catalog with the feed you’ve generated for Facebook, click on the Data sources option, and it will take you to the Add Items window.
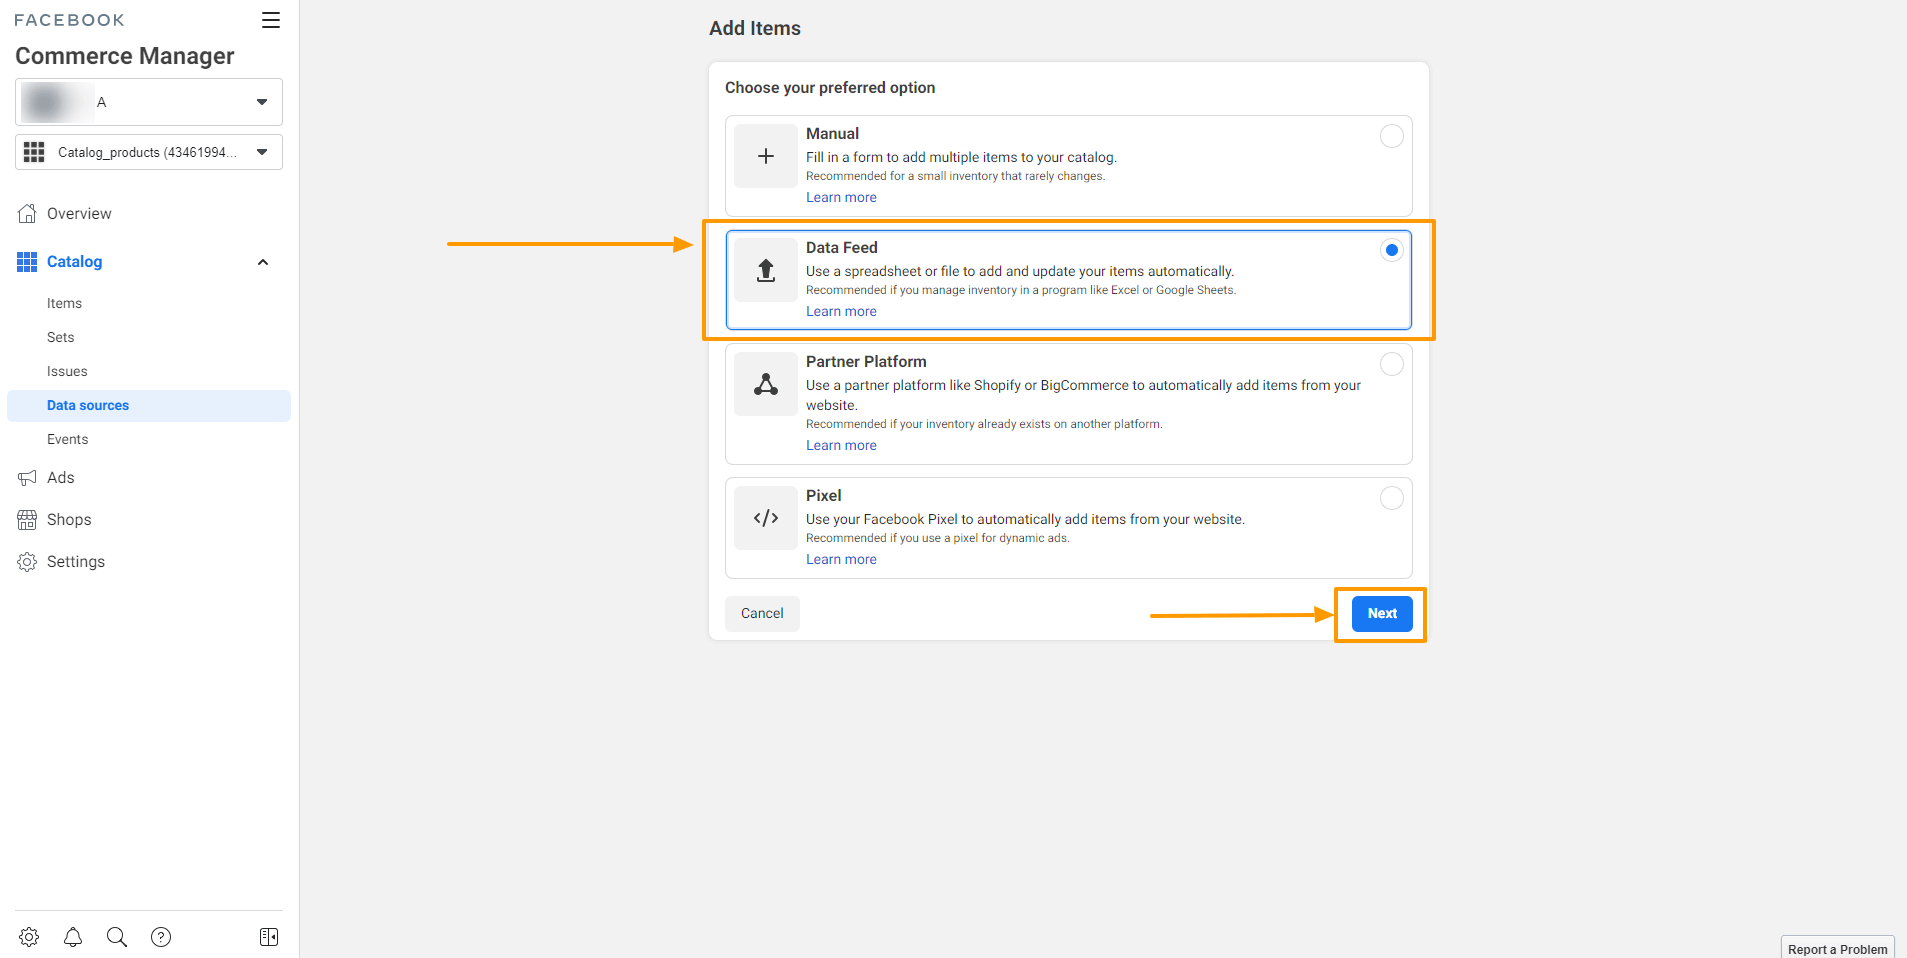
Step 8:
Select Data Feed and click on the Next button.
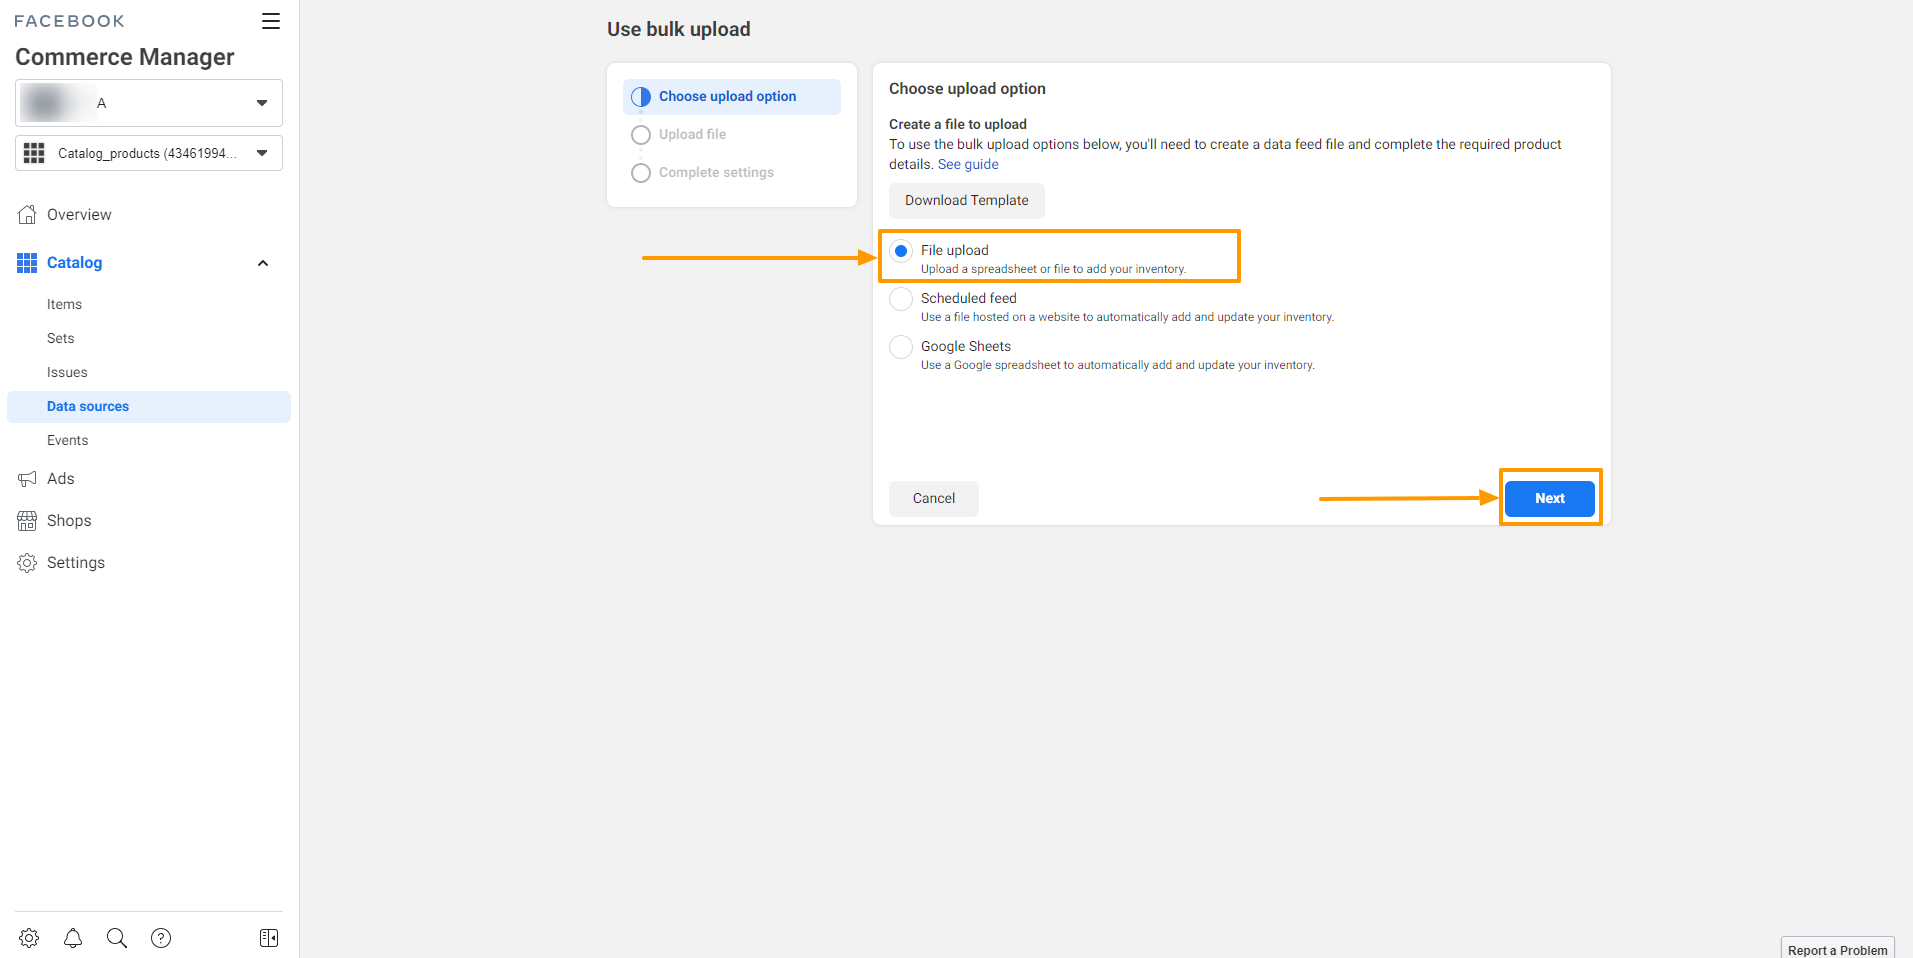
Step 9:
Here you will get three options,
- File upload
- Scheduled feed
- Google Sheets
Choose the File upload option to upload a spreadsheet or file to your inventory.
If you want Facebook to fetch data automatically from your site, select Schedule feed. You can set it later too.
Also, you can add products from Google Sheets too, you can use this Google spreadsheet to automatically add and update your inventory.
For now, select the File upload option.
Step 10:
Upload your Facebook feed – if the feed file is supported, you will see a message that your feed file is a supported file.
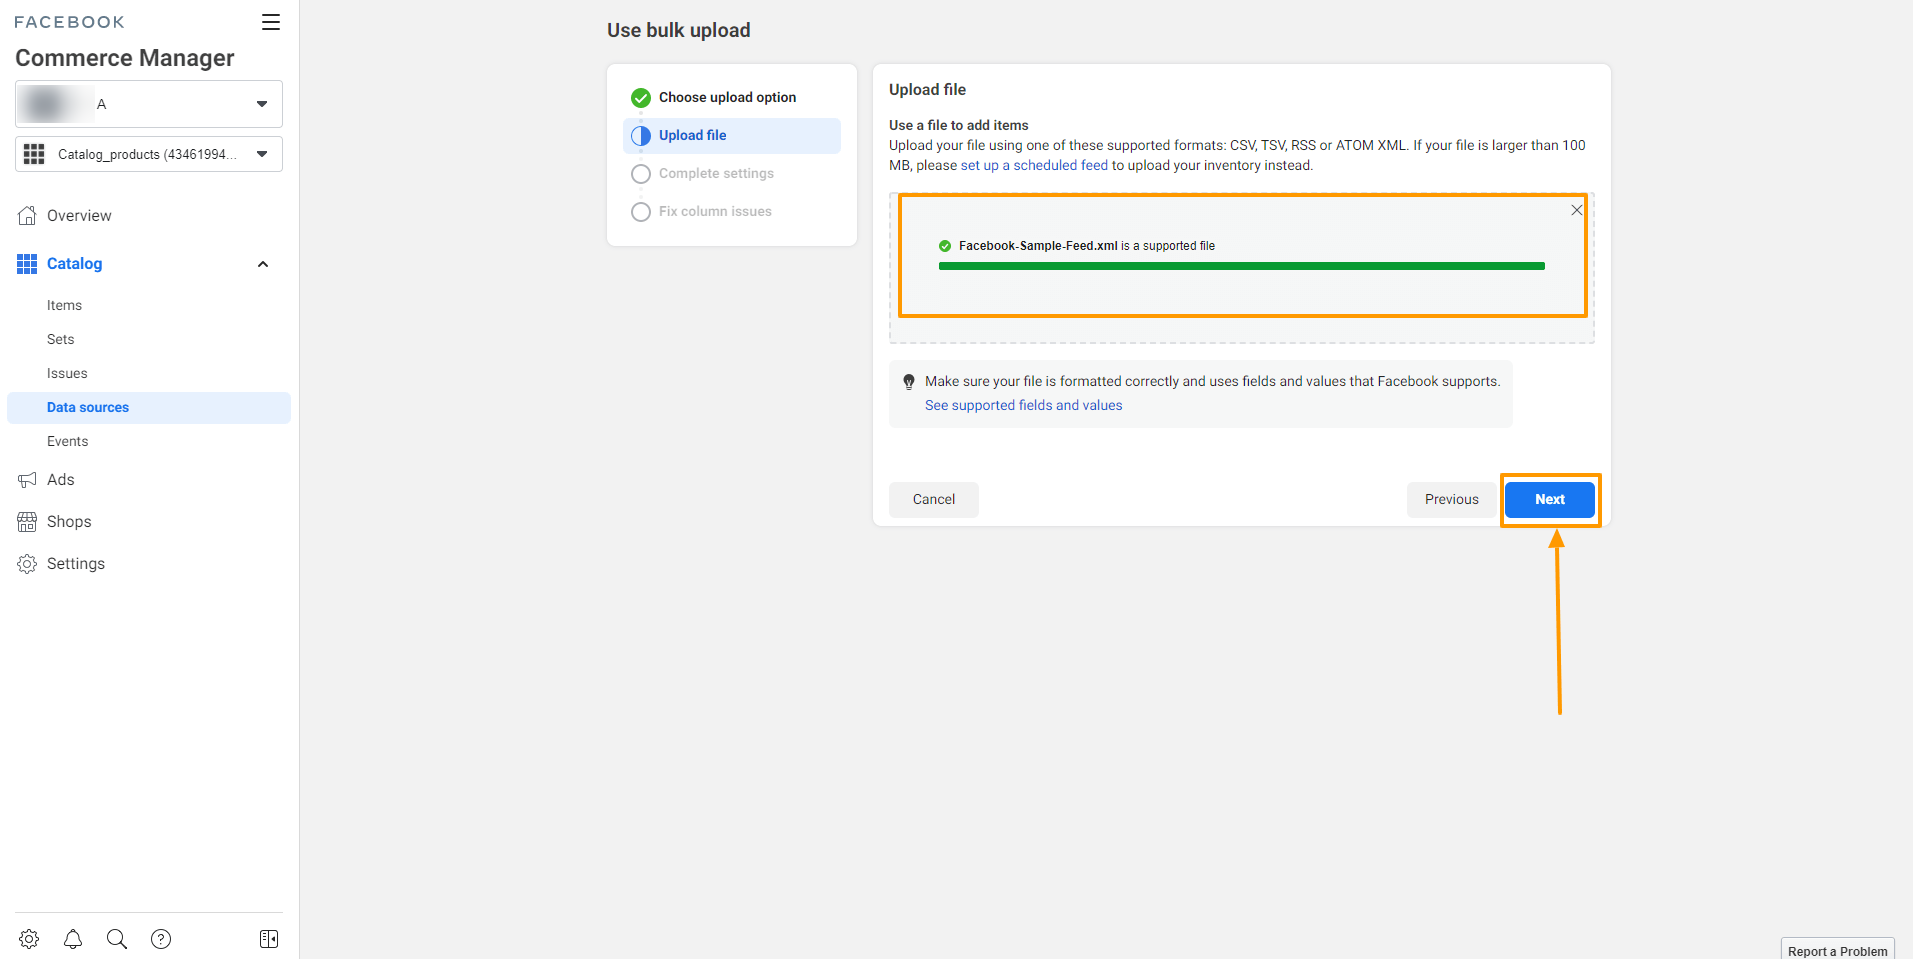
Click on the Next button.
Step 11:
Finally, complete the upload process by changing your data source name and setting up the default currency.
You can keep it the same and click on the Upload button.
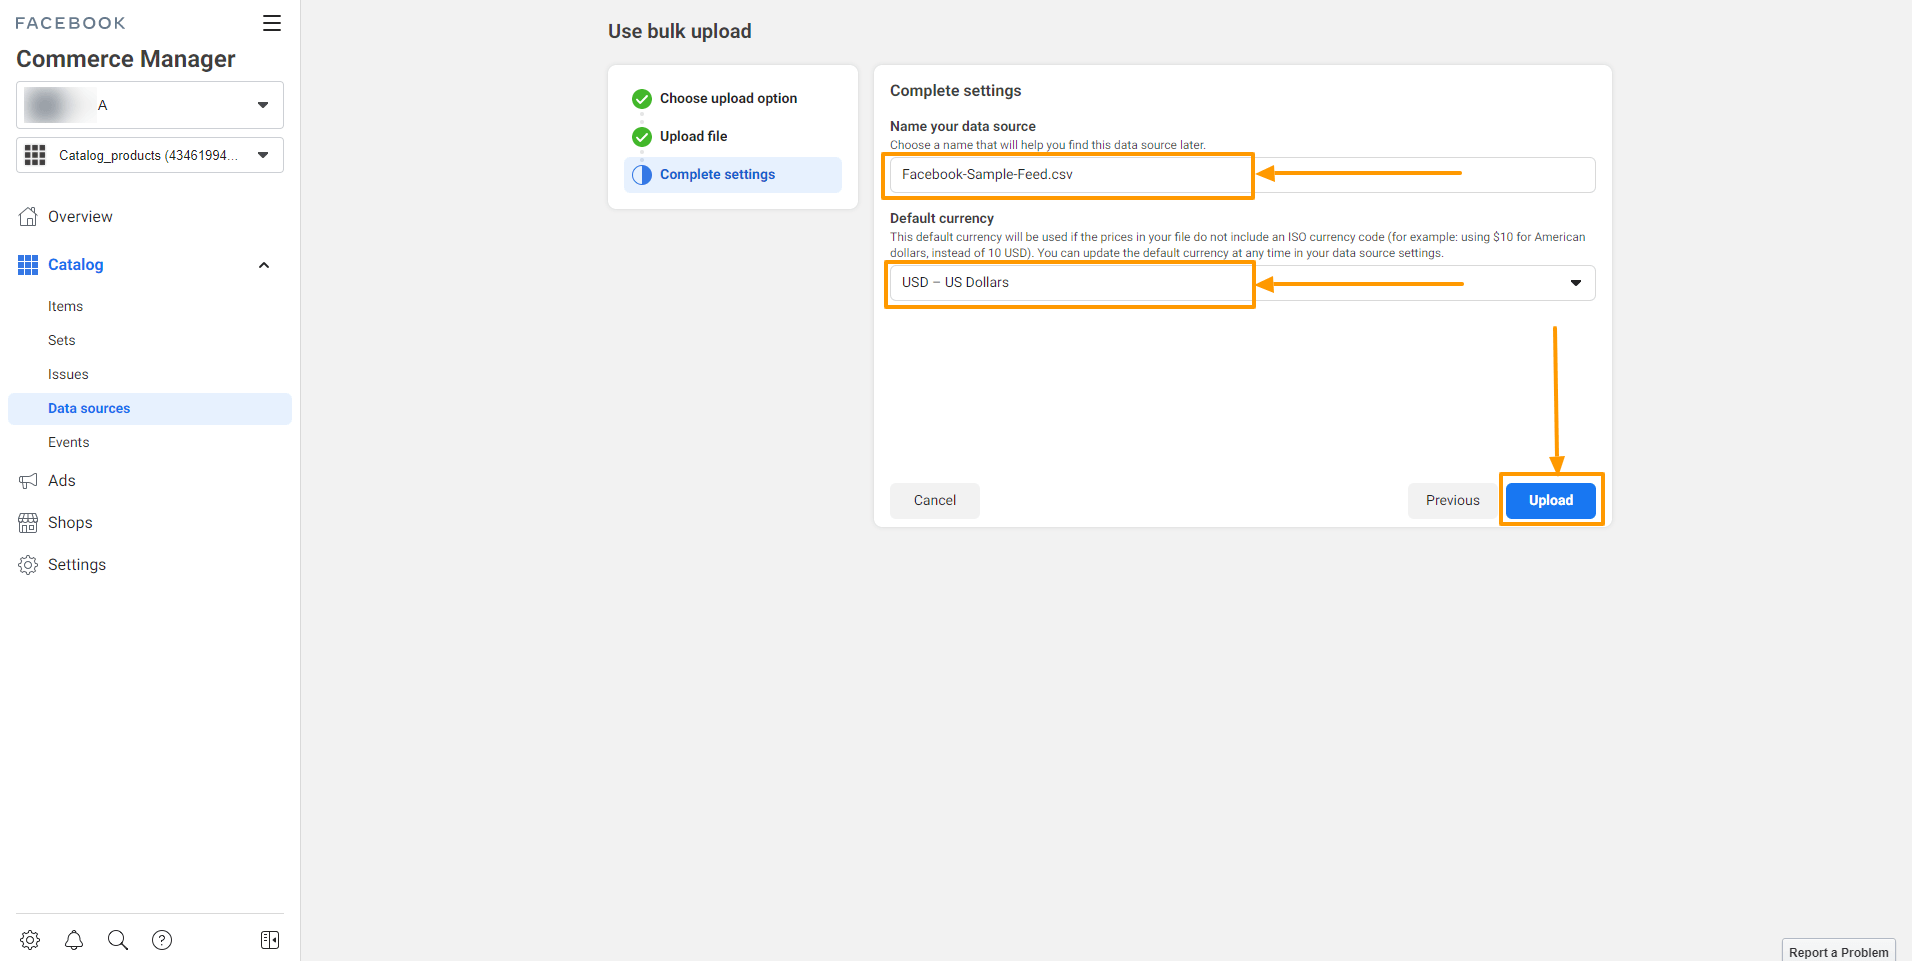
Step 12:
Once you click on the Upload button, your products will start uploading on Facebook.
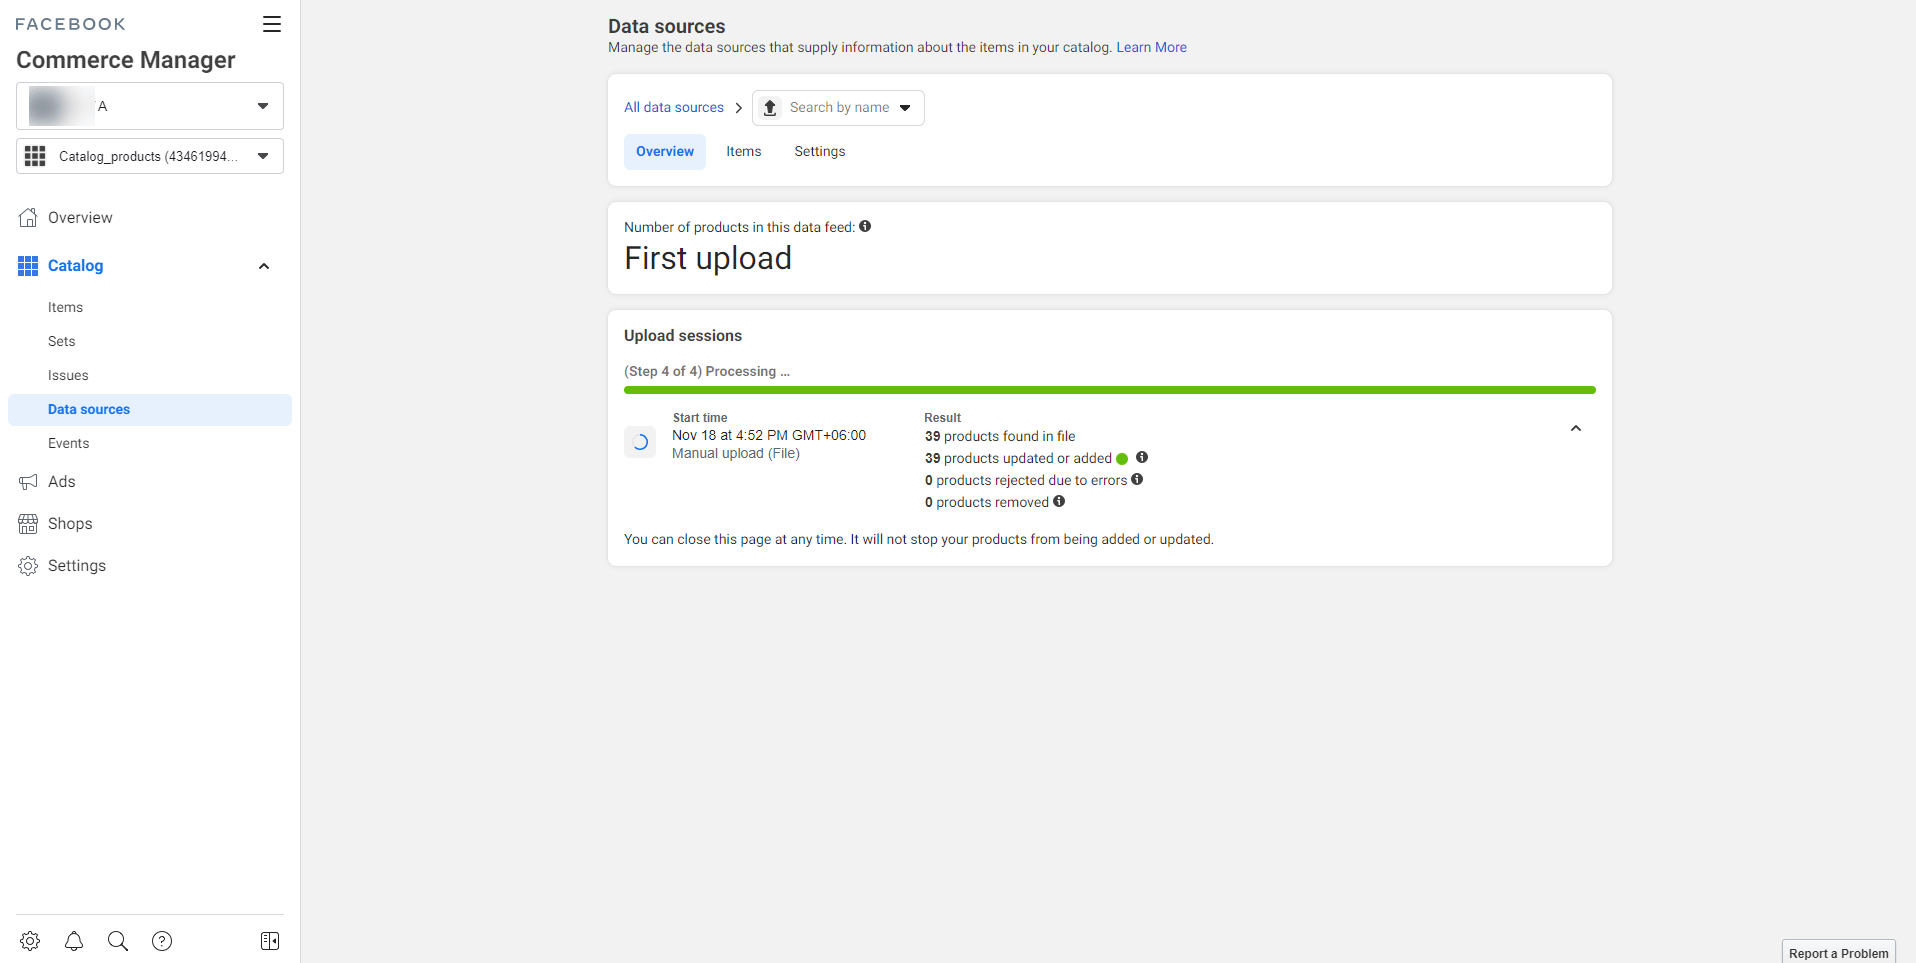
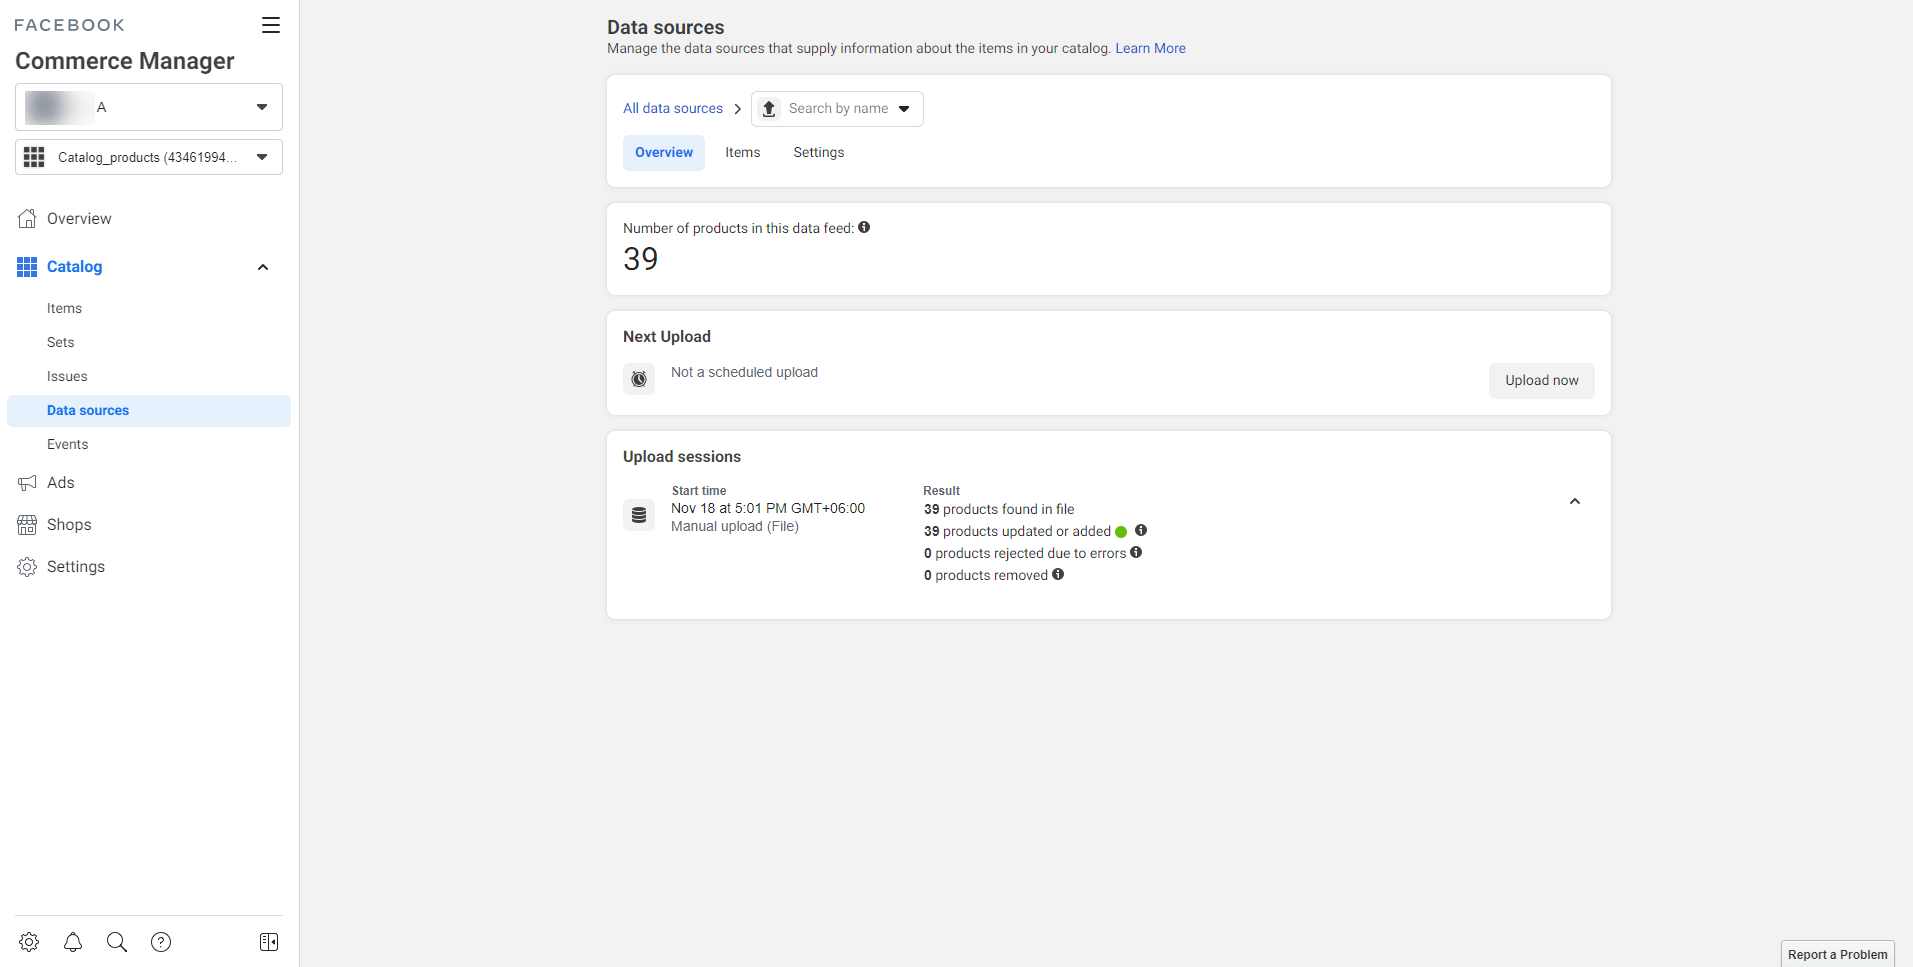
Once the uploading is completed, you will get a summary of your feed catalog.
Step 13:
You can go to the Items tab to see all the uploaded products.
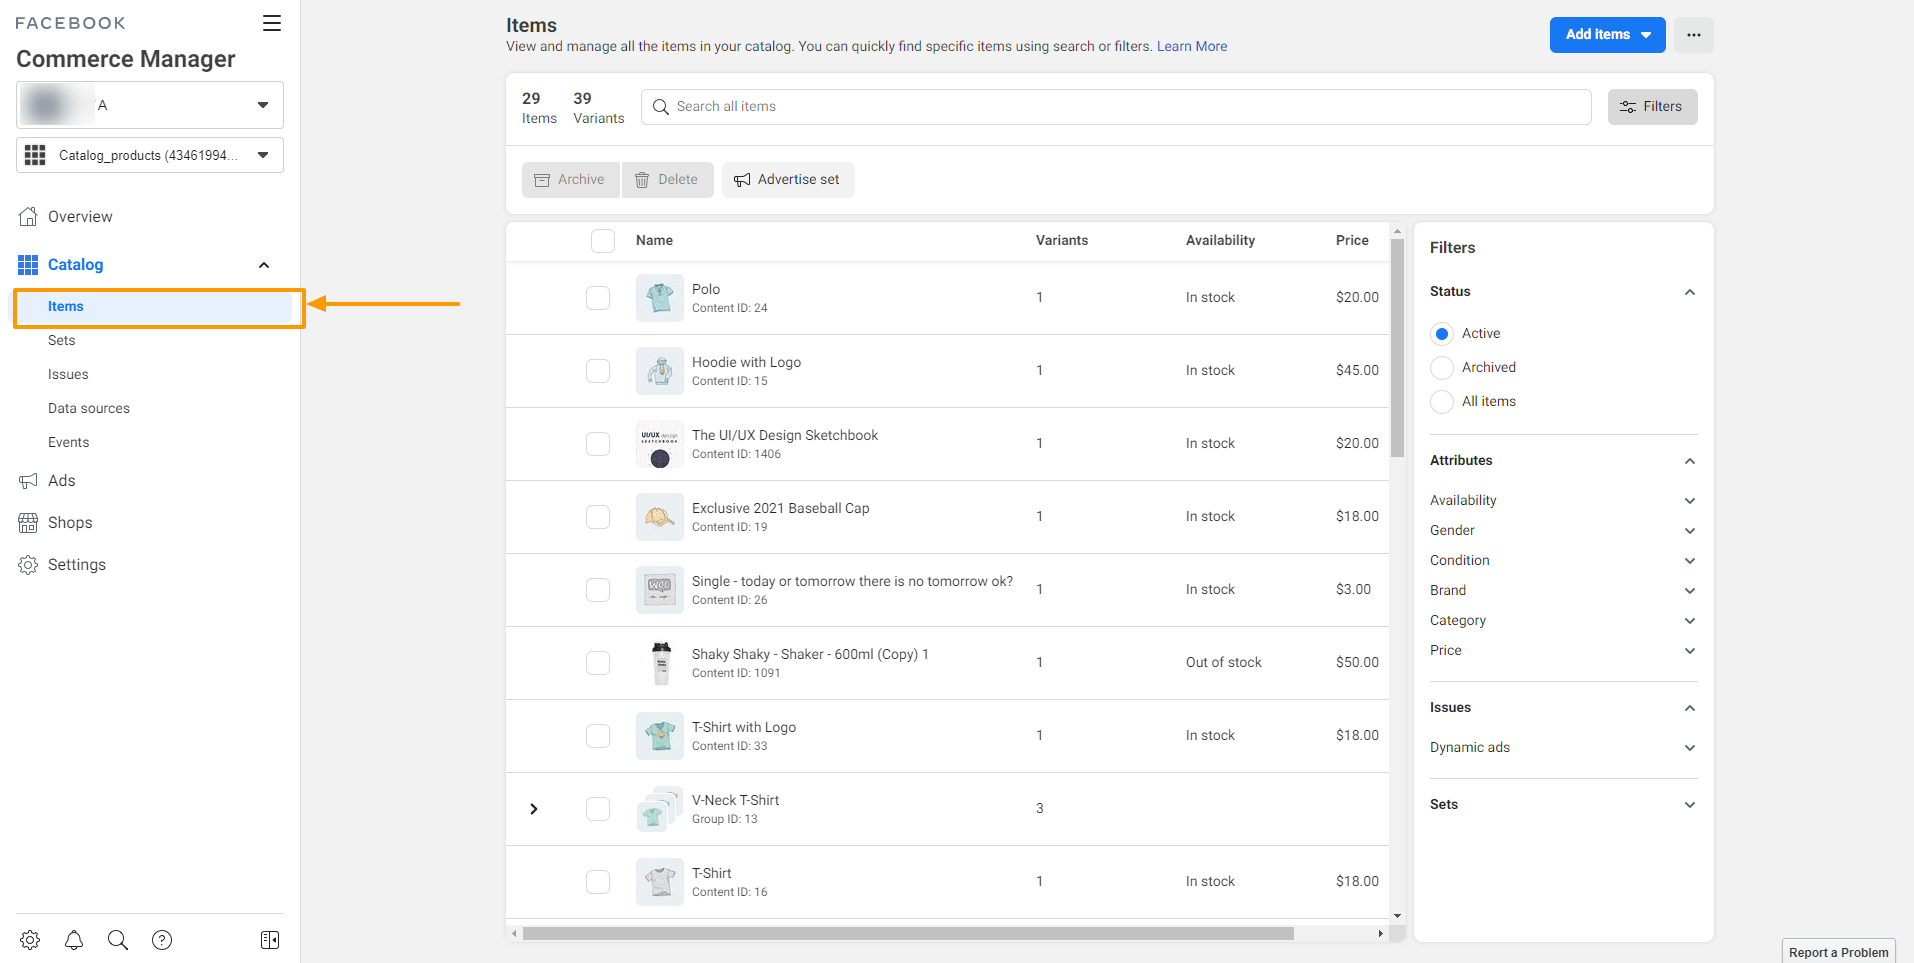
This is it!. Your products are now uploaded on Facebook Commerce Manager.
Now if you can click on any item to view all the detail or edit an item.