Google Shopping Product Feed requires the following data for each of your products-
Note: If any of the following required attribute attributes are missing in your feed, Google will reject your product. However, if you use the Identifier exists attribute in your feed, Google will accept your feed but this product’s performance will be compromised. Click here to learn more about the Identifier exists attribute.
Required Attributes #
- Product ID
- Titel van het product
- Productbeschrijving
- Product URL
- Productcategorie
- Productafbeelding URL
- Voorraadbeschikbaarheid
- Normale prijs
- Productvoorwaarde
- Manufacturer
- GTIN / MPN
Required Attributes (Based on condition) #
- MPN (Fabrieksonderdeelnummer)
- Shipping
- Tax (Available for the US only)
- Availability date
- Voorwaarde
- Volwassen
- Multipack
- Bundel
- Leeftijdsgroep
- Kleur
- Geslacht
- Grootte
- Materiaal
- Patroon
- Item Groeps-ID
Optional Attributes #
- Identificator bestaat
- Google Product Categorie
- Sale price
- Additional image link
- Mobile link
- Cost of goods sold
- Expiration date
- Sale price effective date
- Unit pricing measure (except when required by local laws or regulations)
- Unit pricing base measure (except when required by local laws or regulations)
- Installment
- Subscription cost
- Loyalty points
- Product type
- Energy efficiency class (except when required by local law or regulations)
- Minimum energy efficiency class (except when required by local law or regulations)
- Maximum energy efficiency class (except when required by local law or regulations)
- Size type
- Size system
- Product length
- Product width
- Product height
- Product weight
- Product detail
- Product highlight
- Ads redirect
- Custom label 0-4
- Promotion ID (Required for promotions in Australia, France, Germany, India, the UK and the US)
- Excluded destination
- Included destination
- Excluded countries for Shopping ads
- Pause
- Shipping label
- Shipping weight (Required for carrier-calculated rates, a table based on weight, or a rule based on weight in your account shipping settings)
- Shipping length (Required for carrier-calculated rates in your account shipping settings)
- Shipping width (Required for carrier-calculated rates in your account shipping settings)
- Shipping height (Required for carrier-calculated rates in your account shipping settings)
- Ships from country
- Transit time label
- Maximum handling time
- Minimum handling time
- Tax category
Required Attributes Explanation #
Product ID
Product ID #
| Attribuut | id |
| Voorbeeldwaarde | 671 |
| Voerstructuur | <g:id>671</g:id> |
It is a unique identifier for your product on your store.
U kunt echter ook het product SKU gebruiken als product ID.
Titel van het product
Product Title #
| Attribuut | titel |
| Voorbeeldwaarde | Rood Logo Rex T-shirt |
| Voerstructuur | <g:title> <![CDATA[ Red Logo Rex T-shirt ]]> </g:title> |
It is the name of the product to be displayed.
When you set the product title, specify any special feature such as its color, and the brand name, along with the product. This will create more attraction for buyers.
Het is echter niet toegestaan om de tegel te gebruiken voor andere promoties (bijvoorbeeld het toevoegen van "gratis verzending" of "gereduceerde prijs" of het gebruik van alle petten).
In het geval van variabele producten moet de merknaam bij de titel worden vermeld. En in plaats van alleen maar 'een' kenmerk in de hoofdtitel op te nemen, noem je het kenmerk dat het tot een variant van het product maakt.
Als een product bijvoorbeeld een Logo Rex T-shirt is en variaties Rood en Blauw heeft, dan moet op uw Google Product Feed de ene variatie "Logo Rex T-shirt - Rood" heten en de andere "Logo Rex T-shirt - Blauw".
De weergave van de voergegevens zal er dus individueel zo uitzien:
<g:title>
    <![CDATA[ Logo Rex T-shirt - Red ]]>
</g:title>
<g:title>
<![CDATA[ Logo Rex T-shirt - Blue ]]>
</g:title>Productbeschrijving
Product Description #
| Attribuut | beschrijving |
| Voorbeeldwaarde | Dit is een rood T-shirt. Het is alleen gemaakt voor testdoeleinden. |
| Voerstructuur | <g:description> <![CDATA[ This is a Red T-shirt. It was created for testing purposes only. ]]> </g:description> |
Voeg een goede beschrijving toe van het product dat u verkoopt. Zorg ervoor dat u alle belangrijke functies die het kan hebben, dat zal het aantrekken van kopers te markeren.
Hoewel u de exclusieve kenmerken en voordelen van de beschrijving moet vermelden, mag u in de beschrijving geen uitgebreid promotioneel tintje gebruiken (bijvoorbeeld het toevoegen van "gratis verzending" of "gereduceerde prijs" of het gebruik van alle kappen om een bepaald punt te accentueren).
Ook moet u geen links naar een andere webpagina opnemen of de producten vergelijken met die van concurrenten.
Product URL
Product URL #
| Attribuut | link |
| Voorbeeldwaarde | https://www.yourwebsite.com/red-logo-rex-t-shirt/ |
| Voerstructuur | <g:link> <![CDATA[ https://www.yourwebsite.com/red-logo-rex-t-shirt/ ]]> </g:link> |
This is the link to your product page.
Wanneer mensen uw product op Google vinden, brengt een klik op die advertentie de potentiële koper naar de link die u hier opgeeft.
Het is het beste om de producttitel op de link te vermelden, maar velen geven de voorkeur aan het product Id in plaats daarvan, en sommigen gebruiken beide.
Ook moet u ervoor zorgen dat uw website-domein wordt geverifieerd en begint met "http" of "https".
Productcategorie
Product Category #
| Attribuut | producttype |
| Voorbeeldwaarde | Kleding |
| Voerstructuur | <g:product_type> <![CDATA[ Clothing ]]> </g:product_type> |
This is the product type, or category that you set on your store.
When editing a product on WooCommerce, on the right side, you will the option to set Category.
![A Complete Guide To WooCommerce Product Feed - Google Shopping & Facebook [2022] 1](https://rextheme.com/wp-content/uploads/2019/05/005-Product-Category.png)
Dit attribuut is optioneel, maar we raden u aan het te gebruiken om een betere visualisatie voor de kijkers te creëren.
Google Product Categorie
Google Product Category #
| Attribuut | google_product_categorie |
| Voorbeeldwaarde | Kleding & Accessoires > Kleding |
| Voerstructuur | <g:google_product_category> <![CDATA[ Apparel & Accessories > Clothing ]]> </g:google_product_category> |
Google heeft een eigen categorielijst die u moet gebruiken om uw producten op Google Shopping te categoriseren. U moet dit attribuut instellen volgens hun vereiste taxonomie om uw Google Product Feed goedgekeurd te krijgen.
Klik hier om de Google-categorielijst en de taxonomie te bekijken
Daarom kun je je WooCommerce-winkelcategorieën dienovereenkomstig instellen of je eigen categorieën laten koppelen aan die van Google met behulp van een plugin bij het genereren van productfeeds.
Zoals u kunt zien, staat links een lijst met alle categorieën die in mijn winkel verkrijgbaar zijn. En aan de rechterkant krijg ik de optie om ze in kaart te brengen met Google Categorieën.
Productafbeelding URL
Product Image URL #
| Attribuut | image_link |
| Voorbeeldwaarde | https://www.yourwebsite.com/redtee394.png |
| Voerstructuur | <g:image_link> <![CDATA[ https://www.yourwebsite.com/redtee394.png ]]> </g:image_link> |
This will be the link to the main image of your product.
Welke afbeelding u hier ook gebruikt, u moet de URL naar die afbeelding opgeven voor het "image_link"-attribuut.
U moet een overtuigend beeld van het product geven zonder enige promotionele tekst of watermerk. Vermijd ook het gebruik van een plaatshouderafbeelding.
Vergeet niet dat dit beeld de belangrijkste factor is om meer klanten te krijgen. De meeste mensen zullen uw product alleen opmerken als ze het leuk vinden wat ze zien. Zorg dus voor een duidelijk beeld met een hoge kwaliteit.
Voorraadstatus/beschikbaarheid
Stock Status/Availability #
| Attribuut | beschikbaarheid |
| Voorbeeldwaarde | in_voorraad |
| Voerstructuur | <g:availability>in_stock</g:availability> |
This will signify if the product is still in stock, or all sold out.
Normale prijs
Regular Price #
| Attribuut | prijs |
| Voorbeeldwaarde | 26.53 USD |
| Voerstructuur | <g:price>26.53 USD</g:price> |
This is the price of the product (usually before taxes).
This value will be added under the attribute “price” when generating WooCommerce Google product feed.
Zorg ervoor dat u de juiste prijs invoert, met de ISO-valutacode als achtervoegsel.
Houd er rekening mee dat de prijs niet "0" kan zijn. (De prijs "0" is alleen aanvaardbaar voor mobiele apparaten die op contractuele basis worden verkocht).
Ook, als uw producten voor de VS of Canada zijn, voeg dan geen belasting toe aan de prijs. Voor elk ander land, zorg ervoor dat u BTW of GST toevoegt of welke regionale belasting dan ook die van toepassing is.
Productvoorwaarde
Product Condition #
| Attribuut | voorwaarde |
| Voorbeeldwaarde | Nieuw |
| Voerstructuur | <g:condition> <![CDATA[ New ]]> </g:condition> |
Gebruik dit kenmerk om aan te geven of uw product gloednieuw of gereviseerd is. U kunt de waarden "nieuw", "vernieuwd" of "gebruikt" gebruiken om de toestand te definiëren.
WooCommerce heeft geen veld om de conditie van het product te definiëren, vandaar dat je het zelf moet toevoegen aan de productfeed.
Product Feed Manager For WooCommerce zal echter de optie voor je hebben om het productconditieveld voor alle producten toe te voegen.
Fabrikant/Merknaam
Manufacturer/Brand Name #
| Attribuut | merk |
| Voorbeeldwaarde | RexTest |
| Voerstructuur | <g:brand> <![CDATA[ RexTest ]]> </g:brand> |
It is mandatory to provide the manufacturer/brand name in order to add a product on Google Shopping. Ideally, you should also mention the brand name on the product tile.
Maar WooCommerce bevat geen "merk"-veld voor uw producten. U kunt dus voor elk product een aangepast veld aanmaken of een plugin gebruiken om het merkveld toe te voegen aan elk product in uw WooCommerce winkel.
However, movies, books, or musical records don’t require you to include a brand name. In that case, you can keep the brand section empty.
GTIN (Global Trade Item Number)
GTIN (Global Trade Item Number) #
| Attribuut | gtin |
| Voorbeeldwaarde | 123465465464 |
| Voerstructuur | <g:gtin> <![CDATA[ 123465465464 ]]> </g:gtin> |
Om producten te promoten via Google Shopping Ads, moeten fabrikanten uit de VS of Canada die GTIN-gecertificeerd zijn, het GTIN-nummer opgeven voor elk product op uw Google Product Feed.
Voor andere fabrikanten
- in Noord-Amerika, UPC
- in Europa de EAN
- in Japan, JAN
Voor een boek moet je echter ISBN leveren, en voor multipacks moet je de ITF-14 leveren.
MPN (Fabrieksonderdeelnummer)
MPN (Manufacturer Part Number) #
| Attribuut | MPN |
| Voorbeeldwaarde | Rex0011Test |
| Voerstructuur | <g:MPN> <![CDATA[ Rex0011Test ]]> </g:MPN> |
Indien een product geen GTIN (of UPC, EAN, JAN) heeft, dan dient u in plaats daarvan de MPN op te geven.
U mag het product SKU ook gebruiken als de waarde van de MPN wanneer u niet zowel GTIN als MPN heeft (op voorwaarde dat u de SKU niet als product id heeft gebruikt).
Nu, WooCommerce voorziet niet standaard in velden voor Brand, GTIN of MPN. Daarom moet u voor elk product handmatig aangepaste velden invoeren.
However, I use the Product Feed Manager For WooCommerce plugin which includes those fields on every product, as shown below:
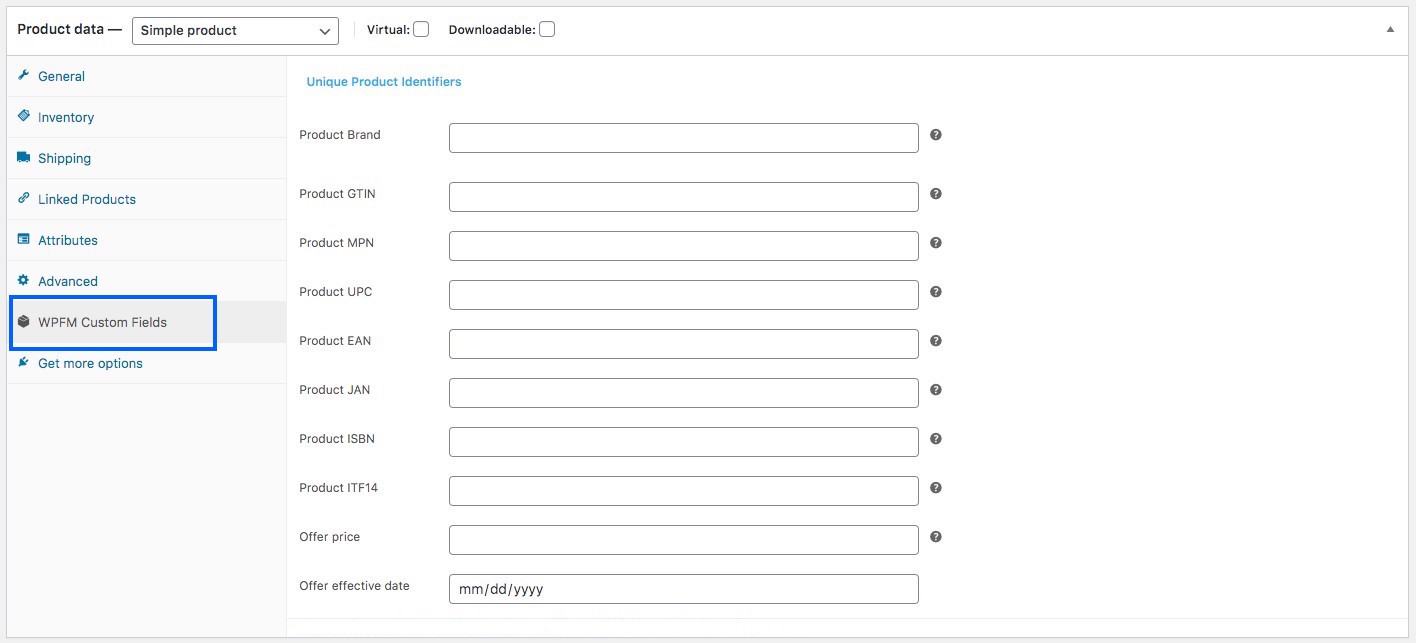
Ik hoef alleen maar de juiste gegevens in te voeren en deze te gebruiken als waarden van de vereiste attributen bij het genereren van mijn WooCommerce Product feed.
Identifier Bestaat
Identifier Exists #
| Attribuut | identificator_bestaat |
| Voorbeeldwaarde | geen |
| Voerstructuur | <g:identifier_exists>no</g:identifier_exists> |
U heeft al eerder geleerd dat het verstrekken van GTIN of MPN verplicht is. Sommige producten hebben echter geen GTIN of MPN.
Sommige producten worden bijvoorbeeld gewoon lokaal geproduceerd en bevatten geen GTIN of MPN.
In dit geval moet u het attribuut "identifier_exists" gebruiken en de waarde "no" toekennen.
Inhoud voor volwassenen
Adult Content #
| Attribuut | volwassen |
| Voorbeeldwaarde | ja |
| Voerstructuur | <g:adult>yes</g:adult> |
Je hebt misschien wat erotische of volwassen producten. Het is prima om ze te promoten op Google Shopping, zolang je ze maar als volwassen content bestempelt. Bij het indienen van een product dat in de volwassen industrie zit, moet u het "volwassen" attribuut gebruiken en de waarde "ja" toekennen.
Als je een bedrijf runt dat volledig in de volwassen industrie zit, bijvoorbeeld een gelicenseerde erotische winkel, dan heb je geen attributen nodig. U kunt beter naar uw Google Merchant Center-instellingen gaan en de optie selecteren die zegt dat uw bedrijf volwassen producten levert.
Multipack
Multipack #
| Attribuut | multipack |
| Voorbeeldwaarde | 8 |
| Voerstructuur | <g:multipack>8</g:multipack> |
Een multipack is wanneer u een groep van meerdere identieke producten als één geheel verkoopt; bijvoorbeeld 8 pennen bij elkaar.
Deze eigenschap is nodig voor de promotie op bepaalde locaties zoals Australië, Brazilië, Tsjechië, Frankrijk, Duitsland, Italië, Japan, Nederland, Spanje, Zwitserland, het Verenigd Koninkrijk en de VS.
U moet dit attribuut opnemen en de waarde ervan toekennen aan het aantal producten dat u in een multipack hebt geassembleerd.
Als het multipack door de eigenlijke fabrikant wordt geassembleerd, en niet door u, dan hoeft u dit attribuut niet op te nemen.
Tip:
Try to include multipacks on your store with a small amount of discount.
For example, if 1 pen cost 10 dollars, and you set a multipack for 8 pens, then rather than charging 80 dollars, try to give a discount and charge 70 or 75 dollars maybe. This little discount will create more attraction.
Bundel
Bundle #
| Attribuut | is_bundel |
| Voorbeeld | ja |
| Voergegevens | <g:is_bundle>yes</g:is_bundle> |
Een bundel is wanneer u meerdere producten neemt en deze als één pakket verkoopt. Meestal zijn alle producten in een bundel enigszins verwant en kunnen ze individueel worden verkocht zonder de bundel.
Hier fungeert één product als hoofdproduct en worden de rest in een bundel aangeboden.
U kunt bijvoorbeeld een productbundel maken met een camera, een geheugenkaart en een draagtas. Hier is de camera het hoofdproduct, terwijl de geheugenkaart en de draagtas verwante bijproducten zijn in een bundel.
Voor het promoten van bundels in Australië, Brazilië, Tsjechië, Frankrijk, Duitsland, Italië, Japan, Nederland, Spanje, Zwitserland, het Verenigd Koninkrijk en de VS moet u dit attribuut gebruiken en de waarde ervan als "ja" of "waar" toekennen.
Materiaal
Material #
| Attribuut | materiaal |
| Voorbeeld | Leder |
| Voergegevens | <g:material>Leather</g:material> |
Als u een product wilt uploaden waarvan het materiaal een opvallende eigenschap is, dan kunt u dit attribuut gebruiken. U moet geldige materiaalnamen gebruiken.
Indien het product met meerdere materialen is gemaakt, vermeld dan alle materialen en scheid ze met "/" ertussen. Bijvoorbeeld katoen/leer/polyester.
**For promoting Apparels & Accessories in Brazil, France, Germany, Japan, the UK, and the US, you need to provide more attributes which include age_group, color, gender, and size. And for variable products, you must include an extra attribute called item_group_id. So let’s learn more about them.
Leeftijdsgroep
Age Group #
| Attribuut | leeftijdsgroep |
| Voorbeeldwaarde | kinderen |
| Voerstructuur | <g:age_group>kids</g:age_group> |
(Dit veld is alleen verplicht als uw product onder de categorie Kleding & Accessoires of de subcategorie valt)
U moet aangeven voor welke leeftijdsgroep dit product bestemd is.
Google accepteert de volgende waarden:
- pasgeborene
- baby
- peuter
- kinderen
- volwassen
In the case of variable products, assign a separate age group for each variant.
Kleur
Color #
| Attribuut | kleur |
| Voorbeeldwaarde | Tango rood |
| Voerstructuur | <g:color>Tango Red</g:color> |
(Dit veld is alleen verplicht als uw product onder de categorie Kleding & Accessoires of de subcategorie valt).
U moet de kleur van het product beschrijven (maar geen kleurcodes of losse letters).
Als er meerdere kleuren zijn, vermeld dan alle kleuren en scheid ze met een "/". Bijvoorbeeld, Rood/Blauw/Groen.
In het geval van variabele producten, wijs een aparte kleur toe voor elke variant en voeg deze toe aan de producttitel.
Tip:
Het is niet nodig om een generieke kleur te geven. U kunt liever pakkende kleurnamen gebruiken zoals "Tango Rood" in plaats van alleen "Rood", wat aantrekkelijker is voor kopers.
Geslacht
Gender #
| Attribuut | geslacht |
| Voorbeeldwaarde | mannetje |
| Voerstructuur | <g:gender>male</g:gender> |
(Dit veld is alleen verplicht als uw product onder de categorie Kleding & Accessoires of de subcategorie valt).
Bij de verkoop van kleding moet u aangeven voor welk geslacht het product bestemd is.
Google accepteert de volgende geslachten:
- mannetje
- vrouwelijk
- uniseks
Grootte
Size #
| Attribuut | formaat |
| Voorbeeldwaarde | XL |
| Voerstructuur | <g:size>XL</g:size> |
(Dit veld is alleen verplicht als uw product onder de categorie Kleding & Accessoires of de subcategorie valt).
U moet een geschikte maat voor het product toewijzen.
Bijvoorbeeld, "XL" om extra groot te definiëren, of "15/32 slim" om 15 inch halsmaat, 32 inch mouwen en een slanke pasvorm te definiëren.
Voor een vrij formaat product moet u de waarde "one size", "OS", "one size fits all", "OSFA", "one size fits most", of "OSFM" toekennen.
In het geval van variabele producten, wijs een aparte maat toe voor elke variant en u kunt deze ook toevoegen aan de titel van het product.
Tip:
Bewaar een meettabel op uw site om de hier genoemde maten te definiëren.
Als u bijvoorbeeld de maat als XL toekent, leg dan op de tafel de hoogte, breedte, borstomvang, etc. uit in inches of cms, om uw klanten een manier te geven om te controleren of die maat de juiste pasvorm heeft.
Verschillende landen hebben verschillende maten voor dezelfde groottecodes, vandaar dat dit nuttig zal zijn.
Patroon
Pattern #
| Attribuut | patroon |
| Voorbeeldwaarde | gestreept |
| Voerstructuur | <g:pattern>Striped</g:pattern> |
Dit veld is alleen van toepassing op variabele producten. Als je verschillende patroonontwerpen hebt voor hetzelfde product, dan moet je met dit attribuut voor elke variant aparte patronen vermelden.
Item Groeps-ID
Item Group ID #
| Attribuut | item_groep_id |
| Voorbeeldwaarde | AB12345 |
| Voerstructuur | <g:item_group_id>AB12345</g:item_group_id> |
Voor variabele producten, als de variaties zich voordoen als gevolg van een van de volgende:
Voor variabele producten, als de variaties zich voordoen als gevolg van een van de volgende:
- kleur
- formaat
- patroon
- materiaal
- leeftijdsgroep
- geslacht
dan moet je het "item_group_id" attribuut gebruiken.
Alle varianten van hetzelfde variabele product zullen dezelfde Item Group ID hebben. Dit geeft aan dat het om varianten van een enkel product gaat. U moet dus voor elk variabel product een unieke groeps-ID kiezen.
Google Product Feed Samples #
Nu u weet welke details u nodig heeft om uw WooCommerce Product Feed voor Google te genereren, laten we nu kijken naar enkele voorbeelden om de structuur te begrijpen.
Google accepteert verschillende bestandsformaten van de te uploaden productfeed. Het aanbevolen formaat is echter XML.
Hier is een voorbeeld van een eenvoudige productaanvoer:
Voorbeeld Google Productvoer van een eenvoudig product
Hier is een voorbeeld van een variabele productaanvoer:
Steekproef Google Productvoer van een variabel product
Deze feed kun je eenvoudig genereren met behulp van de plugin, Product Feed Manager For WooCommerce. Zodra je het productfeed-bestand hebt, kun je het nu handmatig uploaden naar je Google Shopping Center.
Met de plugin kunt u echter ook direct met Google Shopping automatisch synchroniseren. Dat betekent dat de feed automatisch kan worden gegenereerd en verzonden naar Google, volgens uw geplande tijd.
Ik geef je een goede uitleg van de plugin aan het einde van dit artikel.
Of u kunt hier klikken om er nu over te lezen.