
Shipping plays a crucial role in the customer experience, and getting it right can save time and prevent errors. Advanced Shipping lets you create flexible shipping rules tailored to your store’s needs.
With our Advance Shipping plugin you can define conditions based on product types, quantities, order totals, customer locations, and more, so that shipping costs are calculated accurately and automatically during checkout. Properly setting these conditions ensures your customers see the right shipping options and helps streamline your store management.
In this guide, we’ll walk you through how to set shipping conditions for the first time in Advanced Shipping, helping you get started quickly and correctly.
Create Shipping Conditions for All Purchases in Advanced Shipping #
Before starting the process make sure you have the advanced shipping license activated in your WordPress website.
Now, follow the steps to create shipping conditions for your WooCommerce store.
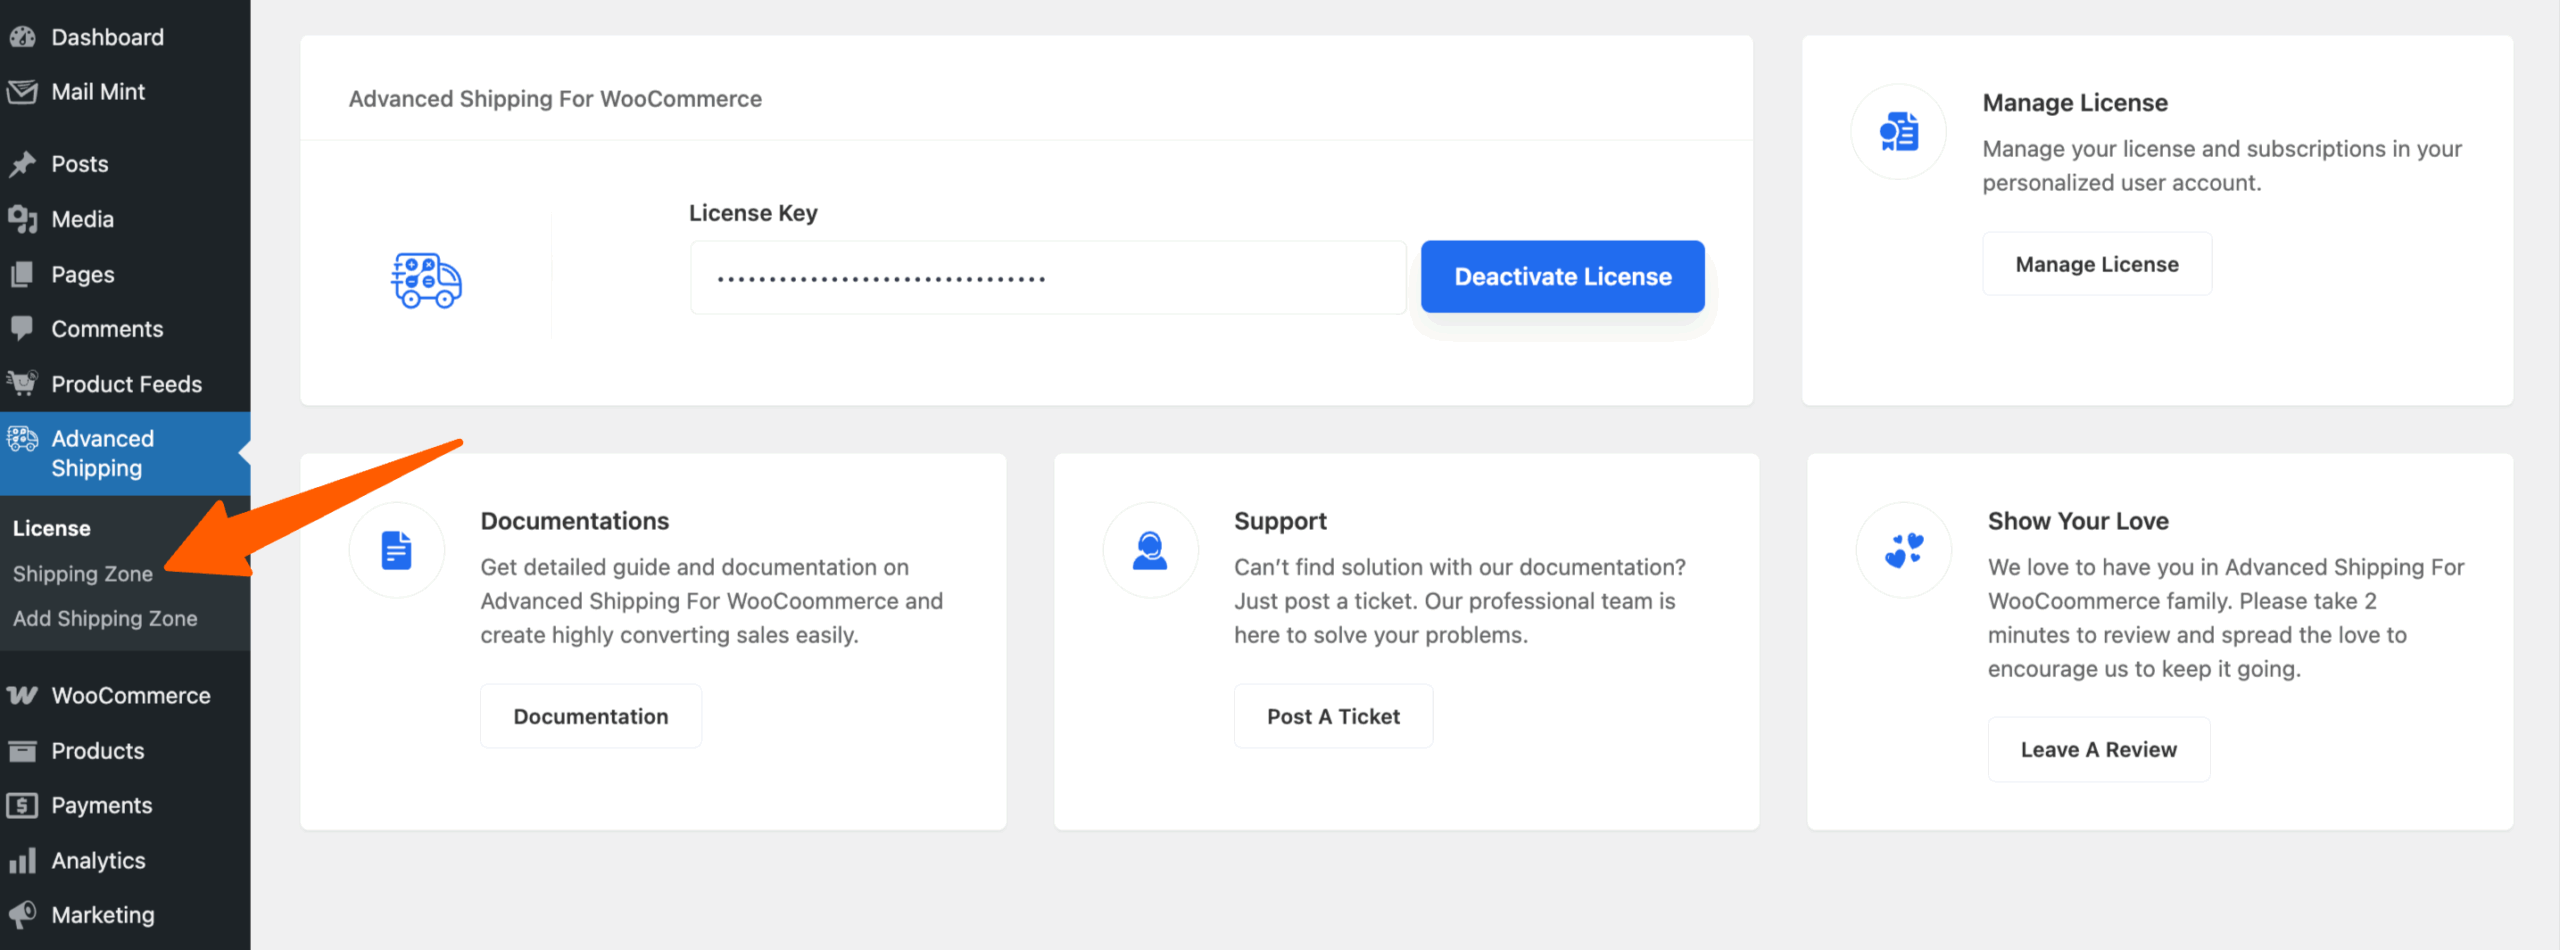
1. First of all go to the Advanced Shipping option on the left side of the backend of your WordPress dashboard and click on Shipping Zone.
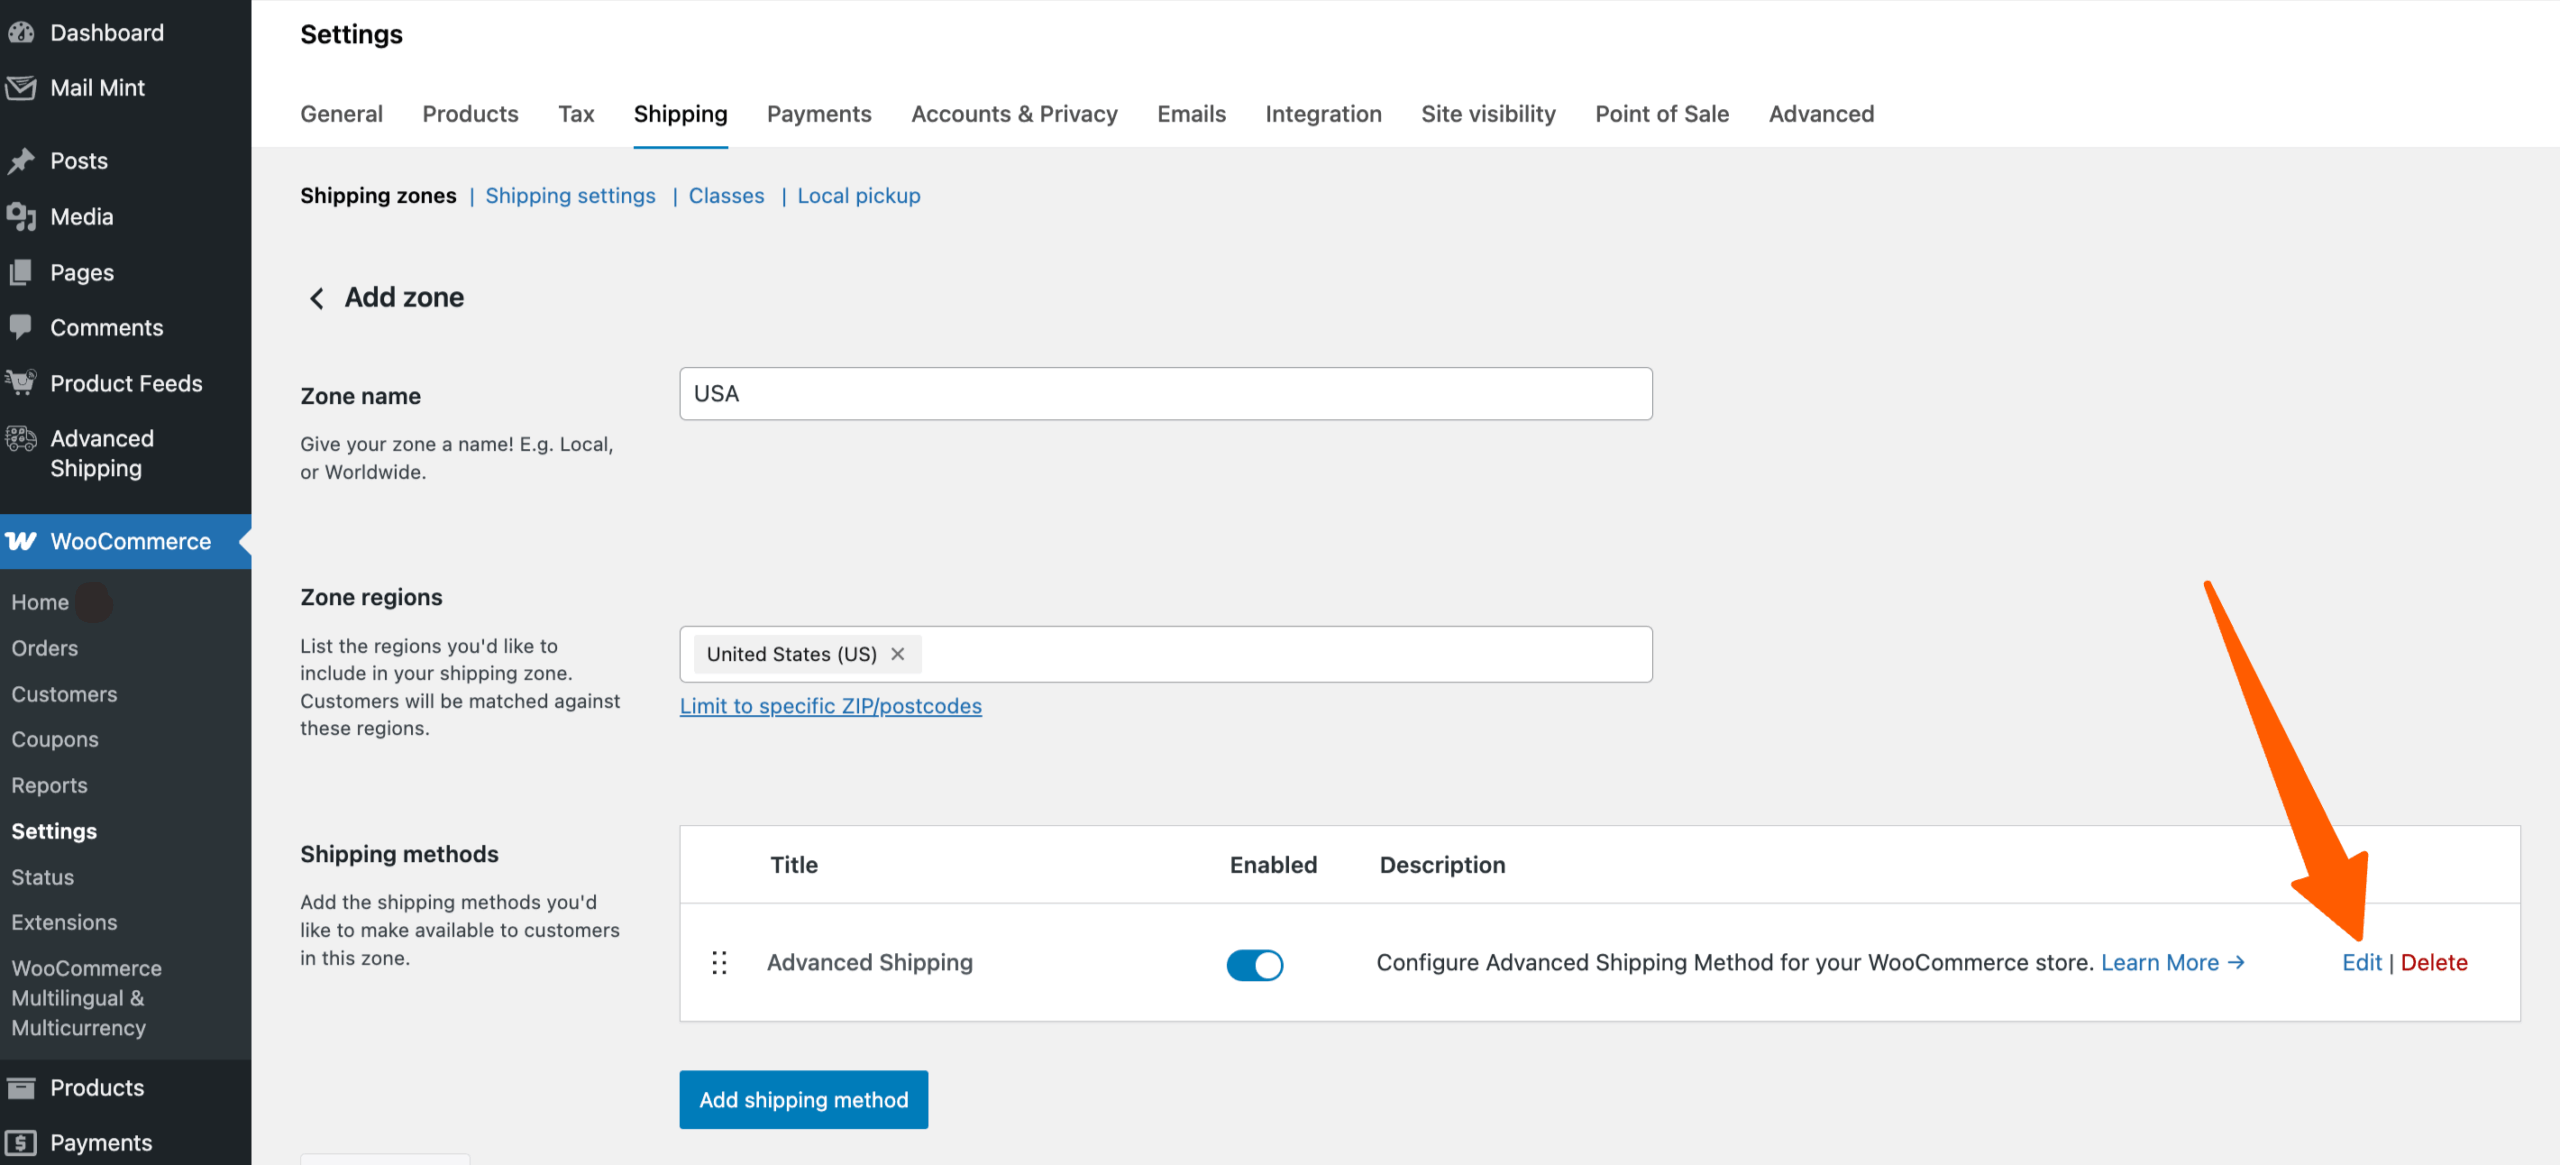
2. It will redirect you to the WooCommerce settings page in the Shipping tabs where you get the Shipping zones that you created earlier.
Now click on edit in which location you want to apply the Shipping condition. (If you don’t know how to add Shipping zones, Kindly visit our previous documentation to add specific locations where you want to apply shipping conditions)
3. In the Advanced Shipping page, scroll down to the bottom where you can see shipping cost calculation rules.
Now click on “Add condition rules.“
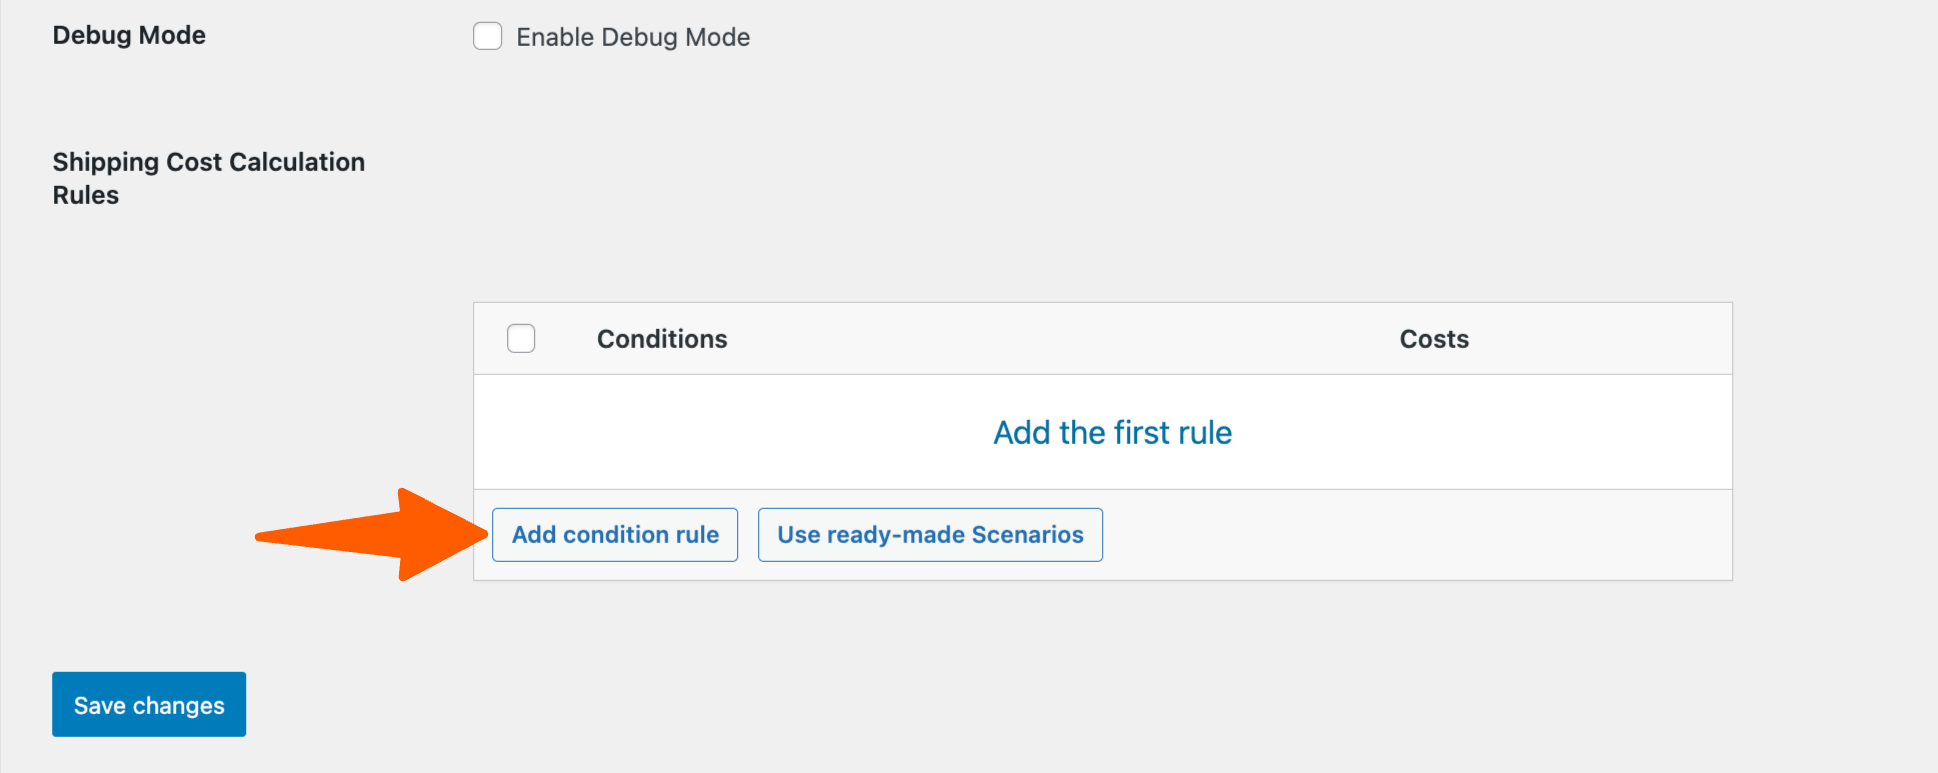
4. You can also select the Use ready-made Scenarios as well.
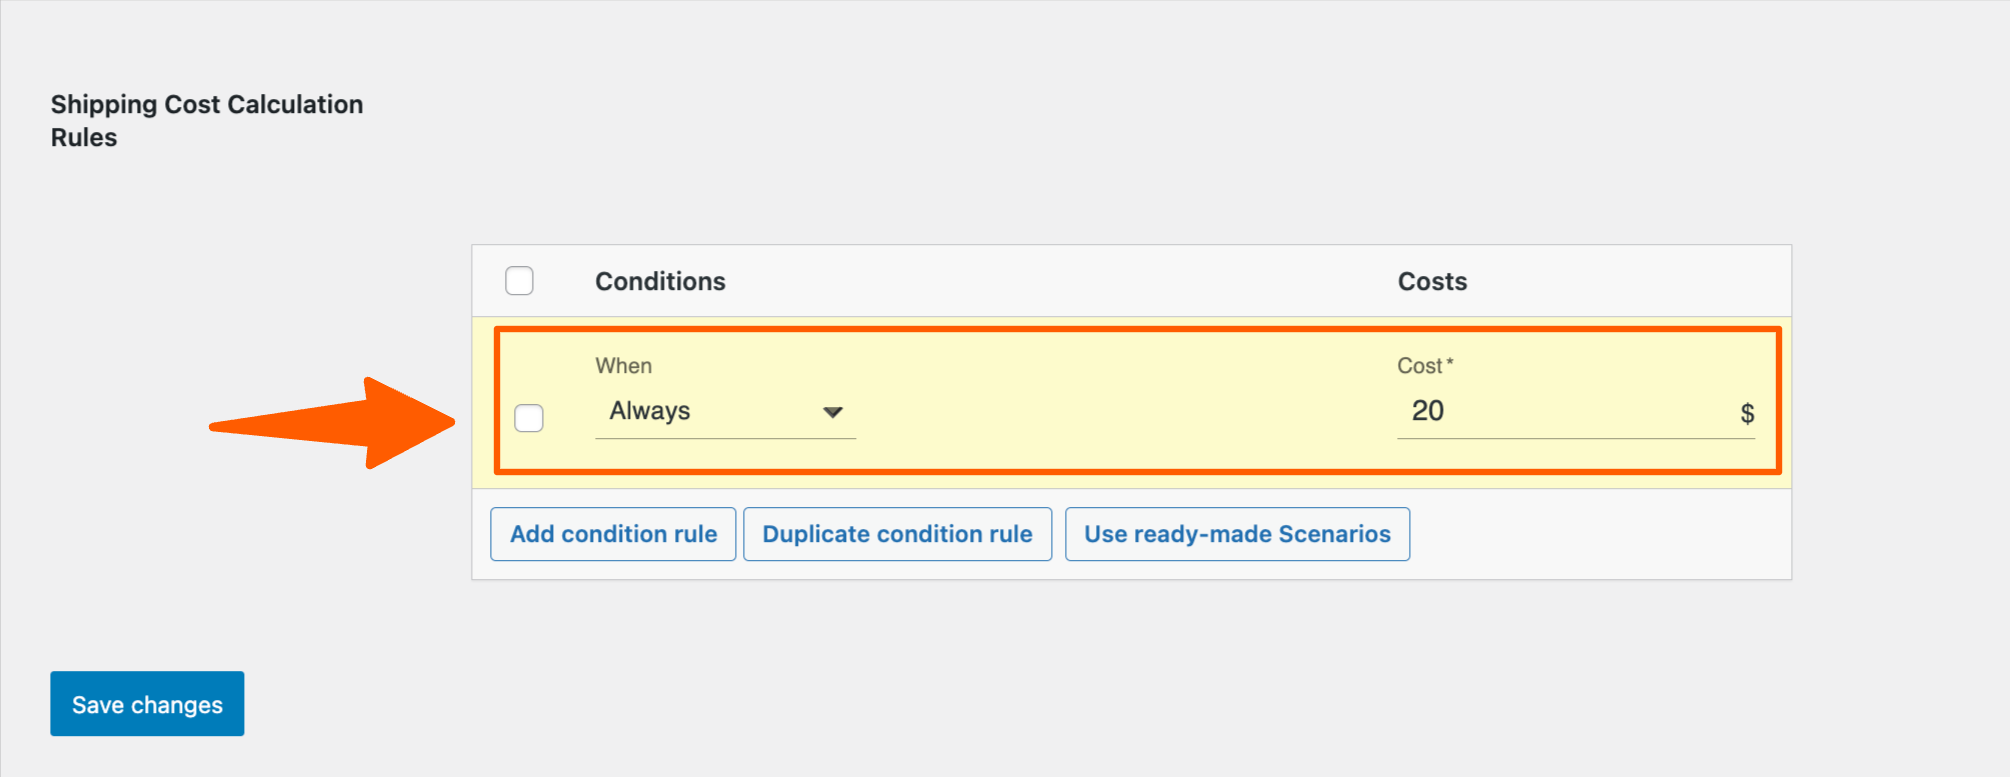
Example: You want every order to use standard and fixed shipping cost of $20
So you create your first “Always” Shipping Condition rule in the Advanced Shipping plugin
Select Add condition rule
Select Always from the When dropdown from the Conditions column
It means whatever the cart value is for the customer, for shipping in California, there will be fixed $20 as a shipping cost. Now click on save changes to apply this condition.
Let’s say customer from California purchases 4 Beanies from your WooCommerce store that price is $72 in total, $18 for each product.
As you have applied a $20 Always condition, it is showing $20 as a shipping charge for the California zone.
So the total price for 4 Beanies is $72 + $20 = $92.

So, this is how you can set your shipping price conditions for all purchases on your WooCommerce Stores.
In the next guides, we’ll walk you through additional shipping rules you can create with our Advanced Shipping.