If you’re a Divi Theme user, you can easily publish virtual tours and panorama images on your website using the WPVR Panorama Module for Divi.
Let’s have a look at how you can do it.
Publish A Virtual Tour Using WPVR Panorama Module for Divi #
Follow these simple steps:
Step 1: Note the Tour ID of the tour you’re going to use.

Step 2: Go to the page where you want to publish your virtual tour.
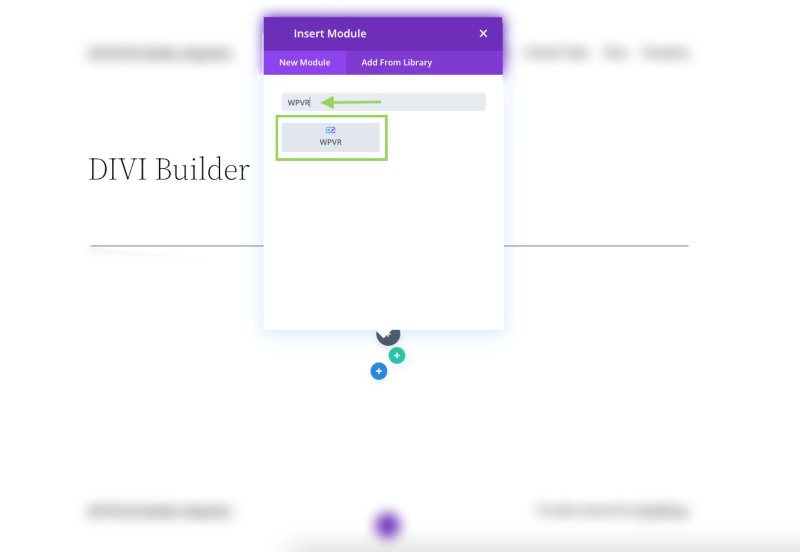
In the Module section, search for WPVR and you’ll find a module dedicated to your virtual tours.
Select it.

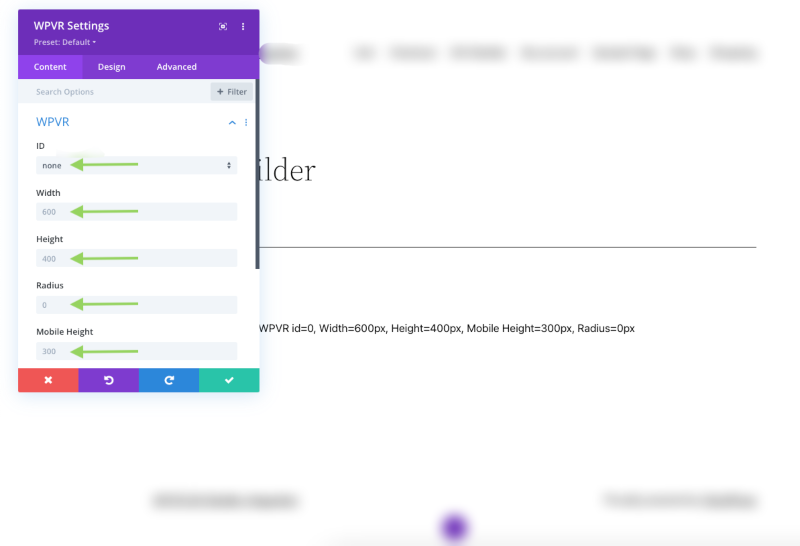
Step 3: Once you select this module, it’ll show you five options:
- ID,
- Width,
- Height,
- Radius and,
- Mobile Height.

ID:
Here, you have to place the ID of the tour that you want to embed into the page.
You’ll be able to select the Tour ID from the Drop Down Menu.
Width:
Assign a positive pixel value to fit the width of the page. Example: 1200 px.
Or, Specify a percentage. Example: 90%.
Enter the text “100vw” if you want the tour to fill the entire page’s width.
Height:
Only use a positive pixel value. Example: 600px.
Don’t use any percentage.
Radius:
Give each pixel in the radius a positive numerical value. Example: 10px
Or, Use a percentage. Example: 10%.
Mobile Height:
The height is by default set to 300px.
But if you want to add a custom height for mobile devices, you can change it.

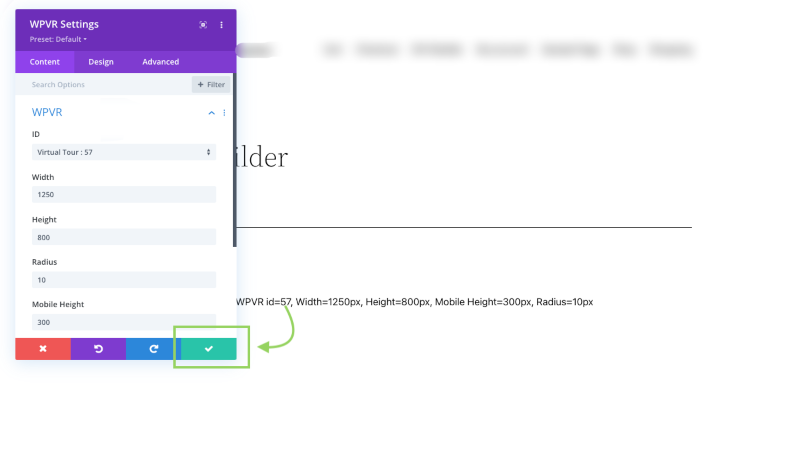
Once you’ve added all the necessary data on the field, preview to see how the tour looks, and then publish it on your website.
And that’s it, you can now publish more virtual tours using this Divi Panorama Module.