In this guide, I will show you how to create a WooCommerce product feed for Wish.com.
Step 1: Create a New Feed and Map Your Product Attributes #
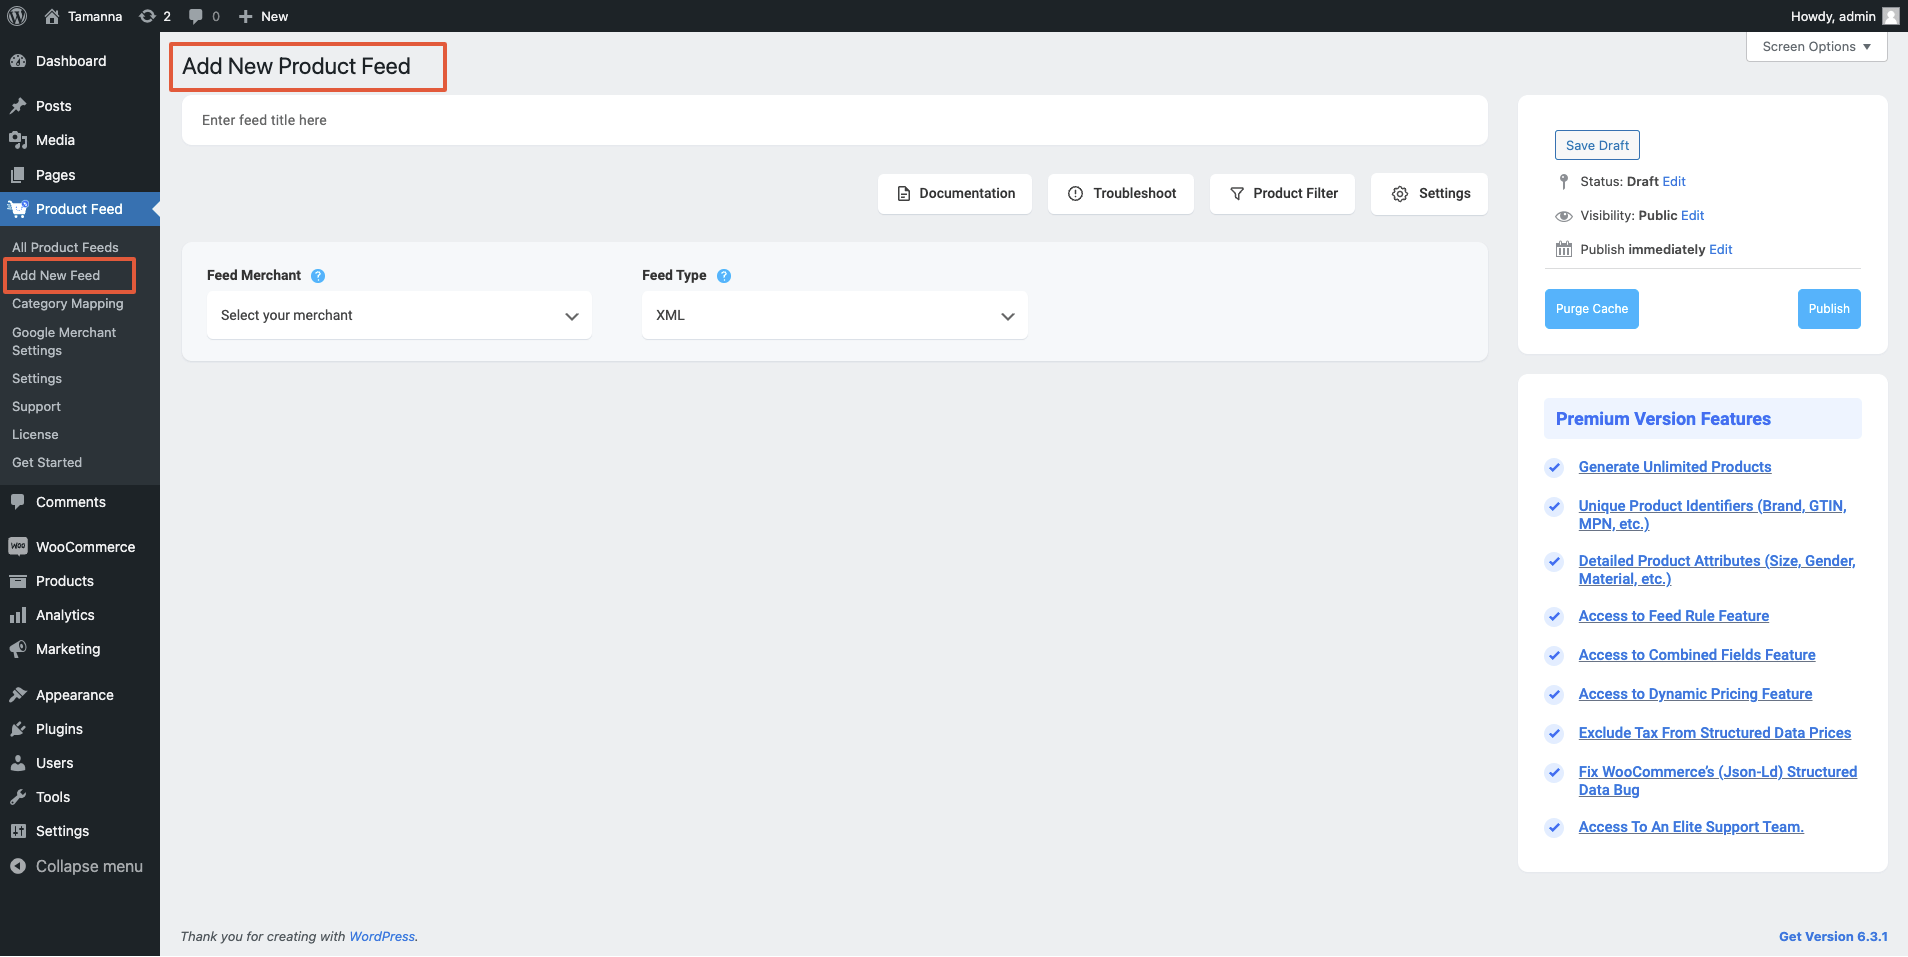
Gehen Sie zu Ihrem Produkt-Feed-Dashboard.
Klicken Sie auf die Schaltfläche Neuen Feed hinzufügen.
Sie gelangen dann zur Seite für die Erstellung des Feeds.
Also, hier,
1. Oben haben Sie die Möglichkeit, dem Feed einen Titel zu geben. Geben Sie Ihrem Feed einen Namen.
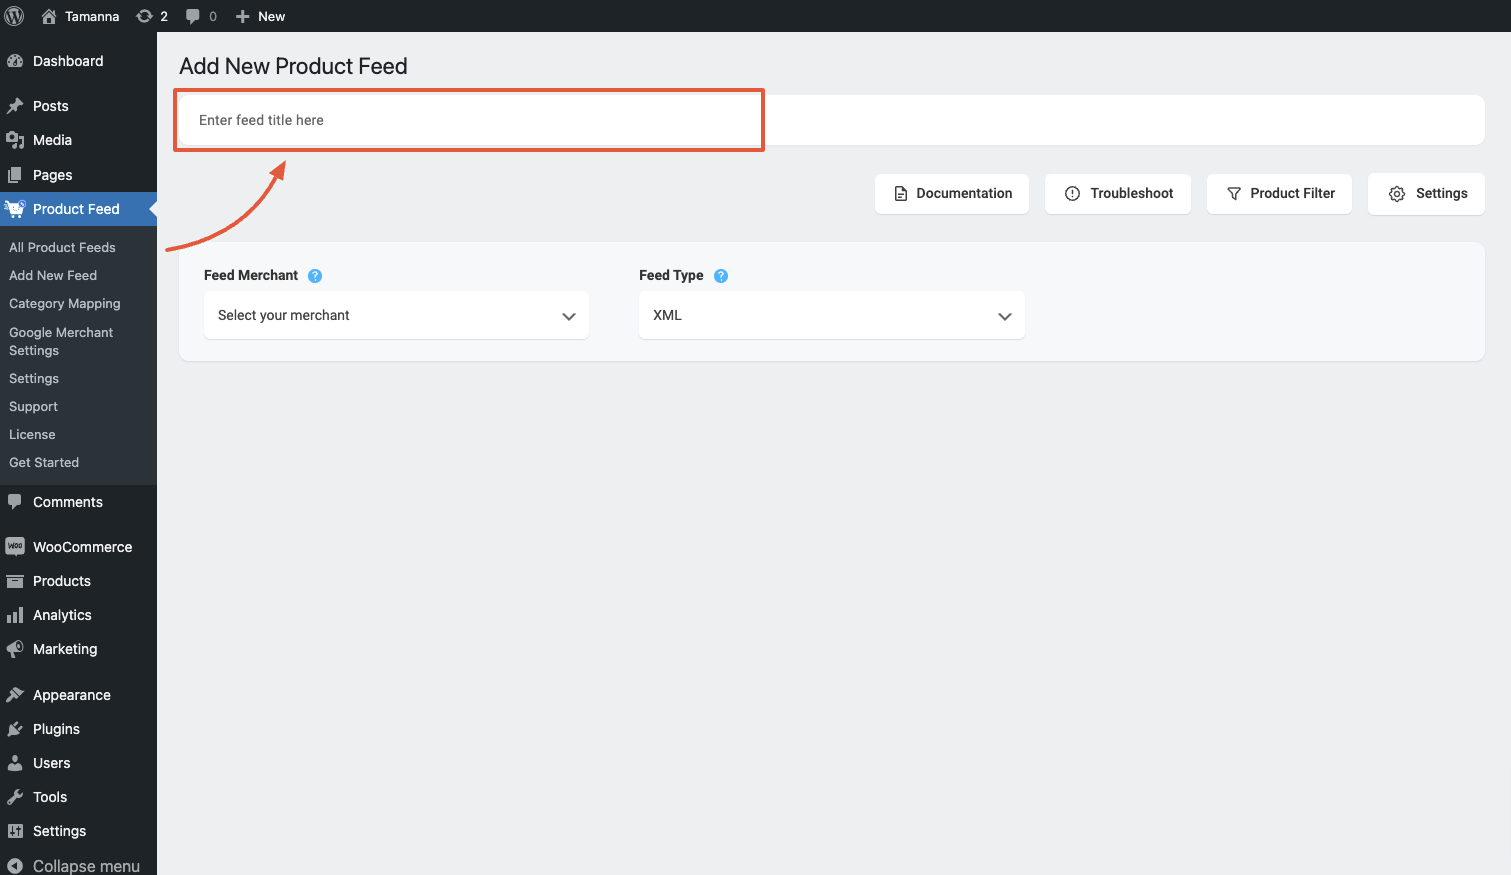
2. Direkt unter dem Titel sehen Sie eine Option zur Auswahl Ihres bevorzugten Händlers. Klicken Sie einfach auf die Dropdown-Schaltfläche Händler füttern und wählen Sie Ihren bevorzugten Händler aus der Dropdown-Liste aus oder suchen Sie in der Dropdown-Box.
Wählen Sie Ihren bevorzugten Händler aus und alle erforderlichen Attribute werden unten geladen.
Select Wish.com from the dropdown list.

3. You can see that some of the attributes are already configured – their values are assigned properly, You can change the assigned values as per your need or you can keep them as it is.
Die übrigen Attributwerte müssen Sie jedoch manuell zuweisen.
For Wish.com, you need to assign values for the following attributes:
**Please note that Wish.com only accepts CSV feed file submissions. So you cannot change the feed format type from the Feed Type dropdown.
3. You can see that some of the attributes are already configured – their values are assigned properly, You can change the assigned values as per your need or you can keep them as it is.
Die übrigen Attributwerte müssen Sie jedoch manuell zuweisen.
For Wish.com, you need to assign values for the following attributes:
- Currency Code
This is your local currency code – the currency you have used for all of your products.
This must match your assigned currency.
Examples:
- Acceptable: USD
- Acceptable: CNY
- Unacceptable: Chinese
- Default Shipping Price
This is the default shipping price of your product. This will automatically apply as the shipping price for any new or unset countries in this warehouse.
Examples:
- Acceptable: 100.99
- Acceptable: 10.99
- Unacceptable: 49.99 + S/H
- Inventory
This is the amount of an SKU that is in stock.
Examples:
- Acceptable: 1200
- Acceptable: 0
- Acceptable: 4
- Unacceptable: In-stock
- Unacceptable: Out of Stock
- Warehouse
Here, you need to provide the unique warehouse name that you use internally to identify a warehouse. Shipping price and the inventory are applied to the specified warehouse only.
If you do not define one, they are applied to the default warehouse attached to your account.
Examples:
- Acceptable: US_94132
- Acceptable: SZ_CN
- Unacceptable: 2
- Unacceptable: a
Schritt 2: Futtermittelkonfiguration #
1. Scrollen Sie nach oben und Sie werden sehen, dass es zwei Optionen gibt: Produktfilter und Produkteinstellungen.
- Produkte Einstellungen
- Produkt-Filter

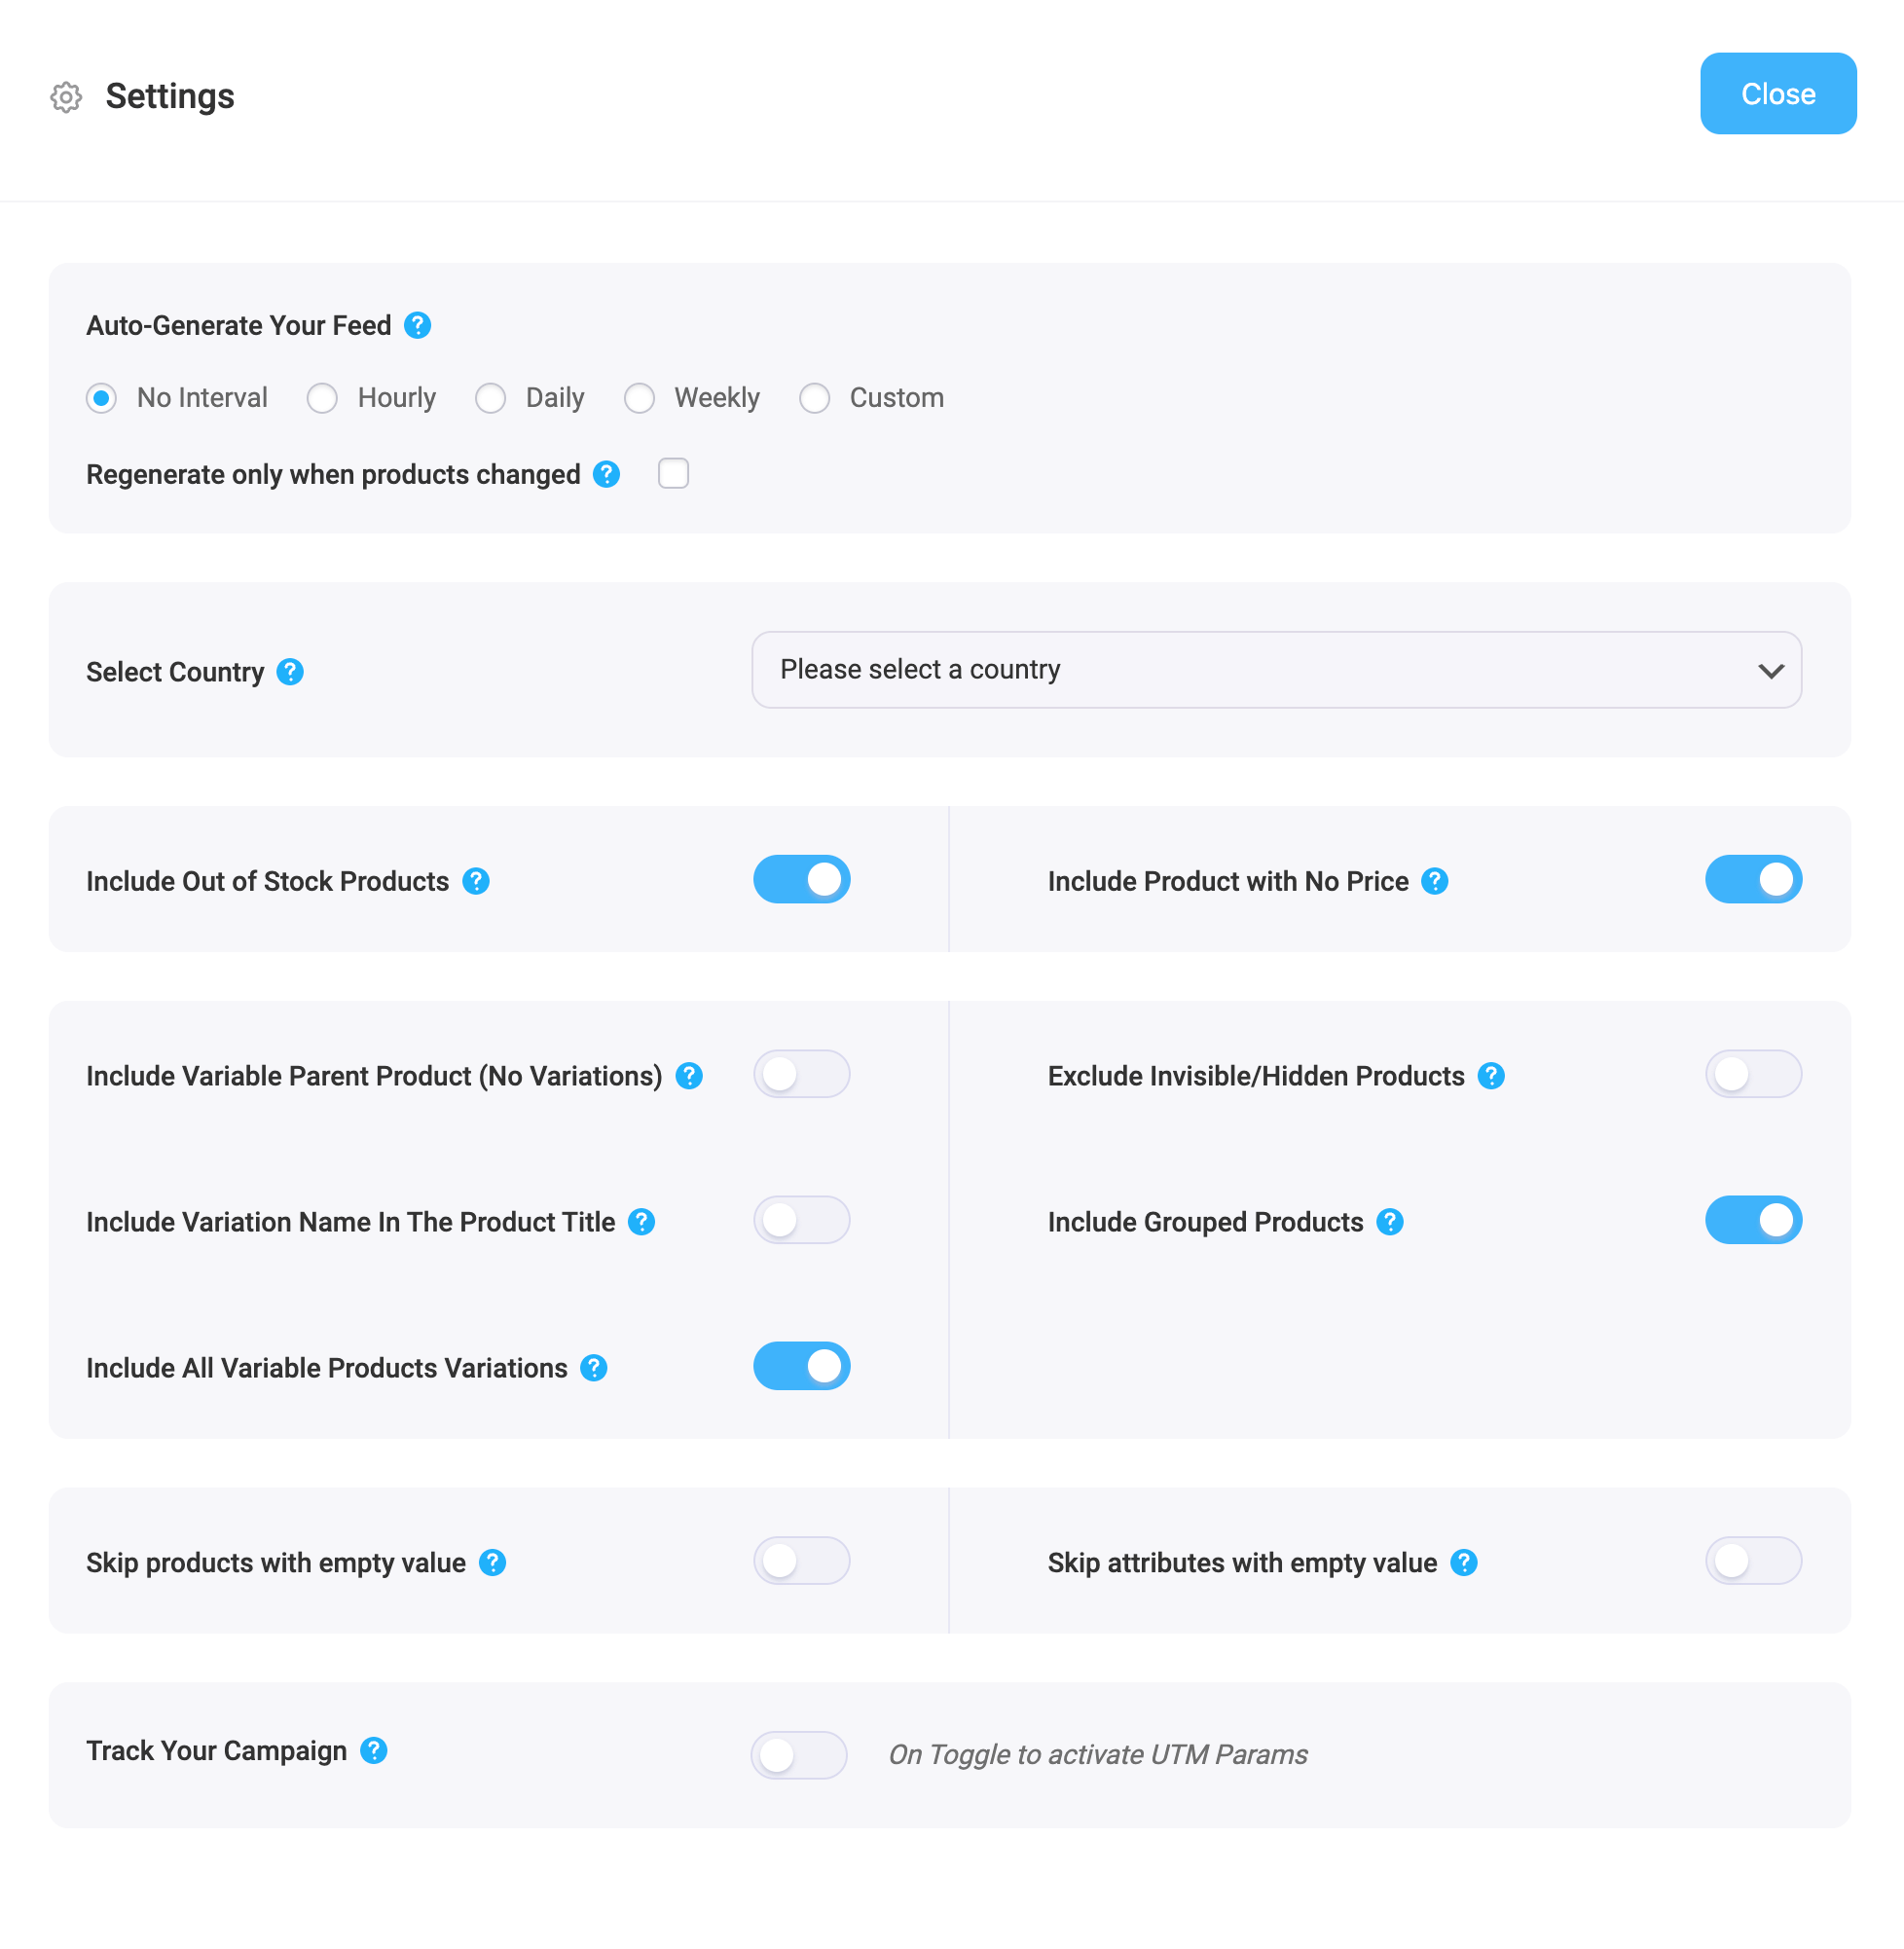
2. First, let us configure the features in the Feed Settings. Click on the Settings button, and a drawer will open from the right side of the screen.
For more in depth knowledge about the setting refer to this doc: Understanding The Basics Of Feed Settings
3. Now, close the drawer and click on the Product Filter option. A new drawer will open from the right.
Oben haben Sie die Möglichkeit, den benutzerdefinierten Filter oder die Funktion Feed-Regeln (PRO) zu verwenden.
Über das Dropdown-Menü Filter erhalten Sie die Feed-Filteroptionen.
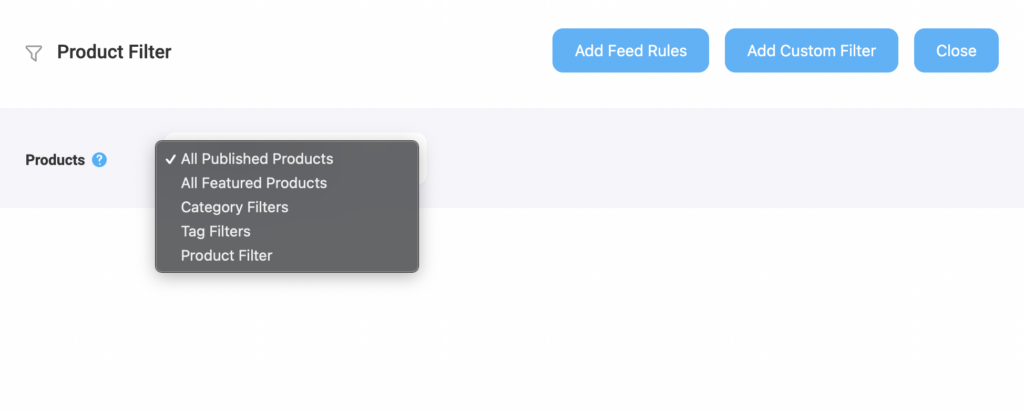
Wählen Sie die Produkte, die Sie in den Feed aufnehmen möchten, mit einem beliebigen Filter aus. Standardmäßig ist "Alle veröffentlichten Produkte" ausgewählt.
Sie können alle anderen Filteroptionen, wie z. B. den benutzerdefinierten Filter, den Kategoriefilter und den Tag-Filter, verwenden, um die gewünschten Produkte einzuschließen (oder die Produkte auszuschließen, die Sie nicht einschließen möchten).
Für ein Basisfutter können Sie es so lassen, wie es ist.
Step 3: Publish WooCommerce Product Feed For Wish.com #
Nachdem Sie Ihren Feed konfiguriert haben, ist es nun an der Zeit, den Feed zu veröffentlichen.
Scrollen Sie zurück nach oben, und Sie finden auf der rechten Seite eine Schaltfläche Veröffentlichen.
Klicken Sie auf die Schaltfläche Veröffentlichen, und Ihr Feed wird erstellt.
Sobald die Erstellung des Feeds abgeschlossen ist, können Sie den Feed anzeigen oder herunterladen.
That’s it. Your WooCommerce CSV product feed for Wish.com is generated.
Now, log in to the Wish.com marketplace, and there you will get the option to upload your feed file to list your items.