reCAPTCHA V3 is an essential tool to protect your Cart Lift campaigns from bots and spam while providing a seamless experience for real users.
This guide will walk you through configuring reCAPTCHA V3 for enhanced security and reliable campaign performance.
Why Use reCAPTCHA V3 in Cart Lift? #
Cart Lift uses reCAPTCHA V3 to help distinguish between real users and malicious bots without requiring visitors to solve captchas. This improves:
User Experience: Keeps the checkout and recovery process friction-free for legitimate users.
Security: Blocks automated spam submissions.
Performance Accuracy: Ensures that recovery campaigns are not skewed by bot activity.
Steps to Configure reCAPTCHA V3 in Cart Lift #
Step 1: Get Your Site Key and Secret Key from Google #
To use reCAPTCHA V3, you must register your site with Google:
- Visit the official Google reCAPTCHA admin panel: https://www.google.com/recaptcha/admin/create
- Register your site:
- Label your site (e.g., “Cart Lift Recovery Campaign”).
- Select reCAPTCHA v3.
- Add your domain (e.g., yourwebsite.com).
- Accept the reCAPTCHA terms of service.
- Click Submit.
- After registration, Google will provide:
- Site Key
- Secret Key
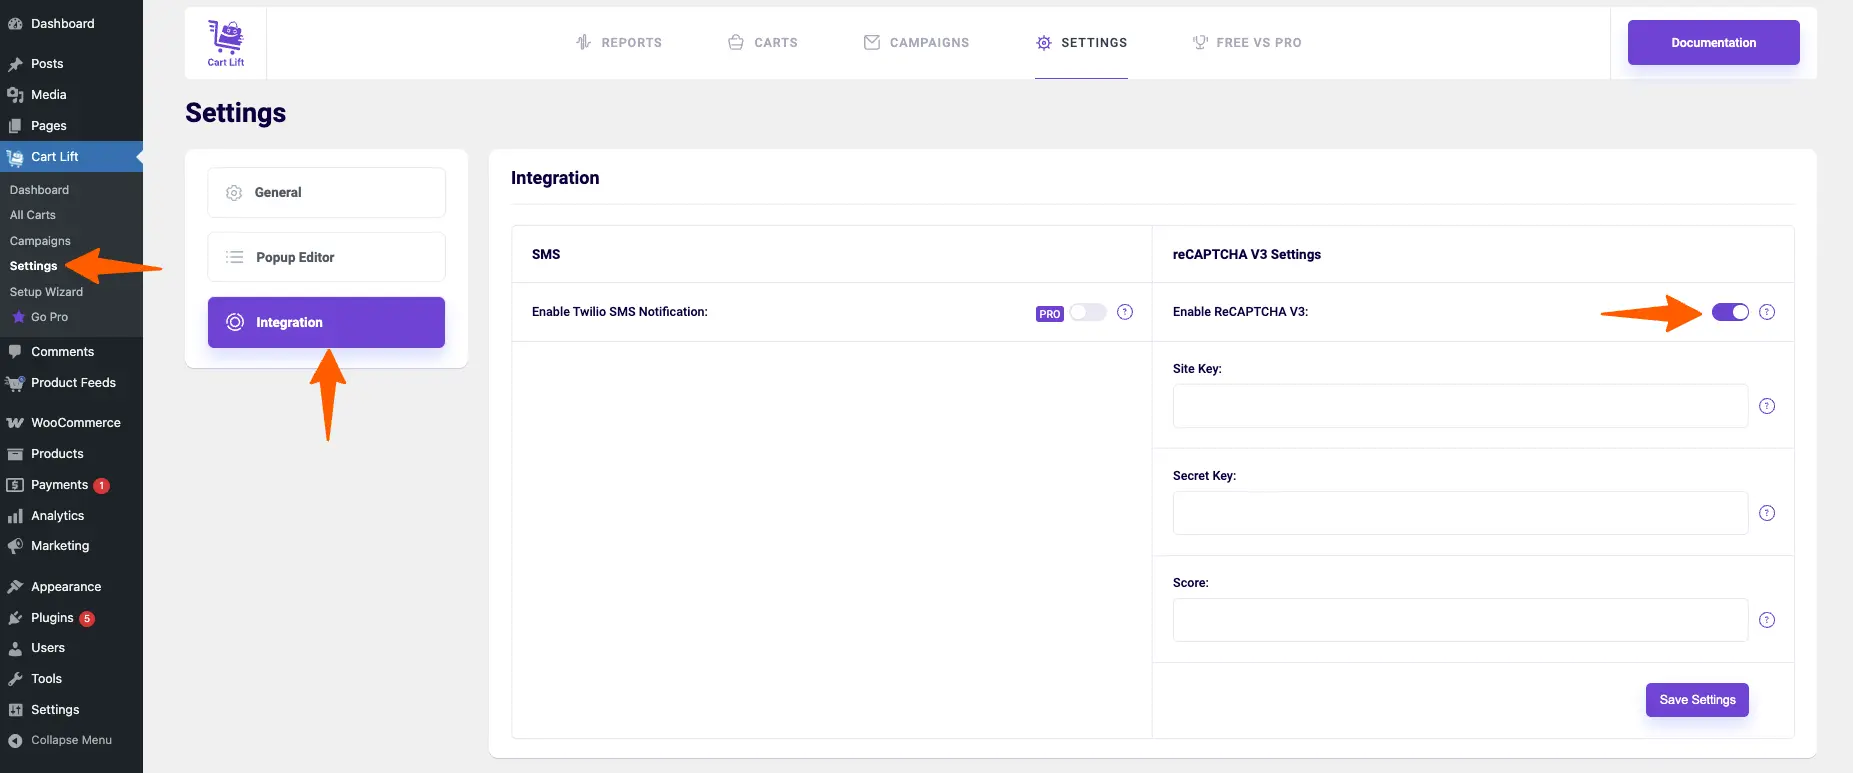
Step 2: Enable reCAPTCHA V3 in Cart Lift #
- Navigate to your WordPress Dashboard.
- Go to Cart Lift > Settings > Integration
- Under the reCAPTCHA Settings tab, toggle the option to Enable reCAPTCHA V3.
- Once enabled, three fields will appear: Site Key, Secret Key, and Score
Step 3: Configure Keys in Cart Lift #
- Copy the Site Key and Secret Key from the Google reCAPTCHA admin panel.
- Paste your keys into the respective fields.
- Click Save Changes.
Step 4: Adjust reCAPTCHA Threshold for Best Results #
You’ll find another filed called Score. The threshold determines how strict reCAPTCHA is when evaluating user behavior.
- The value ranges from 0.0 (most permissive) to 1.0 (most strict).
- Recommended default is 0.5.
Best Practice Tips: #
- If you receive false positives (real users being flagged), lower the threshold slightly.
- If spam still gets through, increase the threshold.
Final Notes #
- Always test your recovery form after enabling reCAPTCHA to ensure a smooth user experience.
- Changes to reCAPTCHA settings may take a few minutes to propagate.
By properly configuring reCAPTCHA V3, you can significantly enhance the security and reliability of your Cart Lift recovery campaigns.
That’s how easy it is to configure it on your site.