You can now easily embed a 360-degree video from Youtube or Vimeo, on your website, using WPVR.
Choose a 360 video from Youtube or Vimeo and follow the steps below.
Embedding A 360 Video From Youtube Or Vimeo #
1. Go to Dashboard > WPVR and click on Add New Tour. And assign the tour a suitable name.
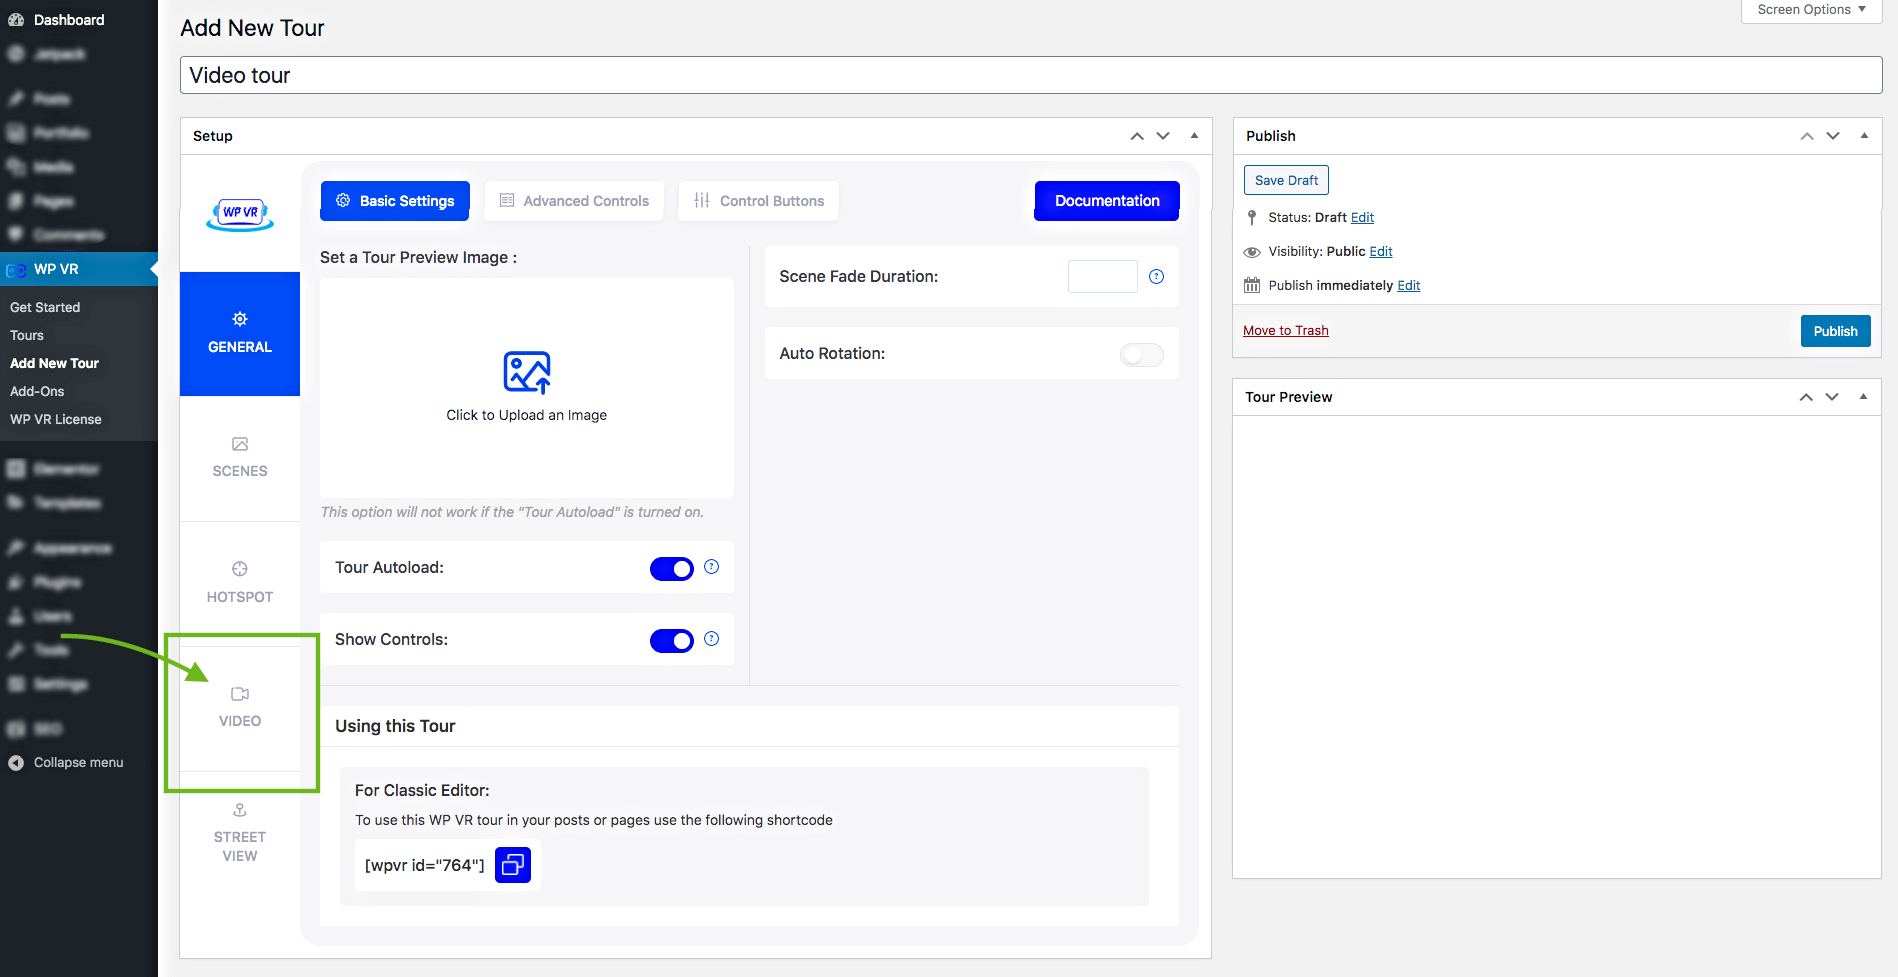
On the left, you will find the Video tab.
2. Click on the Video tab and it will take you to Video Settings.
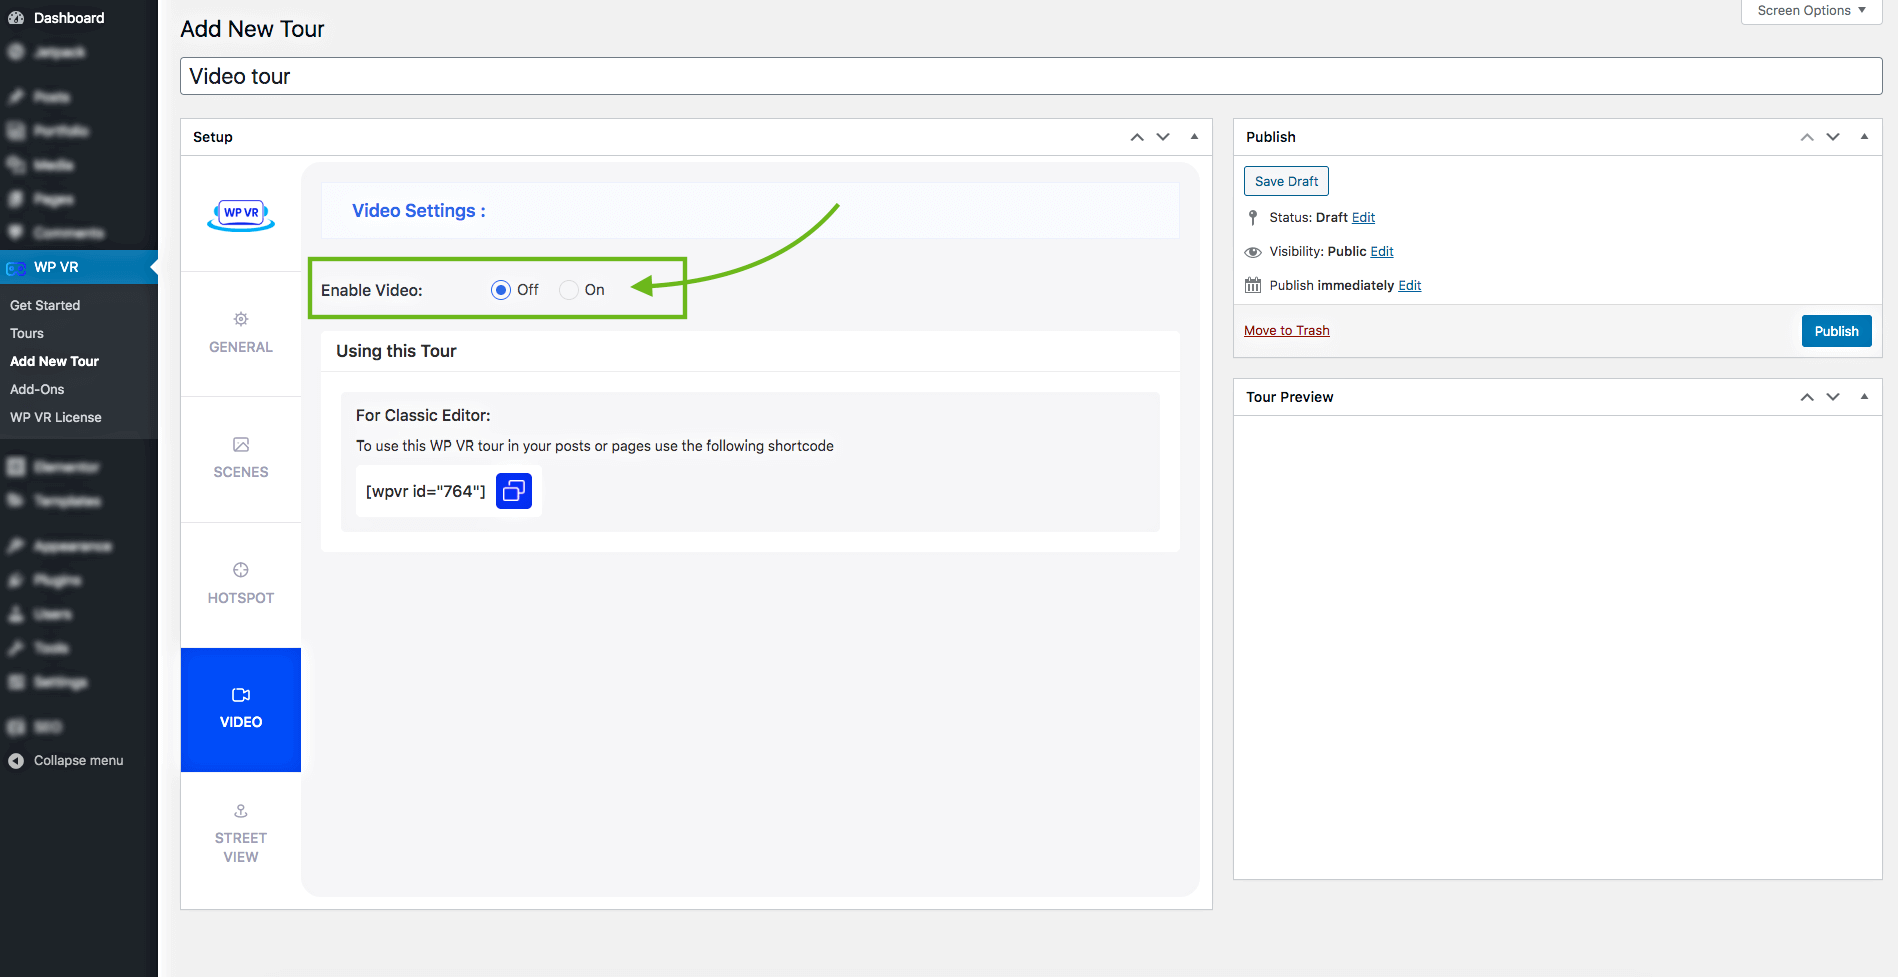
You will get the option to Enable video. Turn it on.
3. Once turned on, you will get the options called “Autoplay”, “Loop” and “Upload or Add Link”.
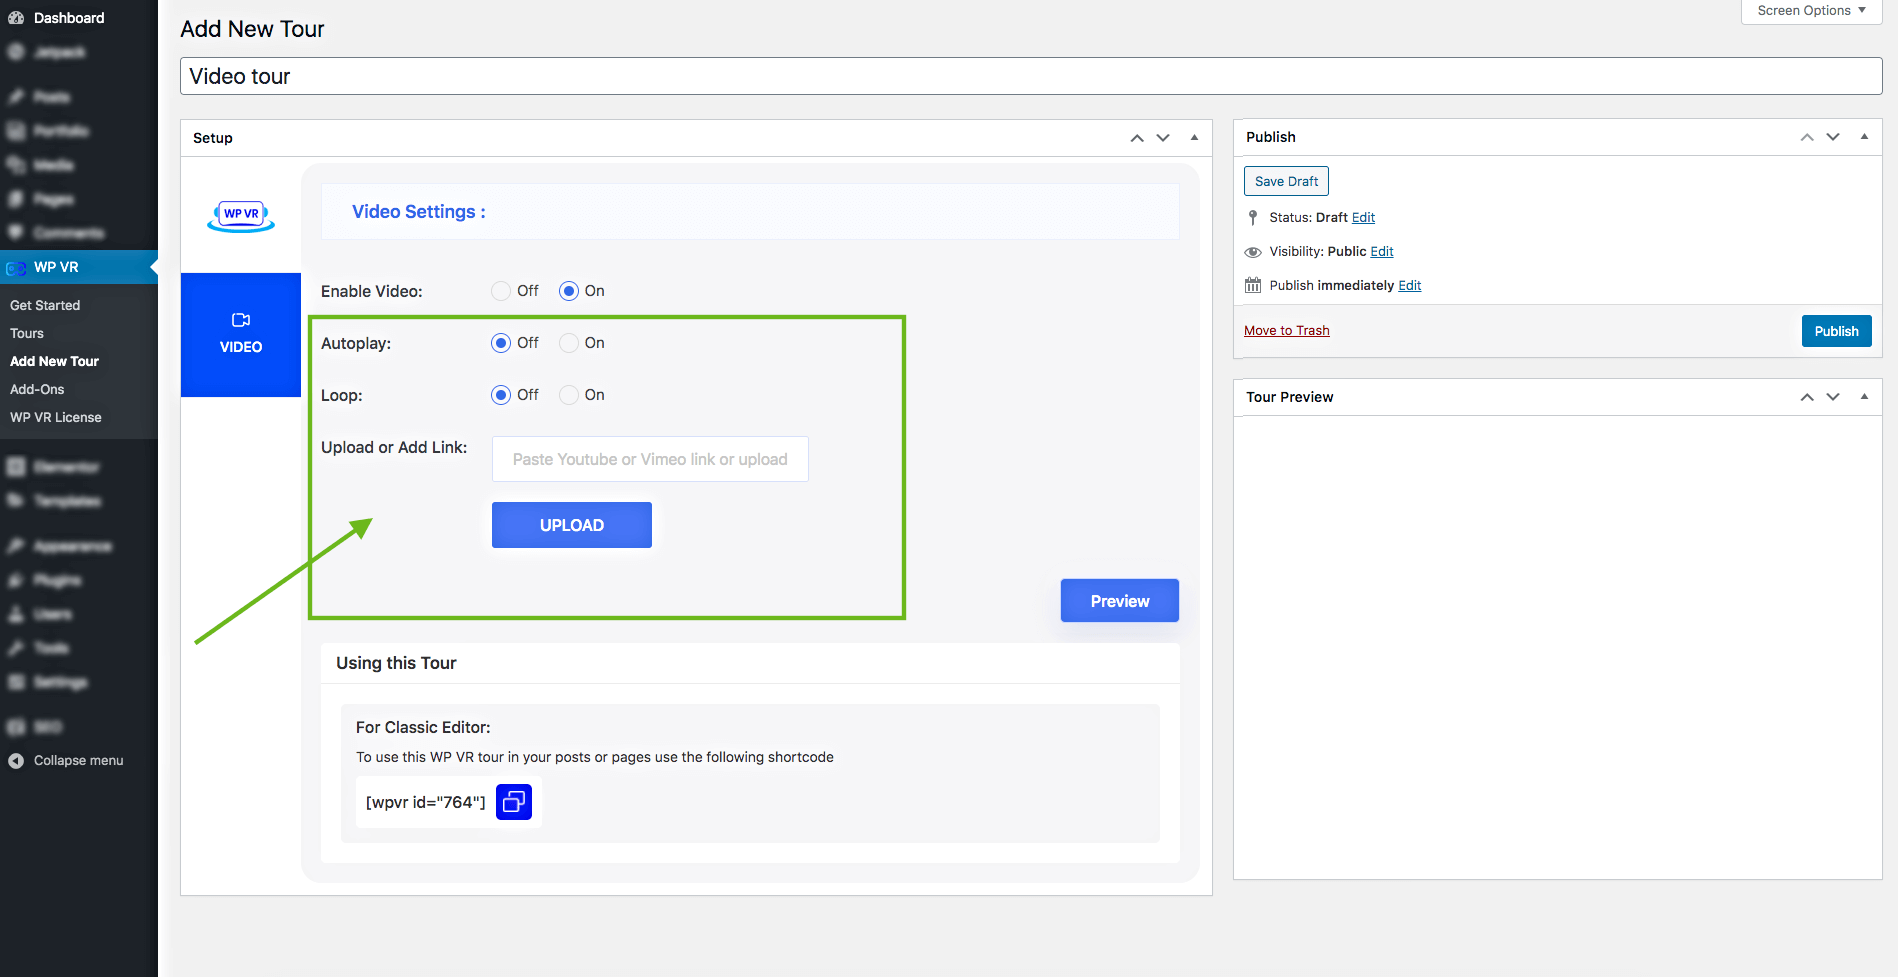
Here, you have to provide the video link.
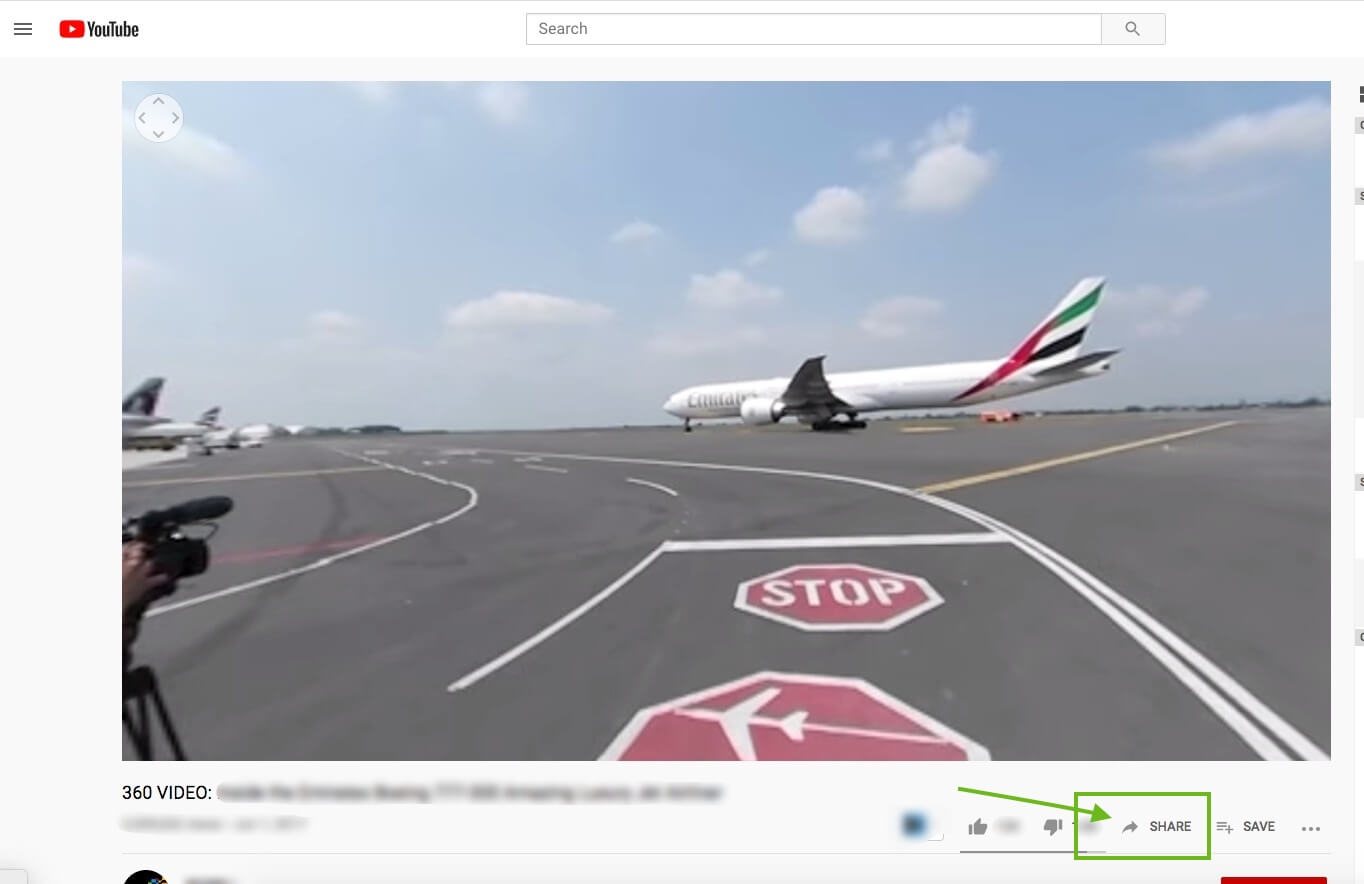
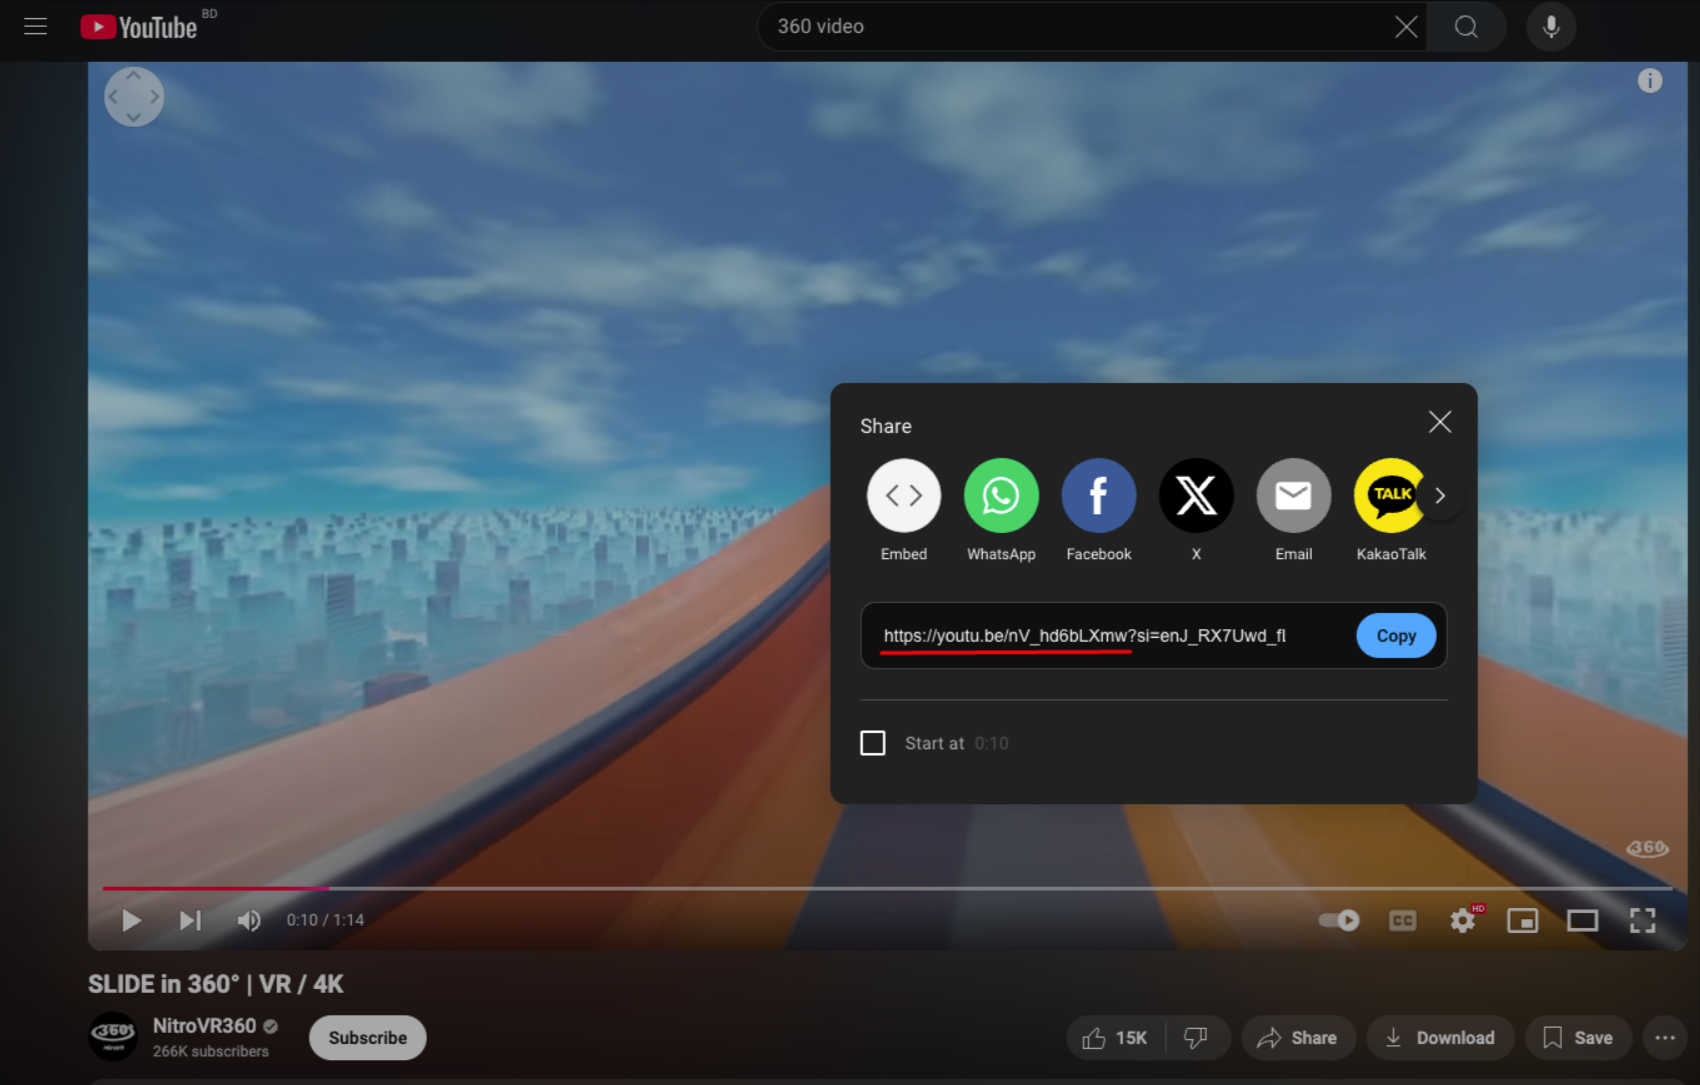
4. Next, go to a Youtube 360 Video that you want to embed and click on Share.
5. A pop-up will appear. In this window, please copy the video link, ensuring that you only copy the portion of the link up to the video ID. Kindly refer to the screenshot below for guidance.
6. Go back to WPVR and paste it in the field for “Upload or Add Link”
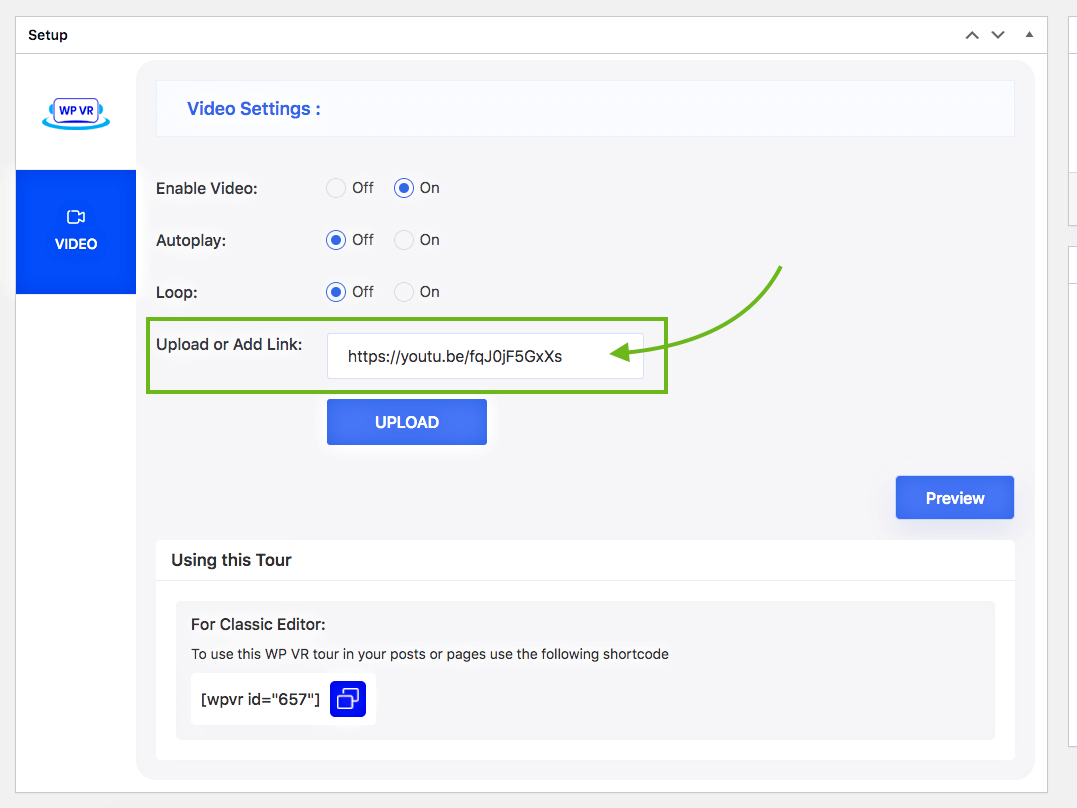
7. Now decide if you wish to enable “Autoplay”
- Autoplay –
Turning this On will mean that the video will start playing the moment a person loads the page. If not turned on, a person will have to click on the video to play.
** The Loop feature is only used for a self-hosted 360 video. So you just keep it as it is when embedding a Youtube or Vimeo 360 video.
**You will also notice that there is a button called Upload. That is used when you wish to embed a self-hosted 360 video. We will guide you with a self-hosted video on another doc, so for now, you don’t need to worry about this button.
8. Once you have the video link in place, click on Preview to get a preview on the right side.
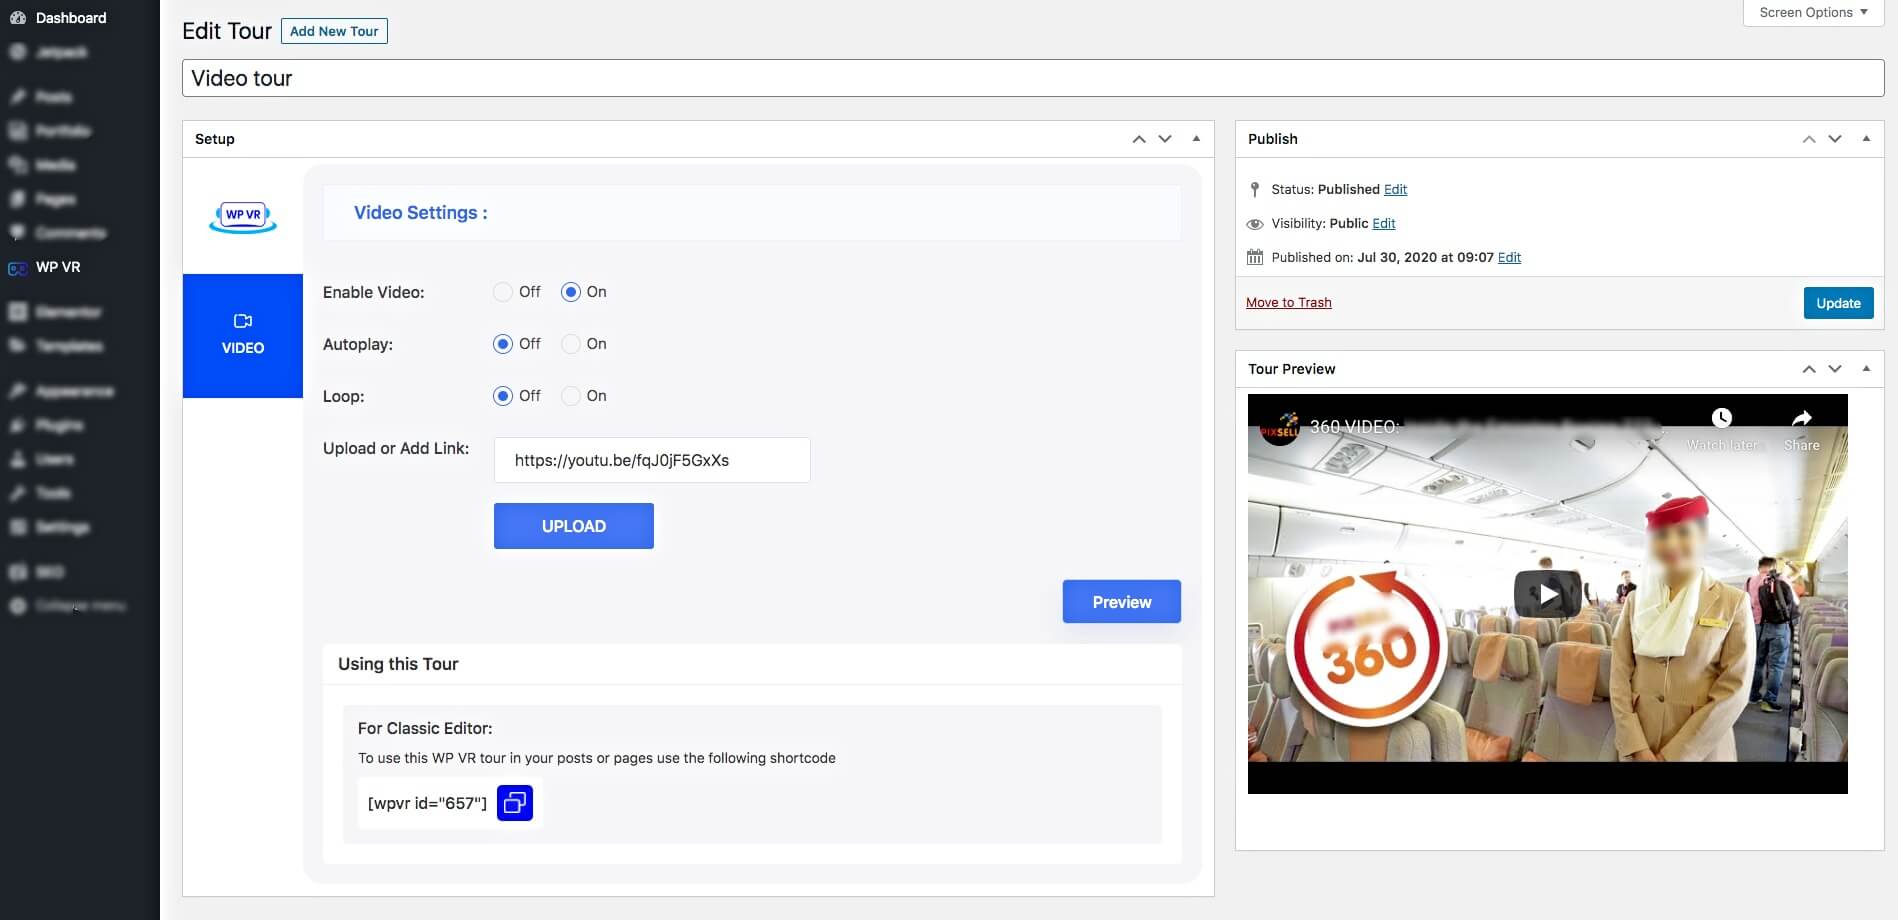
Then you can Publish the tour.
9. You can then embed it on a page or a post using the ID or a shortcode, given below the Video Settings.
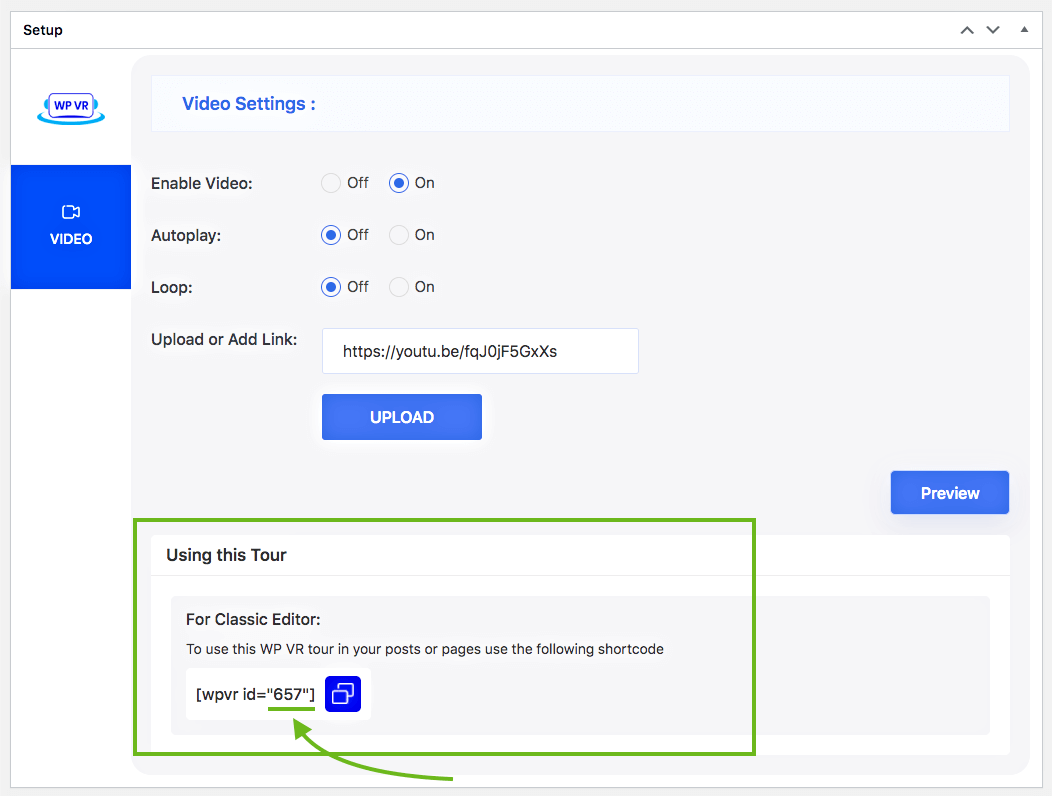
That’s it. You now have a 360 video from Youtube, embedded on your website. All these steps are same for Vimeo as well.
Here is a 360 degree video tour created with WP VR.
Now let’s learn how you can embed a self-hosted 360 video on your website, using WPVR.