When you are about to run an Analytics Campaign, you need to add UTM parameters options in your feed.
These UTM parameters help you analyze the feed result.
With the Product Feed Manager plugin, you can easily set the UTM value for your feed.
In this guide, I will show you how you can set the UTM parameters to your feed.
Follow these easy steps to set UTM parameters to your feed:
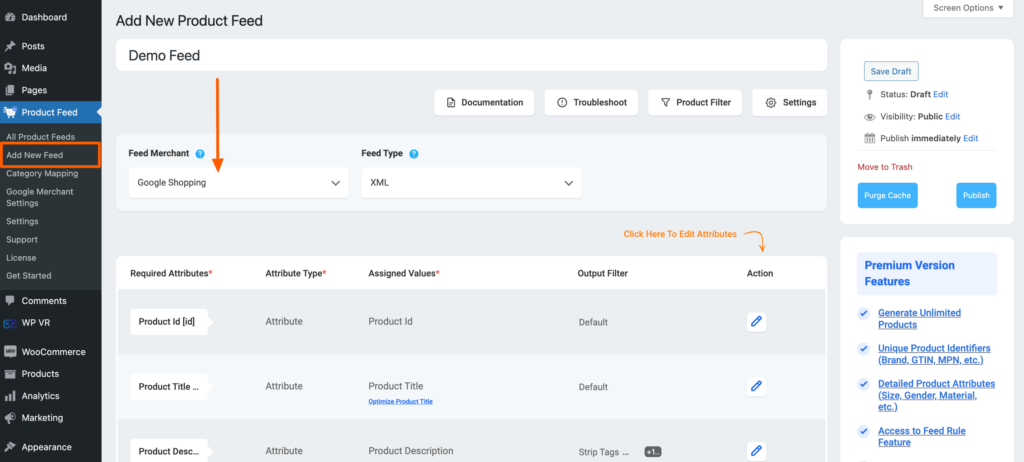
1. Create a new feed or open an existing feed.
To create a new feed, click on the Add New Feed option from the WordPress dashboard and a new feed creation page will appear.
2. Click on the Settings button.
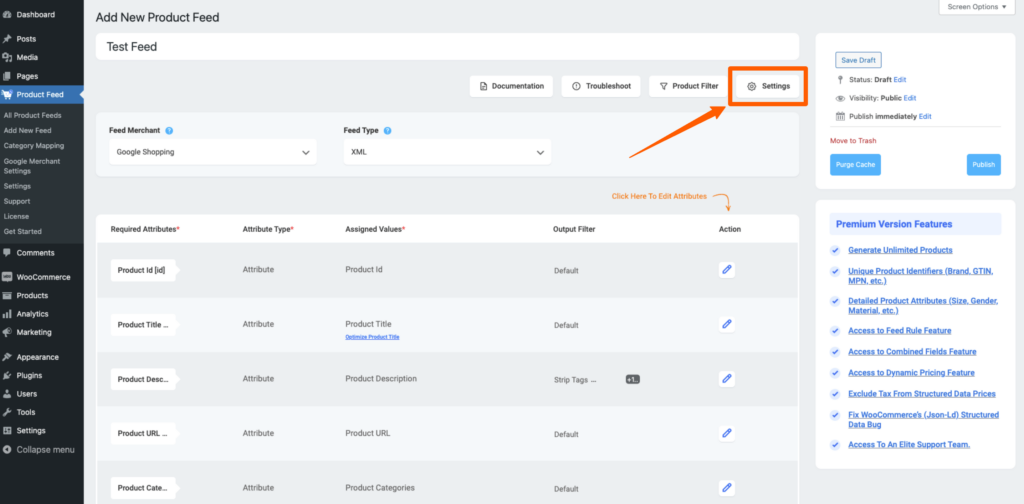
Once you click on the Settings button, the Product Settings drawer will slide in from the right side of the window.
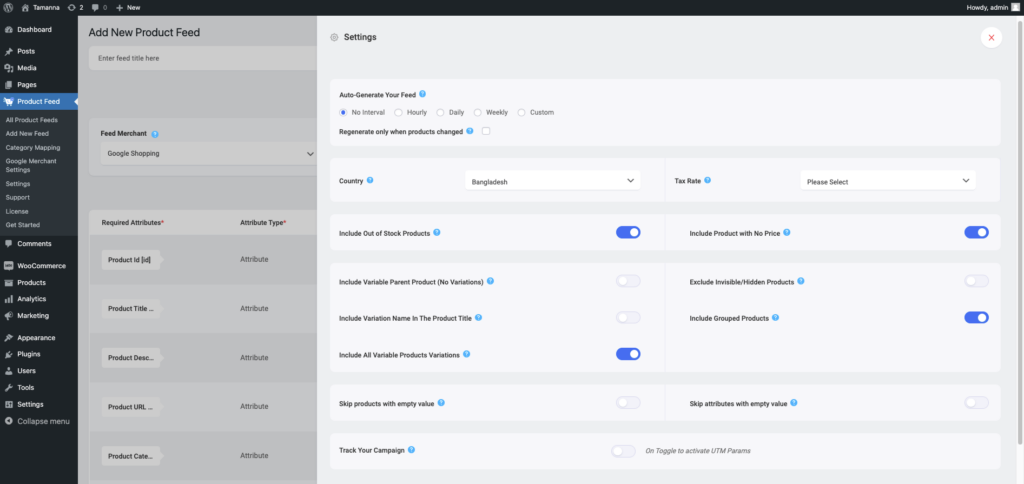
3. there you will find a checkbox for Analytics Parameters, click on the checkbox and you will find the options for the UTM parameters.
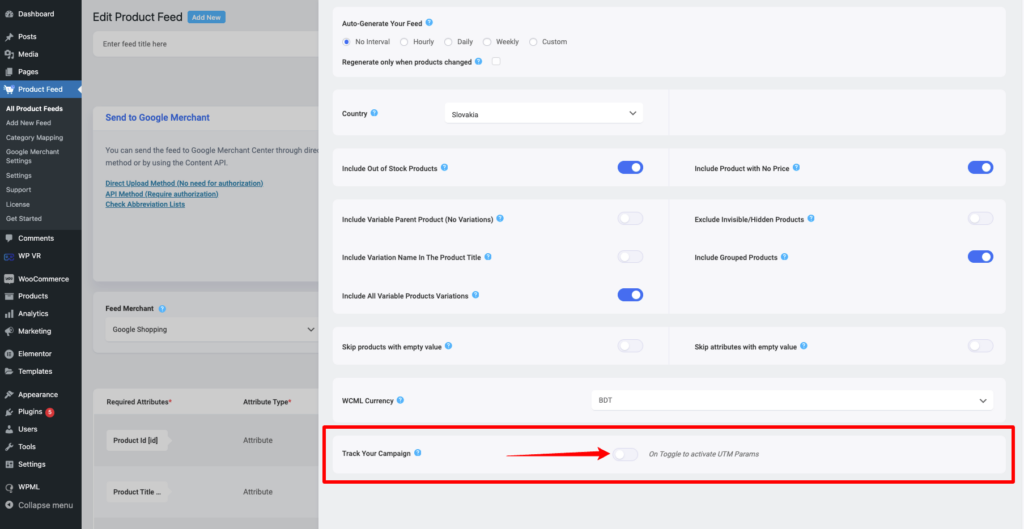
Once you click on the checkbox, you will get the following options:
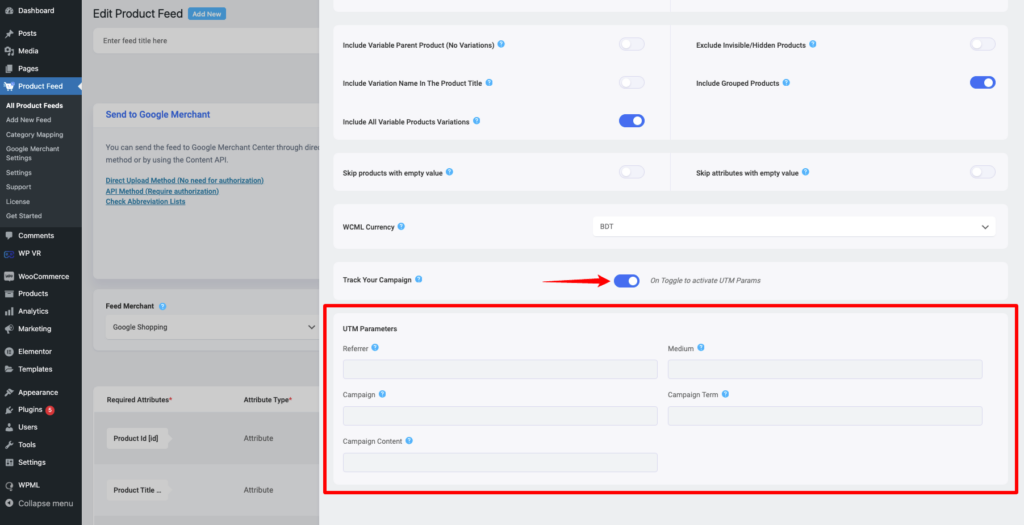
4. Input the field values as
- Referrer – The referrer: (e.g. google, newsletter)
- Medium – Marketing medium: (e.g. CPC, banner, email)
- Campaign – Product, promo code, or slogan (e.g. spring_sale)
- Campaign term – Identify the paid keywords
- Campaign content – Use to differentiate ads
5. For example let’s input some data
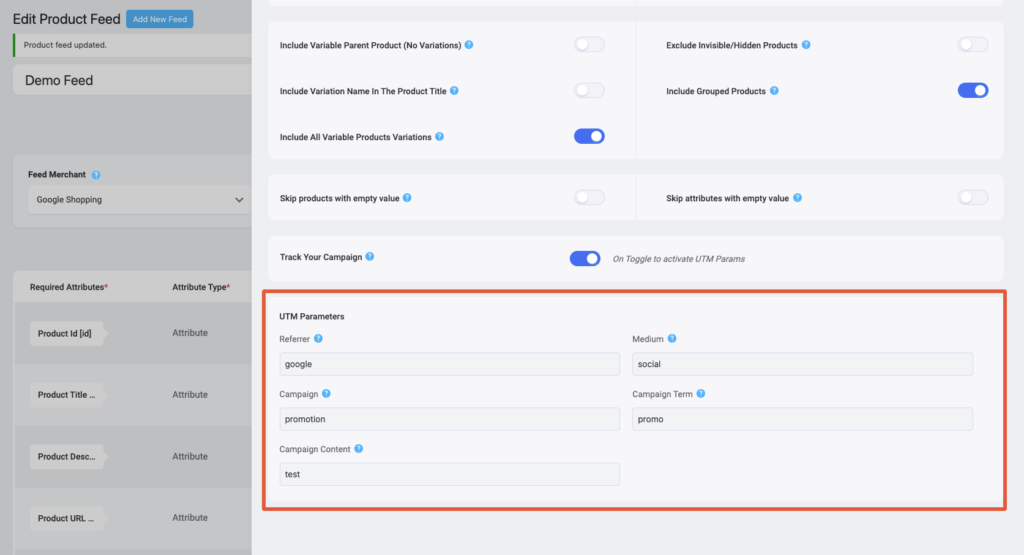
After you’ve put the parameters, click on the Close button and then Publish/ Update the feed.
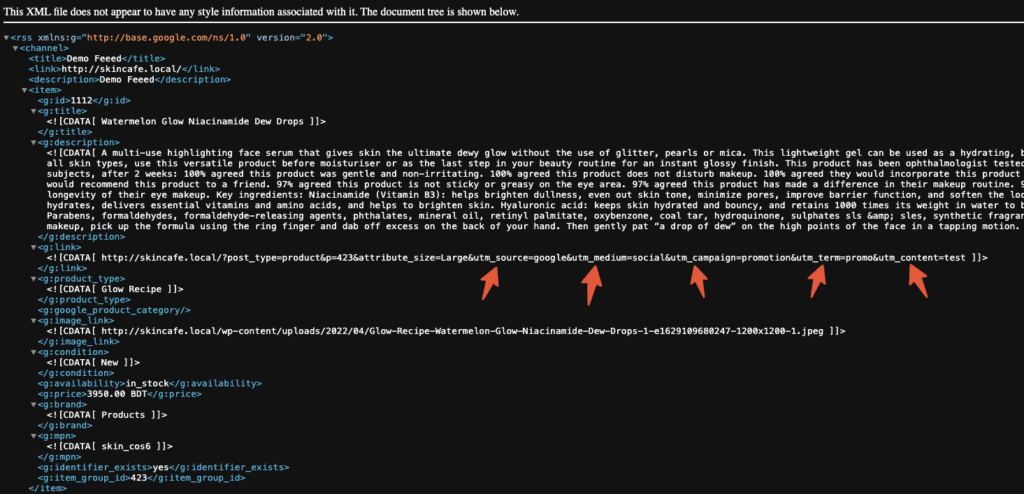
Now, your feed will be published with the UTM parameter values shown in the picture above.
That’s it, from now you can use this feed for the Analytics Campaign.


