You can embed a Google Street View tour on your website using WPVR.
Simply follow the steps below.
For embedding a Google Street View, your website must be SSL certified (i.e., your website should start with HTTPS).
Embedding A Google Street View tour Using WPVR #
First, make sure your website is SSL certified (i.e., your website should start with HTTPS), or else this will not work.
Also, you will need to have WP VR and WP VR Pro activated on your website.
Fangen wir also an.
1. Go to Dashboard > WP VR and click on Add new tour. It will take you to the page where you can start creating a new tour.
2. Give the tour a suitable name.

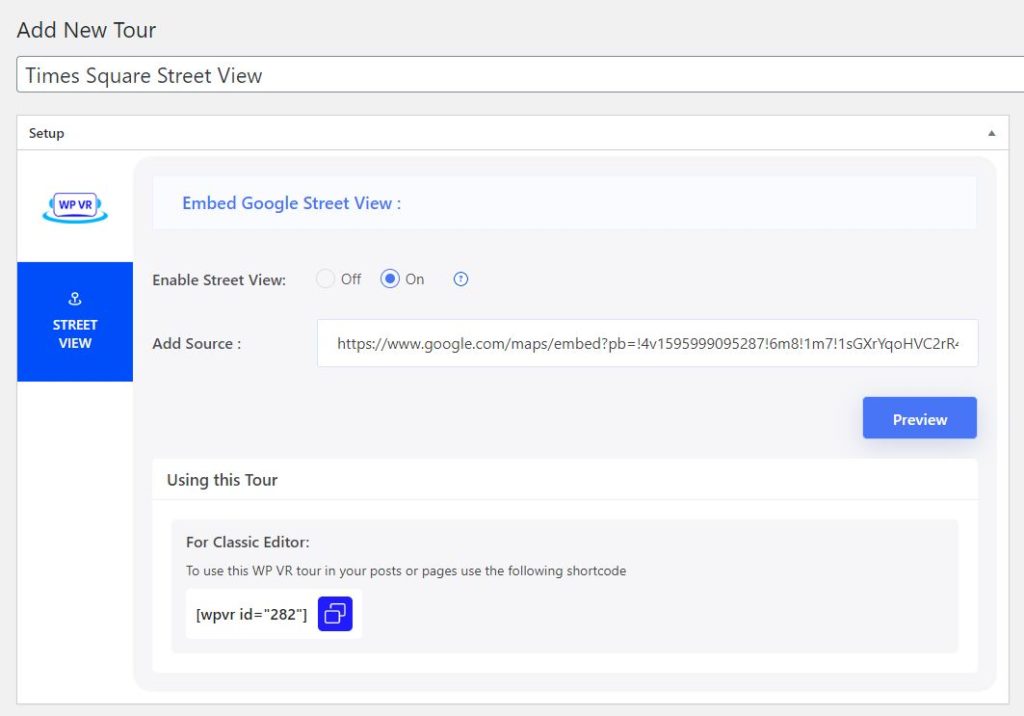
3. On the left side, you will see many tabs Click on the Street View tab and it will take you to the Embed Google Street View page.

4. You will see an option that says Enable Street View. Turn it On.
5. Once enabled, you will get a field to Add Source

6. Now, on a new tab, open your desired Google Street View tour.

On top, click on the 3 dots (as shown in the image above), and choose the option Share or embed Image.
7. A pop-up will appear as shown in the image below. Click on Embed a map tab.

8. Here, you will get he option to Copy HTML. Copy it.

9. Paste this HTML code on a notepad or a code editor and only copy the source URL link.
10. Go back to WPVR and paste this source link in the Add Source field.

11. Click on the Preview button and you will see the preview of the tour on the right side.

12. Now you can publish it and embed it on any page or post on your website using the Tour ID or Shortcode provided below the Embed Google Street View Section.
That’s it. That’s how easily you can embed a Google Street View tour on your website using WPVR.