When you are using Product Feed Manager for WooCommerce plugin, if you go to the Controls tab from the Product Feed Manager Settings, you will get some useful options that can be really helpful in generating an accurate feed for your preferred merchant.
In this guide, I will show you what options you will get from the Controls tab of the plugin and how you can use them.
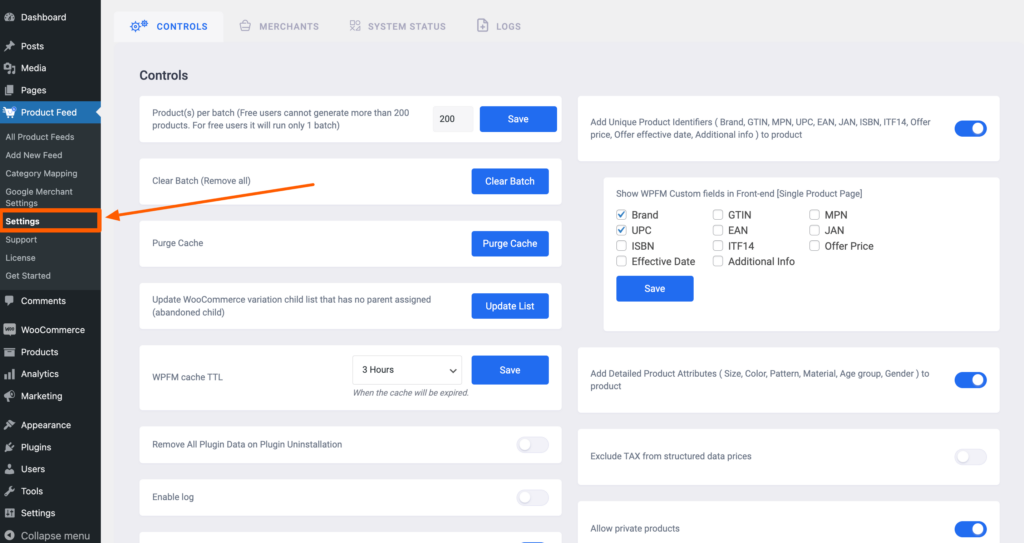
First, click on the Settings option from the Product Feed Manager tab on the WordPress Dashboard. It will take you to the Product Feed Manager for WooCommerce Plugins Settings page.
And it will take you to the Controls page of the plugin:

Now, from this Controls tab, you can see some options, also you can see that some options are marked as PRO, you will need the Product Feed Manager for WooCommerce pro version to use those features.
Free Features #
Here are the free options that you can use with the Free version:
- Product(s) Per Batch
- Clear Batch
- Enable Facebook Pixel
- Enable Log
- WPFM Cache TTL
- Allow Private Products
Product(s) Per Batch #

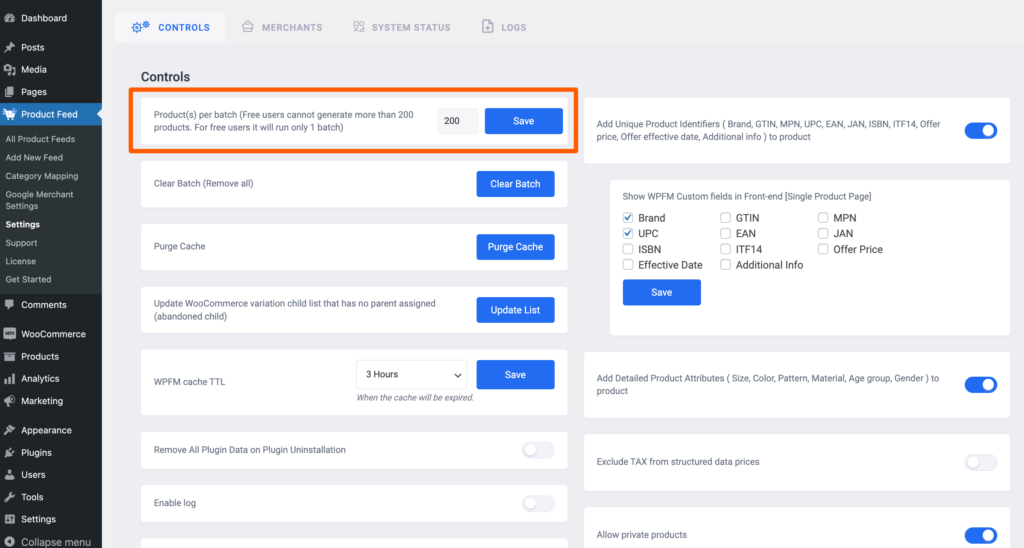
Products per batch indicate the number of products that will be generated per batch.
You see, when you generate a feed with Product Feed Manager if the plugin tries to generate all the products at once, it will put enormous pressure on your server if your site contains too many products.
Hence your server won’t be able to handle it and your site will crash. This is where this batch method comes in. It divides the number of products into batches, so it won’t put much pressure on your server at a time.
Products per batch are set as 50 by default, you can change this number as per server capacity. Put a new batch number and click on the Save button to set the new batch number.
Clear Batch #

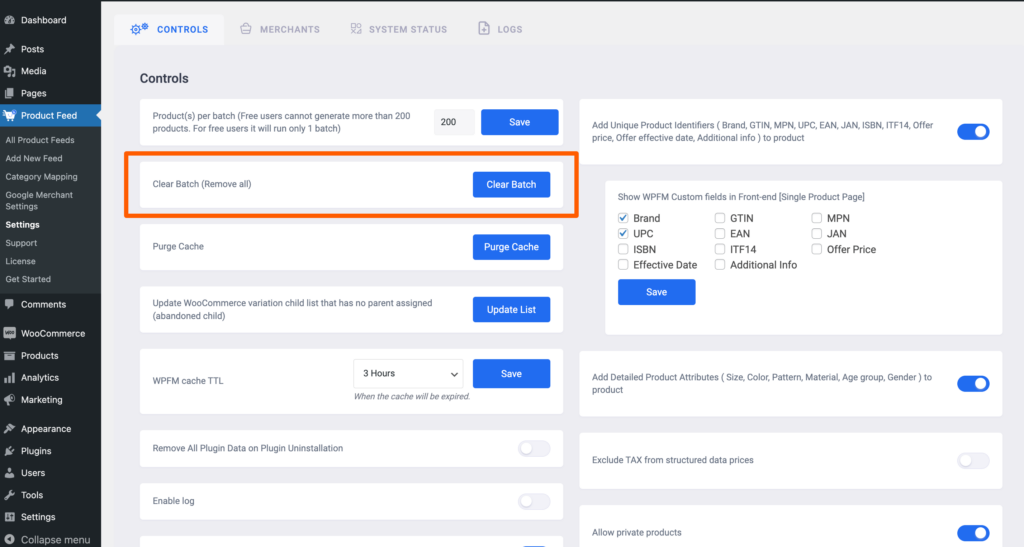
Sometimes your feed may get stuck, or you can see that your feed is still loading. In this case you may want to clear the batch to remove all the batches from the cache.
Just click on the Clear button, and all the batches from the cache will be cleared.
Enable Facebook Pixel #

If you want to track your feed with Facebook Pixel, enable this Enable Facebook Pixel option, and you will see that a new option Facebook Pixel ID appears.
Enter your Facebook Pixel ID and click on the Save button. Now you can go back to Facebook Pixel to track the feed.
Enable Log #

You can enable this log option to get the error log through which you can get the error log of the Product Feed Manager for the WooCommerce plugin.
This error log helps when your feed is not generating or if you are getting any error, then you can get help from this error log to debug the issues.
Click on the Logs option from the upper tab to get all the log entries.
WPFM Cache TTL and Purge Cache #

You can set the Product Feed Manager for WooCommerce cache-keeping time from here. You can set it as No Expiration, 3 Hours, 6 Hours, 12 Hours, 24 Hours, and a Week.
You can click on the Purge Cache button to immediately clean the Product Feed Manager for WooCommerce plugin cache.
Allow Private Products #

You can enable this Allow Private Products option to enable the private products to be included in your product feed.
So far these are the features you can use from the free version of the plugin.
PRO Features #
Remember that to use the Pro features of the plugin, the Pro version of the plugin must be enabled first. Once the Pro version of the plugin is enabled, you will see that the PRO mark is removed and you will get enable options for them.
Now, here are the Pro features of the plugin that will require you the Pro version of the plugin to use them:
- Exclude TAX from structured data prices
- Add Unique Product Identifiers
- Increase the number of products that will be approved in Google’s Merchant Center: This option will fix WooCommerce’s (JSON-LD) structured data bug and add extra structured data elements to your pages
- Add Detailed Product Attributes
Exclude TAX From Structured Data Prices #

Enable this Exclude TAX From Structured Data Prices option to exclude TAX from the structure data prices.
Add Unique Product Identifiers #

Now, this is an important option that you may need to use. Sometimes you need to put some Unique Product Identifiers info of the products to your feed, such as Brand, GTIN, MPN, UPC, EAN, etc. but using WooCommerce, you won’t get such fields to put this information.
By using this plugin, you can get these fields to show on your product settings page, where you insert the information and show it in your feed.
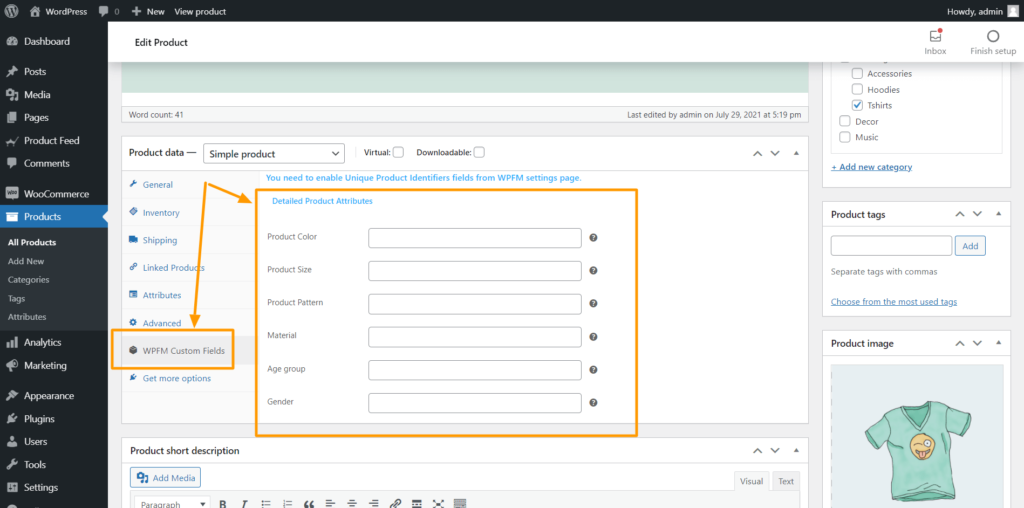
Once you enable this option from here, go back to your product settings page to see that all these fields are added to your product. Click on the WPFM Custom Fields, and you will get the following view:

Insert relevant information and you can get the values from these fields to your feed.
Add Detailed Product Attributes #

Just like Unique Product Identifiers, you can enable this option to get some detailed product attribute fields, such as Size, Color, Pattern, Material, Age group, Gender, etc.
Once you enable this option from here, go back to your product settings page to see that all these fields are added to your product. Click on the WPFM Custom Fields, and you will get the following view:

Insert relevant information and you can get the values from these fields to your feed.
Increase the number of products that will be approved in Google’s Merchant Center And Fix WooCommerce’s (JSON-LD) Structured Data Bug #

Enabling this option will increase the number of products that will be approved in Google’s Merchant Center.
Also, this option will fix WooCommerce’s (JSON-LD) structured data bug and add extra structured data elements to your pages.
That’s all, these features could be really important at the moment when you need them. You can always enable or disable them as per your need.