When setting up a feed for Google, you will notice a recommended field called Google Product Category.
Google requires you to assign this field based on their official Google Product Taxonomy list. If your Product Category values don’t match their taxonomy, your products may be disapproved.
This is where Category Mapping comes in. It helps you map your store’s categories to Google’s predefined ones.
You can do this in two ways:
- Use the default category mapper “Google Product Category” – quick and straightforward.
- Create a custom category mapper – gives you more control if you want to set up your own mappings.
This guide will walk you through both approaches so you can assign the correct Google Product Category without any hassle.
Using The Default Category Mapper #
Using the default category mapper, you won’t have to create a new category mapper; simply configure the category mapper and publish the feed.
Follow the steps to learn how to use the default category mapper “Google Shopping Category“:
1. When you select Google Shopping from the Feed Merchant dropdown, all the required attributes will be loaded below.
Now, here you will find an attribute Google Product category, and you will see that “Google Product Category” is already assigned as the value for this attribute.

This is a pre-made empty category mapper that was created and assigned just to make this category mapping process easier for you. This means although a category mapper is already assigned, you need to configure this category mapper.
2. Now, under the “Google Product Category” assigned value, you will see an option Configure Category Mapping.

Click on this option and a new tab will be opened where you will see this default category mapper and you can configure this default category mapper from here.

3. Here, what you will do is assign your WooCommerce Product Categories to the relevant Google Product Categories.
Now, the category mapping fields are integrated with the Google Taxonomy list, which means you will get smart suggestions with Google Product Categories while you start to type your required category.
For example, let’s say you have a category called “Bag“. You can simply type in the “bag” and you will get suggestions for the most relevant Google Categories available.
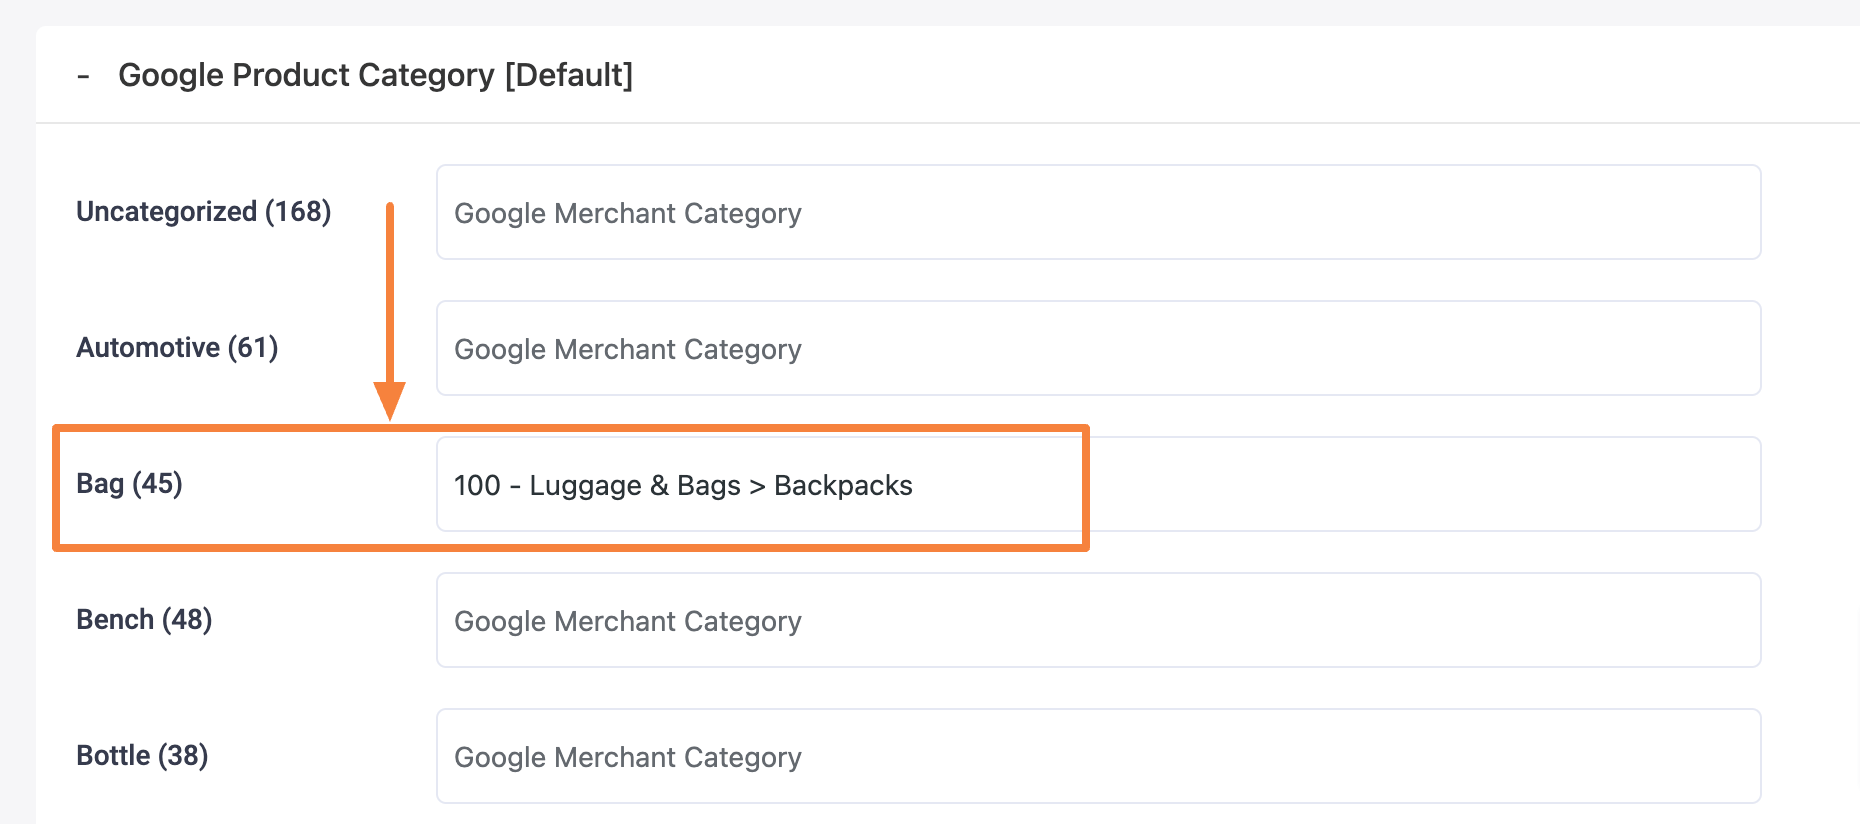
But we advise that you look for the relevant category from the Google Product Taxonomy list, and then copy and paste the category code in the fields.
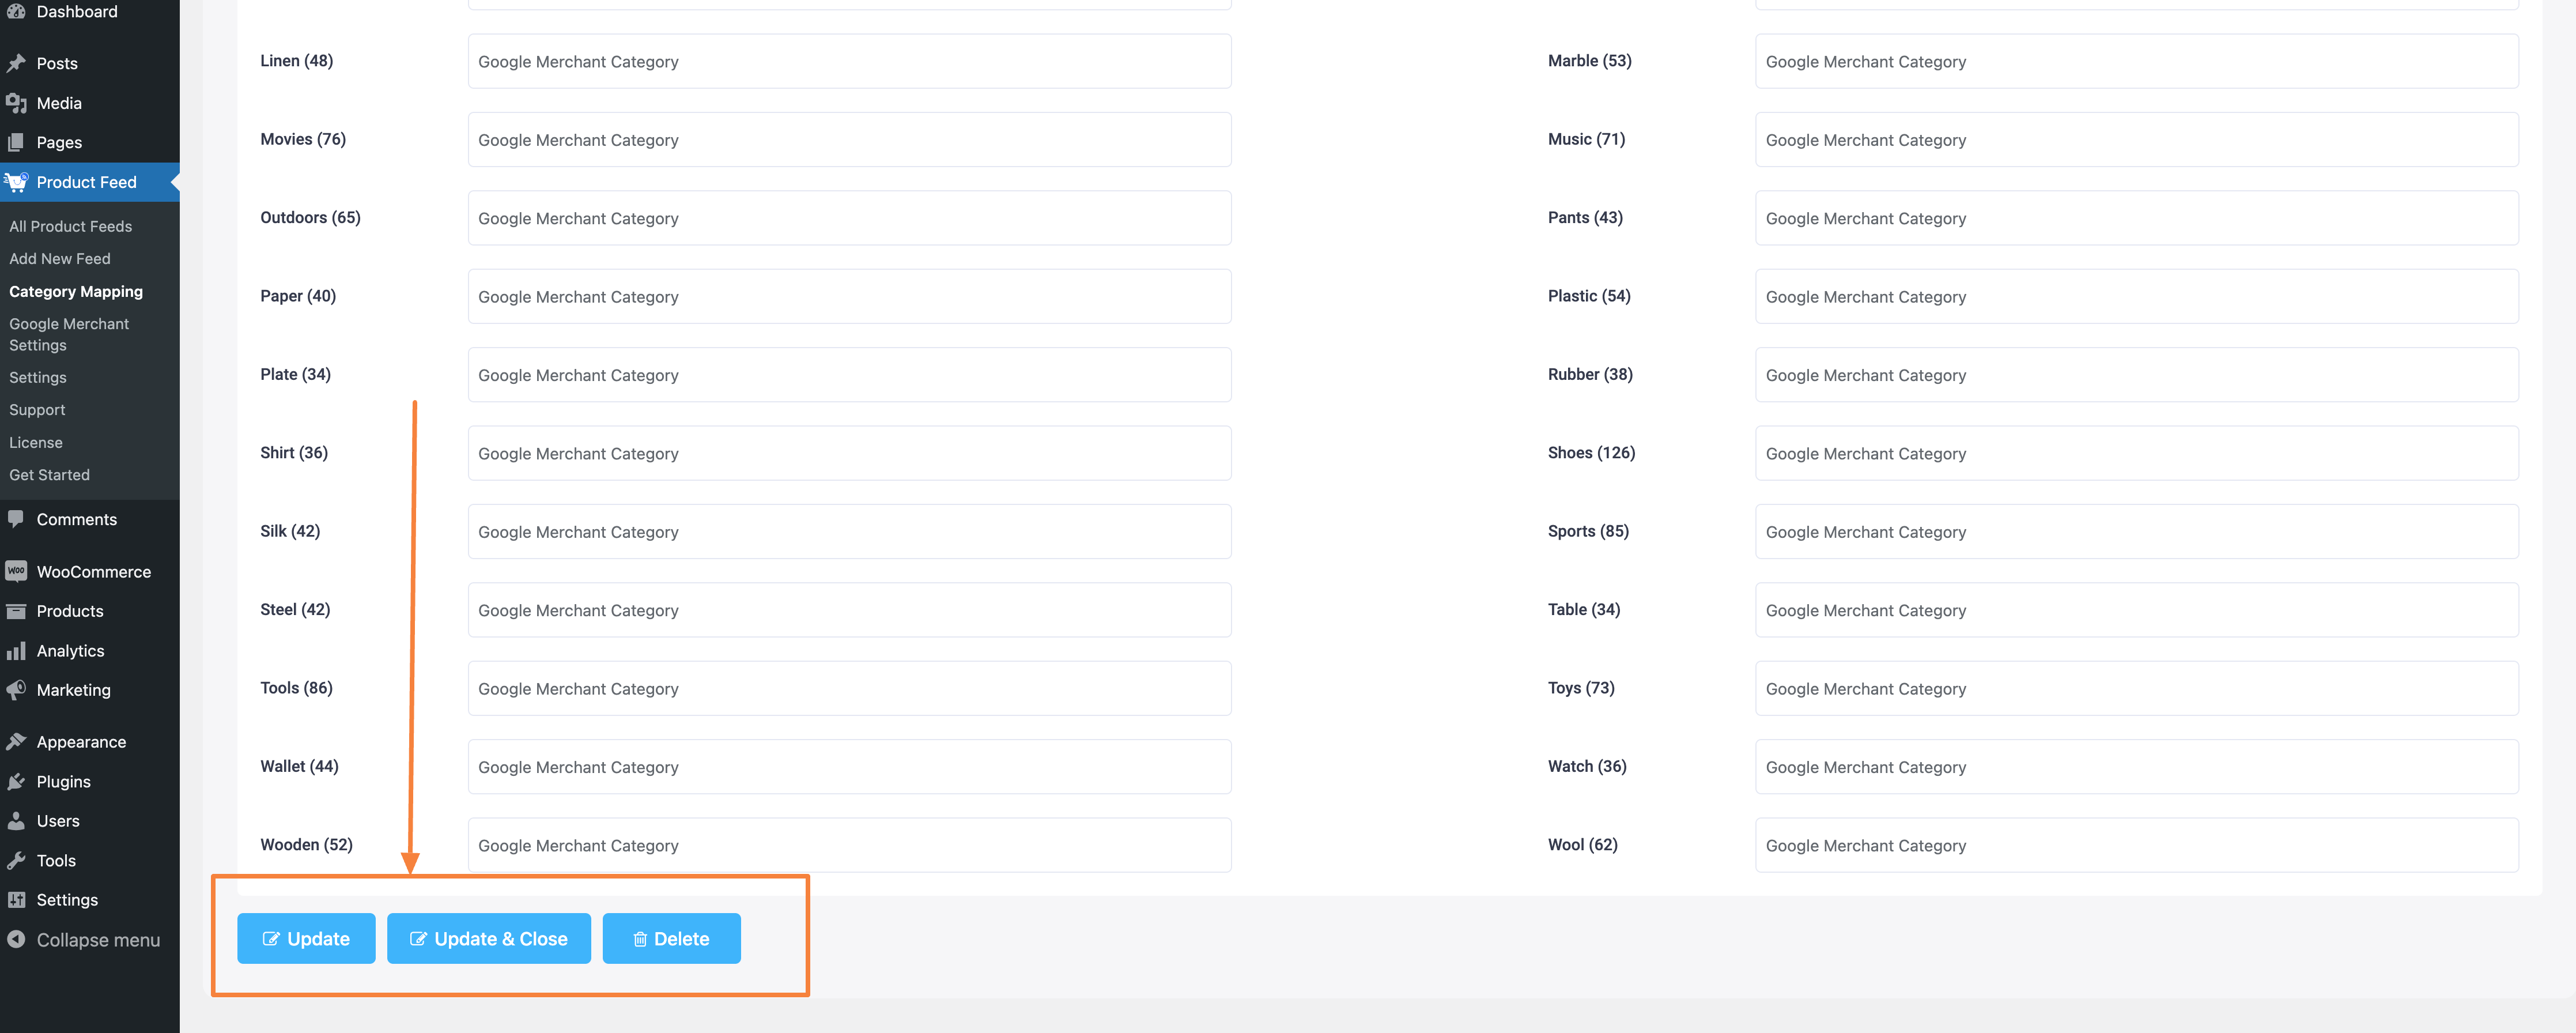
4. Once you have assigned categories to map to, go to the bottom of your category list, and here you will find some options: “Update”, “Update & Close“, and “Delete“
If you click on the “Update” button to save the changes you just made, you will stay on this page.
And if you click on the “Update & Close” button to save the changes you have just made, it will take you back to your feed page. This will close this Category Mapping tab and will take you back to the page where you were creating the feed.
Or if you want, you can delete this category mapper by clicking on the “Delete” button
That’s it, this is how you can use the Default Category Mapper.
Now, to create a new category mapper and use it, follow the steps below:
Creating A New Category Mapper And Configuration #
1. Publish Google Shopping Feed Initially #
When you are creating a Google Product Feed, you will get the Google Product Category field in the template:

Now, you can configure all other fields and initially publish the feed. But your feed is not fully ready yet.
Scroll back to the top and click on the “Publish” button to publish the feed.
Now it is time to configure the Google Product Category.
Configure Google Product Category #
To configure your Google Product Category,
1. At first, you need to create a new mapper.
To do so, go to the Category Mapping section by clicking on Category Mapping from the WordPress Dashboard.
It will take you to the Category Mapping section, where you can add a new Category Mapping for your Google Product Category.
Here, all the categories available in your store will be listed.
And on the right side of each category, you will find the empty fields where you need to assign the Category you want to be mapped in your product feed.
First, give a name to this Mapper.

2. Now, map your categories as required on the respective fields.
You need to assign the category you want to be mapped in your product feed.
What this means is that, if you assign this mapper as the value of an attribute, then the values you input here will be generated as the value of that attribute, for the products in the respective categories.
For example, let’s say, for the category: “Clothing“, you input the value here as “Clothing“.

So, if you use this mapper for the value of an attribute in a feed, then any products in the category “Clothing” will generate the value “Clothing” for that attribute.
Now, the category mapping fields are integrated with the Google Product Taxonomy list, which means you will get smart suggestions with Google Product Categories while you type your required category.

But we advise that you look for the relevant category from the Google Product Taxonomy list, and then copy and paste the category code in the fields.
3. Once you have assigned categories to map to, click on the Save button below.

The Mapper will be saved and listed below.

You can click on it to expand and edit it if needed.

Now that you have set up Category Mapping, you will be able to use it when generating a feed.
Applying Category Mapping For Google Product Category While Generating Product Feed For Google #
Once you have set up a category mapping rule, you can make it effective when creating a new feed by choosing the category mapper you created under Value for an attribute.
1. First, remember the Mapper name you saved it with. Then go back to your initially created Google feed settings.
Click on the Value option for the Google Product Category attribute.

Scroll to the very bottom and you will find the Mappers you created.
Choose your required mapper.

For Google Shopping, you have to use it as the value for the attribute Google Product Category.
2. Update the feed. Go back to the top and click on the Update button.
Now, once you publish the feed, you will see the value of the attribute that will use the mapped value as per the product category you assigned.
That’s it. Now, you can go ahead and use it to generate a flawless product feed for Google.