Adding background music to a virtual tour is a great way to let visitors enjoy the tour.
You may play soothing background music or play informative audio about the place while a person takes the tour.
This is a great way to connect with the visitor and often create more engagements.
Here’s an example of a demo tour with background music:
Here are the steps to follow to add background audio to your virtual tour using WPVR.
Adding A Background Music To A Virtual Tour #
01. Edit or create a new tour. Initially you will be on the Generals Tab.
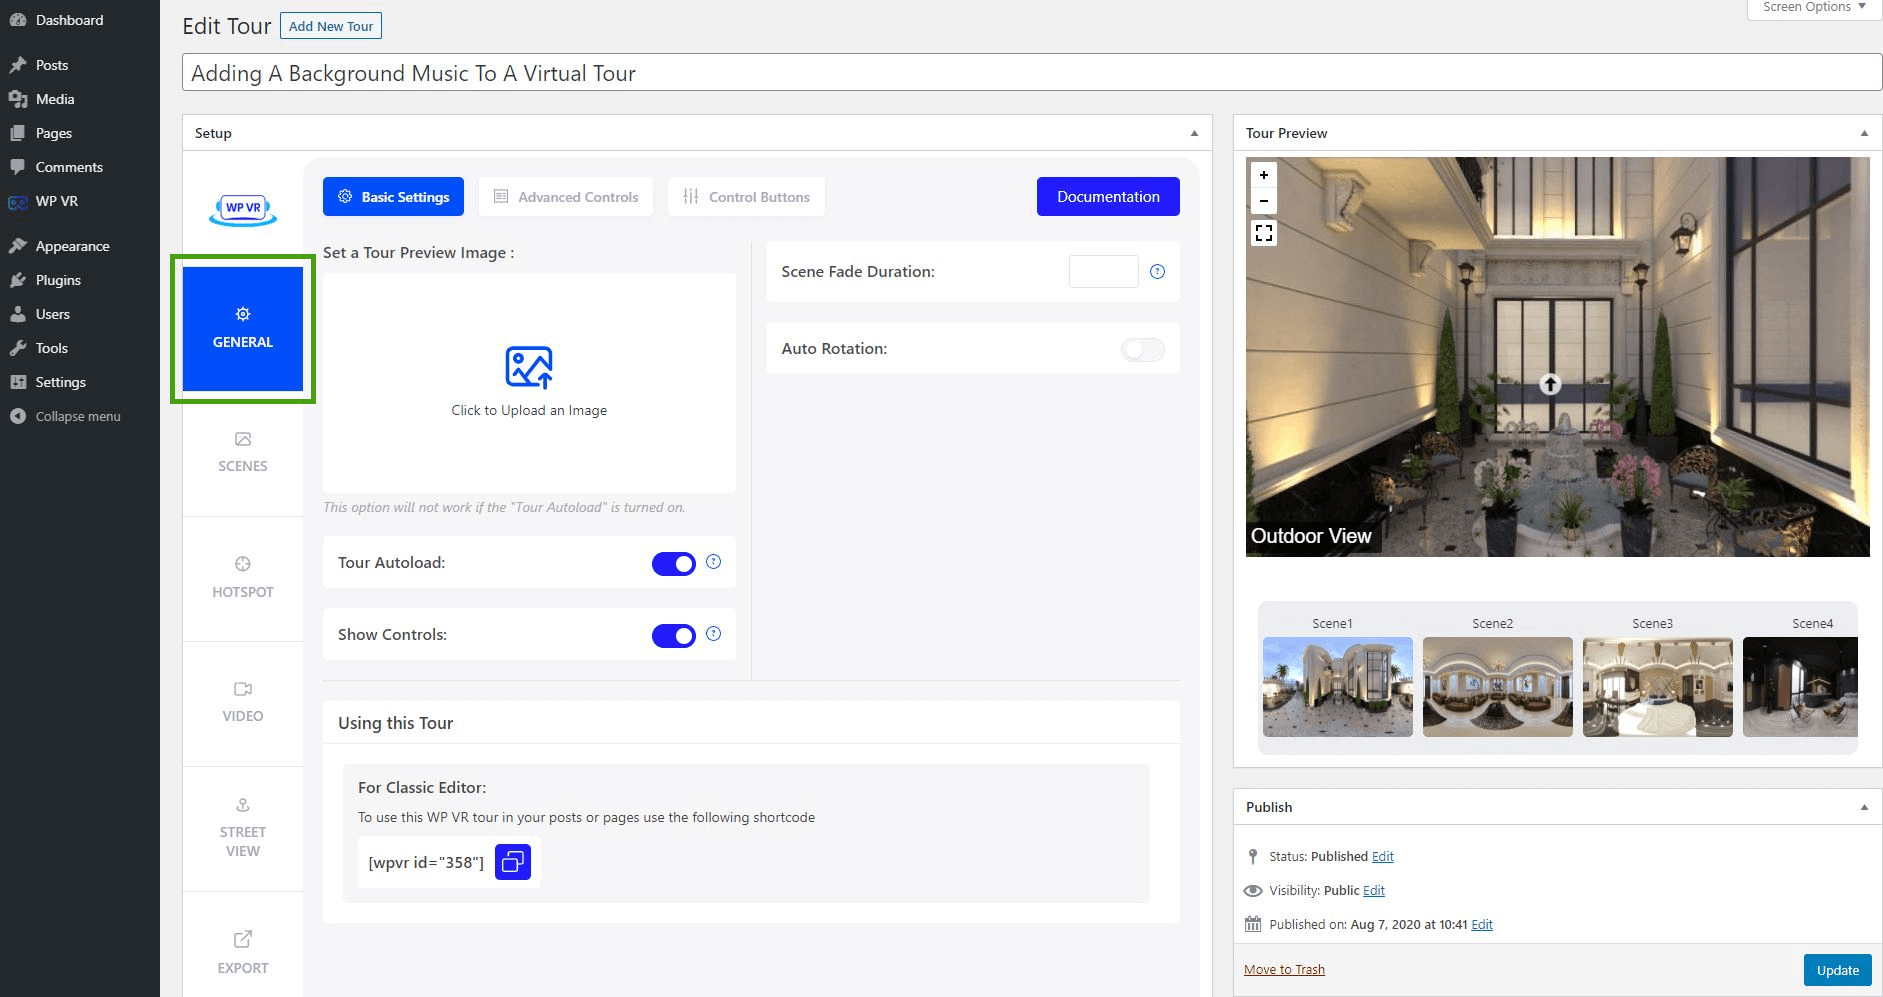
02. On top, click on the Advanced Controls tab.
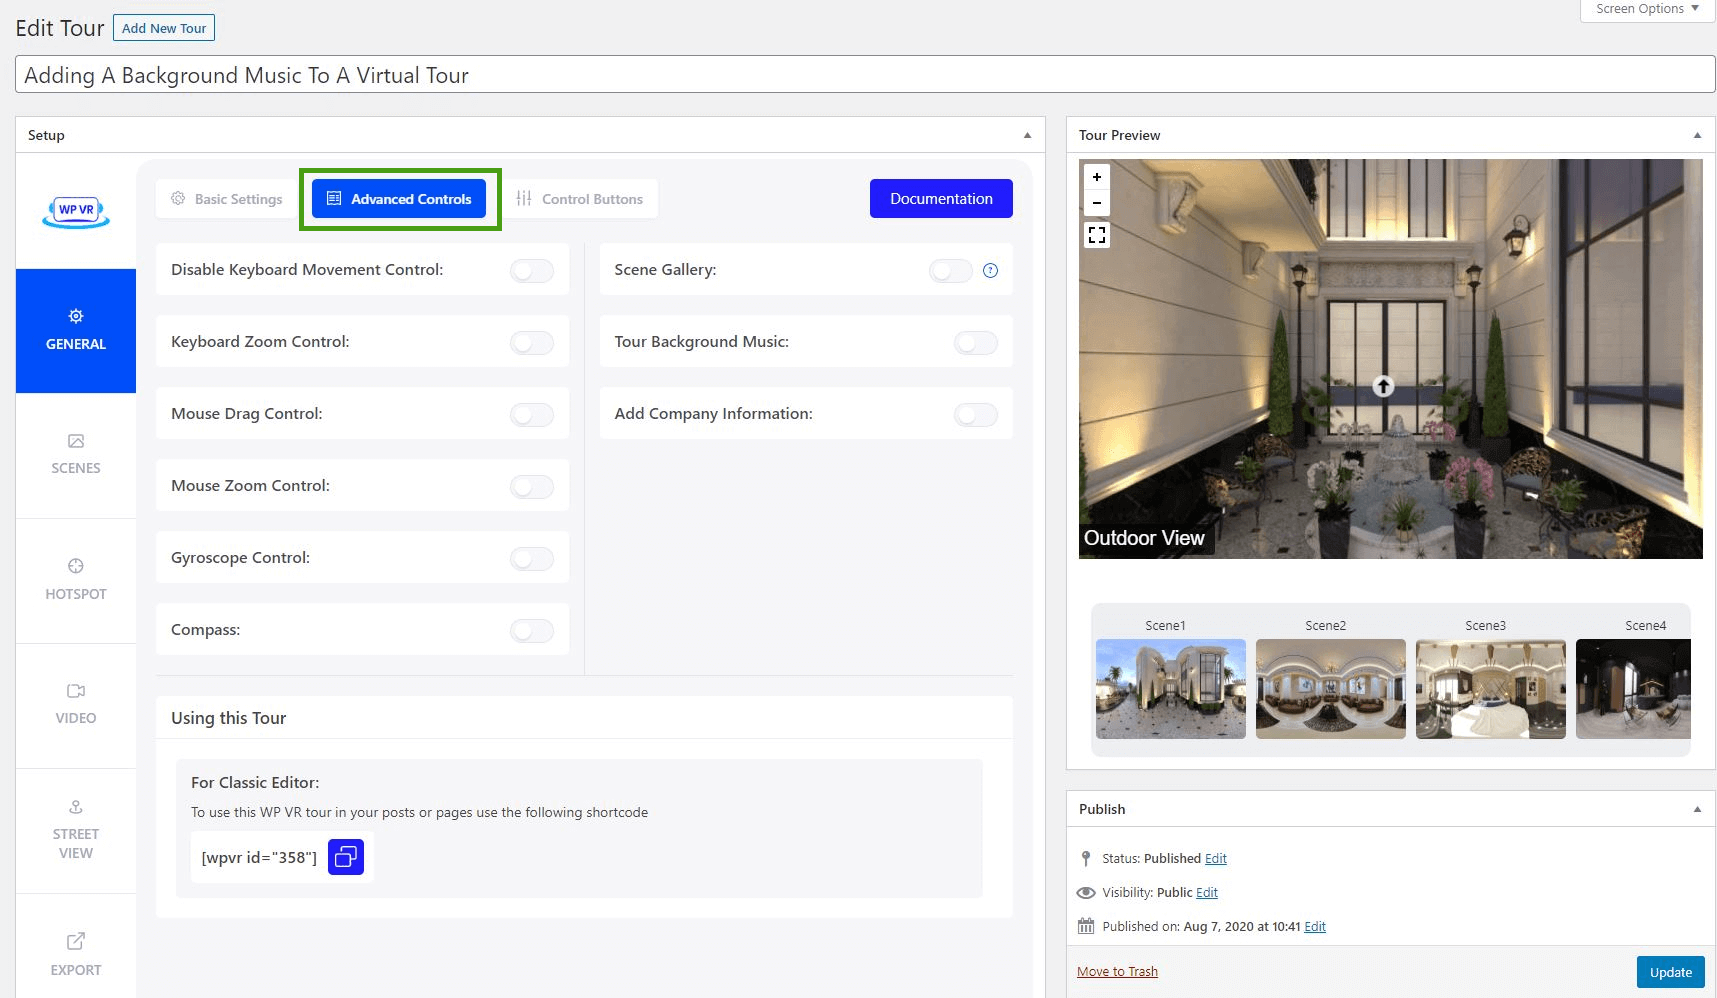
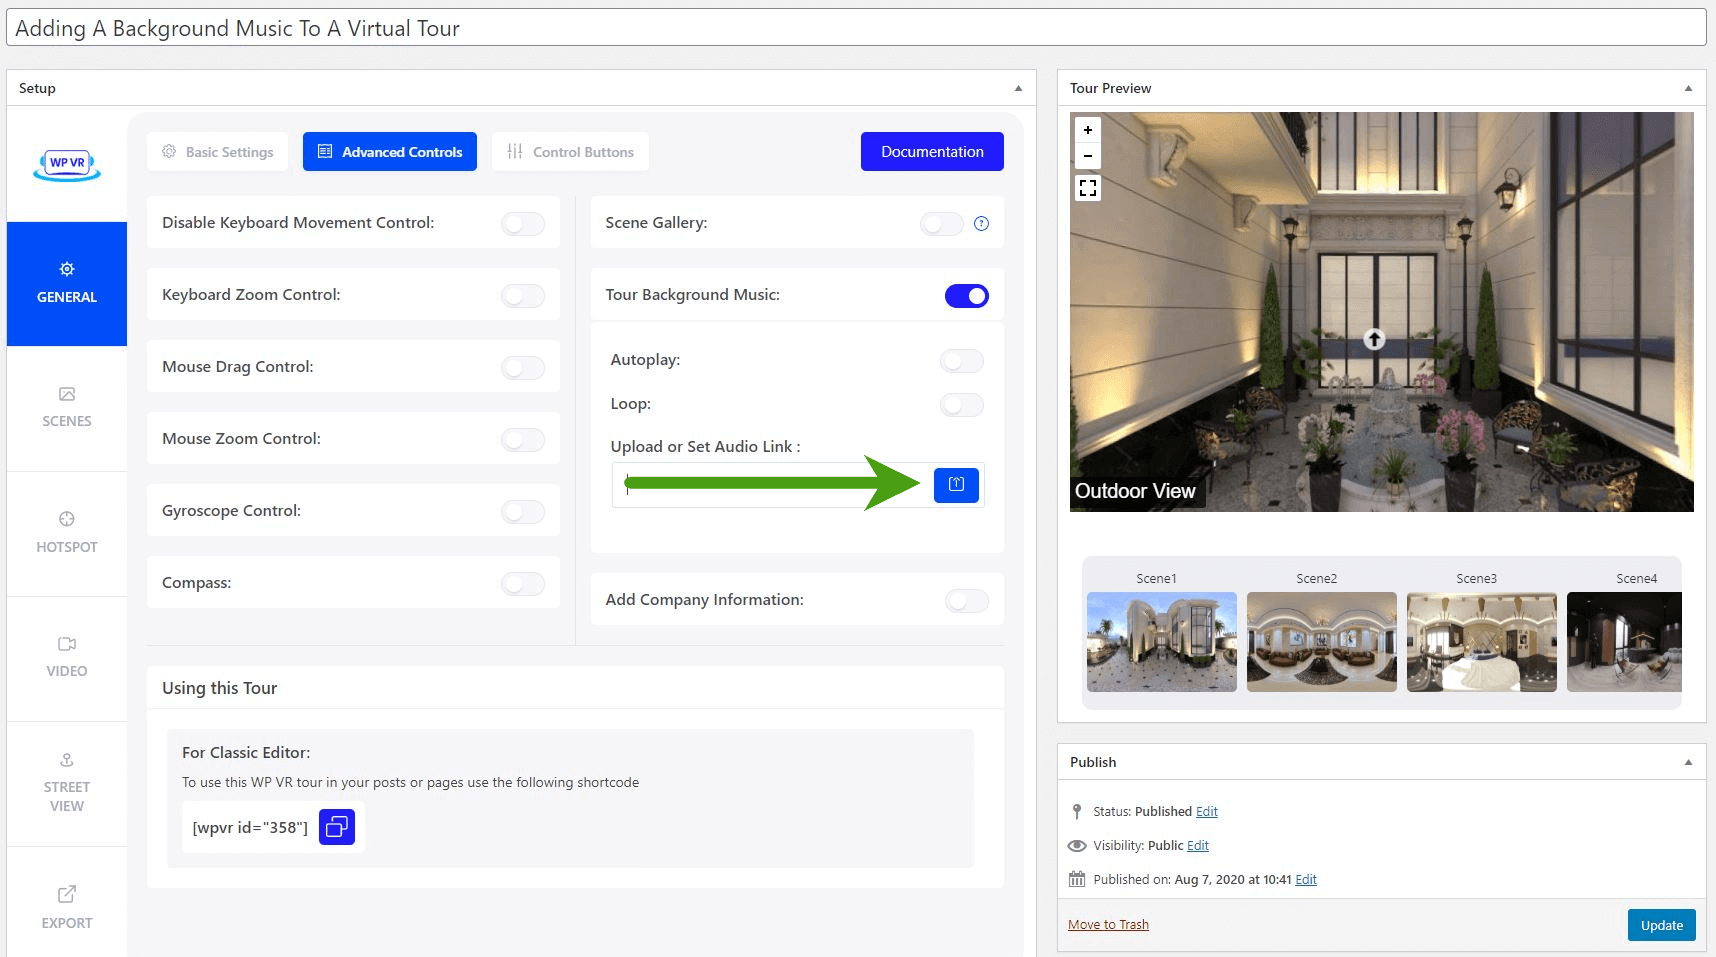
03. On the right side, you will find the option called Tour Background Music.
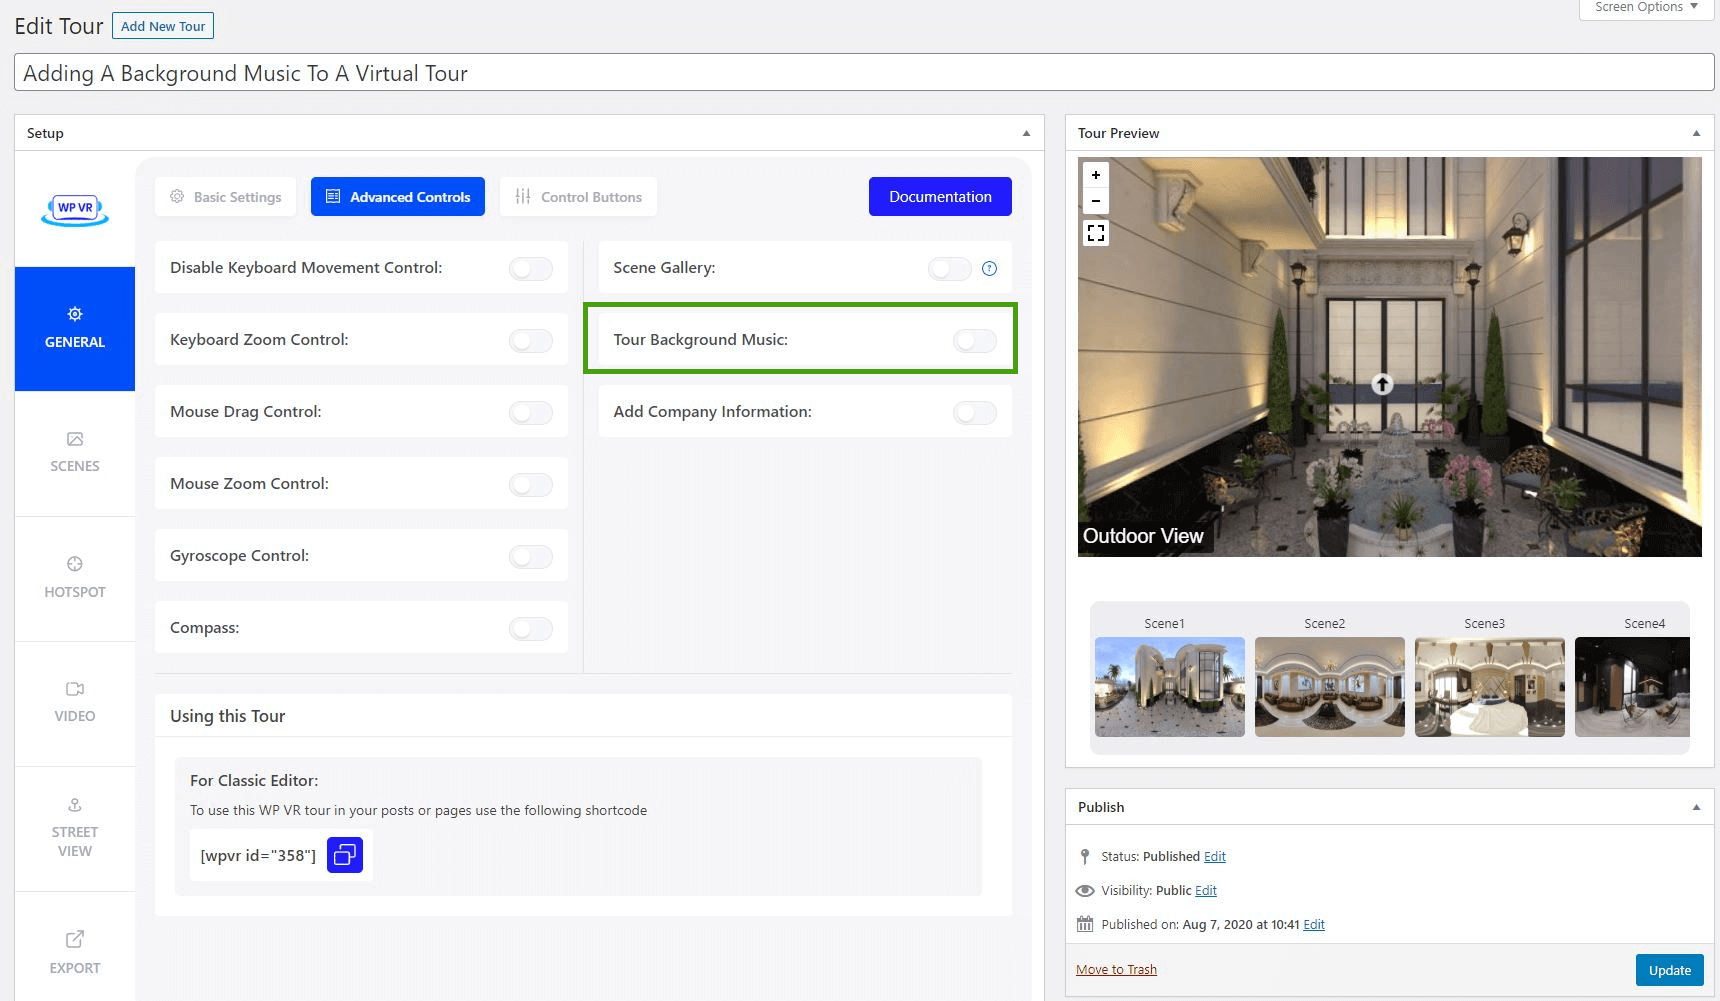
04. Once you enable it, you will get further options called Autoplay, Loop, and Upload or Set Audio Link.
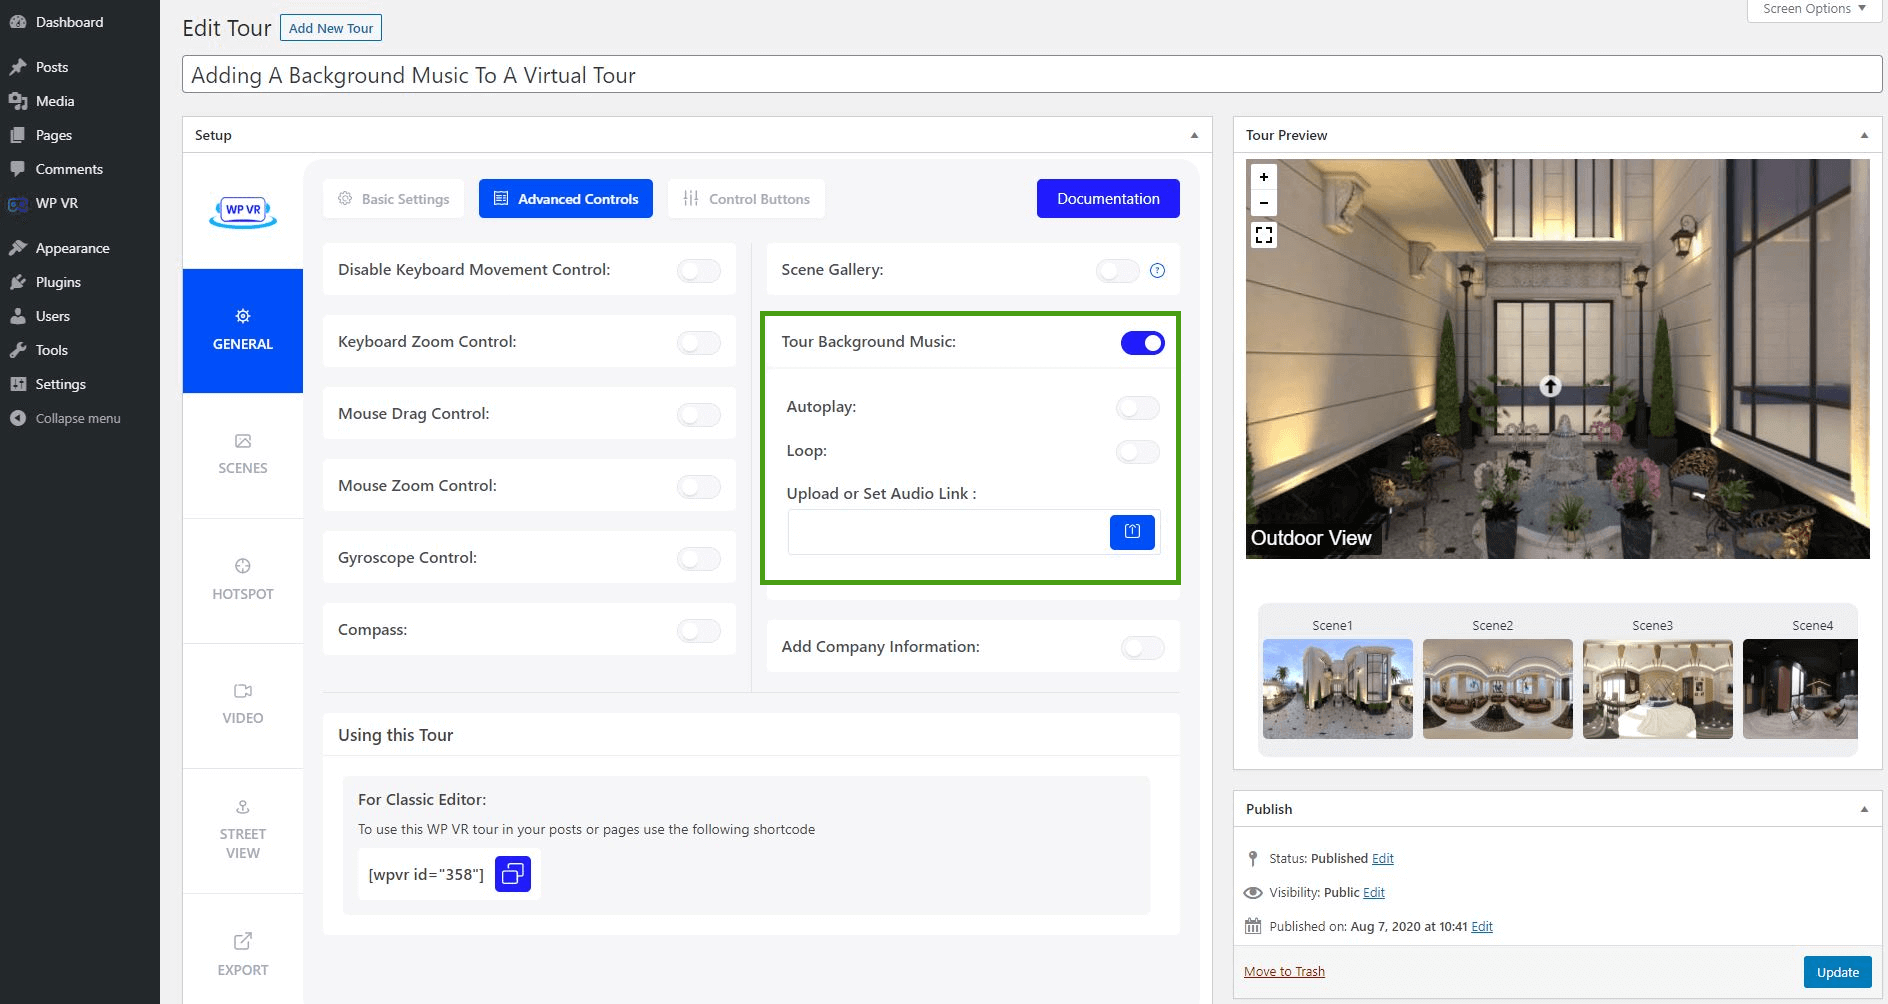
05. Click on the blue button under Upload or Set Audio Link to upload an audio file.
06. Once you upload the music, you can then choose if you want it to enable Autoplay and Loop.
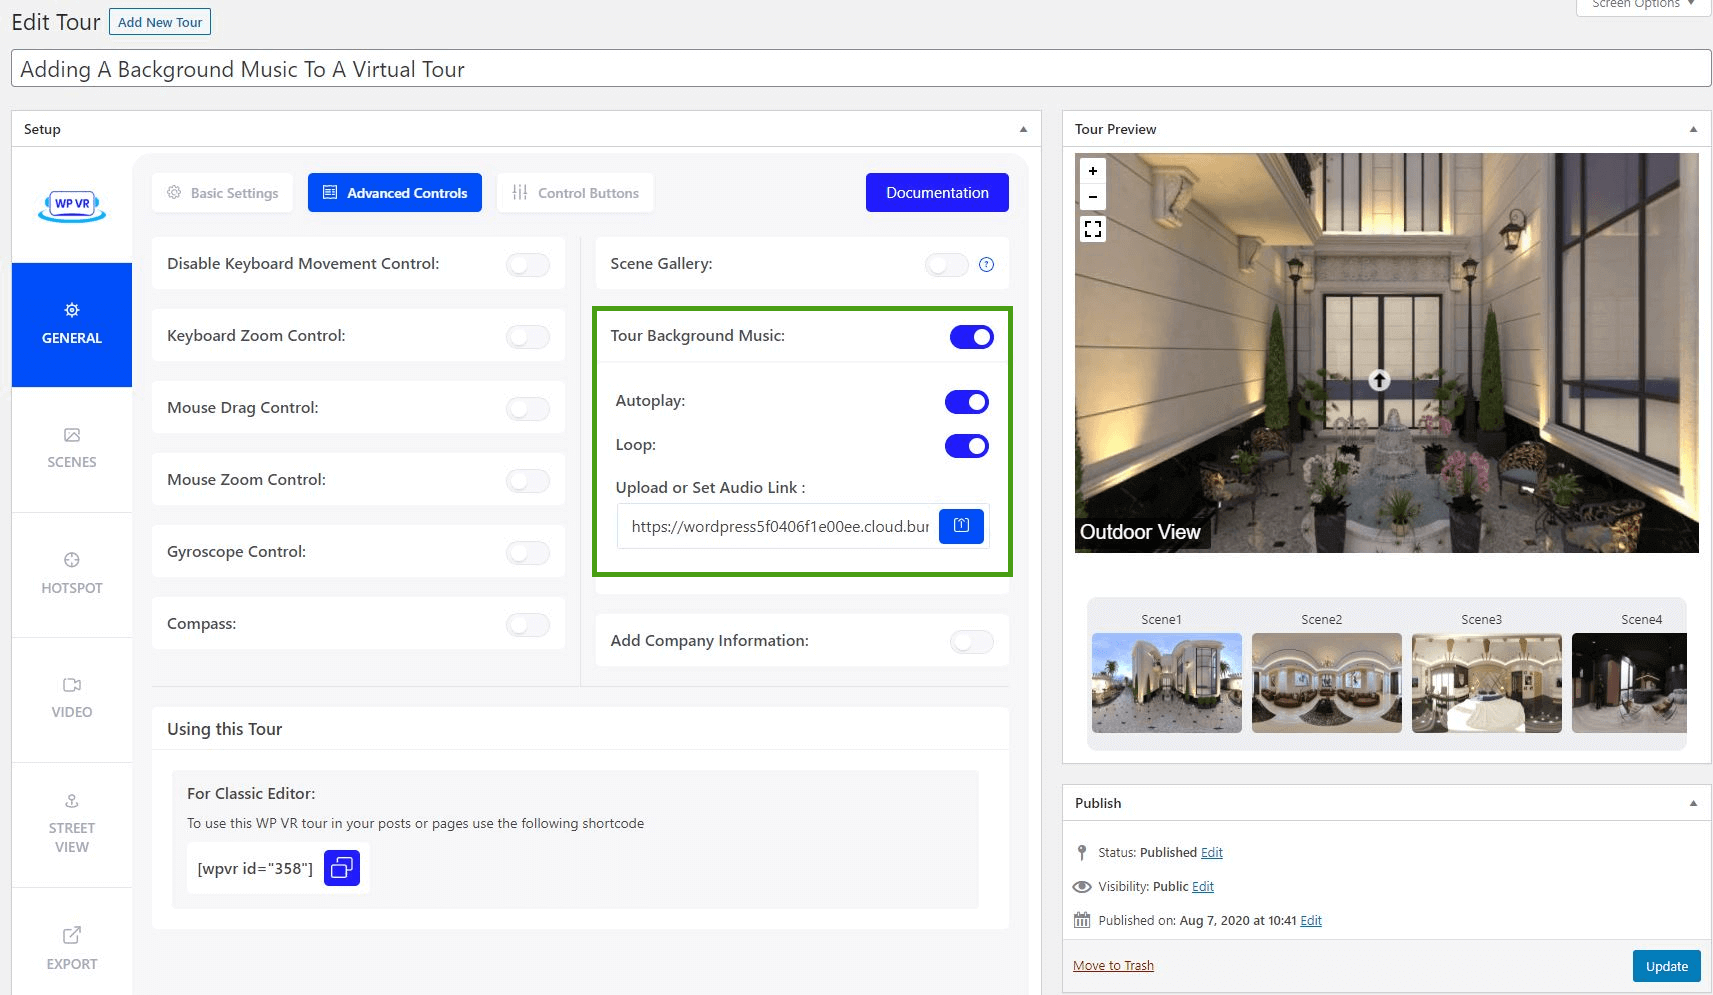
- Autoplay
Enabling it will mean that the music will start playing automatically, the moment the tour loads.
- Loop
Enabling it will mean that if the music has playing for it’s full length, it will start playing again from the beginning.
07. Once you have set the background music, next publish the tour, and embed it on a post/page.

08. On the tour you will find an Audio button on the bottom left corner.
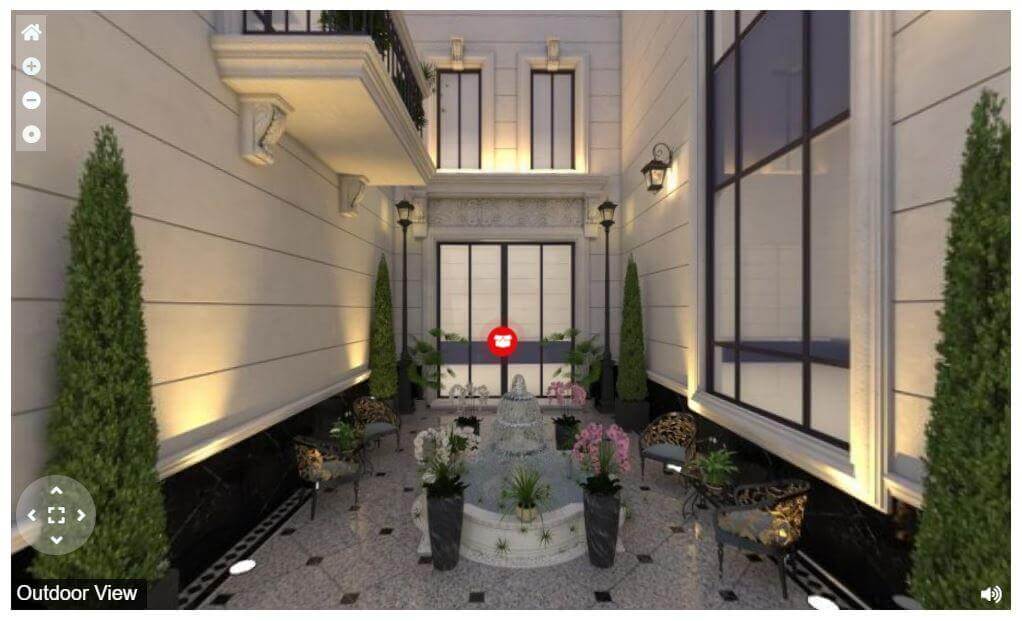
If you have enabled Autoplay, then clicking on this icon will pause the music. And clicking on it again will resume it.
If you did not enable Autoplay, a person will have to click on this icon to start playing the music.
That’s it. You can now easily add background music to any of your virtual tours.


