Are you frustrated because your WP VR virtual tour is not showing up on your WordPress page? You embed the 360° panorama tour perfectly, but visitors see a blank space, loading spinner, or nothing at all. This common issue with the WP VR plugin (the popular free and Pro 360 virtual tour builder) is usually caused by script loading conflicts, caching plugins, or optimization tools minifying/combining JavaScript files.
Sometimes, you may face the issue of your WPVR virtual tours not showing up on your webpage.
If your WPVR Script Control Settings are not properly set up, or you’re using an optimization plugin or a caching plugin on your site, this can happen often.
Today, you’ll learn how to solve virtual tours that are not showing up for WPVR.
Befolgen Sie diese einfachen Schritte:
Step 1: Set Up WPVR Script Control Settings To Solve Virtual Tour Not Showing Up #
First, set up the Script Control settings for WPVR.
1. Go to your WordPress Dashboard > WP VR > Settings > General Settings
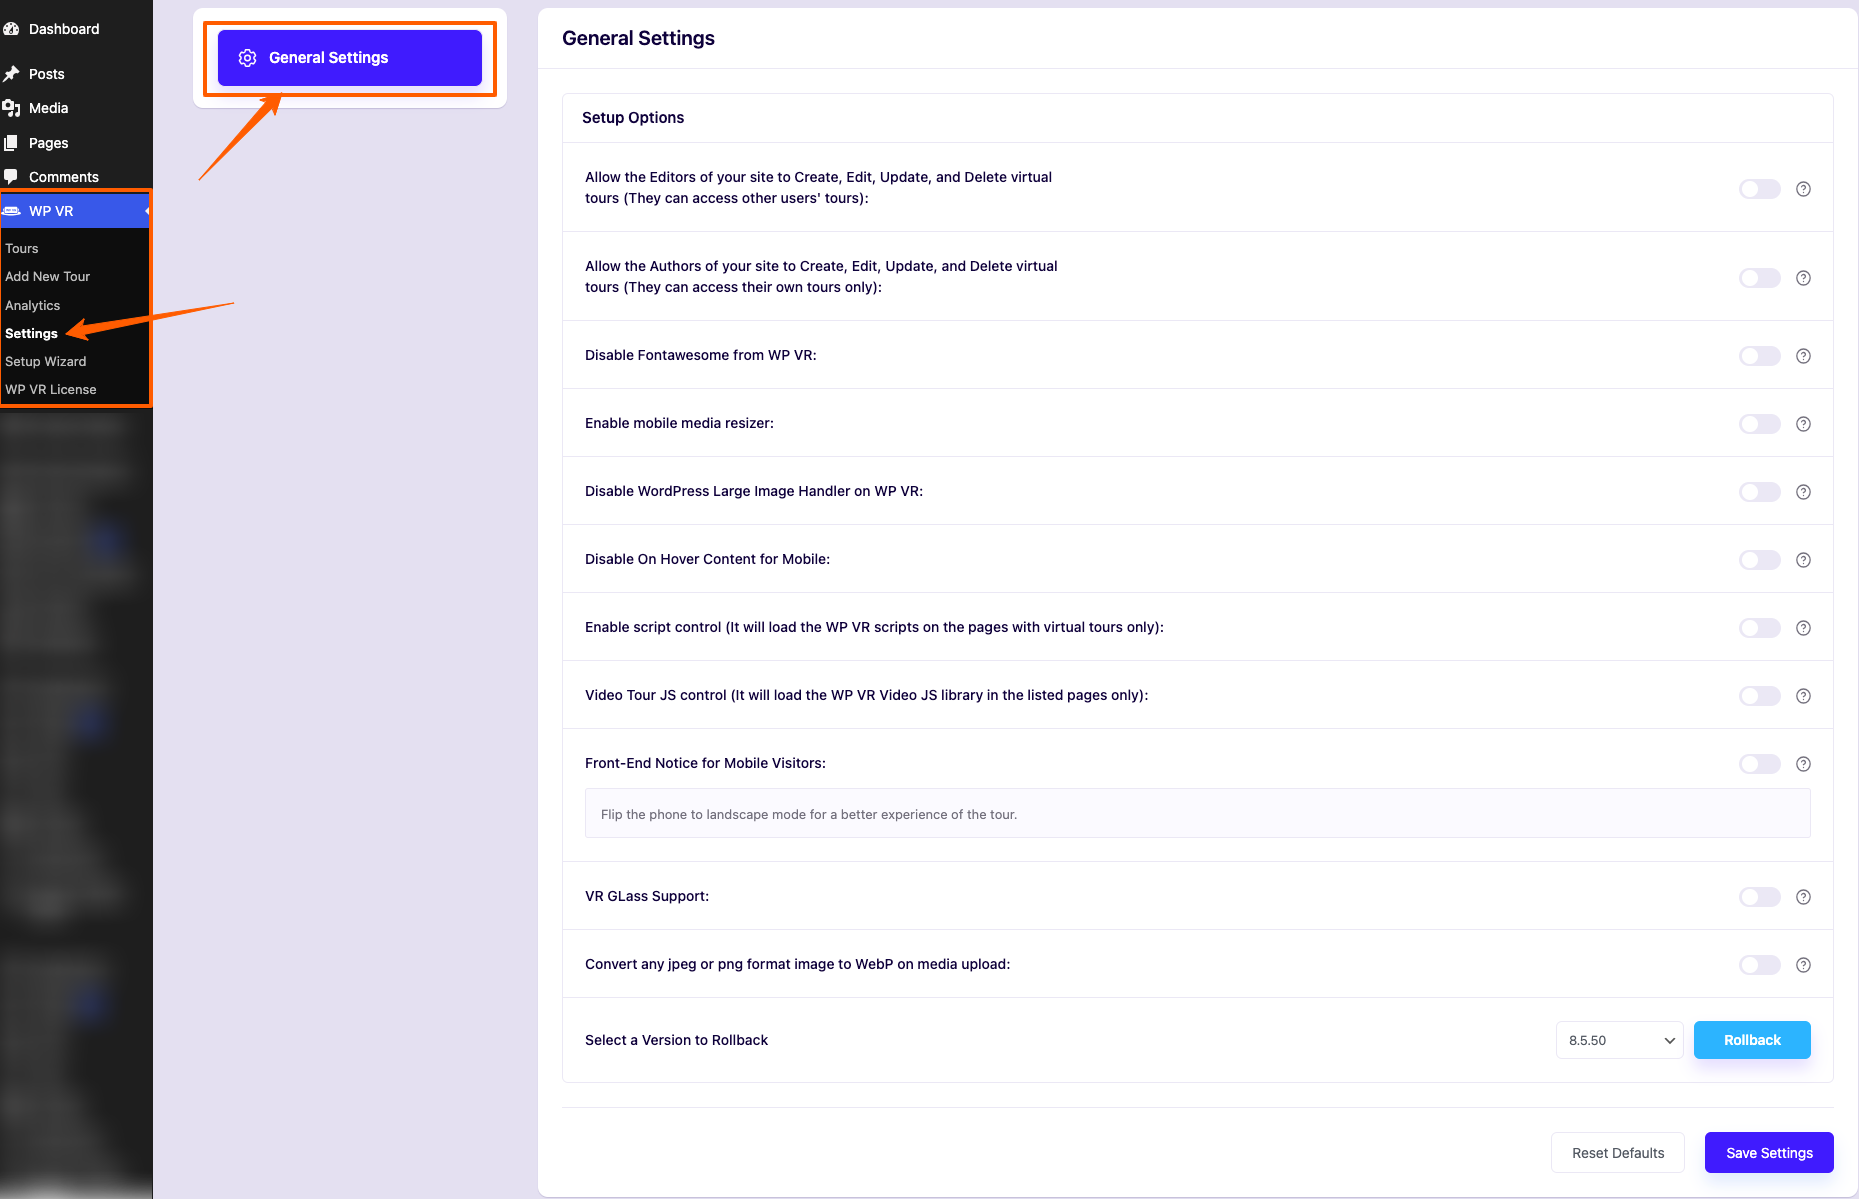
2. Click on the General Settings tab.
3. Find the Enable Script Control option and enable it.

If it’s already turned off, move to Step 2 to exclude WPVR JS files from the optimization or caching plugin you’re using.
If it’s turned on, check out the ‘List of allowed pages to load WP VR scripts’ option.
4. If your webpage URL that has a virtual tour published, is already listed on this field, move to Step 2 to exclude WPVR JS files from your optimization or caching plugin.
If the webpage URL is not listed on this page, add the URL in this field.
If you have multiple web pages with WPVR virtual tours, add them by separating them with commas(,).
5. Click on the Save button.
6. Go to your webpage, clear the cache, and reload the page.
Your virtual tour should appear now on your webpage.
If the tour still doesn’t appear on the webpage, it’s possible that you’re using an optimization plugin on your site and this plugin is optimizing the JS assets of WPVR.
Follow Step 2 to Exclude WPVR Assets from your optimization or caching plugin.