
Marketplace Auto Sync is a versatile plugin that simplifies product management by automatically syncing your product listings across multiple online marketplaces.
This guide will walk you through the quick and easy steps to configure Auto Sync.
Fangen wir also an.
Setting Up An Auto Sync #
Follow the steps below to set up your first auto-sync.
Go to Dashboard > Marketplace Auto Sync > Add Sync
1. Sync List
In this tab, you will find the list of all your connected Marketplace Syncs
Since we are setting up a Sync for the first time, we don’t have any connected Syncs
Now click on the “Add Sync” button

2. Authentication Tab
Now in the Authentication Tab, select your preferred Marketplace for the Auto Sync.
For this guide, let’s choose the Marketplace Google Shopping.

After selecting the Marketplace it will take you to the Authentication tab. Where you’ll Enter the information such as:
- Kunden-ID
- Kundengeheimnis
- Händler-ID
- URL umleiten

Collect this information from your Google Merchant account and enter it into the respective fields. After that click on the Authenticate button.
3. Attribute Mapping
In the Attribute Mapping Tab, there are 4 Sub-Tabs
– Attribute Mapping
– Product Filter
– Product Rule
– Settings
i. Attribute Mapping Sub-Tab
Once the authentication is completed it will show you the Attribute Mapping.
In this tab, you will see all the Required Attributes for Google shopping are already loaded.
In most cases, this template is already configured and values are assigned properly, so you won’t have to do much work with this.
However, depending on the merchant you are generating a feed for, there may be some attributes for which you need to assign values manually.

ii. Product Filter Sub-Tab
Once you click on the Product Filter button, you will find the Product Filters, and from here you can select a filter option to apply to your feed.
The Product Filter Includes
- All Published Products
Apply this filter to add All Published Products in your WooCommerce - All Featured Products
This filter option will let you include only the featured products - Product Filter
Through this filter, you can include/exclude even a single product from your feed. But with this filter, you need to include/ exclude products one by one. - Category Filter
Enabling this option will enlist all the categories in your store to choose from. Whichever ones you select, products under those categories will be included in your feed. - Tag Filter
Enabling this option will enlist all the tags in your store to choose from. Select your desired tags. All the products that are tagged with your selected tags here, will be included in your feed.
ii. Product Rule Sub-tab
Product Rule is one of the most desired features of sellers who want to sell their WooCommerce store products to online merchants. Through this feature, you can manipulate your feed data in various ways.
For example, If the product quantity is less than 5, it will be marked as out of stock. You can create many conditions with this Product Rule feature.
To apply new rules with the Product Rule feature, click on the Product Filter option from the top.
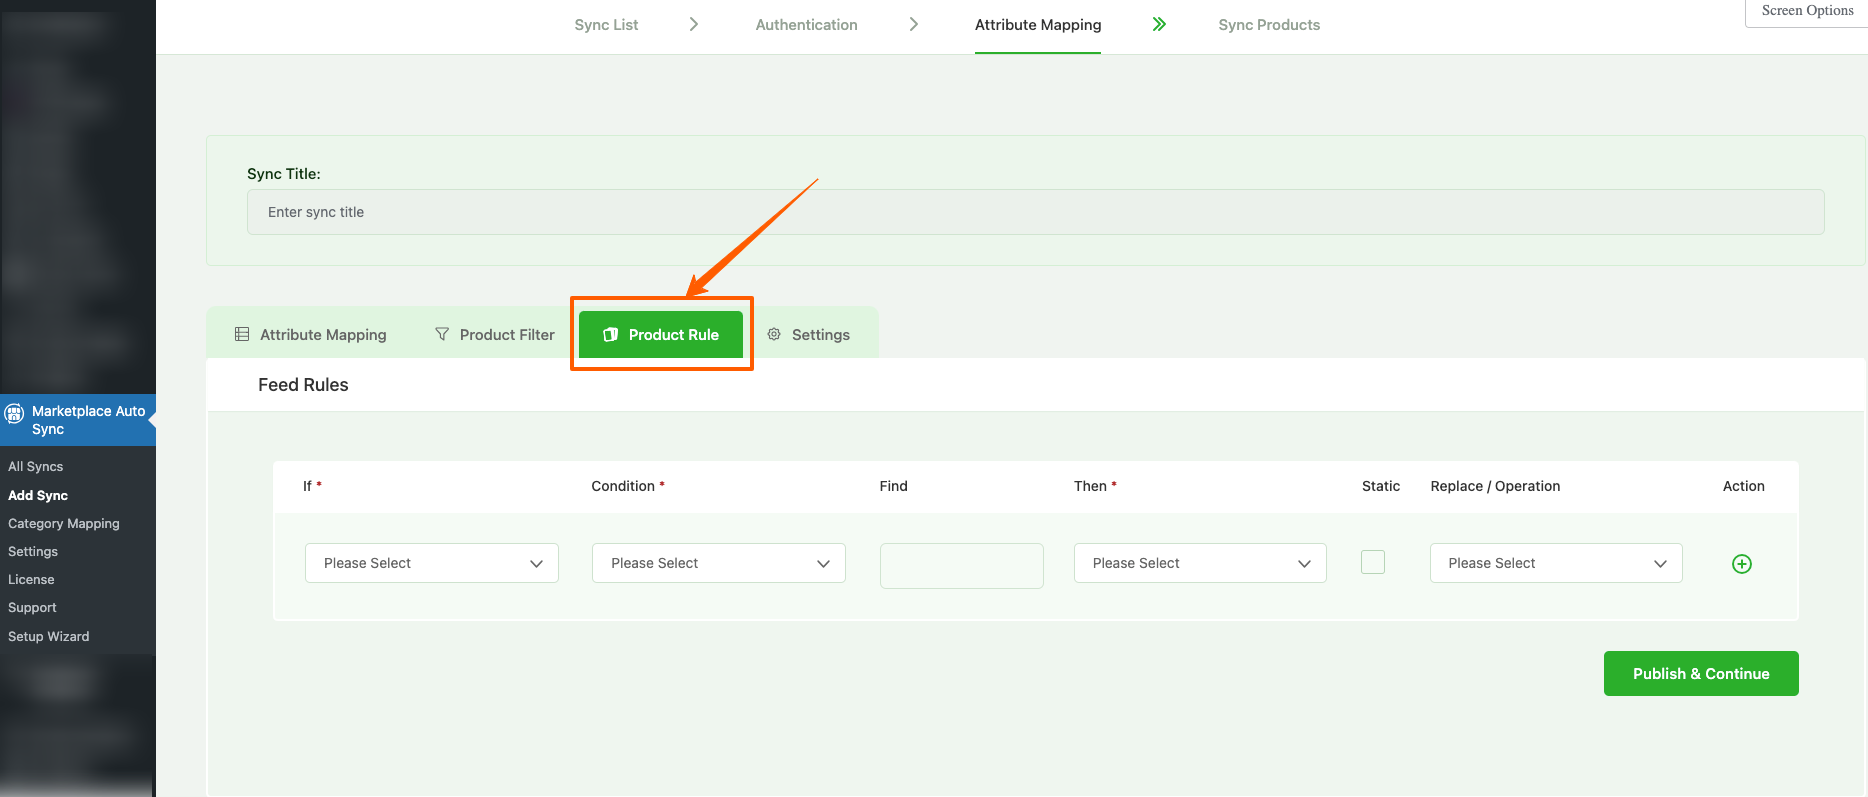
This Feed Rule works in the following way:
IF (Search in which value) >> CONDITION (Search with which condition) >> FIND (Search what) >> THEN (Which value would be affected) >> REPLACE (The new value that would replace the affected value, or change the current value with a static or dynamic value)
Here are some examples of what you can do with the Product Rule feature:
Example 1: If the Product Title contains “Bag” then change the value of the Product Title to a static value “Bags“.
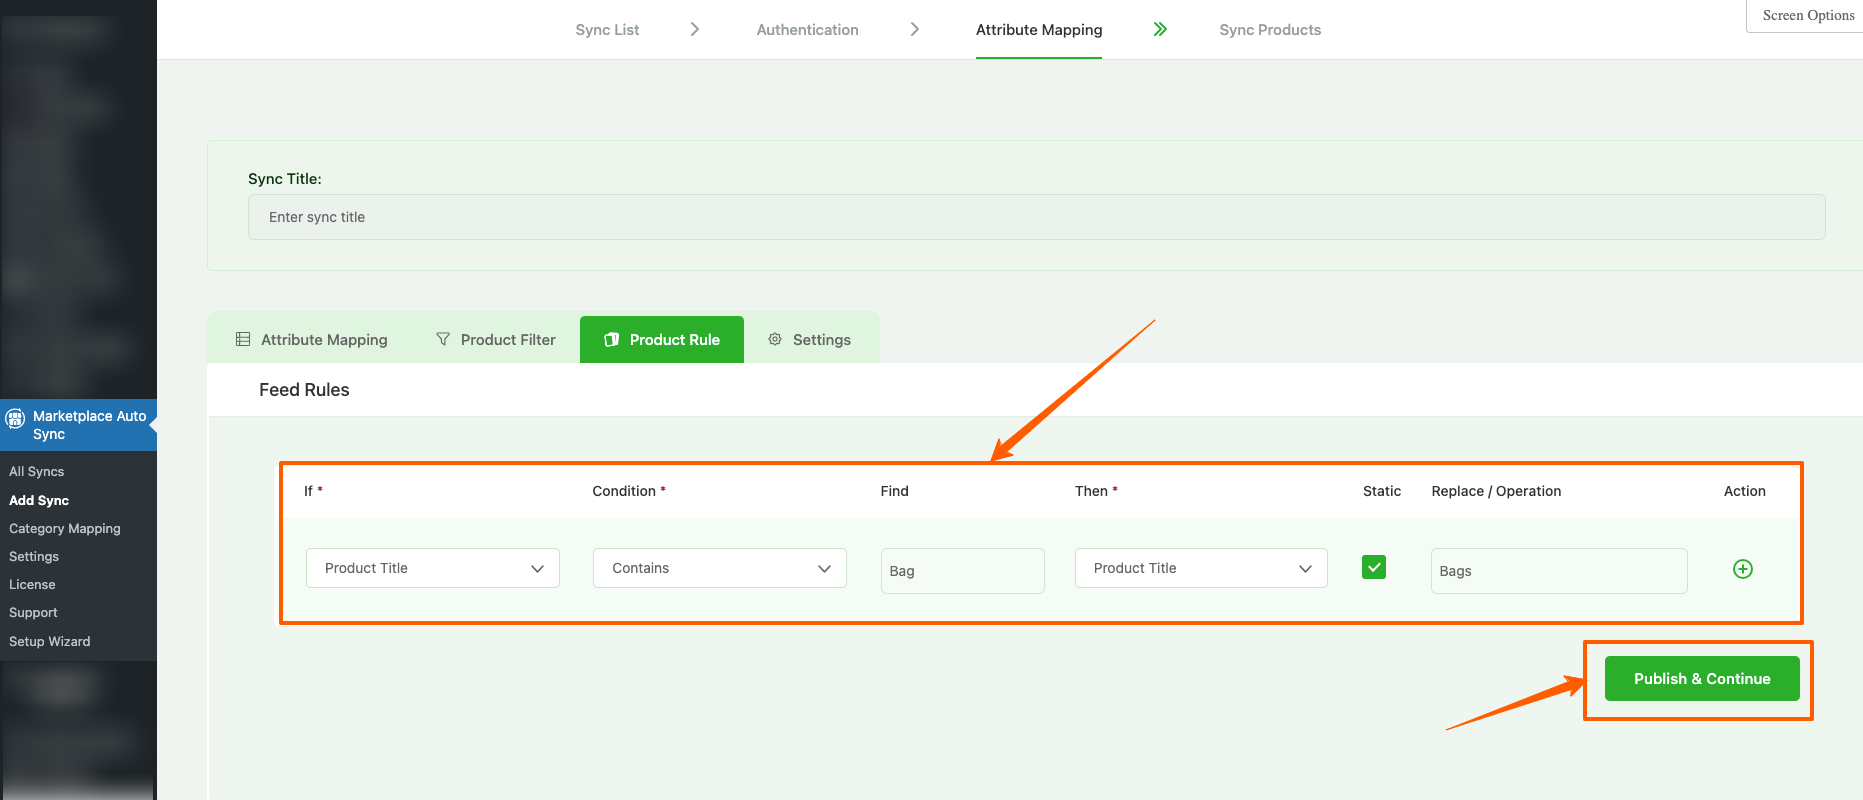
Click on “Publish and Continue”
Example 2: If the Product Title contains “Bag” then change the value of the Product Title to a dynamic value, lets say Product ID

Click on “Publish and Continue”
4. Settings
In the Settings tab, you find the option to:
- Sync product immediately if updated
- Include/Exclude Out of Stock Products
- Include/Exclude Product with No Price
- Include/Exclude Variable Parent Product (No Variations)
- Include/Exclude Invisible/Hidden Products
- Include/Exclude Variation Name In The Product Title
- Include/Exclude Grouped Products
- Include/Exclude All Variable Products Variations
- Include/Exclude products with empty value
- Skip/Include attributes with empty value

5. Publish and Continue
Once complete configuring, click on the Publish and Continue button which will sync your WooCommerce store’s products to the Merchant Center.
Now your newly created Google Shopping Sync will be listed under Dashboard > Marketplace Auto Sync> All Syncs.
Now that you are familiar with how the sync generation process works, try yourself creating a complete product sync for your store that can be uploaded successfully on your desired marketplaces.