![How To Create A Virtual Tour – Easy Step-by-step Guide [2026]](https://rextheme.com/wp-content/uploads/2025/01/How-To-Create-A-Virtual-Tour-In-Easy-Steps-A-Complete-Guide.webp)
It’s been a few years since I started helping real estate agents, hotel owners, and business owners create virtual tours, and I have to say, it’s one of the most effective ways to showcase a space online.
The virtual tour market is booming, expected to hit $74 billion by 2030 with a 34% CAGR
But many tours fail because they aren’t interactive or easy to share.
I’ve seen owners spend time and money on tours, only for visitors to leave without exploring. That’s why I’m going to show you exactly how to make a virtual tour that keeps your visitor engaged.
You’ll learn how to capture 360° photos, connect multiple scenes, add hotspots, and make a full walkthrough experience that people love to explore.
So let’s get started,
TL;DR – Create a Virtual Tour in Easy Steps
- Virtual tours help your visitors explore a place in 360°, which boosts trust and engagement.
- You only need 360° panoramic images and a good virtual tour creator to get started.
- Studies show virtual tours can increase user engagement by up to 27% compared to normal photos.
- The process is simple: capture 360 images → upload to WPVR → add scenes and hotspots → publish on your WordPress site.
- Ensure your tour includes clear hotspots, smooth navigation, and VR headset support for a better experience.
- Virtual tours work great for hotels, real estate, restaurants, universities, gyms, galleries, and tourism businesses.
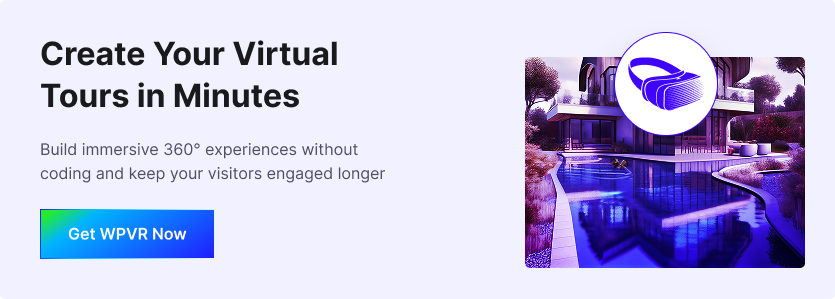
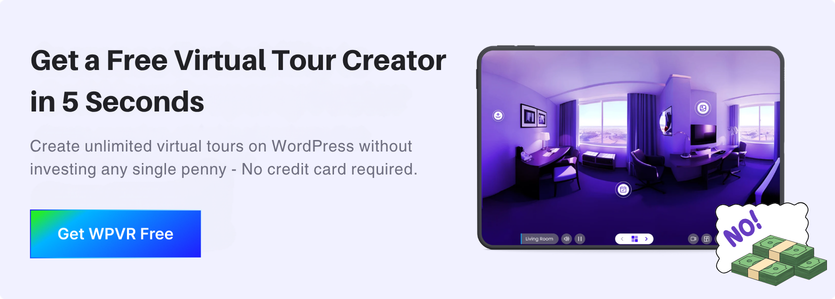
- If you want the easiest solution on WordPress, use WPVR, which turns your 360 images into a full virtual tour without needing technical skills.
If you gain a clear understanding of the basic terms, it will be easier for you to comprehend the process of virtual tour creation.
Now, most people get confused between Virtual Reality and Virtual Tours. Here’s a clear definition:
What is Virtual Reality?

Virtual Reality (VR) is a digital environment you can experience visually. You can see, hear, and interact with it just like you’re really there.
For example, you could let your clients explore your hotel rooms or office space in 360° before they even visit, so they get the full experience without leaving their home.
Virtual Reality in Your Business
Virtual reality (VR) is an effective way to connect with your customers. It helps them to interact with your property easily.
If you run a real estate agency, hotel, restaurant, school, art gallery, or showroom, you can use virtual tours to attract more prospects and showcase your space.
VR devices, including headsets, virtual simulations, and training tools, are continually improving. Even if you work in tech or iGaming, virtual tours can help you show off your products and impress clients.
For example, VR headset sales alone generated over $9 billion in 2023, demonstrating the rapid growth of this technology and the significant opportunities it presents.
Now, there are many types of VR technologies. The 5 most popular ones are listed below :
Types of Virtual Reality |
| Non-immersive virtual reality Non-immersive virtual reality refers to a computerized virtual experience where you can control some characters or activities within the software, but the environment is not directly interacting with you. Example: Simulation games such as God of War. |
| Fully immersive virtual reality A fully immersive virtual technology ensures that you have a realistic experience within the virtual world. This is an expensive form of virtual reality which involves helmets, gloves and body connectors with sense detectors, to transfer your every physical moments within the virtual world. Example: Virtual shooting game zone. |
| Semi-immersive virtual reality A semi-immersive virtual reality can be in the form of a 3D space or a virtual environment which you can move about on your own either through a computer using a mouse and keyboard, or on mobile devices by touching and swiping to move about the place. You do not control any character, you control the view on your own. Some VR headsets are semi-immersive. Most semi-immersive virtual environments support Gyroscope. Example: A Virtual Tour. |
| Augmented virtual reality Augmented Reality is when a certain entity or device seems to be present in reality, but is actually not. Rather than putting you into a virtual world, a virtual entity is placed in the real world through any device. Example: The game Pokemon Go displays Pokemons through your phone. |
| Collaborative virtual reality This is a form of virtual world where different people from various locations can come into contact within a virtual environment, usually in the form of 3D or projected characters. People can interact with each other through microphones, headsets and chatting. Example: Games such as PUBG (Players Unknown Battle Ground) |
**To learn more about types of VR in detail click here.
What is A Virtual Tour?

A virtual tour is a simple VR experience that lets you explore a place online as if you’re physically there. You can look around, move between areas, and get a true feel of any space.
For example, you can open a 360° panoramic image and instantly rotate your screen in any direction or jump from one room to another with a tap.
Other panorama types like Cube Map or Fish Eye exist, but Equirectangular tours give you the smoothest experience.
With background music, info tags, and strong platform development, the tour becomes even more immersive for you.
Virtual tours are gaining popularity because they keep visitors engaged and make browsing easier. As you continue, you’ll learn how to create a virtual tour for your own business.
Let us look at the advantages of using a virtual tour for most businesses.
Advantages of Using a Virtual Tour on Your Website
Virtual tours are great for any business that needs to show its location, like real estate, hotels, or restaurants. They help prospects explore your space easily.
Photos help, but virtual tours feel more real and engaging. Viewers connect faster and trust your business more.
Here are some of the benefits you can expect for your business using a virtual tour.
1. Instant Engagement

A virtual tour feels new and exciting for most visitors, so it instantly grabs attention. It gives your site a fresh, immersive experience that people aren’t used to.
For example, if you run a small boutique hotel, guests can walk through your rooms and lobby virtually. This helps them imagine staying there long before they arrive.
Flat images and videos feel limited since viewers have no control. But in a virtual tour, they can look around freely and explore at their own pace.
This creates a more accurate feel of your location and builds stronger trust. It can turn casual visitors into real buyers, especially for realtors, hotels, and any unique business.
2. Give a Better Visual to Prospects

A virtual tour helps your prospects see your place exactly as it is, instead of relying on guesswork. This gives them a much clearer and more confident understanding of your location.
For example, if you run a school, parents can explore classrooms, labs, and corridors virtually. Virtual tour creation makes it easy for them to feel familiar with the environment before visiting in person.
Traditional videos only show one fixed angle, and flat photos often create imagined expectations. When the real place doesn’t match that imagination, interest drops immediately.
A virtual tour fixes this by providing a near-real view from every angle. Whether it’s a hotel, school, or amusement park, it helps you attract more serious and confident prospects.
3. Help Prospects to Take a Decision

A virtual tour helps prospects make informed decisions by providing a detailed view of the location. They can inspect every corner, which gives a realistic understanding before visiting.
For example, if you’re choosing a restaurant, a virtual tour lets you see the seating, décor, and ambiance. Using immersive tours or 360 camera views makes it easier to decide which place feels right for your visit.
In real estate, virtual tours allow visitors to explore multiple homes online. Prospects can compare layouts and styles, making it easier to pick the property that fits their needs.
Almost any business can use virtual tours to guide choices. By giving a clear, near-real view with virtual reality headsets or 360o photos, it builds trust and helps turn visitors into actual customers.
4. Avoid Unnecessary Visits & Rejection

Using too many photos is common for realtors, but it still doesn’t give a clear picture of the property layout. People can see each room, but not how everything connects, even with the latest photo editors.
For example, if you’re selling a house, creating a virtual tour allows buyers to walk through the rooms and see how spaces connect. They gain a true sense of the property before scheduling a visit.
Virtual tours utilizing immersive technology or a 360-degree camera give viewers full control to explore every corner. This makes the experience more engaging and realistic than static photos.
By giving a near-real view, virtual tours reduce unnecessary visits and rejections. This means more potential clients, better engagement, and higher chances of turning visitors into actual buyers.
5. Technological Advantage Over Competitors

Even though virtual tours are still relatively new, they have become a key marketing strategy for real estate, hospitality, museums, and more. Almost any business can benefit from using them.
For example, if you own a super shop, creating a virtual tour lets visitors explore the store remotely. They can see sections, products, and how organized and clean your shop is.
Many viewers might decide to visit in person after noticing a section they like. Shops without a virtual tour miss the chance to convert online visitors into real prospects.
Similarly, if you run a hotel, a virtual tour gives you an edge over competitors relying only on images or videos. People can experience rooms and amenities virtually before booking.
Learning how to make a 360 virtual tour for your business can help you gain trust, appear modern, and stay ahead of competitors.
List of Businesses
That Can Benefit from Virtual Tours
- Real Estate
- Hotels & Resorts
- Restaurants
- Casinos
- Art Gallery
- Fashion House
- Wedding Venues
- Conference Halls
- Car Showrooms
- Aquarium Shops
- Antique Shops
- Shopping Malls
- Super Shops
- Movie Theatres
- Home/Interior Decors
- Historic Locations
- Travel/Tourism Industry
- Gym/Fitness Centers
- Universities, Schools & Colleges
- Virtual Learning Centers
- Research Facilities
- Production House
- Corporate Office
- Virtual Gaming Zones
- Indoor Gaming Zones/Clubs
- Handcraft/Furniture Shops
- Theme/Amusement Park
- Airports & Airlines
- Orchids & Flower Gardens
- Natural/Safari Parks
- Museums
- Hospitals
Later in this article, we will also learn how each of these businesses can take advantage of using virtual tours. You will get niche-specific information on how you can use virtual tours to get more prospects.
If your business is on this list, then you will find this guide very helpful. And if you haven’t used virtual tours yet, then it’s time you start thinking about using them.
How to Create a Virtual Tour
To use a virtual tour you need to create one. To create a virtual tour you need some materials and need to know the process.
Let’s start with materials :
Resources You Need to Create a Virtual Tour
To create a virtual tour, you will need two specific things. You can go for any type of virtual tour.
For this article, I am going to use an equirectangular type to create a virtual tour. In the case of an Equirectangular virtual tour, the main elements are:
- 360 panoramic images, and
- A Virtual Tour Creator Tool.
What is a 360 Panoramic Image & How it Works?
A 360° panoramic image captures the entire surroundings of a place or object. It’s more than a regular photo; your viewers can look around in every direction, just like being there.
For example, if you want to showcase a hotel room, you can take a 360° panoramic image of the space. Then, using WPVR, you can easily turn it into a virtual tour.
Here is a visual example:
A 360-degree Panorama Image

Converted To A Basic Virtual Tour
Once processed, the 360° image becomes an interactive Equirectangular virtual tour. This way, your visitors feel immersed, engage more, and trust the space before making a decision.
Step-by-Step Guide To Create a Virtual Tour Using WPVR

Creating a virtual tour can sound difficult, but it’s actually easy with the right tool. Just avoid video tours – they’re costly and don’t give full control for inspections.
- You can get the free version of WPVR from the WordPress repository.
- You can get the pro version from here: Get the pro plugin: WPVR Pro
First, let’s look at how you can create a virtual tour using the free version. Then I will discuss some of its Pro features that you can use to make the virtual tour more attractive.
To create a 360° virtual tour from your WordPress dashboard, follow 9 simple steps:
- Step 1 – Install and Activate WPVR
- Step 2 – Create a Virtual Tour
- Step 3 – Configure General Settings
- Step 4 – Set Up Scenes
- Step 5 – Use Hotspot Efficiently
- Step 6 – Publish The Tour and Collect Tour ID
- Step 7 – Place The Virtual Tour On Your Website
- Step 8 – Enjoy The Benefits Of Using A Virtual Tour
Now, let’s go through it step-by-step.
Step 1 – Install And Activate WPVR
- Go to your WordPress Dashboard > Plugin > Add New.
- Search for WPVR and you will find a blue icon of the plugin as shown in the image below:

Click on “Install” and after that “Activate” will appear. Click on the button of the plugin.
Once the plugin is activated, you will get this page :

- Click on the “Let’s create your first tour” button.
You will see on your Dashboard that a new menu called “WP VR” has been added. And this page will appear :

- Now give a title to your virtual tour. If you don’t want to give a title now, then just press the cross button.
Then, as you proceed, a pop-up of the scene ID will appear:

Step 2 – Create A Virtual Tour
As you proceed, this dashboard will appear :

On the left side, you will see 8 tabs:
:
- General
- Scenes
- Hotspot
- Video
- Floor plan
- Background Tour
- Street View
- Export
For a virtual tour, you will need to set the proper settings of the first three tabs.
Step 3 – Configure General Settings
- Go to the General > Basic Settings tab, and you will see the following options:

Set A Tour Preview Image:
When you keep the Autoload option “Off”, there is a netted placeholder visible. However. You can replace that by uploading a Preview image.
- Simply click on the “UPLOAD” button and add a media image. (You should use a flat image for this, rather than a 360 panoramic image)
- Or you can provide a link to the image. (Make sure if your site is SSL certified, i.e., “https”, then the image link should also have “https”.)

Once you upload the image, a thumbnail will appear above the upload button.
This means the preview image was uploaded successfully.
Now, once you preview the tour (or view the tour on a live page), if the Autoload option is “Off”, you will see that this image is in place of the tour until you click on it.
And if the Autoload option is “On”, then this image will be there until the tour loads. And if not you need to click on the button preview.

Now, the tour preview image won’t appear on the tour, if you’ve turned on the Autoload option.
Tour Autoload:
If the autoload is turned on, the panorama you upload will load automatically. Otherwise, it will load on-click on the option “preview“

Basic Control Buttons:
Turning it “On” will view the on-screen control button, such as zoom in/out and full-screen mode.

Scene Fade Duration:
The scene fade duration can be added in milliseconds for the transition between two scenes.

According to this image, the scene fade duration is set to 1000 milliseconds i.e. 1 second. Hence there will be a 1-second fading effect to transit from one scene to another.
Auto Rotation:
Turning it “On” will show three more fields for you to add an auto-rotation feature to your virtual tour.

- Rotation Speed and Direction
These are to set the speed of auto rotation on your tour. We suggest you keep this speed within the range of -20 to 20, or else the rotation will probably be too fast.
A negative number will rotate the tour anti-clockwise and a positive number will make it rotate clockwise.
- Resume Auto Rotation After
This lets you set a time, in milliseconds, so that if you stop the rotation, then after this amount of time, it will start rotating again.
According to the image above, it is set to 2000 milliseconds, i.e., 2 seconds.
- Stop Auto Rotation After
This lets you set a time after which the tour will stop auto-rotating.
However, this will not work if you input the value on Auto Rotation Inactive Delay. According to the image above, it is set to 2000 milliseconds, i.e., 2 seconds.
These are all the options in the General settings. Configure the settings as you require
Step 4 – Set Up Scenes
Basically, every single panorama you want to include in your Virtual tour is a scene. Go to the Scenes tab and you get the following options:

Set as default:
If you select “Yes” then the current scene will be the default scene to be viewed at first when the virtual tour is loaded. (FYI: The first scene is considered the default scene naturally.
If you want another scene to be the default scene, then mark that scene as “Yes” for Set as default.
Scene ID:
Scene ID is the initialization of a scene. You need to assign a unique scene ID to every scene you wish to upload.

You can later use this Scene ID to assign a scene as the Target Scene under Hotspot, i.e. clicking on the hotspot will take you to this scene. You will get a guide to this under the “HotSpot” section.
Scene Type:
The scene type is set as ‘equirectangular’ by default. It means that it will view the Equirectangular format of the scene.

Scene Upload:
Here, click on the “UPLOAD” button and upload a 360-degree panoramic image to use it as your current scene.
Once you upload the image, a thumbnail will appear above the upload button.

This will mean that the image is uploaded as the current scene image.
FYI: Most mobile devices have restrictions on the resolution; they can support a maximum of 4096 px by 2048 px.
Hence, we suggest you use a panoramic image within these dimensions for the virtual tour to be responsive on all devices. (However, the plugin works with any resolution. You can upload high resolution images if you just want to view the tour on PC).
Preview:
Once you have uploaded the image, you can now click on the Preview button.

You will get a Tour Preview of the tour just beside the Scene Settings.
Every time you make changes to any settings, you can click on the Preview button to see the changes taking effect on the tour preview.
**The Tour Preview has a scene gallery below. You can double-click on a thumbnail there to go to any scene in the tour preview.
To add a second scene, on top, click on the “+” button.

And a new blank scene will be added.
To switch between scenes, click on the icons above. The currently viewed scene will be marked blue.
To delete a scene, you can simply go to the scene, then click on the “Trash Bin” icon, and the scene will be deleted.

Here are more fields that you get :
- Title: Specifies the name or title of the panoramic scene.
- Author: Identifies the creator or photographer of the panoramic image.
- Author URL: Provides a link to the author’s website or portfolio.
- Vertical Angle of View: Determines the vertical field of view for the panoramic scene.
- Horizontal Angle of View: Sets the horizontal field of view for the panoramic scene.
Set accordingly the field as per your needs.
That’s it with the basics of Scene Settings.
Now, add Hotspots to make the tour more meaningful and engaging.
Step 5 – Use Hotspot Efficiently
For an active scene, you can add multiple hotspots. With this option, you can link any of your scenes with other scenes.
Also, you can add images, links, or video information via this option.
While on a Scene, go to the HotSpot tab and you get the hotspots you added for that particular Scene.
To add a hotspot for another scene, first, go to the Scene tab, select the desired Scene, then go to the Hotspot tab to view its respective Hotspots.
For a hotspot of a scene, initially, you will get the following options:
HotSpot ID:
You have to provide a unique Hotspot ID for every hotspot you create in a scene.

Pitch And Yaw:
The Pitch and Yaw are the coordinates required to define the point where the Hotspot will be placed.

You will be able to collect these from the Preview Tour.
Previously you set up the scene and clicked on Preview. The Preview Tour will be still there.
Scroll down to the Preview Tour and click on the point on the tour, where you want to place the Hotspot. You will see that the pitch and yaw coordinates will appear below the Preview Tour.
You can copy the Pitch and Yaw and input them in the required fields.
Or, you can click on the arrow button (beside the Pitch and Yaw coordinates under the Tour preview) to automatically collect and place Pitch and Yaw values in the Pitch and Yaw fields for a Hotspot.
Once you are done setting up the hotspot, click on the Preview button, and a hotspot icon will appear in the current scene on the spot from where you collected the coordinates of the Pitch and Yaw.

HotSpot Type:
There are two types of hotspots available:
- Info
- Scene

It comes as “Info” by default and you will view these fields:
- URL.
- On Click Content.
- On Hover Content.

URL:
Provide the URL of a website, so clicking on the hotspot will take you to that website on a new tab.
On Click Content:
Here you can add content to your hotspot so that clicking on the hotspot will display a pop-up window over the tour with the content you entered. There are options to add text, images, videos, gifs and more!

On Hover Content:
Here you can add content to your hotspot so that if you just hover your mouse on the hotspot, the content will appear. And similar to the on click content, you can add whatever type of content you want.

You can also add images using the <img src> tag or add a video using the <iframe> snippet of the video to display them when you hover the mouse on the hotspot.
Now, let’s look at the Scene type hotspot.
A scene-type hotspot is used to connect two scenes, i.e., clicking on the hotspot will transmit you to another scene (assigned here).
If you change the hotspot style to Scene, then you will view these fields:
- On Hover Content.
- Select Target Scene from the List.
- Target Scene ID.

On Hover Content:
Here you can add content to your hotspot so that if you just hover your mouse on the hotspot, the content will appear. In the content, you’ll be able to add image [maybe of the scene that you’re guiding them to], videos, images etc.
Here’s an example:

You can also add images using the <img src> tag or add a video using the <iframe> snippet of the video to display them when you hover the mouse on the hotspot.
Select Target Scene and the ID from the List:
For every Scene you create, their Scene IDs get listed here for you to choose from. Whichever you choose will be the scene where the hotspot will take you. This field shows you the Id of the Scene that you selected from the Target Scene from the List.
The ID automatically gets loaded.

**When you choose a hotspot to be Scene type, the hotspot icon on the tour will change to a small Arrow.

Hotspot Custom Icon Class:
This field is there to allow you to implement customizations of the hotspot content.

Here you can apply customization to the hotspot icon. You can use any icon of your own choice. Let me give you an example.
To customize your hotspot icon, go to your Appearance > Editor. Choose the style sheet of your current theme, or you can go to Appearance > Customize > Additional CSS.
Here, create a class and under the class, add your custom style CSS code for customization. Click Save. For example:
.custom-icon {
height: 26px;
width: 26px;
background: url("image url") no-repeat center center/auto;
border-radius: 12px;
}
Here I set the class name as “custom-icon” but you can give any name you want. Then set the height and width of the image (ideally 26px by 26px for icons). Then provide the image URL. You can add a border radius if you want the icon to be circular.
Here’s how my one looks:

Then Publish.
Hotspot Custom Icon Class:
Now go to your tour and input the class name “custom-icon” on the “Hotspot custom icon class” field for the hotspot you wish this icon to apply on.

Then update the tour. This icon won’t show at the back end, but it will appear on the front-end.
Hence, embed the tour on a page and preview it to see the result.
Add More Hotspot As You Move On:
To add a second hotspot, click on the “+” button above and a new blank hotspot will be added.

To remove a hotspot, simply click on the trash icon and the hotspot will be deleted.

That’s it, that’s all you need to know about setting up a hotspot for now.
Hotspot Special Features In WPVR PRO
Now utilize Steps 3, 4, and 5 to add more scenes and set up a virtual tour.
You can also customize your icon with these options :
- Hotspot Custom Background Color: This allows you to set a specific background color for hotspots in the panoramic scene.
- Hotspot Custom Background Shape: This allows you to set specific background shapes for hotspot icons like circles, rectangles or hexagon.
- Hotspot Custom Icon Color: Enables customization of the color of the icon used for hotspots in the panoramic view.
- Hotspot Animation: Provides options to add visual effects or movements to hotspots, making them more noticeable or interactive. This icon won’t show at the back end, but it will appear on the front end.

Step 6 – Publish The Tour and Collect Tour ID
Once done, move to the next step.
Publish The Tour:
Once you have successfully set the settings for General settings, Scene settings, and Hotspots settings, click on the Publish button on the top right side of the page.

Once you publish, that button will change to Update.

Collect Tour ID:
On the tour setting pages, you will see a box named Using This Tour where the shortcode and the Tour ID is provided. You will need the Tour ID to embed your virtual tour on the website.

You can also get the Tour ID from the tours section.
All the tours you have created will be stored under Dashboard > WPVR > Tours.
You will see the list of the tours you have created. You can collect the Shortcode or tour ID.
Step 7 – Place The Virtual Tour On Your Website
Placing the virtual tour on your website depends on the page editor you use.
- Gutenberg Block Editor: Check out this doc to learn how you can publish virtual tours using Gutenberg Block.
- Elementor Page Builder: Check out this doc to learn how you can publish virtual tours using Elementor Page Builder.
- Classic editor: For Classic Editor, copy and paste the shortcode of your virtual tour. You can add height, width, radius, or any designs you want within the shortcode.
[wpvr id = "Example ID" width = "600px" height = "400px"]Preview or Publish the page to find the virtual tour added.
- Other page editors (such as Visual Composer):
For page builders such as Beaver Builder, Visual Composer, etc, you need to use an “HTML” block (such as Raw HTML block) and input the shortcode there.
Step 8 – Enjoy The Benefits Of Using A Virtual Tour
Now that you know how to create, set up, and present the virtual tour on your website. The next thing to do is to sit and see your audience getting excited, visitors becoming dedicated prospects, and prospects turning into customers.
As you can see, it is super easy to create a virtual tour for your WordPress site. Go ahead and start using virtual tours ASAP.
In a later section, I will discuss how many business niches can use and benefit from using virtual tours. You will definitely be able to relate.
Anyways, now most of us are not familiar with panoramic images since they cannot be taken without a few equipment and methods. And as you saw in the last section, in order to create a virtual tour, you will need to use a Seamless 360 Panoramic Image.
Now, let us look at how you can capture 360 panoramic images on your own.
Capturing A Perfect 360 Panoramic Image

You can capture and create 360 panoramic images in 3 ways:
Digital 360 Degree Cameras are the best for this case. They are easy to use, less hassle, and cost-effective.
However, I will give you a proper guide to follow all the 3 methods with suggestions on the equipment required, and tips and directions to successfully create 360 Panoramic Images.
1. Using Digital 360 Degree Cameras
There are certain cameras available just for 360-degree photography. These are digital cameras that usually have multiple built-in Fisheye lenses that cover a complete 360 degrees in one go.
Here is a list of some of the best 360 Degree Digital Cameras.
Here, we will give a brief guide on using the Ricoh Theta V to take seamless 360 panoramic images.
Let us look at the tools required.
Equipment Required:
1. Ricoh Theta V
A Ricoh Theta V is a slim camera with two Fisheye lenses in opposite directions. Each lens captures a complete 180 degrees both horizontally and vertically.

The main advantage of this camera is that it has an auto-stitching function, i.e., once you take a photo, the output will automatically be a 360 panoramic image. You do not need to do any manual stitching or take multiple images.
2. Monopod
A Monopod is a camera that has 1 extendable leg, fixable at specific heights. Since the Ricoh Theta covers a complete 360 degrees, a tripod would be obstructive with its 3 legs. A Monopod will not appear in the image at all.

Here’s a list of monopods you can check out.
However, you will need a 3-leg locking base to be attached at the bottom for it to stand tall.

It is a small 3-legged stand that lays flat, while the Monopod is connected on top. Its 3 legs give the support required for the Monopod to stand.
3. Ricoh Theta V App
Whether you call it an advantage or not, you can control the Ricoh Theta capture using your smartphone through the Ricoh Theta V App.

Simply connect the camera to your phone through Bluetooth and then you can get the image preview on your phone through the Ricoh Theta V app. Hence, you can carefully analyze if you have placed the camera in the right spot for the best light and location exposure.
The app gives you features to control white balance, ISO, bracketing, and shutter timer.
The main reason to use the app is to be able to take photos remotely. Since the 360 camera covers all directions in one go, you clicking manually would mean that you would be on the image.
With the help of the app, you can set the devices up, go to the next room and use the app to capture the image.
Tips And Directions To Use
- Place the Monopod on the stand and attach the camera to it. Place the devices at a point near the center of the room.
- Toggle the Monopod to place the camera at a height similar to the height of an average person’s eyes or shoulder. This will create a more realistic effect when creating a virtual tour.
- Connect the phone app to the camera, and go on live view mode. Here, it will show the image in a 360 Equirectangular format, to see if you have adjusted all the settings correctly and if the image looks good.
- During the day, it is advised to keep the ISO between 200-400 based on the surrounding light. At night you should lower the ISO to 100 or below to get less noise in the image.
- Enable the “noise reduction” option from the app to improve image quality.
- Go outside the room and prepare to shoot the image.
- Turn the live view mode “off” since it can causes a shutter lag if turned “on”.
- Capture the photo which will be saved either on your phone’s photo gallery or in the memory card of the camera.
The device automatically does the stitching and processing so you do not have to do any extra hard work.
That’s it! You now have a seamless 360 panoramic image. You can upload this image to WPVR and create a stunning virtual tour.
2. Using DSLR To Capture 360 Panoramic Images
DSLRs are usually used for professional photography and can capture high-quality images. However, it is quite difficult to capture 360 panoramic images using a DSLR.
You will need to capture several images to cover complete 360 degrees in all directions, and then do some editing to achieve a proper 360 panoramic image.
Here’s a brief guide to help you out.
Equipment Required:
1. A Quality DSLR Body
Use a DSLR body with high dpi that has a bracketing feature.

**Bracketing refers to taking a certain photo multiple times at different exposures and then merging them together to form a photo with a balanced exposure.
You can take a look at Nikon D810, Canon EOS 5d Mark IV, Sony Alpha A7R2, or Panasonic Lumix G6 when considering buying a DSLR body.
2. A Fisheye Lens
You will need a Fisheye lens to capture wider images, in order to complete the process with fewer photographs taken.

Here’s a list of Canon Fisheye lens you can take a look at.
3. A Panohead
A Panohead/Nodalhead is a piece of equipment to that you attach your camera to. You can then can set the camera to rotate at fixed horizontal angles using the Panohead rings. This will ensure you cover a complete 360 degrees horizontally, without overlapping.

You can learn more about Panoheads here.
4. A Ball head (optional)
If you are willing to capture images on an uneven or unbalanced ground location, then you can use a Ball head to balance your camera on a proper horizontal axis.

Here’s a list of good ball heads you can look at.
5. A Tripod
A tripod is a camera stand with 3 legs that are extendable and fixable to specific heights. It has a horizontal 360 spinnable top section, with a handle, on which the ball head or the Panohead (in case you don’t use a ball head) is attached.
The Panohead ring will help to control the angles you can spin the camera.

Here are some of the best tripods out there.
Tips And Directions To Use
- Chose a time of the day when there is suitable light from all directions to take photographs. If you’re shooting at night, make sure you have proper lighting all around.
- Set up the equipment and place it in the center of the room.
- Make sure to create a no Parallex point. Here’s a video to help you understand.
- Toggle the tripod to place the camera at a height similar to the height of an average person’s eyes or shoulder.
- Toggle camera for best settings. Here are my suggestions in case there is sufficient daylight:
- Put the camera in full manual mode
- Keep a decent shutter speed; 1/10th or 1/20th is ideal at daytime
- Set apparture to about F11, and ISO to around 640 or more
- Set manual white balance to 4000Kelvin
- Set bracketing to 3 exposure levels at a difference of 2 levels between them.
- Apply auto timer to capture these bracketing images, maybe within 3-5seconds.
FYI: Photography completely depends on the light, and these settings might not give the best output at different light exposures. Hence, you need to toggle settings based on the amount of light available.
Now to take pictures.
Capturing Necessary Images Using DSLR

Now, you need to take a number of photographs depending on the width your Fisheye lens can cover.
Let’s take an example:
If you are using a Fisheye lens that cover 90 degrees vertically and 60 degrees horizontally, then here’s what you need to do:
- Set your Panohead to rotate 60 degrees.
- Take 6 bracketed photographs by rotating the camera to 60 degrees after each capture.
- Set the camera upwards and take 2 photographs by rotating the camera 180 degrees after the 1st shot.
- Set the camera downwards and take 2 photographs by rotating the camera 180 degrees after the 1st shot.
- Separate the DSLR body from rest of the equipment and take a handheld photo of the center of the room where the tripod was placed earlier.
So, as per this example, you will now have 6 horizontal photos, two ceiling photos, and 3 ground photos.
Stitching The Photos

Now that you have the required images, you have to stitch them into a seamless 360 panoramic image.
You can manually do it using Photoshop. Here’s a beginner’s tutorial.
Once you do it, you need to make sure you inject metadata to make it into a complete 360 degree panorama. You can use the tool Xifer to do it.
However, this is not necessary to have metadata when you use WPVR since the plugin does not need metadata to work.
You can also use tools such as PhotoMerge, PhotoStitcher, Stitcher V4, etc.
Once stitched, a seamless 360 panoramic image is created. You can then upload it to WPVR to convert it into a Virtual Tour.
3. 360-Degree Photos With Your Smartphone

Even if you don’t have any DSLR, Lenses, or specialized 360 cameras, you can take a 360 seamless panorama picture with your smartphone.
Here’s a step-by-step guide to using a smartphone to take 360 panoramic images.
Four Steps Guide To Capture 360 Panoramas With a Smartphone
Whether you use an Android device or an IOS device, the process is the same.
Step 1 – Download The App
The Google Street View app lets you easily take 360 photos with your Android smartphone. It is the most stable 360-degree photography app for smartphones to date.
Download the Google Street View For Android or Google Street View For IOS and the Google Camera app from the Play Store/App Store.
Step 2 – Set Up The App
The app will give you some welcome tips and then take you to the homepage. In the bottom-right corner, there is a camera option.
Choose the camera option, and a menu will appear. You have to choose the third option to take 360 photos.
Step 3 – Take The Pictures
You will be taken to the camera screen and the app will give you guidance for the capture process. Hold the phone close to you, choose a suitable position, and stand up still.
Once you click on the start button, you will have a hollow circle in the center of your screen. And some orange circles will start appearing in different directions.
Move the phone, match the center circle with an orange circle, and click the snap button. That orange circle will turn blue/green and will disappear, while a photo is captured.
Another orange circle will appear in a different direction. Move the phone to the next orange circle to do the same. Keep doing it until all the orange spots are captured.
The app is designed so that once you have snapped all the orange circles, a full 360 view was captured.
Once done, the app will take you to the homepage again.
Step 4 – Image Output
At this point, the app is already stitching the photos together to make a 360 image. You will be able to see the progress of stitching on a loading bar.
After stitching is complete, you will find the 360-degree image saved in your photo gallery. You can then use this photo to upload it on WPVR and create a virtual tour.
**Please note that the latest update of the Google Camera App has some major back-end changes, due to which it might not be compatible with many Android devices.
There you go, now you know what is virtual reality, what is a virtual tour, how to create a virtual tour, what a seamless 360 panoramic image is, and how to capture 360 panoramic images on your own.
Now, you can simply choose a method to take a 360 panoramic image, upload it on the virtual tour creator (WPVR) and present it on your website to engage with your audience with more authority and opportunity for conversion.
How Your Business Can Benefit From Virtual Tours
Previously, I have listed a number of businesses that can benefit from using virtual tours on their websites.
If your business was part of that list, then you already know that virtual tours are ideal for your business.
Around 67% of the people online want virtual tours to be implemented on more businesses.
Every business can have a virtual tour on its website. However, some businesses can dramatically increase revenue by implementing a virtual tour on their site.
Now let us look at the major benefits of using a virtual tour on your site, focusing on the major niches.
Find out how a virtual tour can positively impact your business.
1. Real Estate

People visiting real estate sites are mostly looking to buy properties or houses within the next 2-3 months. However, the main issue is indecisiveness.
Though prospects mostly look for houses in specific locations and within a suitable price range, they find it difficult to choose among multiple properties that match their requirements.
One of the reasons for this is that they are visualizing how the house looks based on flat images. They are not able to understand if the structure of the house is suitable for them since they are visualizing in their imagination.
End result? They tend to physically visit several properties before choosing one that resembles their imagination and requirements.
Here, you are losing a lot of time while giving them the live tour, and effort by pitching to prospects who might end up buying from other realtors (yes, people will talk with several realtors when searching for a house).
A real estate virtual tour can ensure that the prospects you are dealing with are already interested to buy.
The visit is just for credibility. People will be able to remotely visit the place and explore.
They will be able to view the place from every angle and eventually develop a genuine interest in a property that suits their requirements.
Hence, they will call you for a visit, with the intent to buy.
Rather than taking several live tours of many properties, they will only wish to visit a few which they might end up purchasing, thanks to the remote virtual tour.
2. Hotel & Resorts

Tourists, travelers, or international businessmen tend to look for suitable hotels to lodge at when going to distant locations. So, it is natural for them to browse through the websites of hotels available at the location they are visiting.
You can take steps to attract as many prospects as possible through your website. A simple hotel or resort virtual tour can take you a long way.
Here’s the idea. People always look for hotels that are both affordable and comfortable to stay at. Most people tend to browse through photos of rooms when choosing. Why not give them a better visual with a virtual tour?
Create virtual tours for each room available for lodging and place them on your website. Try to add a virtual tour of your reception, hall room, bar, and dining area on your home page.
These will act as big attractions, especially for foreigners. A quality virtual tour will mean that people will be able to understand the quality and beauty of your hotel, and will probably consider calling in for reservations immediately, rather than looking into more hotels.
For Resorts, you should create a broad virtual tour, highlighting all of your special facilities such as swimming pools, beach areas, parks, ballrooms, spas, and other specialties besides the lodging and basic entertainment.
Virtual tours will definitely get prospects excited and influence more site visitors to convert into interested prospects.
3. Restaurants

Having a restaurant means a lot of competition since currently, it is among to top business niches.
People love to try out restaurants with good food, as well as well interior design.
Whether it’s a fancy restaurant or a classic restaurant, they have their own set of admirers.
Now, food quality is the most important thing. If you get good ratings about your food from customers, more people will probably take a visit soon.
However, the second most important aspect is the interior.
Nowadays, prospects tend to visit the websites of several restaurants before choosing to visit one.
There, they not only look at the menus but also look at the gallery of your restaurant photos to understand if it is a suitable place to visit.
A better way to catch their attention is by allowing them to take a virtual tour of your restaurant from home.
They will be able to see the seating arrangement, spaciousness, decoration, quality, and overall interior arrangement. This will inspire them to choose your restaurant over others.
Here’s an example:
Let’s say you are a burger joint. A group of teenagers is willing to eat burgers in your area. So they will visit the websites of several burger joints in your area before choosing one.
You can stand out by displaying your amazing interior decorations besides your delicious food, through a virtual tour.
Through this remote tour, they might realize that the seating arrangements are comfortable and the decorations are great for taking selfies with friends.
Thus, they will end up visiting your place. Your next task is to impress them with the food.
For a fancy or theme-based restaurant, a virtual tour is more lucrative since you will be able to highlight your specialty to remote prospects on your website.
This will raise more awareness and influence more people to visit your restaurant.
4. Wedding Venues

A wedding is among the most important milestones that a person achieves in life. And it is natural for anyone to wish to have a wedding ceremony like no other. The wedding venue plays an important role in making the wedding a memorable one.
Usually, fiances choose the wedding venue together. They tend to browse through the websites of several wedding venues and shortlist a few that they feel are perfect for their wedding.
A virtual tour can make your wedding venue the ideal one. Let the couple take a remote visit and experience how grand the venue is.
The venue entrance, the stage, the dining halls, the chandeliers, the photo session room, and all the specialties of your venue can be highlighted easily through a virtual tour.
Send the couple into a world of imagination so that they can feel their walk in the venue, and the bride walking down the carpet towards the priest and her fiance, ready to get married; the tossing of the bouquet and toasts from friends and family.
This little journey within the venue will help them set their future and choose your venue to be the ideal venue that will mark their togetherness in days to come.
Hence, a virtual tour on your website is only the right thing to do.
5. Universities, Schools & Colleges

Though newly implemented in many, a lot of universities, schools, and colleges achieved greater student reach by creating virtual tours of their institutions.
Whether you run a large institution or a small one, students and their parents are more concerned about quality dorms and attractive campuses, after quality education.
While they visit your website to find out about the courses you offer, you can also present a virtual tour of your campus to give them a remote experience of being part of the institution.
Let them take a stroll around your faculty buildings, sports facilities, dorms, research labs, fitness centers, etc, and understand the quality you offer besides education.
This is very important for international students. They will be moving to a new location, therefore, the quality environment and surroundings are among their main concerns and priorities.
Plus, the virtual tour will act as a symbol of credibility, highlighting your ability to accommodate students with high quality, while within your premises.
6. Travel/Tourism Industry

If you are promoting holiday or travel packages, then getting more prospects depends a lot on the locations you are taking them to, besides the price.
People are often reluctant to purchase travel packages since they have doubts about the quality of their journey. You can easily gain their trust by using a virtual tour.
You can include virtual tours for several iconic locations that your travel package will cover. You can also highlight great tourist resorts or historic places that your travel package will take travelers to.
The idea is to give viewers a glimpse of the attractive zones that the tour will include remotely through a virtual tour. Let them inspect, in full control, the amazing locations they will be able to visit.
This will not only create more excitement but also influence onlookers into interested prospects.
7. Gym / Fitness Centers

People tend to choose a gym or fitness center based on the various types of equipment and fitness machines available there. Plus, it also depends on the quality of the Equipment.
You can use virtual tours to attract people online and gain credibility for your fitness center. Create a quality virtual tour, covering every section of your center. And on each section, leave click bubbles beside the machines which will give information about the machine model and quality.
At the same time, create short videos of the fitness trainer of the center, training and demonstrating the use of every piece of fitness equipment.
Leave a hotspot on each piece of fitness equipment available within the virtual tour, to be clicked to watch the relevant video.
This will not only highlight the equipment but also demonstrate the expertise of the fitness trainer, thus inspiring more people to join your fitness center.
8. Shopping Mall

Shopping is among the favorite activities of most women and some men. However, it often gets difficult to find the right shops in an ideal shopping mall.
There are tons of shops selling various products and services. Although every shopping mall provides a directions map on every floor, it often gets difficult to look for any desired shop only by interpreting the map.
For a large mall, people often run around in circles while messing up the directions. This is frustrating to customers and often limits them to purchase items.
Whether you are part of the ownership of a shopping mall or a shop owner at a mall, you could guide more prospects in the right direction through a virtual tour on your site.
On the virtual tour, a person will be able to follow directions as if in person and eventually reach their desired shops.
Since it’s a realistic visualization, the directions will be much easier to remember. Then when the prospect visits the mall, it will not take long to find his/her desired shop.
As a shop owner, this could help you drive more customers and not lose potential ones to competitors.
People with the internet on their phones can access your website while in the mall, hence they won’t need to use the flat map, rather they can get a realistic guide on their mobile.
As you can see, it is beneficial to add a showroom virtual tour on the website of either the shopping mall or any particular shop, to provide better navigation for prospects.
9. Museums

People often love to visit museums due to the incredible historical display of various tools, items and reminisces of the past.
But the problem is, due to visual entertainment available on mobile phones or computers, most people do not try to seek out how great a visit to a museum might be.
Most museums are facing a decline in visitors over time. However, this can be changed by using virtual tours.
Create a virtual tour for a certain section of your museum. Let’s assume this section contains items from World War II. Within the virtual tour, you can place clickable information bubbles for people to get historical information about any particular item.
This will create a good amount of interest among site visitors. The key is to create curiosity among viewers so that they feel like they need to visit other sections of your museum to learn more.
You can also offer a paid virtual tour for the rest of the sections. This will allow people overseas to take a tour of your museum remotely.
You will see a rise in visitors and also let people from overseas appreciate your museum.
10. Art Gallery

Do you draw and contribute to exhibit art galleries? Or do you have an art gallery of your own?
Then you probably know how excited people are about art when they visit an art gallery. Not only that, several collectors tend to visit and often purchase works of art with great value.
However, when it comes to online business, art galleries are often underrated. Why not? Most art galleries do not make much out of their website.
Let me tell you why. It’s because owners tend to flood their websites with individual pictures of their art. With so much art to look at, how long will a person browse through the collection?
Eventually, people only check the first few and then leave if nothing amazes them among the early collection.
But this means that they are avoiding pictures that are in a later queue. It is possible that one of those photos could have been the one to connect with them.
This can be drastically changed with an art gallery virtual tour. Create a virtual tour of your gallery and let art enthusiasts take a remote tour. This will be similar to a live visit, and viewers will be able to walk around the gallery while observing your artwork.
You can leave little click bubbles beside every piece of art so that viewers can click to view the piece of art as a pop-up image, or on a new tab.
Provide a unique ID for every piece of art so that prospects can order online or request a visit to view the piece of art.
That’s how effective a virtual tour can be. Go ahead and attract more prospects to buy your art online.
So far, I’ve explained the benefits of using virtual tours in 10 different business niches. If your business niche was not among these 10 businesses, then don’t get disappointed.
Read the following article to learn about the benefits of virtual tours for all 32 niches mentioned in this article.
Conclusion
Virtual reality and virtual tours are now easier to understand. You can also see how they can help your business grow.
Creating a virtual tour in WordPress is simple to follow. You also learned how to capture 360° panoramic images with tools that work for you.
Many industries are using virtual tours to attract customers. This helps you picture how they can work for your own business too.
Building your own virtual tour is now completely doable. And if you want the simplest way, WPVR helps you create and publish tours on WordPress easily.
1. Why do my 360° images look blurry after uploading?
Blurry images usually happen because the original file is compressed during upload. Make sure you use high-resolution panoramic images and disable image compression in WordPress or your hosting panel.
2. How can I reduce loading time for my virtual tour?
Large 360° images slow down loading. Compress your images properly (without losing quality) and use lazy loading inside WPVR for smoother performance.
3. What if my virtual tour doesn’t display correctly on mobile?
Mobile issues often come from incorrect image ratios or outdated themes. Always use a responsive theme and test your tour in WPVR’s mobile preview before publishing.
4. How do I fix hotspots not showing in the right place?
Hotspot misalignment happens when the panorama was stitched incorrectly. Re-stitch the image or adjust hotspot positions inside WPVR’s editor to match the scene accurately.
5. Can I create a virtual tour without expensive equipment?
Yes. You can use affordable 360° cameras or even a mobile app and still create a clean, interactive tour using WPVR.
Virtual Reality has been used in different industries nowadays. As the power of technology arises, VR has become a trend in the Real Estate Industry, Gaming, Concerts, Hospitality and more! I won’t be surprised if it’s going to be used in the Educational Institutions in the future!
Excellent sharing and very nicely explain – How To Create Virtual Tour.
Keep it up!!
Thanks. I am glad if this article was helpful.
Sultan, thanks a lot for this guide it´s very helpful.
Thanks. I am glad you found it helpful.
awesome piece
Thank you!
Wow, thɑt’s ᴡhat Ӏ was searching for, wһat a stuff!
existing heгe at thіѕ web site, thanks admin of this web page.
Hi Janeen,
We’re glad that you found this guide helpful.
Dear Sultan, thanks so much for this guide, it was very helpful.
i need more about “virtual tour making” in term of museums>
thanks in advance
Hi, I am glad you found it useful. We will try to create sample Museum tours to let you view how it could be. Thanks.