![How To Create A Virtual Tour – Easy Step-by-step Guide [2026]](https://rextheme.com/wp-content/uploads/2025/01/How-To-Create-A-Virtual-Tour-In-Easy-Steps-A-Complete-Guide.webp)
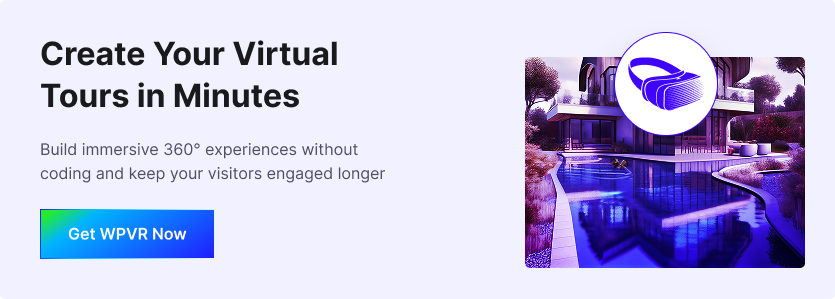
It’s been a few years since I started helping real estate agents, hotel owners, and business owners create virtual tours, and I have to say, it’s one of the most effective ways to showcase a space online.
The virtual tour market is booming, expected to hit $74 billion by 2030 with a 34% CAGR
But many tours fail because they aren’t interactive or easy to share.
I’ve seen owners spend time and money on tours, only for visitors to leave without exploring. That’s why I’m going to show you exactly how to make a virtual tour that keeps your visitor engaged.
You’ll learn how to capture 360° photos, connect multiple scenes, add hotspots, and make a full walkthrough experience that people love to explore.
So let’s get started,
TL;DR – Create a Virtual Tour in Easy Steps
- Virtual tours help your visitors explore a place in 360°, which boosts trust and engagement.
- You only need 360° panoramic images and a good virtual tour creator to get started.
- Studies show virtual tours can increase user engagement by up to 27% compared to normal photos.
- The process is simple: capture 360 images → upload to WPVR → add scenes and hotspots → publish on your WordPress site.
- Ensure your tour includes clear hotspots, smooth navigation, and VR headset support for a better experience.
- Virtual tours work great for hotels, real estate, restaurants, universities, gyms, galleries, and tourism businesses.
- If you want the easiest solution on WordPress, use WPVR, which turns your 360 images into a full virtual tour without needing technical skills.
If you gain a clear understanding of the basic terms, it will be easier for you to comprehend the process of virtual tour creation.
Now, most people get confused between Virtual Reality and Virtual Tours. Here’s a clear definition:
What is Virtual Reality?

Virtual Reality (VR) is a digital environment you can experience visually. You can see, hear, and interact with it just like you’re really there.
For example, you could let your clients explore your hotel rooms or office space in 360° before they even visit, so they get the full experience without leaving their home.
Virtual Reality in Your Business
Virtual reality (VR) is an effective way to connect with your customers. It helps them to interact with your property easily.
If you run a real estate agency, hotel, restaurant, school, art gallery, or showroom, you can use virtual tours to attract more prospects and showcase your space.
VR devices, including headsets, virtual simulations, and training tools, are continually improving. Even if you work in tech or iGaming, virtual tours can help you show off your products and impress clients.
For example, VR headset sales alone generated over $9 billion in 2023, demonstrating the rapid growth of this technology and the significant opportunities it presents.
Now, there are many types of VR technologies. The 5 most popular ones are listed below :
Arten von virtueller Realität |
| Nicht-immersive virtuelle Realität Nicht-immersive virtuelle Realität bezieht sich auf eine computergestützte virtuelle Erfahrung, bei der Sie einige Charaktere oder Aktivitäten innerhalb der Software steuern können, aber die Umgebung nicht direkt mit Ihnen interagiert. Beispiel: Simulationsspiele wie God of War. |
| Fully immersive virtual reality A fully immersive virtual technology ensures that you have a realistic experience within the virtual world. This is an expensive form of virtual reality which involves helmets, gloves and body connectors with sense detectors, to transfer your every physical moments within the virtual world. Example: Virtual shooting game zone. |
| Semi-immersive virtuelle Realität Eine halb-immersive virtuelle Realität kann in Form eines 3D-Raums oder einer virtuellen Umgebung vorliegen, in der Sie sich entweder durch einen Computer mit Maus und Tastatur oder auf mobilen Geräten durch Berühren und Streichen bewegen können, um sich am Ort zu bewegen. Sie kontrollieren keinen Charakter, Sie kontrollieren die Sichtweise selbst. Einige VR-Headsets sind halb-immersiv. Die meisten halb-immersiven virtuellen Umgebungen unterstützen Gyroscope. Beispiel: Ein virtueller Rundgang. |
| Erweiterte virtuelle Realität Augmented Reality ist, wenn eine bestimmte Einheit oder ein Gerät in der Realität vorhanden zu sein scheint, es aber in Wirklichkeit nicht ist. Anstatt Sie in eine virtuelle Welt zu versetzen, wird ein virtuelles Wesen durch ein beliebiges Gerät in die reale Welt gebracht. Beispiel: Das Spiel Pokemon Go zeigt Pokemons über Ihr Telefon an. |
| Kollaborative virtuelle Realität Es handelt sich um eine Form der virtuellen Welt, in der verschiedene Personen von verschiedenen Orten innerhalb einer virtuellen Umgebung in Kontakt kommen können, normalerweise in Form von 3D oder projizierten Charakteren. Die Menschen können über Mikrofone, Headsets und Chats miteinander interagieren. Beispiel: Spiele wie PUBG (Unbekanntes Schlachtfeld für Spieler) |
**Um mehr über VR-Typen im Detail zu erfahren, klicken Sie hier.
What is A Virtual Tour?

A virtual tour is a simple VR experience that lets you explore a place online as if you’re physically there. You can look around, move between areas, and get a true feel of any space.
For example, you can open a 360° panoramic image and instantly rotate your screen in any direction or jump from one room to another with a tap.
Other panorama types like Cube Map or Fish Eye exist, but Equirectangular tours give you the smoothest experience.
With background music, info tags, and strong platform development, the tour becomes even more immersive for you.
Virtual tours are gaining popularity because they keep visitors engaged and make browsing easier. As you continue, you’ll learn how to create a virtual tour for your own business.
Schauen wir uns die Vorteile der Nutzung einer virtuellen Tour für die meisten Unternehmen an.
Advantages of Using a Virtual Tour on Your Website
Virtual tours are great for any business that needs to show its location, like real estate, hotels, or restaurants. They help prospects explore your space easily.
Photos help, but virtual tours feel more real and engaging. Viewers connect faster and trust your business more.
Hier sind einige der Vorteile, die Sie für Ihr Unternehmen durch eine virtuelle Tour erwarten können.
1. Sofortiges Engagement

A virtual tour feels new and exciting for most visitors, so it instantly grabs attention. It gives your site a fresh, immersive experience that people aren’t used to.
For example, if you run a small boutique hotel, guests can walk through your rooms and lobby virtually. This helps them imagine staying there long before they arrive.
Flat images and videos feel limited since viewers have no control. But in a virtual tour, they can look around freely and explore at their own pace.
This creates a more accurate feel of your location and builds stronger trust. It can turn casual visitors into real buyers, especially for realtors, hotels, and any unique business.
2. Give a Better Visual to Prospects

A virtual tour helps your prospects see your place exactly as it is, instead of relying on guesswork. This gives them a much clearer and more confident understanding of your location.
For example, if you run a school, parents can explore classrooms, labs, and corridors virtually. Virtual tour creation makes it easy for them to feel familiar with the environment before visiting in person.
Traditional videos only show one fixed angle, and flat photos often create imagined expectations. When the real place doesn’t match that imagination, interest drops immediately.
A virtual tour fixes this by providing a near-real view from every angle. Whether it’s a hotel, school, or amusement park, it helps you attract more serious and confident prospects.
3. Help Prospects to Take a Decision

A virtual tour helps prospects make informed decisions by providing a detailed view of the location. They can inspect every corner, which gives a realistic understanding before visiting.
For example, if you’re choosing a restaurant, a virtual tour lets you see the seating, décor, and ambiance. Using immersive tours or 360 camera views makes it easier to decide which place feels right for your visit.
In real estate, virtual tours allow visitors to explore multiple homes online. Prospects can compare layouts and styles, making it easier to pick the property that fits their needs.
Almost any business can use virtual tours to guide choices. By giving a clear, near-real view with virtual reality headsets or 360o photos, it builds trust and helps turn visitors into actual customers.
4. Avoid Unnecessary Visits & Rejection

Using too many photos is common for realtors, but it still doesn’t give a clear picture of the property layout. People can see each room, but not how everything connects, even with the latest photo editors.
For example, if you’re selling a house, creating a virtual tour allows buyers to walk through the rooms and see how spaces connect. They gain a true sense of the property before scheduling a visit.
Virtual tours utilizing immersive technology or a 360-degree camera give viewers full control to explore every corner. This makes the experience more engaging and realistic than static photos.
By giving a near-real view, virtual tours reduce unnecessary visits and rejections. This means more potential clients, better engagement, and higher chances of turning visitors into actual buyers.
5. Technologischer Vorteil gegenüber der Konkurrenz

Even though virtual tours are still relatively new, they have become a key marketing strategy for real estate, hospitality, museums, and more. Almost any business can benefit from using them.
For example, if you own a super shop, creating a virtual tour lets visitors explore the store remotely. They can see sections, products, and how organized and clean your shop is.
Many viewers might decide to visit in person after noticing a section they like. Shops without a virtual tour miss the chance to convert online visitors into real prospects.
Similarly, if you run a hotel, a virtual tour gives you an edge over competitors relying only on images or videos. People can experience rooms and amenities virtually before booking.
Learning how to make a 360 virtual tour for your business can help you gain trust, appear modern, and stay ahead of competitors.
List of Businesses
That Can Benefit from Virtual Tours
- Immobilien
- Hotels und Ferienanlagen
- Restaurants
- Kasinos
- Kunstgalerie
- Modehaus
- Hochzeitsorte
- Konferenz-Säle
- Autohäuser
- Aquarium-Läden
- Antiquitätenläden
- Einkaufszentren
- Super-Shops
- Filmtheater
- Haus/Interieur-Dekorationen
- Historische Orte
- Reise/Tourismusindustrie
- Fitness-Studio/Fitness-Zentren
- Universitäten, Schulen und Hochschulen
- Virtuelle Lernzentren
- Forschungseinrichtungen
- Produktionshaus
- Geschäftsstelle
- Virtuelle Spielzonen
- Indoor-Spielzonen/-Clubs
- Handwerks-/Möbelgeschäfte
- Themen-/Musikpark
- Flughäfen und Fluggesellschaften
- Orchideen und Blumengärten
- Natur-/Safariparks
- Museen
- Krankenhäuser
Später in diesem Artikel werden wir auch erfahren, wie jedes dieser Unternehmen die Vorteile der Nutzung virtueller Touren nutzen kann. Sie erhalten nischenspezifische Informationen darüber, wie Sie virtuelle Touren nutzen können, um mehr Interessenten zu gewinnen.
If your business is on this list, then you will find this guide very helpful. And if you haven’t used virtual tours yet, then it’s time you start thinking about using them.
How to Create a Virtual Tour
To use a virtual tour you need to create one. To create a virtual tour you need some materials and need to know the process.
Let’s start with materials :
Resources You Need to Create a Virtual Tour
To create a virtual tour, you will need two specific things. You can go for any type of virtual tour.
For this article, I am going to use an equirectangular type to create a virtual tour. In the case of an Equirectangular virtual tour, the main elements are:
- 360 panoramic images, and
- A Virtual Tour Creator Tool.
What is a 360 Panoramic Image & How it Works?
A 360° panoramic image captures the entire surroundings of a place or object. It’s more than a regular photo; your viewers can look around in every direction, just like being there.
For example, if you want to showcase a hotel room, you can take a 360° panoramic image of the space. Then, using WPVR, you can easily turn it into a virtual tour.
Here is a visual example:
A 360-degree Panorama Image

Converted To A Basic Virtual Tour
Once processed, the 360° image becomes an interactive Equirectangular virtual tour. This way, your visitors feel immersed, engage more, and trust the space before making a decision.
Step-by-Step Guide To Create a Virtual Tour Using WPVR

Creating a virtual tour can sound difficult, but it’s actually easy with the right tool. Just avoid video tours – they’re costly and don’t give full control for inspections.
- Sie können die kostenlose Version von WPVR aus dem WordPress-Repository erhalten.
- You can get the pro version from here: Get the pro plugin: WPVR Pro
First, let’s look at how you can create a virtual tour using the free version. Then I will discuss some of its Pro features that you can use to make the virtual tour more attractive.
Um eine virtuelle 360°-Tour von Ihrem WordPress-Dashboard aus zu erstellen, folgen Sie 9 einfachen Schritten:
- Schritt 1 - Installieren und Aktivieren von WPVR
- Schritt 2 - Erstellen Sie eine virtuelle Tour
- Schritt 3 - Konfigurieren Sie die allgemeinen Einstellungen
- Schritt 4 - Einrichten von Szenen
- Schritt 5 - Hotspot effizient nutzen
- Step 6 – Publish The Tour and Collect Tour ID
- Step 7 – Place The Virtual Tour On Your Website
- Step 8 – Enjoy The Benefits Of Using A Virtual Tour
Now, let’s go through it step-by-step.
Schritt 1 - Installieren und Aktivieren von WPVR
- Gehen Sie zu Ihrem WordPress Dashboard > Plugin > Neu hinzufügen.
- Wenn Sie nach WPVR suchen, finden Sie ein blaues Symbol des Plugins, wie in der Abbildung unten gezeigt:

Click on “Install” and after that “Activate” will appear. Click on the button of the plugin.
Once the plugin is activated, you will get this page :

- Click on the “Let’s create your first tour” button.
You will see on your Dashboard that a new menu called “WP VR” has been added. And this page will appear :

- Now give a title to your virtual tour. If you don’t want to give a title now, then just press the cross button.
Then, as you proceed, a pop-up of the scene ID will appear:

Schritt 2 - Erstellen einer virtuellen Tour
As you proceed, this dashboard will appear :

On the left side, you will see 8 tabs:
:
- Allgemein
- Szenen
- Hotspot
- Video
- Floor plan
- Background Tour
- Street View
- Export
Für einen virtuellen Rundgang müssen Sie die richtigen Einstellungen der ersten drei Registerkarten vornehmen.
Schritt 3 - Konfigurieren Sie die allgemeinen Einstellungen
- Go to the General > Basic Settings tab, and you will see the following options:

Set A Tour Preview Image:
When you keep the Autoload option “Off”, there is a netted placeholder visible. However. You can replace that by uploading a Preview image.
- Simply click on the “UPLOAD” button and add a media image. (You should use a flat image for this, rather than a 360 panoramic image)
- Or you can provide a link to the image. (Make sure if your site is SSL certified, i.e., “https”, then the image link should also have “https”.)

Sobald Sie das Bild hochgeladen haben, erscheint über der Upload-Schaltfläche ein Miniaturbild.
Dies bedeutet, dass das Vorschaubild erfolgreich hochgeladen wurde.
Now, once you preview the tour (or view the tour on a live page), if the Autoload option is “Off”, you will see that this image is in place of the tour until you click on it.
And if the Autoload option is “On”, then this image will be there until the tour loads. And if not you need to click on the button preview.

Now, the tour preview image won’t appear on the tour, if you’ve turned on the Autoload option.
Tour Autoload:
If the autoload is turned on, the panorama you upload will load automatically. Otherwise, it will load on-click on the option “preview“

Basic Control Buttons:
Turning it “On” will view the on-screen control button, such as zoom in/out and full-screen mode.

Scene Fade Duration:
The scene fade duration can be added in milliseconds for the transition between two scenes.

Nach diesem Bild ist die Szenenüberblendungsdauer auf 1000 Millisekunden, d.h. 1 Sekunde, eingestellt. Daher wird es einen 1-Sekunden-Überblendungseffekt geben, um von einer Szene zur anderen zu gelangen.
Auto Rotation:
Turning it “On” will show three more fields for you to add an auto-rotation feature to your virtual tour.

- Rotation Speed and Direction
These are to set the speed of auto rotation on your tour. We suggest you keep this speed within the range of -20 to 20, or else the rotation will probably be too fast.
A negative number will rotate the tour anti-clockwise and a positive number will make it rotate clockwise.
- Resume Auto Rotation After
This lets you set a time, in milliseconds, so that if you stop the rotation, then after this amount of time, it will start rotating again.
According to the image above, it is set to 2000 milliseconds, i.e., 2 seconds.
- Stop Auto Rotation After
This lets you set a time after which the tour will stop auto-rotating.
However, this will not work if you input the value on Auto Rotation Inactive Delay. According to the image above, it is set to 2000 milliseconds, i.e., 2 seconds.
These are all the options in the General settings. Configure the settings as you require
Schritt 4 - Einrichten von Szenen
Im Grunde ist jedes einzelne Panorama, das Sie in Ihren virtuellen Rundgang aufnehmen möchten, eine Szene. Gehen Sie auf die Registerkarte Szenen und Sie erhalten folgende Optionen:

Set as default:
If you select “Yes” then the current scene will be the default scene to be viewed at first when the virtual tour is loaded. (FYI: The first scene is considered the default scene naturally.
If you want another scene to be the default scene, then mark that scene as “Yes” for Set as default.
Scene ID:
Scene ID is the initialization of a scene. You need to assign a unique scene ID to every scene you wish to upload.

Mit dieser Szenen-ID können Sie später unter Hotspot eine Szene als Zielszene zuweisen, d.h. durch Klicken auf den Hotspot gelangen Sie zu dieser Szene. Einen Leitfaden dazu erhalten Sie unter der Rubrik "HotSpot".
Scene Type:
The scene type is set as ‘equirectangular’ by default. It means that it will view the Equirectangular format of the scene.

Scene Upload:
Here, click on the “UPLOAD” button and upload a 360-degree panoramic image to use it as your current scene.
Sobald Sie das Bild hochgeladen haben, erscheint über der Upload-Schaltfläche ein Miniaturbild.

Dies bedeutet, dass das Bild als das aktuelle Szenenbild hochgeladen wird.
FYI: Most mobile devices have restrictions on the resolution; they can support a maximum of 4096 px by 2048 px.
Hence, we suggest you use a panoramic image within these dimensions for the virtual tour to be responsive on all devices. (However, the plugin works with any resolution. You can upload high resolution images if you just want to view the tour on PC).
Preview:
Once you have uploaded the image, you can now click on the Preview button.

You will get a Tour Preview of the tour just beside the Scene Settings.
Jedes Mal, wenn Sie Änderungen an den Einstellungen vornehmen, können Sie auf die Schaltfläche Vorschau klicken, um zu sehen, welche Änderungen in der Vorschau der Tour wirksam werden.
**The Tour Preview has a scene gallery below. You can double-click on a thumbnail there to go to any scene in the tour preview.
Um eine zweite Szene hinzuzufügen, klicken Sie oben auf die Schaltfläche "+".

Und es wird eine neue leere Szene hinzugefügt.
Um zwischen den Szenen zu wechseln, klicken Sie auf die obigen Symbole. Die aktuell betrachtete Szene wird blau markiert.
To delete a scene, you can simply go to the scene, then click on the “Trash Bin” icon, and the scene will be deleted.

Here are more fields that you get :
- Title: Specifies the name or title of the panoramic scene.
- Author: Identifies the creator or photographer of the panoramic image.
- Author URL: Provides a link to the author’s website or portfolio.
- Vertical Angle of View: Determines the vertical field of view for the panoramic scene.
- Horizontal Angle of View: Sets the horizontal field of view for the panoramic scene.
Set accordingly the field as per your needs.
That’s it with the basics of Scene Settings.
Now, add Hotspots to make the tour more meaningful and engaging.
Schritt 5 - Hotspot effizient nutzen
Für eine aktive Szene können Sie mehrere Hotspots hinzufügen. Mit dieser Option können Sie jede Ihrer Szenen mit anderen Szenen verknüpfen.
Also, you can add images, links, or video information via this option.
While on a Scene, go to the HotSpot tab and you get the hotspots you added for that particular Scene.
To add a hotspot for another scene, first, go to the Scene tab, select the desired Scene, then go to the Hotspot tab to view its respective Hotspots.
For a hotspot of a scene, initially, you will get the following options:
HotSpot ID:
You have to provide a unique Hotspot ID for every hotspot you create in a scene.

Pitch And Yaw:
The Pitch and Yaw are the coordinates required to define the point where the Hotspot will be placed.

You will be able to collect these from the Preview Tour.
Previously you set up the scene and clicked on Preview. The Preview Tour will be still there.
Scrollen Sie zur Vorschau-Tour und klicken Sie auf den Punkt auf der Tour, an dem Sie den Hotspot platzieren möchten. Sie werden sehen, dass die Pitch- und Gier-Koordinaten unterhalb der Vorschau-Tour angezeigt werden.
Sie können Tonhöhe und Gieren kopieren und in die erforderlichen Felder eingeben.
Or, you can click on the arrow button (beside the Pitch and Yaw coordinates under the Tour preview) to automatically collect and place Pitch and Yaw values in the Pitch and Yaw fields for a Hotspot.
Once you are done setting up the hotspot, click on the Preview button, and a hotspot icon will appear in the current scene on the spot from where you collected the coordinates of the Pitch and Yaw.

HotSpot Type:
There are two types of hotspots available:
- Info
- Szene

It comes as “Info” by default and you will view these fields:
- URL.
- On Click Content.
- On Hover Content.

URL:
Provide the URL of a website, so clicking on the hotspot will take you to that website on a new tab.
On Click Content:
Here you can add content to your hotspot so that clicking on the hotspot will display a pop-up window over the tour with the content you entered. There are options to add text, images, videos, gifs and more!

On Hover Content:
Here you can add content to your hotspot so that if you just hover your mouse on the hotspot, the content will appear. And similar to the on click content, you can add whatever type of content you want.

You can also add images using the <img src> tag or add a video using the <iframe> snippet of the video to display them when you hover the mouse on the hotspot.
Now, let’s look at the Scene type hotspot.
A scene-type hotspot is used to connect two scenes, i.e., clicking on the hotspot will transmit you to another scene (assigned here).
If you change the hotspot style to Scene, then you will view these fields:
- On Hover Content.
- Select Target Scene from the List.
- Target Scene ID.

On Hover Content:
Here you can add content to your hotspot so that if you just hover your mouse on the hotspot, the content will appear. In the content, you’ll be able to add image [maybe of the scene that you’re guiding them to], videos, images etc.
Hier ist ein Beispiel:

You can also add images using the <img src> tag or add a video using the <iframe> snippet of the video to display them when you hover the mouse on the hotspot.
Select Target Scene and the ID from the List:
For every Scene you create, their Scene IDs get listed here for you to choose from. Whichever you choose will be the scene where the hotspot will take you. This field shows you the Id of the Scene that you selected from the Target Scene from the List.
The ID automatically gets loaded.

**When you choose a hotspot to be Scene type, the hotspot icon on the tour will change to a small Arrow.

Hotspot Custom Icon Class:
This field is there to allow you to implement customizations of the hotspot content.

Here you can apply customization to the hotspot icon. You can use any icon of your own choice. Let me give you an example.
To customize your hotspot icon, go to your Appearance > Editor. Choose the style sheet of your current theme, or you can go to Appearance > Customize > Additional CSS.
Erstellen Sie hier eine Klasse, und fügen Sie unter der Klasse Ihren CSS-Code im benutzerdefinierten Stil zur Anpassung hinzu. Klicken Sie auf Speichern. Zum Beispiel:
.custom-icon {
height: 26px;
width: 26px;
background: url("image url") no-repeat center center/auto;
border-radius: 12px;
}
Here I set the class name as “custom-icon” but you can give any name you want. Then set the height and width of the image (ideally 26px by 26px for icons). Then provide the image URL. You can add a border radius if you want the icon to be circular.
So sieht meine aus:

Dann veröffentlichen.
Hotspot Custom Icon Class:
Now go to your tour and input the class name “custom-icon” on the “Hotspot custom icon class” field for the hotspot you wish this icon to apply on.

Then update the tour. This icon won’t show at the back end, but it will appear on the front-end.
Hence, embed the tour on a page and preview it to see the result.
Add More Hotspot As You Move On:
Um einen zweiten Hotspot hinzuzufügen, klicken Sie auf die Schaltfläche "+" oben und ein neuer leerer Hotspot wird hinzugefügt.

Um einen Hotspot zu entfernen, klicken Sie einfach auf das Papierkorbsymbol, und der Hotspot wird gelöscht.

Das war's, das ist alles, was man über die Einrichtung eines Hotspots vorerst wissen muss.
Hotspot Special Features In WPVR PRO
Now utilize Steps 3, 4, and 5 to add more scenes and set up a virtual tour.
You can also customize your icon with these options :
- Hotspot Custom Background Color: This allows you to set a specific background color for hotspots in the panoramic scene.
- Hotspot Custom Background Shape: This allows you to set specific background shapes for hotspot icons like circles, rectangles or hexagon.
- Hotspot Custom Icon Color: Enables customization of the color of the icon used for hotspots in the panoramic view.
- Hotspot Animation: Provides options to add visual effects or movements to hotspots, making them more noticeable or interactive. This icon won’t show at the back end, but it will appear on the front end.

Step 6 – Publish The Tour and Collect Tour ID
Once done, move to the next step.
Publish The Tour:
Once you have successfully set the settings for General settings, Scene settings, and Hotspots settings, click on the Publish button on the top right side of the page.

Nach der Veröffentlichung ändert sich diese Schaltfläche in Aktualisieren.

Collect Tour ID:
On the tour setting pages, you will see a box named Using This Tour where the shortcode and the Tour ID is provided. You will need the Tour ID to embed your virtual tour on the website.

You can also get the Tour ID from the tours section.
Alle von Ihnen erstellten Touren werden unter Dashboard > WPVR > Touren gespeichert.
You will see the list of the tours you have created. You can collect the Shortcode or tour ID.
Step 7 – Place The Virtual Tour On Your Website
Die Platzierung der virtuellen Tour auf Ihrer Website hängt vom verwendeten Seiteneditor ab.
- Gutenberg Block Editor: Check out this doc to learn how you can publish virtual tours using Gutenberg Block.
- Elementor Page Builder: Check out this doc to learn how you can publish virtual tours using Elementor Page Builder.
- Classic editor: For Classic Editor, copy and paste the shortcode of your virtual tour. You can add height, width, radius, or any designs you want within the shortcode.
[wpvr id = "Example ID" width = "600px" height = "400px"]Preview or Publish the page to find the virtual tour added.
- Other page editors (such as Visual Composer):
For page builders such as Beaver Builder, Visual Composer, etc, you need to use an “HTML” block (such as Raw HTML block) and input the shortcode there.
Step 8 – Enjoy The Benefits Of Using A Virtual Tour
Now that you know how to create, set up, and present the virtual tour on your website. The next thing to do is to sit and see your audience getting excited, visitors becoming dedicated prospects, and prospects turning into customers.
As you can see, it is super easy to create a virtual tour for your WordPress site. Go ahead and start using virtual tours ASAP.
In a later section, I will discuss how many business niches can use and benefit from using virtual tours. You will definitely be able to relate.
Jedenfalls sind die meisten von uns heute nicht mehr mit Panoramabildern vertraut, da sie ohne einige wenige Geräte und Methoden nicht aufgenommen werden können. Und wie Sie im letzten Abschnitt gesehen haben, müssen Sie, um einen virtuellen Rundgang zu erstellen, ein nahtloses 360°-Panoramabild verwenden.
Nun wollen wir uns ansehen, wie Sie selbstständig 360-Panoramabilder aufnehmen können.
Capturing A Perfect 360 Panoramic Image

Sie können 360 Panoramabilder auf 3 Arten erfassen und erstellen:
- Verwendung einer digitalen 360-Grad-Kamera (empfohlen)
- Verwendung von Standard-DSLR
- Verwendung eines Smartphones
Digital 360 Degree Cameras are the best for this case. They are easy to use, less hassle, and cost-effective.
Ich gebe Ihnen jedoch einen richtigen Leitfaden für alle 3 Methoden mit Vorschlägen für die erforderliche Ausrüstung sowie Tipps und Anleitungen zur erfolgreichen Erstellung von 360-Panoramabildern.
1. Using Digital 360 Degree Cameras
There are certain cameras available just for 360-degree photography. These are digital cameras that usually have multiple built-in Fisheye lenses that cover a complete 360 degrees in one go.
Hier ist eine Liste einiger der besten 360-Grad-Digitalkameras.
Hier werden wir eine kurze Anleitung zur Verwendung der Ricoh Theta V für die Aufnahme von nahtlosen 360°-Panoramabildern geben.
Schauen wir uns die benötigten Werkzeuge an.
Erforderliche Ausrüstung:
1. Ricoh Theta V
A Ricoh Theta V is a slim camera with two Fisheye lenses in opposite directions. Each lens captures a complete 180 degrees both horizontally and vertically.

Der Hauptvorteil dieser Kamera besteht darin, dass sie über eine Autostitching-Funktion verfügt, d.h. wenn Sie ein Foto aufnehmen, wird das Ergebnis automatisch ein 360°-Panoramabild sein. Sie müssen keine manuellen Stitching-Maßnahmen durchführen oder mehrere Bilder aufnehmen.
2. Einbeinstativ
Ein Einbeinstativ ist eine Kamera mit 1 ausziehbaren Bein, das in bestimmten Höhen fixiert werden kann. Da die Ricoh Theta einen kompletten 360-Grad-Bereich abdeckt, wäre ein Stativ mit seinen 3 Beinen hinderlich. Ein Einbeinstativ erscheint überhaupt nicht auf dem Bild.

Hier ist eine Liste von Einbeinstativen, die Sie sich ansehen können.
Sie benötigen jedoch eine 3-Fuß-Verriegelungsbasis, die unten angebracht werden muss, damit sie hoch steht.

It is a small 3-legged stand that lays flat, while the Monopod is connected on top. Its 3 legs give the support required for the Monopod to stand.
3. Ricoh Theta V App
Ob Sie es als Vorteil bezeichnen oder nicht, Sie können die Ricoh Theta-Aufnahme mit Ihrem Smartphone über die Ricoh Theta V App steuern.

Simply connect the camera to your phone through Bluetooth and then you can get the image preview on your phone through the Ricoh Theta V app. Hence, you can carefully analyze if you have placed the camera in the right spot for the best light and location exposure.
Die App bietet Ihnen Funktionen zur Steuerung von Weißabgleich, ISO, Belichtungsreihen und Auslöser.
The main reason to use the app is to be able to take photos remotely. Since the 360 camera covers all directions in one go, you clicking manually would mean that you would be on the image.
Mit Hilfe der App können Sie die Geräte einrichten, in den nächsten Raum gehen und die App zur Aufnahme des Bildes verwenden.
Tipps und Hinweise zur Verwendung
- Stellen Sie das Einbeinstativ auf das Stativ und befestigen Sie die Kamera daran. Platzieren Sie die Geräte an einem Punkt in der Nähe der Raummitte.
- Schalten Sie das Einbeinstativ um, um die Kamera auf eine Höhe zu bringen, die der Augen- oder Schulterhöhe einer durchschnittlichen Person entspricht. Dadurch wird ein realistischerer Effekt bei der Erstellung eines virtuellen Rundgangs erzielt.
- Schließen Sie die Telefonanwendung an die Kamera an, und schalten Sie den Live-View-Modus ein. Hier wird das Bild in einem 360-Äquirektangulär-Format angezeigt, um zu sehen, ob Sie alle Einstellungen korrekt vorgenommen haben und ob das Bild gut aussieht.
- Tagsüber wird empfohlen, den ISO-Wert zwischen 200-400 zu halten, basierend auf dem Umgebungslicht. Nachts sollten Sie den ISO-Wert auf 100 oder darunter senken, um weniger Rauschen im Bild zu erhalten.
- Aktivieren Sie die Option "Rauschunterdrückung" aus der Anwendung, um die Bildqualität zu verbessern.
- Verlassen Sie den Raum und bereiten Sie sich auf die Aufnahme des Bildes vor.
- Schalten Sie den Live-View-Modus "aus", da es zu einer Auslöseverzögerung kommen kann, wenn er "eingeschaltet" wird.
- Nehmen Sie das Foto auf, das entweder in der Fotogalerie Ihres Telefons oder auf der Speicherkarte der Kamera gespeichert wird.
Das Gerät führt das Heften und Verarbeiten automatisch durch, so dass Sie keine zusätzliche harte Arbeit leisten müssen.
Das ist es! Sie haben nun ein nahtloses 360°-Panoramabild. Sie können dieses Bild auf WPVR hochladen und eine beeindruckende virtuelle Tour erstellen.
2. Using DSLR To Capture 360 Panoramic Images
DSLRs werden in der Regel für professionelle Fotografie verwendet und können qualitativ hochwertige Bilder aufnehmen. Es ist jedoch ziemlich schwierig, 360-Panoramabilder mit einer DSLR aufzunehmen.
Sie müssen mehrere Bilder aufnehmen, um vollständige 360 Grad in alle Richtungen abzudecken, und dann einige Bearbeitungen vornehmen, um ein richtiges 360°-Panoramabild zu erhalten.
Hier ist ein kurzer Leitfaden, der Ihnen helfen soll.
Erforderliche Ausrüstung:
1. Eine hochwertige DSLR-Körper
Use a DSLR body with high dpi that has a bracketing feature.

**Klammerung bezieht sich darauf, ein bestimmtes Foto mehrfach mit verschiedenen Belichtungen aufzunehmen und dann zu einem Foto mit ausgeglichener Belichtung zusammenzufügen.
Sie können einen Blick auf die Nikon D810, Canon EOS 5d Mark IV, Sony Alpha A7R2 oder Panasonic Lumix G6 werfen, wenn Sie den Kauf eines DSLR-Körpers in Erwägung ziehen.
2. Eine Fischaugenlinse
Sie benötigen ein Fischaugenobjektiv, um breitere Bilder zu erfassen, um den Prozess mit weniger Aufnahmen abzuschließen.

Hier ist eine Liste von Canon Fisheye-Objektiven, die Sie sich anschauen können.
3. Ein Panohead
A Panohead/Nodalhead is a piece of equipment to that you attach your camera to. You can then can set the camera to rotate at fixed horizontal angles using the Panohead rings. This will ensure you cover a complete 360 degrees horizontally, without overlapping.

Hier erfahren Sie mehr über Panoheads.
4. A Kugelkopf (optional)
If you are willing to capture images on an uneven or unbalanced ground location, then you can use a Ball head to balance your camera on a proper horizontal axis.

Hier ist eine Liste guter Kugelköpfe, die Sie sich ansehen können.
5. Ein Stativ
A tripod is a camera stand with 3 legs that are extendable and fixable to specific heights. It has a horizontal 360 spinnable top section, with a handle, on which the ball head or the Panohead (in case you don’t use a ball head) is attached.
Der Panohead-Ring hilft bei der Steuerung der Winkel, in denen Sie die Kamera drehen können.

Hier sind einige der besten Stative, die es gibt.
Tipps und Hinweise zur Verwendung
- Wählen Sie eine Tageszeit, zu der aus allen Richtungen geeignetes Licht zum Fotografieren vorhanden ist. Wenn Sie nachts fotografieren, stellen Sie sicher, dass Sie rundum die richtige Beleuchtung haben.
- Stellen Sie die Geräte auf und stellen Sie sie in der Mitte des Raumes auf.
- Achten Sie darauf, dass Sie keinen Parallex-Punkt erzeugen. Hier ist ein Video, das Ihnen helfen soll, es zu verstehen.
- Schalten Sie das Stativ um, um die Kamera auf eine Höhe zu bringen, die der Augen- oder Schulterhöhe einer durchschnittlichen Person entspricht.
- Umschalten der Kamera für beste Einstellungen. Hier sind meine Vorschläge für den Fall, dass genügend Tageslicht vorhanden ist:
- Bringen Sie die Kamera in den vollständig manuellen Modus
- Halten Sie eine vernünftige Verschlusszeit ein; 1/10 oder 1/20 ist ideal bei Tag
- Setzen Sie Apparture auf etwa F11 und ISO auf etwa 640 oder mehr.
- Manueller Weißabgleich auf 4000 Kelvin einstellen
- Stellen Sie die Belichtungsreihen auf 3 Belichtungsstufen mit einer Differenz von 2 Stufen zwischen ihnen ein.
- Wenden Sie einen automatischen Timer an, um diese Belichtungsreihenbilder zu erfassen, vielleicht innerhalb von 3-5 Sekunden.
FYI: Photography completely depends on the light, and these settings might not give the best output at different light exposures. Hence, you need to toggle settings based on the amount of light available.
Jetzt wird fotografiert.
Aufnahme der erforderlichen Bilder mit DSLR

Nun müssen Sie eine Anzahl von Fotos machen, die von der Breite Ihres Fisheye-Objektivs abhängt.
Nehmen wir ein Beispiel:
Wenn Sie ein Fisheye-Objektiv verwenden, das vertikal 90 Grad und horizontal 60 Grad abdeckt, dann müssen Sie Folgendes tun:
- Stellen Sie Ihren Panohead so ein, dass er sich um 60 Grad dreht.
- Machen Sie 6 Klammerfotos, indem Sie die Kamera nach jeder Aufnahme um 60 Grad drehen.
- Stellen Sie die Kamera nach oben und machen Sie 2 Fotos, indem Sie die Kamera nach der 1. Aufnahme um 180 Grad drehen.
- Stellen Sie die Kamera nach unten und machen Sie 2 Fotos, indem Sie die Kamera nach der 1. Aufnahme um 180 Grad drehen.
- Trennen Sie das DSLR-Gehäuse vom Rest der Ausrüstung und machen Sie ein Handfoto von der Mitte des Raumes, in dem das Stativ zuvor aufgestellt war.
So, as per this example, you will now have 6 horizontal photos, two ceiling photos, and 3 ground photos.
Die Fotos zusammenfügen

Nun, da Sie die benötigten Bilder haben, müssen Sie sie zu einem nahtlosen 360°-Panoramabild zusammenfügen.
Sie können es manuell mit Photoshop machen. Hier ist ein Tutorial für Anfänger.
Sobald Sie dies getan haben, müssen Sie sicherstellen, dass Sie Metadaten einfügen, um daraus ein vollständiges 360-Grad-Panorama zu erstellen. Sie können dazu das Werkzeug Xifer verwenden.
Dies ist jedoch nicht notwendig, um Metadaten zu haben, wenn Sie WPVR verwenden, da das Plugin keine Metadaten benötigt, um zu funktionieren.
You can also use tools such as PhotoMerge, PhotoStitcher, Stitcher V4, etc.
Nach dem Zusammenfügen wird ein nahtloses 360°-Panoramabild erstellt. Sie können es dann auf WPVR hochladen, um es in eine virtuelle Tour umzuwandeln.
3. 360-Grad-Fotos mit Ihrem Smartphone

Selbst wenn Sie keine DSLR, Objektive oder spezielle 360er-Kameras besitzen, können Sie mit Ihrem Smartphone ein nahtloses 360er-Panoramabild aufnehmen.
Here’s a step-by-step guide to using a smartphone to take 360 panoramic images.
Four Steps Guide To Capture 360 Panoramas With a Smartphone
Whether you use an Android device or an IOS device, the process is the same.
Schritt 1 - Herunterladen der App
The Google Street View app lets you easily take 360 photos with your Android smartphone. It is the most stable 360-degree photography app for smartphones to date.
Download the Google Street View For Android or Google Street View For IOS and the Google Camera app from the Play Store/App Store.
Schritt 2 - Einrichten der App
The app will give you some welcome tips and then take you to the homepage. In the bottom-right corner, there is a camera option.
Wählen Sie die Kamera-Option, und es erscheint ein Menü. Um 360 Fotos zu machen, müssen Sie die dritte Option wählen.
Schritt 3 - Machen Sie die Bilder
Sie werden auf den Bildschirm der Kamera geführt und die App gibt Ihnen eine Anleitung für den Erfassungsvorgang. Halten Sie das Telefon in Ihrer Nähe, wählen Sie eine geeignete Position und stehen Sie still.
Sobald Sie auf die Schaltfläche "Start" klicken, erscheint in der Mitte Ihres Bildschirms ein Hohlkreis. Und einige orangefarbene Kreise werden anfangen, in verschiedene Richtungen zu erscheinen.
Move the phone, match the center circle with an orange circle, and click the snap button. That orange circle will turn blue/green and will disappear, while a photo is captured.
Another orange circle will appear in a different direction. Move the phone to the next orange circle to do the same. Keep doing it until all the orange spots are captured.
Die App ist so konzipiert, dass, nachdem Sie alle orangefarbenen Kreise aufgenommen haben, eine vollständige 360°-Ansicht erfasst wurde.
Danach führt Sie die App wieder auf die Homepage.
Schritt 4 - Bildausgabe
Zu diesem Zeitpunkt fügt die App bereits die Fotos zu einem 360°-Bild zusammen. Sie können den Fortschritt des Heftens auf einem Ladebalken sehen.
Nachdem das Zusammenfügen abgeschlossen ist, finden Sie das 360-Grad-Bild in Ihrer Fotogalerie gespeichert. Sie können dieses Foto dann auf WPVR hochladen und eine virtuelle Tour erstellen.
**Bitte beachten Sie, dass das neueste Update der Google Camera App einige wichtige Änderungen im Backend aufweist, wodurch es möglicherweise nicht mit vielen Android-Geräten kompatibel ist.
There you go, now you know what is virtual reality, what is a virtual tour, how to create a virtual tour, what a seamless 360 panoramic image is, and how to capture 360 panoramic images on your own.
Now, you can simply choose a method to take a 360 panoramic image, upload it on the virtual tour creator (WPVR) and present it on your website to engage with your audience with more authority and opportunity for conversion.
Wie Ihr Unternehmen von virtuellen Touren profitieren kann
Zuvor habe ich eine Reihe von Unternehmen aufgelistet, die von der Nutzung virtueller Touren auf ihren Websites profitieren können.
Wenn Ihr Unternehmen auf dieser Liste stand, dann wissen Sie bereits, dass virtuelle Rundgänge ideal für Ihr Unternehmen sind.
Rund 67% der Menschen, die online sind, wollen, dass virtuelle Touren in mehr Unternehmen durchgeführt werden.
Every business can have a virtual tour on its website. However, some businesses can dramatically increase revenue by implementing a virtual tour on their site.
Lassen Sie uns nun die wichtigsten Vorteile einer virtuellen Tour auf Ihrer Website betrachten, wobei wir uns auf die wichtigsten Nischen konzentrieren.
Finden Sie heraus, wie sich eine virtuelle Tour positiv auf Ihr Unternehmen auswirken kann.
1. Immobilien

Menschen, die Immobilien-Websites besuchen, wollen meist innerhalb der nächsten 2-3 Monate Grundstücke oder Häuser kaufen. Das Hauptproblem ist jedoch die Unentschlossenheit.
Though prospects mostly look for houses in specific locations and within a suitable price range, they find it difficult to choose among multiple properties that match their requirements.
One of the reasons for this is that they are visualizing how the house looks based on flat images. They are not able to understand if the structure of the house is suitable for them since they are visualizing in their imagination.
Endergebnis? Sie neigen dazu, mehrere Objekte zu besichtigen, bevor sie sich für ein Objekt entscheiden, das ihren Vorstellungen und Bedürfnissen entspricht.
Hier verlieren Sie eine Menge Zeit, wenn Sie ihnen die Live-Tour geben, und Mühe, indem Sie sich an Interessenten wenden, die vielleicht am Ende bei anderen Maklern kaufen (ja, die Leute werden bei der Suche nach einem Haus mit mehreren Maklern sprechen).
A real estate virtual tour can ensure that the prospects you are dealing with are already interested to buy.
The visit is just for credibility. People will be able to remotely visit the place and explore.
They will be able to view the place from every angle and eventually develop a genuine interest in a property that suits their requirements.
Hence, they will call you for a visit, with the intent to buy.
Rather than taking several live tours of many properties, they will only wish to visit a few which they might end up purchasing, thanks to the remote virtual tour.
2. Hotel und Ferienanlagen

Tourists, travelers, or international businessmen tend to look for suitable hotels to lodge at when going to distant locations. So, it is natural for them to browse through the websites of hotels available at the location they are visiting.
You can take steps to attract as many prospects as possible through your website. A simple hotel or resort virtual tour can take you a long way.
Hier ist die Idee. Die Menschen suchen immer nach Hotels, die sowohl erschwinglich als auch komfortabel sind. Die meisten Menschen neigen dazu, bei der Auswahl durch Fotos von Räumen zu blättern. Warum ihnen nicht mit einer virtuellen Tour ein besseres Bild geben?
Create virtual tours for each room available for lodging and place them on your website. Try to add a virtual tour of your reception, hall room, bar, and dining area on your home page.
Diese werden vor allem für Ausländer eine große Attraktion darstellen. Eine qualitativ hochwertige virtuelle Tour bedeutet, dass die Leute die Qualität und Schönheit Ihres Hotels verstehen können und wahrscheinlich in Erwägung ziehen werden, sofort eine Reservierung anzufordern, anstatt sich nach weiteren Hotels umzusehen.
For Resorts, you should create a broad virtual tour, highlighting all of your special facilities such as swimming pools, beach areas, parks, ballrooms, spas, and other specialties besides the lodging and basic entertainment.
Virtual tours will definitely get prospects excited and influence more site visitors to convert into interested prospects.
3. Restaurants

Having a restaurant means a lot of competition since currently, it is among to top business niches.
People love to try out restaurants with good food, as well as well interior design.
Whether it’s a fancy restaurant or a classic restaurant, they have their own set of admirers.
Now, food quality is the most important thing. If you get good ratings about your food from customers, more people will probably take a visit soon.
However, the second most important aspect is the interior.
Nowadays, prospects tend to visit the websites of several restaurants before choosing to visit one.
There, they not only look at the menus but also look at the gallery of your restaurant photos to understand if it is a suitable place to visit.
A better way to catch their attention is by allowing them to take a virtual tour of your restaurant from home.
They will be able to see the seating arrangement, spaciousness, decoration, quality, and overall interior arrangement. This will inspire them to choose your restaurant over others.
Hier ist ein Beispiel:
Sagen wir, Sie sind ein Burgerladen. Eine Gruppe Jugendlicher ist bereit, in Ihrer Gegend Burger zu essen. Sie werden also die Websites mehrerer Burger-Buden in Ihrer Gegend besuchen, bevor sie sich für einen entscheiden.
Sie können sich durch einen virtuellen Rundgang davon abheben, indem Sie neben dem köstlichen Essen auch Ihre erstaunliche Innendekoration zeigen.
Through this remote tour, they might realize that the seating arrangements are comfortable and the decorations are great for taking selfies with friends.
Thus, they will end up visiting your place. Your next task is to impress them with the food.
For a fancy or theme-based restaurant, a virtual tour is more lucrative since you will be able to highlight your specialty to remote prospects on your website.
This will raise more awareness and influence more people to visit your restaurant.
4. Hochzeitsorte

Eine Hochzeit gehört zu den wichtigsten Meilensteinen, die ein Mensch im Leben erreicht. Und es ist ganz natürlich, dass sich jeder eine Hochzeitszeremonie wünscht wie kein anderer. Der Hochzeitsort spielt eine wichtige Rolle, um die Hochzeit zu einem unvergesslichen Ereignis zu machen.
Usually, fiances choose the wedding venue together. They tend to browse through the websites of several wedding venues and shortlist a few that they feel are perfect for their wedding.
A virtual tour can make your wedding venue the ideal one. Let the couple take a remote visit and experience how grand the venue is.
The venue entrance, the stage, the dining halls, the chandeliers, the photo session room, and all the specialties of your venue can be highlighted easily through a virtual tour.
Schicken Sie das Paar in eine Welt der Phantasie, damit sie ihren Gang durch den Veranstaltungsort und den Gang der Braut über den Teppich in Richtung des Pfarrers und ihres Verlobten spüren, die bereit sind zu heiraten; das Werfen des Blumenstraußes und die Trinksprüche von Freunden und Familie.
Diese kleine Reise innerhalb des Veranstaltungsortes wird ihnen helfen, ihre Zukunft zu planen und Ihren Veranstaltungsort als idealen Ort auszuwählen, der ihr Zusammensein in den kommenden Tagen prägen wird.
Eine virtuelle Tour auf Ihrer Website ist daher nur das Richtige.
5. Universitäten, Schulen und Hochschulen

Obwohl in vielen Universitäten, Schulen und Hochschulen neu eingeführt, haben viele von ihnen durch die Erstellung virtueller Rundgänge durch ihre Einrichtungen eine größere Reichweite für die Studenten erreicht.
Egal, ob Sie eine große oder eine kleine Einrichtung leiten, Studenten und ihre Eltern sind nach einer qualitativ hochwertigen Ausbildung eher um qualitativ hochwertige Wohnheime und attraktive Campusse besorgt.
While they visit your website to find out about the courses you offer, you can also present a virtual tour of your campus to give them a remote experience of being part of the institution.
Lassen Sie sie einen Spaziergang durch Ihre Fakultätsgebäude, Sporteinrichtungen, Wohnheime, Forschungslabors, Fitnesszentren usw. machen und verstehen Sie die Qualität, die Sie neben der Ausbildung bieten.
This is very important for international students. They will be moving to a new location, therefore, the quality environment and surroundings are among their main concerns and priorities.
Darüber hinaus wird der virtuelle Rundgang als Symbol der Glaubwürdigkeit fungieren und Ihre Fähigkeit unterstreichen, die Studierenden mit hoher Qualität in Ihren Räumlichkeiten unterzubringen.
6. Reise/Tourismusindustrie

Wenn Sie für Urlaubs- oder Reisepakete werben, dann hängen die Aussichten auf mehr Interessenten neben dem Preis auch sehr von den Orten ab, zu denen Sie sie bringen.
People are often reluctant to purchase travel packages since they have doubts about the quality of their journey. You can easily gain their trust by using a virtual tour.
You can include virtual tours for several iconic locations that your travel package will cover. You can also highlight great tourist resorts or historic places that your travel package will take travelers to.
Die Idee besteht darin, den Zuschauern durch einen virtuellen Rundgang einen Einblick in die attraktiven Zonen zu geben, die die Tour aus der Ferne einschließt. Lassen Sie sie die erstaunlichen Orte, die sie besuchen können, unter voller Kontrolle inspizieren.
Dies wird nicht nur für mehr Aufregung sorgen, sondern auch die Zuschauer in interessierte Perspektiven beeinflussen.
7. Fitnessstudio / Fitnesscenter

Die Menschen neigen dazu, ein Fitnessstudio oder Fitnesscenter aufgrund der verschiedenen Arten von Geräten und Fitnessgeräten zu wählen, die dort zur Verfügung stehen. Außerdem hängt es auch von der Qualität der Ausrüstung ab.
Sie können virtuelle Touren nutzen, um online Leute anzuziehen und Glaubwürdigkeit für Ihr Fitnesscenter zu gewinnen. Erstellen Sie einen hochwertigen virtuellen Rundgang, der jeden Abschnitt Ihres Zentrums abdeckt. Und lassen Sie in jedem Abschnitt Klickblasen neben den Maschinen stehen, die Informationen über das Maschinenmodell und die Qualität geben.
At the same time, create short videos of the fitness trainer of the center, training and demonstrating the use of every piece of fitness equipment.
Leave a hotspot on each piece of fitness equipment available within the virtual tour, to be clicked to watch the relevant video.
Dadurch werden nicht nur die Geräte hervorgehoben, sondern auch die Fachkenntnisse des Fitnesstrainers demonstriert, wodurch mehr Menschen für Ihr Fitnesscenter begeistert werden.
8. Einkaufszentrum

Einkaufen gehört zu den Lieblingsbeschäftigungen der meisten Frauen und einiger Männer. Es ist jedoch oft schwierig, die richtigen Geschäfte in einem idealen Einkaufszentrum zu finden.
Es gibt Tonnen von Geschäften, die verschiedene Produkte und Dienstleistungen verkaufen. Obwohl jedes Einkaufszentrum auf jeder Etage eine Anfahrtsskizze zur Verfügung stellt, wird es oft schwierig, jedes gewünschte Geschäft nur durch die Interpretation der Karte zu finden.
For a large mall, people often run around in circles while messing up the directions. This is frustrating to customers and often limits them to purchase items.
Whether you are part of the ownership of a shopping mall or a shop owner at a mall, you could guide more prospects in the right direction through a virtual tour on your site.
On the virtual tour, a person will be able to follow directions as if in person and eventually reach their desired shops.
Since it’s a realistic visualization, the directions will be much easier to remember. Then when the prospect visits the mall, it will not take long to find his/her desired shop.
Als Ladenbesitzer könnte dies Ihnen helfen, mehr Kunden zu gewinnen und nicht potenzielle Kunden an die Konkurrenz zu verlieren.
People with the internet on their phones can access your website while in the mall, hence they won’t need to use the flat map, rather they can get a realistic guide on their mobile.
As you can see, it is beneficial to add a showroom virtual tour on the website of either the shopping mall or any particular shop, to provide better navigation for prospects.
9. Museen

People often love to visit museums due to the incredible historical display of various tools, items and reminisces of the past.
But the problem is, due to visual entertainment available on mobile phones or computers, most people do not try to seek out how great a visit to a museum might be.
Die meisten Museen sind mit einem Rückgang der Besucherzahlen im Laufe der Zeit konfrontiert. Dies kann jedoch durch die Verwendung von virtuellen Touren geändert werden.
Create a virtual tour for a certain section of your museum. Let’s assume this section contains items from World War II. Within the virtual tour, you can place clickable information bubbles for people to get historical information about any particular item.
Dies wird bei den Website-Besuchern ein gutes Interesse wecken. Der Schlüssel ist es, die Neugier der Besucher zu wecken, damit sie das Gefühl haben, dass sie andere Bereiche Ihres Museums besuchen müssen, um mehr zu erfahren.
You can also offer a paid virtual tour for the rest of the sections. This will allow people overseas to take a tour of your museum remotely.
Sie werden einen Anstieg der Besucherzahlen feststellen und auch Menschen aus Übersee Ihr Museum schätzen lassen.
10. Kunstgalerie

Zeichnen Sie und tragen Sie zur Ausstellung von Kunstgalerien bei? Oder haben Sie eine eigene Kunstgalerie?
Dann wissen Sie wahrscheinlich, wie begeistert die Menschen von der Kunst sind, wenn sie eine Kunstgalerie besuchen. Darüber hinaus neigen einige Sammler dazu, Kunstwerke mit großem Wert zu besuchen und oft zu kaufen.
Wenn es um das Online-Geschäft geht, werden Kunstgalerien jedoch oft unterschätzt. Warum nicht? Die meisten Kunstgalerien machen nicht viel aus ihrer Website.
Let me tell you why. It’s because owners tend to flood their websites with individual pictures of their art. With so much art to look at, how long will a person browse through the collection?
Eventually, people only check the first few and then leave if nothing amazes them among the early collection.
But this means that they are avoiding pictures that are in a later queue. It is possible that one of those photos could have been the one to connect with them.
This can be drastically changed with an art gallery virtual tour. Create a virtual tour of your gallery and let art enthusiasts take a remote tour. This will be similar to a live visit, and viewers will be able to walk around the gallery while observing your artwork.
You can leave little click bubbles beside every piece of art so that viewers can click to view the piece of art as a pop-up image, or on a new tab.
Provide a unique ID for every piece of art so that prospects can order online or request a visit to view the piece of art.
That’s how effective a virtual tour can be. Go ahead and attract more prospects to buy your art online.
Bisher habe ich die Vorteile der Nutzung virtueller Touren in 10 verschiedenen Geschäftsnischen erläutert. Wenn Ihre Geschäftsnische nicht unter diesen 10 Unternehmen war, dann lassen Sie sich nicht enttäuschen.
Read the following article to learn about the benefits of virtual tours for all 32 niches mentioned in this article.
Schlussfolgerung
Virtual reality and virtual tours are now easier to understand. You can also see how they can help your business grow.
Creating a virtual tour in WordPress is simple to follow. You also learned how to capture 360° panoramic images with tools that work for you.
Many industries are using virtual tours to attract customers. This helps you picture how they can work for your own business too.
Building your own virtual tour is now completely doable. And if you want the simplest way, WPVR helps you create and publish tours on WordPress easily.
1. Why do my 360° images look blurry after uploading?
Blurry images usually happen because the original file is compressed during upload. Make sure you use high-resolution panoramic images and disable image compression in WordPress or your hosting panel.
2. How can I reduce loading time for my virtual tour?
Large 360° images slow down loading. Compress your images properly (without losing quality) and use lazy loading inside WPVR for smoother performance.
3. What if my virtual tour doesn’t display correctly on mobile?
Mobile issues often come from incorrect image ratios or outdated themes. Always use a responsive theme and test your tour in WPVR’s mobile preview before publishing.
4. How do I fix hotspots not showing in the right place?
Hotspot misalignment happens when the panorama was stitched incorrectly. Re-stitch the image or adjust hotspot positions inside WPVR’s editor to match the scene accurately.
5. Can I create a virtual tour without expensive equipment?
Yes. You can use affordable 360° cameras or even a mobile app and still create a clean, interactive tour using WPVR.
Virtual Reality has been used in different industries nowadays. As the power of technology arises, VR has become a trend in the Real Estate Industry, Gaming, Concerts, Hospitality and more! I won’t be surprised if it’s going to be used in the Educational Institutions in the future!
Ausgezeichnetes Teilen und sehr schön erklären - Wie man eine virtuelle Tour erstellt.
Weiter so!!
Danke. Ich bin froh, wenn dieser Artikel hilfreich war.
Sultan, thanks a lot for this guide it´s very helpful.
Thanks. I am glad you found it helpful.
awesome piece
Ich danke Ihnen!
Wow, thɑt’s ᴡhat Ӏ was searching for, wһat a stuff!
existing heгe at thіѕ web site, thanks admin of this web page.
Hi Janeen,
We’re glad that you found this guide helpful.
Dear Sultan, thanks so much for this guide, it was very helpful.
i need more about “virtual tour making” in term of museums>
thanks in advance
Hi, I am glad you found it useful. We will try to create sample Museum tours to let you view how it could be. Thanks.