Over the past couple of months, we have worked really hard and now, WP VR is on the next level.
You can now create virtual tours more easily, and get high conversions with all the new exciting features.
For example, you can now integrate forms on a virtual tour so that people can submit inquiry forms, or you can embed a virtual tour on another non-WordPress site.
Let us look at all the latest exciting features that you can use with the new WP VR.
What’s New With WP VR?
- A Brand new look
- WPVR Oxygen Builder Element
- Multisite Support
- Fluent Forms Integration
- WooCommerce Integration
- Embed A Virtual Tour On A Non-WordPress Site
1. A Brand New Look
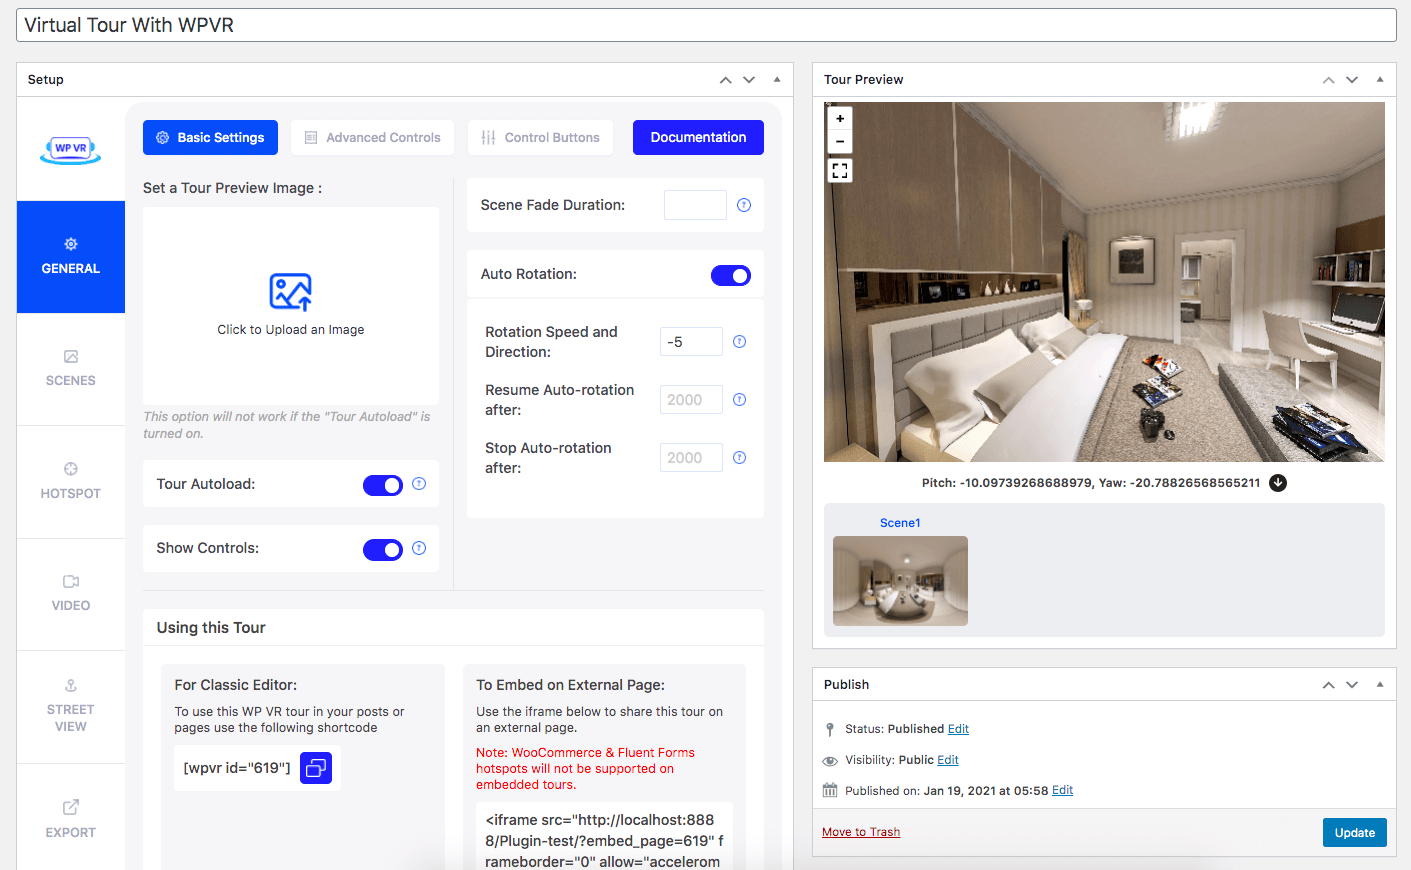
WPVR now has a brand new look on the interface that will let you create virtual tours more easily.
You will see that you can now take a preview tour on the right side while editing the tour on the left side.
Also, the General section is now segmented into 3 parts.
- Basic Settings
-This section simply includes the very basic features such as Auto Rotation, Preview image, scene fade duration, and show controls.

- Advanced Controls
-This tab includes advanced features such as keyboard and mouse usage limit, Gyroscope support, Scene gallery display, include background music, and adding a company logo.

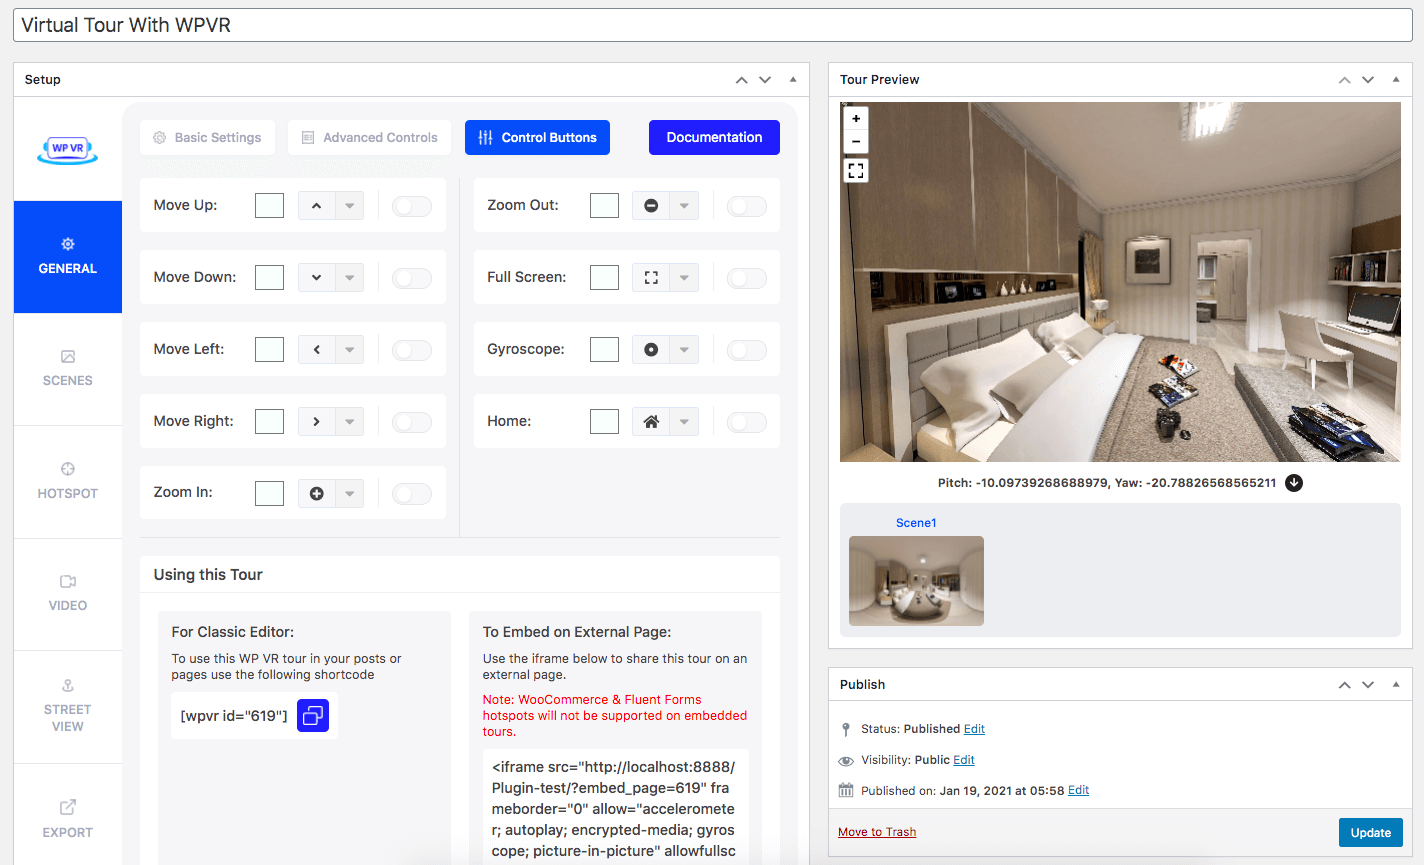
- Control Buttons
-Here, you will be able to enable custom icons for navigation and control buttons on the tour.

Plus, we have updated video tutorials to help you out all the way.
Watch tutorial videos here: WPVR Complete Video Tutorials
2. WPVR Oxygen Builder Element
Do you like the new emerging Oxygen builder?
Well, now you will find a dedicated WP VR Element for Oxygen builder to embed virtual tours on any pages or posts you edit using Oxygen builder.
It’s really simple.
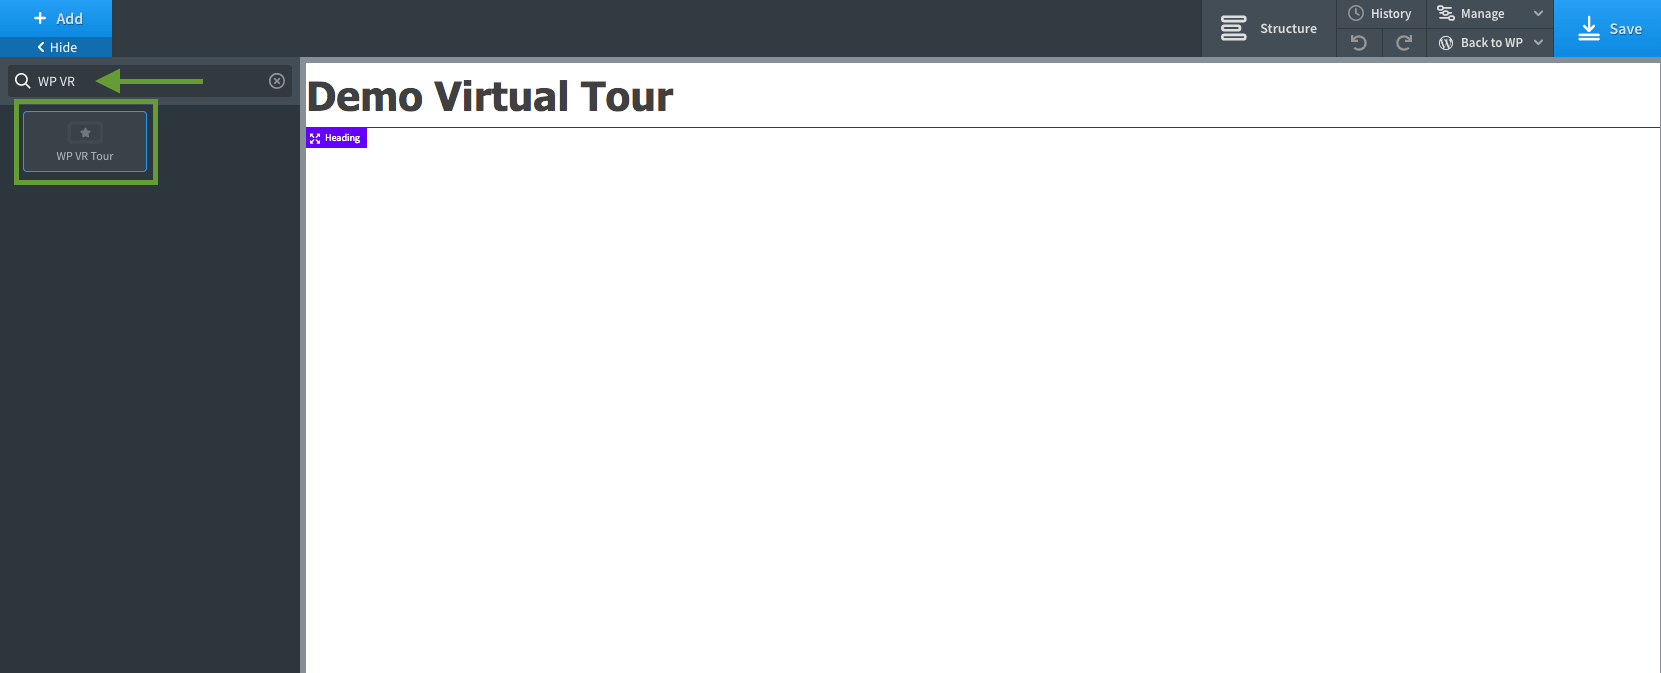
On the element area, search for WP VR, and you should find an element called WP VR Tour.
Simply choose the tour you want to embed, and assign your desired size. And that’s it. The tour will be embedded on that page/post.

Here’s a complete guide on how you can use this feature easily.
3. Multisite Support
WP VR now has full multisite support. This means, if you are the Network Admin of a multisite network, then you can now manage the plugin on your sub-domains or subdirectories from a single WordPress dashboard.
No need to install/activate WP VR on each sub-domains or subdirectories, individually anymore.
This is especially useful for certain site owners such as Realtors, who may have several sub-domains under the multisite paradigm.
So go ahead and manage WP VR on multisite with no barriers.
4. Fluent Forms Integration
You can now integrate forms, created using Fluent Forms, in your virtual tours.
This is a long-awaited feature that might just help you take your business to the next level.
For example, if you create a virtual tour for a car showroom, you can let people submit inquiry forms for each car.
It’s really simple.
i. Create a form using Fluent Forms
ii. While editing a virtual tour, create a hotspot at the point where you want people to click to submit a form.
iii. Choose the hotspot type as Fluent Forms.
iv. Then choose the form you created from a dropdown list in the hotspot settings.
v. Update and publish the tour on a page, and it’s ready to go.

Here’s a complete guide on how you can use this feature easily:
**This feature comes as an add-on if you purchase WPVR Pro.
5. WooCommerce Integration
If you have an online shop that you manage using, WooCommerce, then this is a big feature for you.
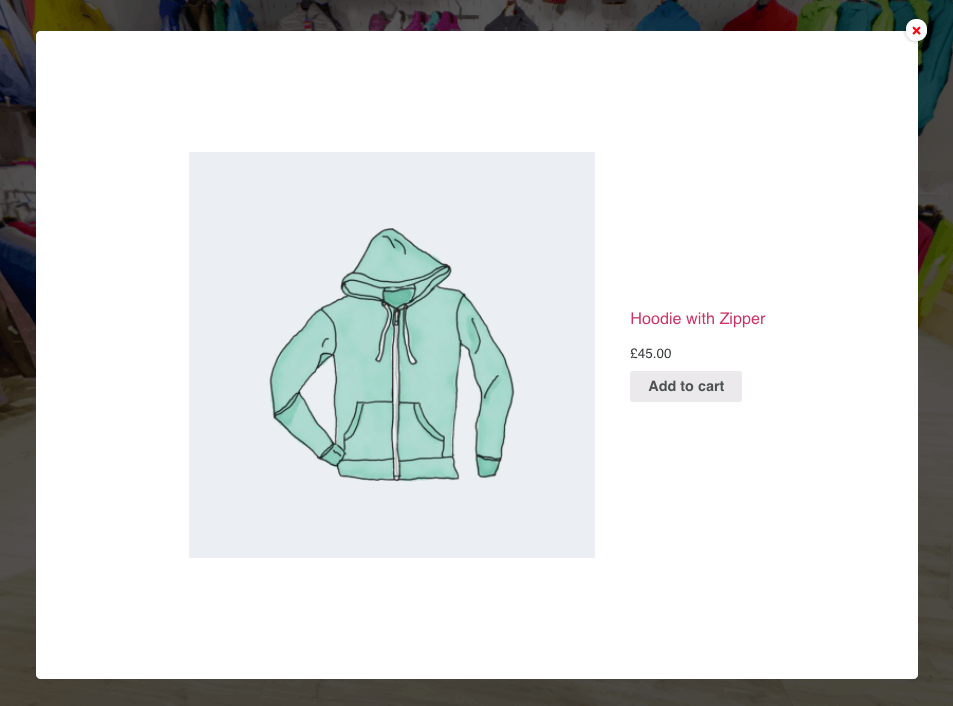
You can now allow visitors to Preview and add products to the cart, directly from within the virtual tour.
Let’s say you own a clothing shop and you have a virtual tour of it on your WooCommerce site. Then you can use product hotspots on the clothes on the tour so that people can click to preview the products and add them to the cart.

And this feature is also very easy to use.
i. While editing a virtual tour, create a hotspot on the product which you want people to be able to order.
ii. Choose the hotspot type as WooCommerce Product.
iii. Then on the respective field, start typing the name of the product, and you will get suggestions for the available products in your store.
iv. Choose the appropriate product.v. Update and publish the tour on a page, and it’s ready to go.
Here’s a complete guide on how you can use this feature easily.
**This feature comes as an add-on if you purchase WP VR Pro.
6. Embed A Virtual Tour On A Non-WordPress Site
You can now create a virtual tour on your site, and then embed it on another non-WordPress site!!
Suppose you have a second website for which you do not use WordPress.
However, you want to use the same virtual tours there, that you have created on your WordPress website. You can now easily do that.
Simply publish the tour, and you will get an embed link (with iframe tags), which you can use on any other websites to embed the virtual tour there. It’s as simple as that.
**This feature comes as an add-on if you purchase WPVR Pro – Unlimited lifetime license.
Upcoming Features
With all these features already out there, you would think where we go from here. Well, we have several upcoming features planned.
- Walking tour – you will move across the tour as if you were walking.
- Floor plan – you can add a tour map where people can click to visit a scene
- Cubemap virtual tour – a different form of a virtual tour that can be created with images that are not 360 panoramic images.
And many more are on the way.
Here’s our public roadmap for you to keep an eye on our development progress:
Final Thoughts
As you can see, the plugin is getting better and better, and with the current features, you will surely connect with the visitors and create more engagements.
So get WPVR Pro now enjoy all the features that can make your tour more attractive, and productive at the same time.
![What’s New With WP VR – Huge Updates [2020]](https://rextheme.com/wp-content/uploads/2020/08/Whats-New-WP-VR-huge-updates-2020.png)


