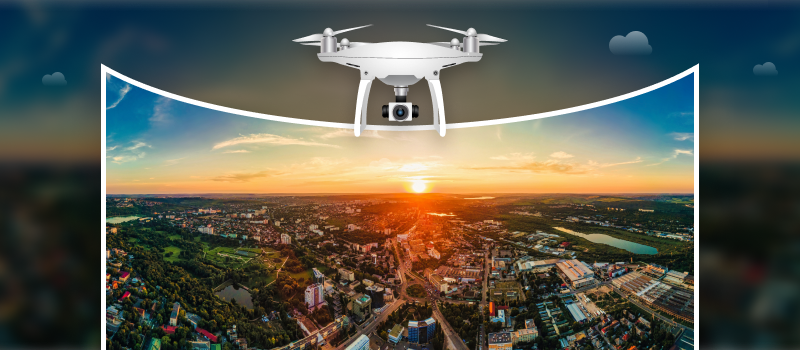
![How To Take A Panoramic Photo With Drones – Guide To Aerial Panorama [2026]](https://rextheme.com/wp-content/uploads/2024/06/Panoramic-Photo-with-Drone.webp)
360 panoramic images have changed how people see photography in several businesses. You can easily present properties or various locations in the form of 360 virtual tours thanks to panoramic images.
However, it’s 2024, and now you can take 360 photography to a whole new level. And it’s all thanks to the invention of drones!
That’s right! Drones have grown in popularity over the past few years, and now, you will find several drones that come with high-quality cameras that are perfect for capturing 360 panoramic photos from the air.
If you are part of businesses such as real estate, hotels, resorts, education institutes, etc., then you can get a huge advantage when using aerial photography.
For instance, homes with aerial panorama photos sell 68% faster.
Today, you’ll learn how to take a panoramic photo using a drone, easily capturing stunning wide-angle views.
Fangen wir also an.
How To Take A Panoramic Photo Using Drones
Drones give you an extra edge in 360 aerial photography because you will be able to capture a panoramic photo that’s more versatile and unique than ever, unlike a regular camera.
For instance, you will be able to take aerial shots and shots from a distance you could never take on your own using a regular 360 camera.
There are three main steps to capturing a 360 panoramic image during a drone shoot:
- Choosing a reliable drone with the right 360 camera and lens.
- Preparing to capture a 360 panoramic photo using your drone.
- Capturing an amazing 360 panorama using your drone.
Let us look at each of them one by one.
1. Choosing A Reliable Drone with The Right 360 Camera & Lens
Since this is about taking panoramic photos, the first thing you need to invest in is a drone suitable to take high-quality 360 panoramic images.
This means you will need to ensure the drone you choose has a proper fish-eye lens along with a stable, high-resolution camera.
Let us look at a couple of drones that you may consider buying for this.
i. DJI Phantom 4 Pro V2.0
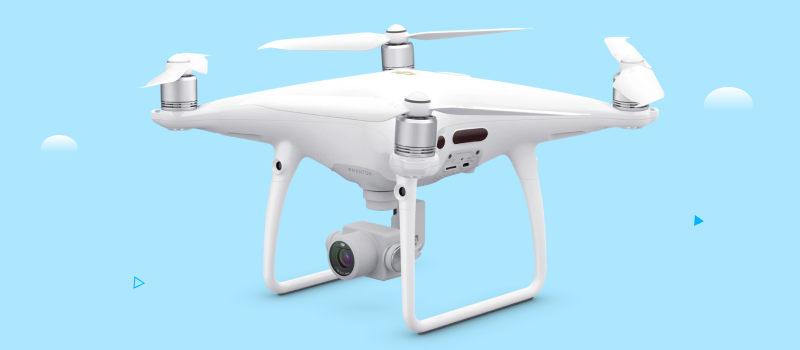
The DJI Phantom 4 Pro V2.0 is one of the best drones for capturing 360-degree panoramic photos.
It has a 20-megapixel camera with a 1-inch CMOS sensor and a mechanical shutter that can shoot 4K video at 60 frames per second.
It comes with a 3-axis gimbal that provides stability during flight and ensures smooth footage.
Specifications of DJI Phantom 4 Pro V2.0:
- Camera: 20-megapixel camera with a 1-inch CMOS sensor.
- Video resolution: 4K at 60 frames per second.
- Gimbal: 3-axis gimbal.
- Flight time: Up to 30 minutes.
- Max speed: 45 mph.
- Max range: 4.3 miles.
- Weight: 3.04 pounds.
Pros & Cons of DJI Phantom 4 Pro V2.0:
Pros:
- High-quality camera with a large sensor and mechanical shutter.
- The 3-axis gimbal provides stability during flight.
- Long flight time and range.
- Obstacle avoidance sensors for added safety.
- Advanced flight modes for easier panoramic photography.
Cons:
- It is expensive compared to other drones.
- The heavy and bulky design may not be as portable as other options.
- Limited battery life.
Industry Use Cases of DJI Phantom 4 Pro V2.0:
If you are a professional photographer or videographer and require high-quality panoramic images for commercial use, then The DJI Phantom 4 Pro V2.0 is an excellent choice.
For example, if you are a real estate agent, this will be a great drone for you to capture an aerial panoramic photo of your properties which you can include in your virtual tour to create a unique perspective.
ii. DJI Mavic Air 2
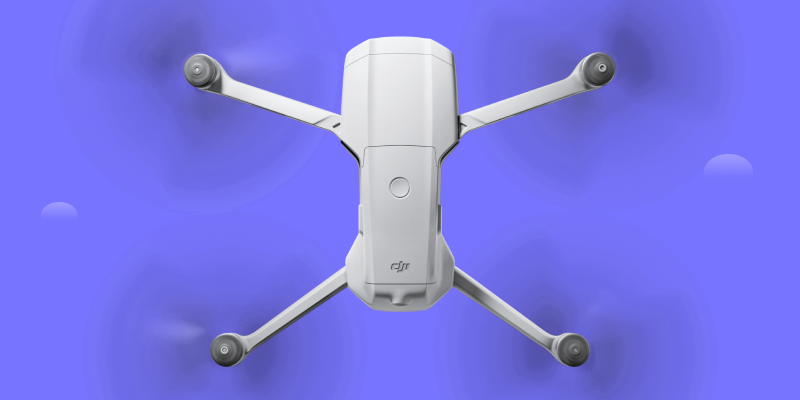
The DJI Mavic Air 2 is another great option for capturing 360-degree panoramic images.
It has a 48-megapixel camera with a 1/2-inch CMOS sensor and can shoot 4K video at 60 frames per second.
It also has a 3-axis gimbal for stability during flight and can fly for up to 34 minutes on a single charge.
Specifications of DJI Mavic Air 2:
- Camera: 48-megapixel camera with a 1/2-inch CMOS sensor.
- Video resolution: 4K at 60 frames per second.
- Gimbal: 3-axis gimbal.
- Flight time: Up to 34 minutes.
- Max speed: 42.5 mph.
- Max range: 6.2 miles.
- Weight: 1.25 pounds.
Pros & Cons of DJI Mavic Air 2:
Pros:
- High-quality camera with a large sensor.
- Lightweight and portable design.
- Long flight time and range.
- Advanced obstacle avoidance sensors for added safety.
- Intelligent flight modes for easier panoramic photography.
Cons:
- Gimbal may not be as stable as other options.
- Limited camera control compared to more advanced drones.
- No mechanical shutter.
Industry Use Cases of DJI Mavic Air 2:
If aerial photography is your hobby and you like to capture stunning 360 panoramic images for your personal collection, then The DJI Mavic Air 2 is an excellent option.
It’s easier to operate and has just the right features required for aerial photography.
It’s also a great option for travel bloggers and social media influencers who want to capture aerial panorama photos and videos on the go.
2. Preparing to Capture A 360 Panoramic Image Using Your Drone
Before you are able to capture a proper 360 panorama, you have to consider a few preparations.
i. Configure Your Drone for Panoramic Photography
The first thing to do is to ensure your drone is well-prepared for panoramic photography.
Make sure that the drone’s batteries are fully charged and the propellers are in good condition.
Additionally, you should ensure that the camera is correctly mounted on the drone and is set up for panoramic photography.
Set it up to capture images in RAW format, which will allow you to make adjustments to the exposure and color later during post-processing. Also, enable the manual mode for the camera for consistent exposure.
ii. Observe The Lighting Conditions & Weather Conditions
Lighting is a crucial aspect when capturing any photos. Hence, you need to keep an eye on the weather conditions and observe if the lighting is correct to be able to capture colorful, attractive panoramic images.
Most photographers prefer to conduct their photography session during the golden hour, which is the first hour after sunrise and the last hour before sunset when the light is soft and warm.
You should avoid your aerial photography session during windy conditions to avoid disruptions or at times when the sunlight is too bright to avoid unwanted flares.
iii. Identify A Spot with Fewer Obstructions to Fly Your Drone
You need to keep in mind that your drone will have a few automatic functions that will not allow you to move it to a place with obstructions.
Hence, you need to find a spot where you are sure you can fly and land your drone.
This is where you will navigate your drone to for landing once the photography session is done.
So this spot should be a place with no trees or wires within a 3-meter radius.
If you don’t want to be captured within the photo, then this spot should be a bit away from your main focus location.
iv. Use Flight Planning Software for Efficiency
You can use one of the two apps which is suitable for you:
1. Pix4Dcapture
Pix4Dcapture allows you to design precise flight paths, ensuring consistent and high-quality panoramic photos. It provides valuable data on altitude, speed, and direction, giving you greater control over your drone’s movements.
With Pix4Dcapture, you can automate your drone’s flight, making it easier to capture detailed and accurate panorama images for your virtual tours.
2. AirMap
AirMap provides real-time airspace information and tools to design precise flight paths, ensuring safe and effective panoramic photography. It offers insights into altitude, speed, and no-fly zones, giving you greater control over your drone’s movements.
With AirMap, you can plan your drone’s flight to capture stunning panorama images, making your virtual tours more engaging and professional.
These are flight planning software designed for drones and help you with valuable data such as altitude, drone spend, and direction so that you can have more control over your drone while capturing a photo.
3. Capturing An Amazing 360 Panorama with Your Drone
Now that you are ready to start your photo session let’s learn how you can proceed to capture the panoramic image.
i. Identifying the Sweet Spot for Capturing Your Panoramas
Next, it’s time to decide on a location where you want to fly your drone and capture the image.
To find the sweet spot, fly the drone above and around your desired location and find an angle where you find the scene that meets your photogenic requirements.
It’s best you can find a view where your main element gets the highest focus while still capturing a few surrounding elements to add some extra attraction.
Plus, the opposite direction should have something very interesting.
For example, if you are taking a 360 photo of your resort, then your resort should be the center of attention, while you can still have the mountains behind the resorts within the capture on a small scale.
And on the other side, there could be a view of the nearby beach.
Once you find such an angle, mark the spot.
ii. Capture your 360 photo
While the drone is on the spot, let it remain still for a few seconds for the camera focus to fully stabilize.
Once you are happy with the output, capture the image three times.
Check the images after capture and see if this is the view you were looking for.
The drone controller screen should let you get a 360 view of your panorama to understand if it meets your requirements.
If you are satisfied, then there you go. You have just captured 360 panoramas using the best drone for pictures.
iii. Take More Images From Other Angles
As satisfying as it may be, you shouldn’t stop. You should be determined to find the best possible view rather than settling for just one.
Move your drone around again to find more suitable angles and positions and capture a few more aerial panoramic images.
We recommend you capture at least 3 such panoramas before choosing to stop.
iv. Landing Your Drone
If you have flown the drone from a location with no obstacles, then most drones have a single-click option to return to the initial position and land.
But if you move around your drone in too many angles from there, there could be obstacles in the path of the drone from the initial flight position, and then you have to navigate it back to the landing place or to another suitable landing spot manually.
- Avoid trying to land the drone on your palm. Many find it daring, but it could be risky.
- If you notice it is windy at the moment around the landing area, then you should move away from that place before attempting to land the drone. You do not want the wind to cause an accident.
- Make sure there are no birds or other animals around the area where you are landing the drone.
v. Post-processing Your Images
Since you captured your images in RAW, you may edit them using Adobe Photoshop and adjust the color balance, brightness, and exposure before exporting them in a suitable image format.
You may then upload it to a VR tool to observe and decide if any more changes are required.
In case you captured this image to create a virtual tour that you want to embed on your WordPress site, then you may use the plugin WPVR. It is right now the no. 1 virtual tour software in WordPress.
You can simply upload your 360 panoramic images in just a few clicks and get a ready virtual tour in less than 5 minutes.
Advantages of Using Drones for Aerial Panorama Photography
You have just learned how you can capture a 360-panoramic photo using a drone.
But if you are still having doubts about why this is the best option, let us look at some of the core benefits you will get when using drones.
1. Access to Difficult Locations
You can use drones to capture images from high altitudes, over water bodies, or in areas that are difficult to reach.
With a drone, you can easily capture panoramic images of landscapes, cityscapes, or even inaccessible natural wonders like waterfalls or canyons.
2. High-Quality Images
Drones are equipped with high-quality cameras that can capture high-resolution images.
On top of that, drones with advanced features like 3-axis gimbals and mechanical shutters can ensure that images are stable and free from blur.
3. Time-Saving
Capturing panoramic images manually is a time-consuming process, involving multiple shots taken at different angles and then stitched together in post-processing.
With the best drone for pictures, you can capture panoramic images quickly and efficiently, saving time and effort.
Drones can capture multiple images at different angles in a single flight, making the process of capturing panoramic images faster and more convenient.
4. Unique Perspective
Drones can provide a unique perspective that is not possible with traditional photography techniques.
You can capture panoramic images from high altitudes, providing a bird’s eye view of the environment.
This perspective can provide viewers with a unique and breathtaking view of landscapes and cityscapes.
5. Cost-Effective
Drones are a cost-effective option compared to traditional photography methods.
They can capture high-quality images at a fraction of the cost of traditional aerial photography methods like helicopters or planes.
Top 3 Tools to Create a Virtual Tour with Drone Panoramic Photos
Creating a stunning virtual tour with drone panorama photos requires the right tools. Here are the top three tools that will help you maximize the potential of your panoramic shots:
1. WPVR

WPVR is one of the best tools to create a virtual tour with drone panoramic photos. This WordPress plugin allows you to effortlessly transform your drone panorama shots into immersive virtual tours.
You can also upload high-resolution panoramic images, customize navigation hotspots, and add interactive elements to enhance the viewer experience.
Its user-friendly interface ensures that even beginners can create professional-quality virtual tours quickly. Ideal for real estate, tourism, and other industries, WPVR helps you engagingly showcase properties and locations.
By leveraging the ability of drone panoramic photography, WPVR makes it easy to captivate your audience with stunning virtual tours.
Preisgestaltung:
- Free Plan: free in WordPress Repository.
- Starter Annual Plan: $79.99 per annual for 1 site.
- Pro Annual Plan: $169.99 per annual for 10 sites.
- Agency Annual Plan: $269.99 per annual for unlimited sites.

2. Koala

Koala is a cutting-edge virtual tour software that allows you to create stunning VR experiences using drone-captured footage. You can easily transform aerial photos and videos into immersive virtual tours, providing viewers with a unique and engaging perspective.
This software supports high-resolution imagery and offers intuitive tools for stitching, editing, and customizing your tours. Ideal for real estate, tourism, and event planning, It enhances the presentation of properties and locations, making them more appealing to potential clients.
Its user-friendly interface ensures that even beginners can create professional-quality VR tours, maximizing the impact of your drone photography effortlessly.
Preisgestaltung:
- Basic Annual Plan: free with limited functionality.
- Pro Annual Plan: $65 per annual for 3 tours.
- Unlimited Annual Plan: $450 per annual for unlimited tours.

3. My360tours

My360tours is a top tool for creating virtual tours with drone panoramic photos. This platform allows you to turn your high-resolution panoramic images into immersive virtual experiences with ease.
It offers intuitive features for uploading, editing, and customizing your drone panorama shots, making the process straightforward even for beginners.
You can add interactive elements such as hotspots, info points, and navigation tools to enhance viewer engagement. Perfect for real estate, hospitality, and tourism industries, My360tours helps you showcase properties and locations in a captivating way.
By utilizing the capability of drone panoramic photography, My360tours enables you to create professional and engaging virtual tours that leave a lasting impression.
Preisgestaltung:
- Real Estate Annual Plan: $37 per month (billed annually)
- Dealership Annual Plan: $37 per month (billed annually)
- Architect Annual Plan: $37 per month (billed annually)
- Photographer Annual Plan: $49 per month (billed annually)

Conclusion
To summarize, capturing 360 panoramic photos using drones is a revolutionary approach that can significantly enhance your photography capabilities.
Drones offer unique perspectives, high-quality images, and access to challenging locations, making them an ideal choice for real estate, hospitality, and education businesses.
They save you time and effort, provide breathtaking views, and are a cost-effective alternative to traditional methods. By following the steps outlined in this guide, you can master aerial panoramic photography and elevate your visual content.
Once you’ve captured these stunning images, you can easily create a virtual tour using the WPVR plugin. WPVR simplifies the process, allowing you to upload and integrate your 360 panoramic images into a virtual tour on your WordPress site in just a few clicks.
** FAQs **
1. What kind of weather conditions should you avoid when flying your drone?
- When flying your drone, avoid strong winds, heavy rain, and extreme temperatures. These conditions can interfere with the drone’s stability and performance, potentially causing crashes or damage. Instead, opt for calm, clear days with moderate temperatures to ensure the best flying and photography experience.
2. How can you ensure your drone’s battery lasts longer during a photo session?
- To ensure your drone’s battery lasts longer, fully charge it before your session and bring spare batteries. Avoid aggressive tricks and high-speed flights, as these can drain the battery quickly. Additionally, monitor your battery level regularly and plan your flight path to make efficient use of power. It ensures you have enough battery to safely return and land.
3. What should you do if your drone loses signal while capturing photos?
- If your drone loses signal, stay calm. Most modern drones have a “Return to Home” feature that automatically brings the drone back to its takeoff point. Ensure this feature is enabled before flying. If the drone doesn’t return automatically, try moving to a higher or clearer location to re-establish the connection.
4. How can you enhance the quality of your drone photos in post-processing?
- Enhance your drone photos by using editing software like Adobe Photoshop or Lightroom. Adjust the exposure, contrast, and saturation to make the images pop. Also, fix any distortions or stitching errors in panoramic shots. Shooting in RAW format gives you more flexibility in post-processing. It allows for better adjustments and higher-quality final images.
5. What precautions should you take when flying your drone in populated areas?
- When flying in populated areas, always follow local regulations and avoid restricted zones. Maintain a safe distance from people, buildings, and vehicles to prevent accidents. Fly at a lower altitude to minimize risks, and always keep your drone within your line of sight. Additionally, inform any nearby individuals of your drone activity to ensure their awareness and cooperation.