![How To Make A Virtual Tour With iPhone Panorama – Simple Guide [2026]](https://rextheme.com/wp-content/uploads/2021/05/How-To-Make-A-Virtual-Tour-With-iPhone-WPVR.jpeg)
A virtual tour is one of the most effective technologies that can bring you the attention of your viewers.
If you have a virtual tour for your business, then you can surely get an edge over your competitors and attract more prospects.
Now, you might think that creating a virtual tour costs a fortune since nowadays professional 360 photography may cost up to $1000.
What if I tell you that if you own an iPhone, then you can capture high-quality panoramic images and create a virtual tour by spending less than $120?
In fact, it’s possible to capture an iPhone panorama image, on your own, and turn it into a virtual tour without any professional help at all.
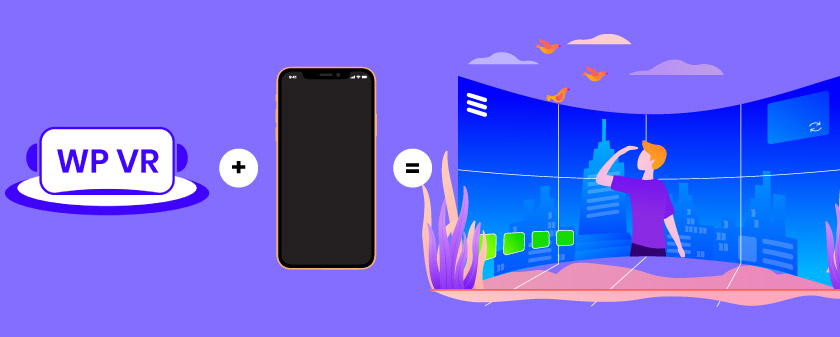
All you will need is your iPhone, an app to capture Panoramic images, a monopod if possible, and a simple virtual tour creator, WPVR.
Today, you will get a step-by-step guide so that you can learn how to make a virtual tour with iPhone panorama and WPVR easily.
After you read this article, you will learn:
- How to take a panorama on iPhone.
- The best iOS apps you can use for panorama or 360 photography.
- How to use a reliable plugin to create a virtual tour.
- Start getting more prospects using that virtual tour.
Fangen wir an.
How To Make A Virtual Tour With iPhone Panorama And WPVR
According to recent studies, websites with virtual tours get 87% more visits and 5-10 times longer stays.
Whether you sell properties, own a hotel or restaurant, or simply have a corporate business, having a quality virtual tour will help you to attract more relevant visitors to your site, make your prospects stay longer on your website, and create instant interest in prospects to make a decision.
So, it’s highly convenient for you to be able to create a virtual tour without any complications and within the budget.
Let’s look at the steps on how to make a virtual tour with iPhone.
When creating a virtual tour, you will go through 3 quick processes:
- Capture Panoramic Images Using An iPhone Panorama App.
- Turn Those Panoramic Photos Into Virtual Tours Easily Using WPVR.
- Use This Virtual Tour On Your Site And Attract More Prospects.
Follow the quick steps below to carry out these processes easily.
1. Take Panorama On iPhone – Using An App
To capture a panoramic image with your iPhone, you need to use a VR app that is dedicated to capturing panoramas.
This app will assist you to capture a wide-angle panoramic image of your surroundings, which is difficult to do on your own.
You may try out the following two iPhone panorama apps in the Apple Store:
- DMD Panorama
- Virtual Tours & Panoramas: P360
Both of them are suitable iPhone panorama apps with useful features and have a user-friendly interface. But we recommend DMD Panorama app as it’s easier to use. Additionally, for those concerned with online privacy while uploading and sharing your virtual tours, using a service to hide IP can provide an extra layer of security, ensuring that your internet activity remains confidential.
- You can get the DMD Panorama app here.
Once you get the app, follow the steps below.
5 Steps To Capture A Panoramic Image Using DMD Panorama App
Step 1 – Open The DMD Panorama App In Your iPhone
In the app, you will get the option to capture a panorama.
Step 2 – Hold The iPhone at Your Preferred Height
You may either hold the iPhone with your hands or use a monopod (which would be ideal).
Step 3 – Ensure The Proper Angle to Capture The Panoramic Image
Point the phone camera at the rightmost angle of the view where you wish to capture the panoramic image.
Step 4 – Start Capturing Your Panoramic Image
On your app, you will find two markers. Match the markers and capture, and one section is captured. You’ll then get a new pair of markers to the left. Rotate the phone to the left to match these two markers and capture them again. Continue the same process.
Keep the phone steady and do not tilt the phone too much when doing this.
Step 5 – Continue Till Your Panorama Is Captured
Follow this process until all angles have been captured and the app starts processing the panoramic image.
And that’s it. Your panoramic image will be generated.
FYI – The panoramic image you capture using your iPhone panorama app is often referred to as a partial panorama. That’s because it is rather a 180-degree panorama.
But no worries – I will show you how you can use this image to create an engaging virtual tour.
Here’s a video to show the app in action:
As you can see, it’s really simple and if done right, your panoramic image will be as good as a professionally captured panorama photo.
Now that you have captured the required panoramic image, it’s time to create a virtual tour.
2. Turn Your Panorama Into A Virtual Tour Easily Using WPVR
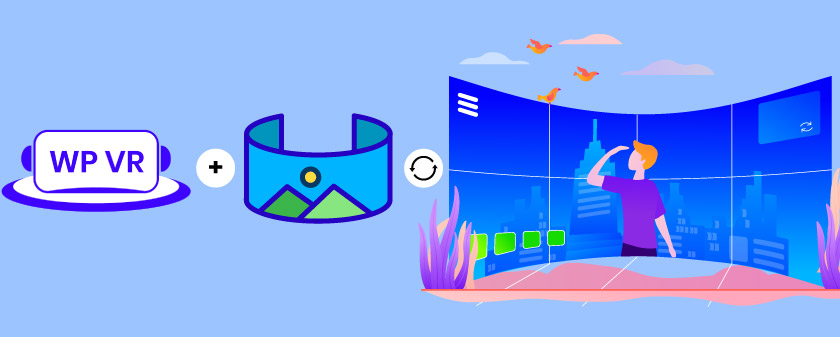
Once you have captured the panoramic images, the next step is to use a reliable virtual tour builder to convert this panoramic image into a virtual tour.
If you run a WordPress site, then you can easily do it using the plugin, WPVR – Virtual Tour Builder for WordPress.
WPVR is currently the most popular and stable plugin for creating virtual tours on WordPress websites.
In the next few steps, you will get a guide to turning your panoramic image into a fully-functional virtual tour.
5 Steps To Convert A Partial Panorama Into A Virtual Tour
The first thing to do is to install and activate the plugin, WPVR on your WordPress site.
Once you have WPVR on your site, follow the steps below to turn your panoramic image into a virtual tour.
Step 1 – Create A New Tour
Go to your WordPress Dashboard > WP VR and click on Add New Tour. It will take you to the tour creation page.

Step 2 – Upload And Preview Your Panoramic Image To The Plugin
i. First give a title to the tour.
ii. Then go to the Scenes tab.
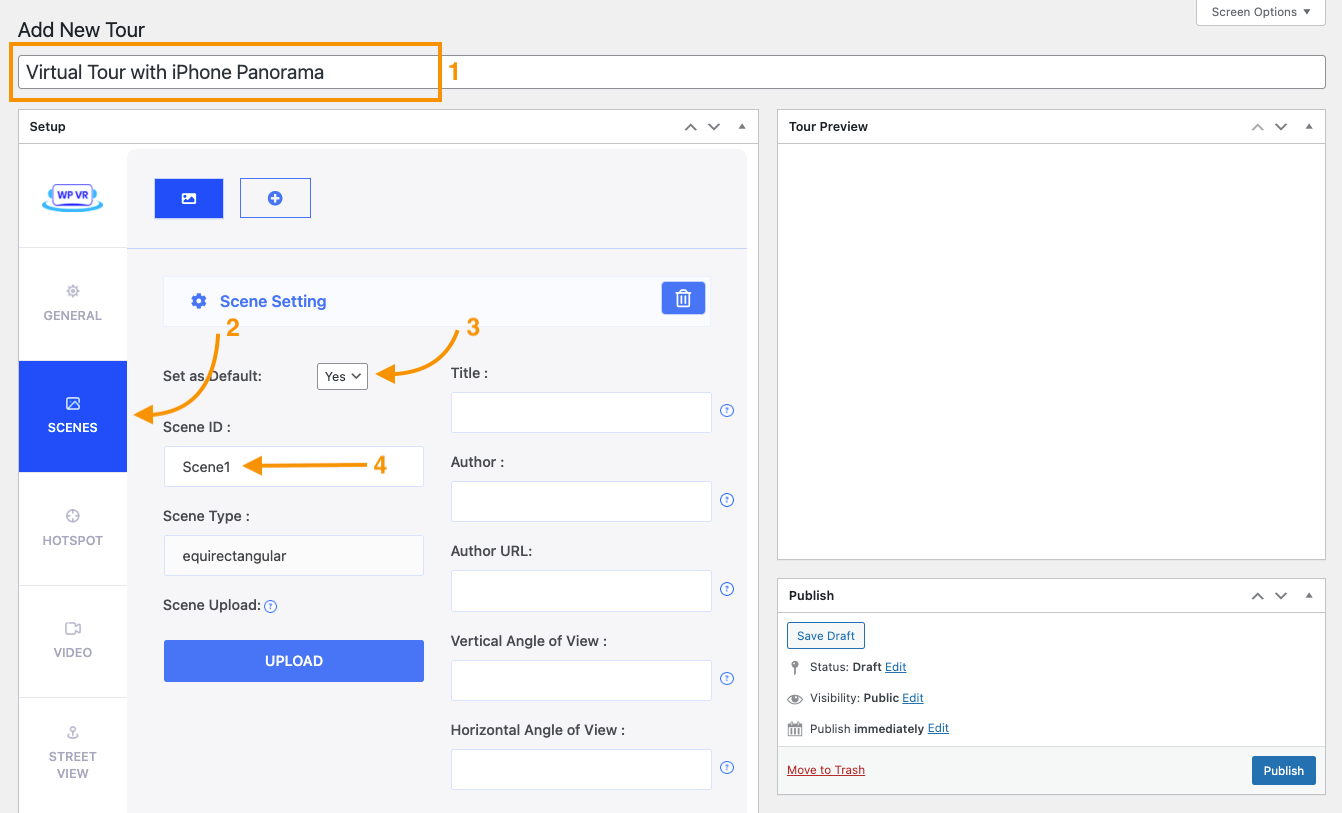
iii. Set this scene as the Default scene.
iv. Assign a unique Scene ID.
v. Click on the blue Upload button and upload the panoramic image you had captured with your iPhone.
vi. Now scroll down to the bottom and click on the Preview button.
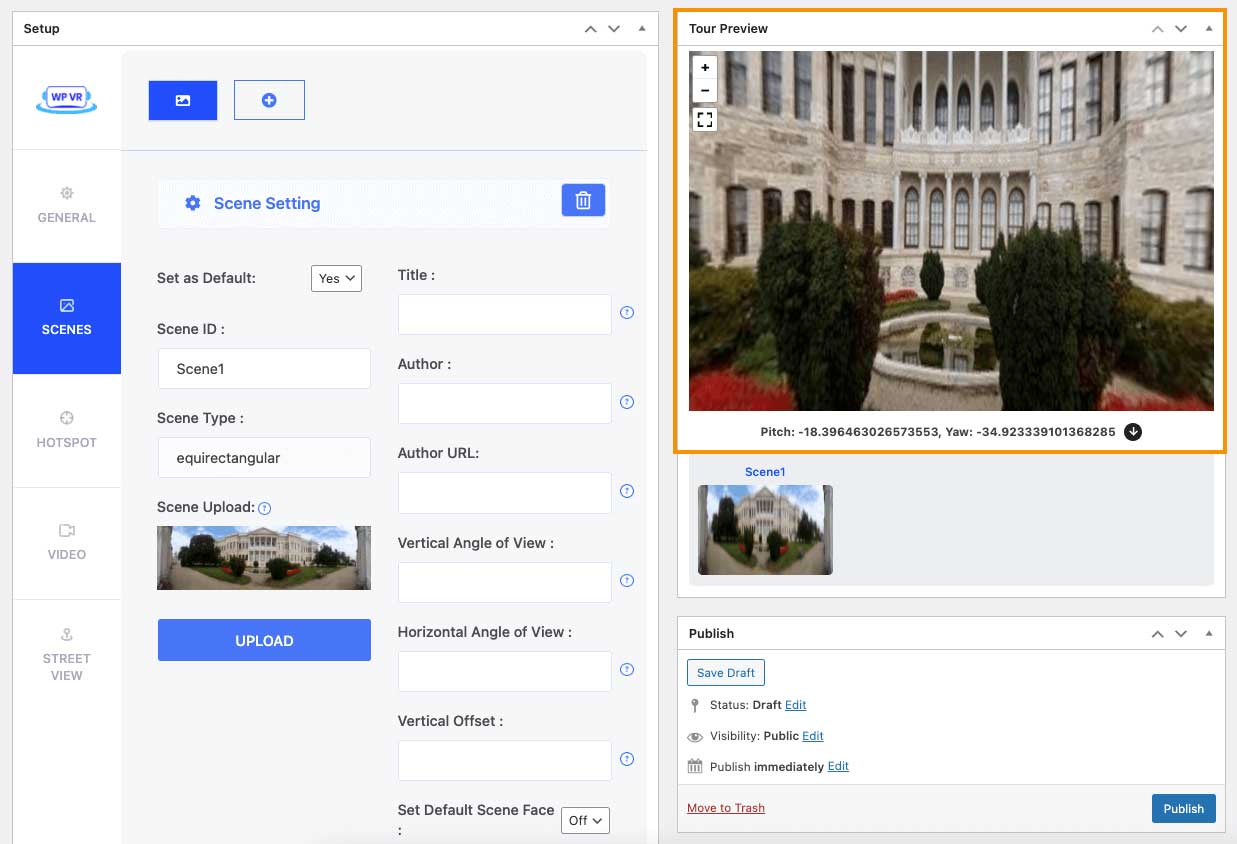
A preview of your scene will appear on the Tour Preview section on the right side.
Step 3 – Optimize The Tour For Partial Panorama
Once you preview the tour, you’ll notice that the virtual tour is not proper; the image is overly stretched out than what is expected.
This is because a partial panorama does not cover a full 360 view. You need to make some small adjustments to make it proper. Let me show you how.
i. Use the following settings in the plugin:
- In the Vertical Angle of View field, set the value as 100.
- In the Horizontal Angle of View field, set the value as 300 degrees.
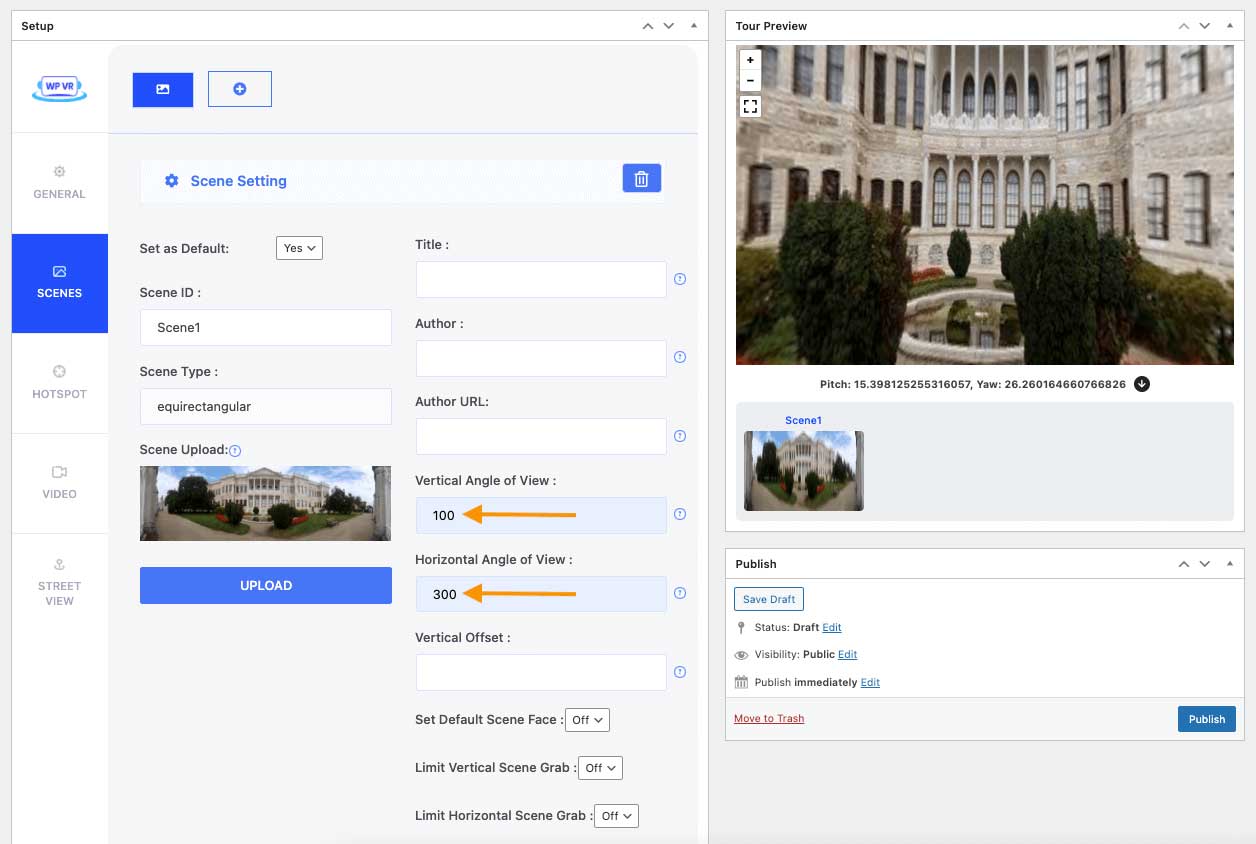
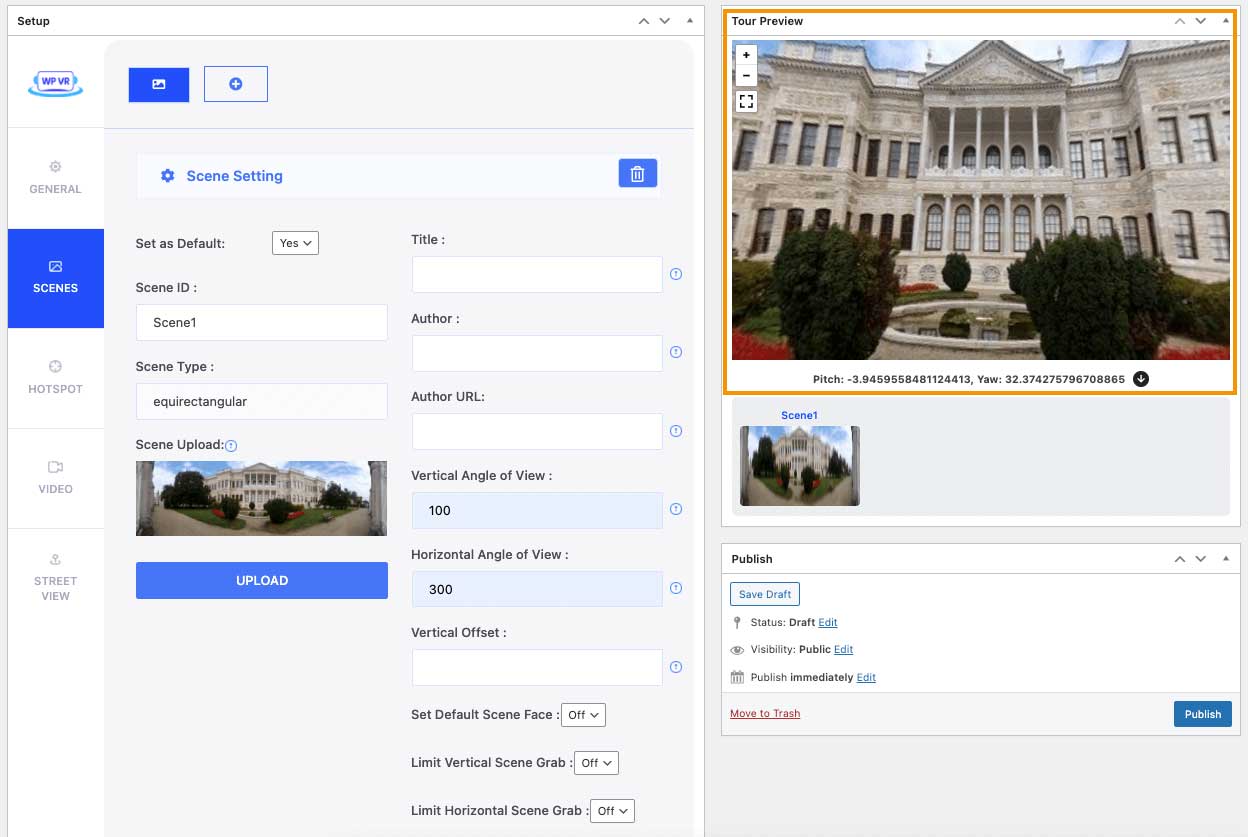
ii. Now, scroll down and click on the Preview button.
**The values of Horizontal & Vertical Angle of Views will be different depending on the dimensions of each individual panoramic image. So sometimes you have to play around with the numbers and preview a few times until you find the right angle.
However, when you move around in the virtual tour, you’ll find that there are now some blank spaces in the tour view as shown in the image below.
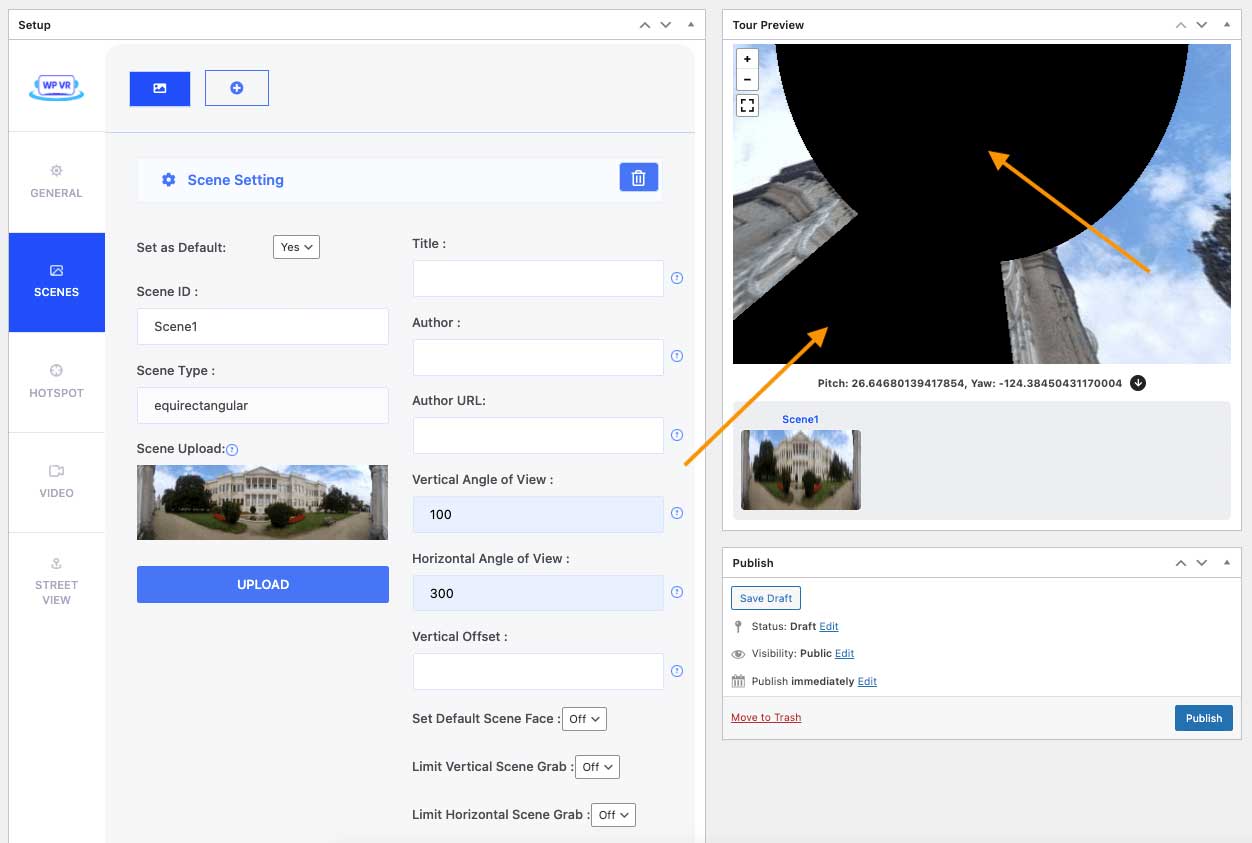
These are there because of the custom angle of views we’ve applied. Let’s fix them.
We will apply the following advanced settings to this scene in the next few steps:
- Limit Vertical Scene Grab.
- Limit Horizontal Scene Grab.
- Customize Scene Zoom.

Sep 4 – Set A Vertical Grab Limitation To The Tour
i. Scroll down and turn on the Limit Vertical Scene Grab option.
ii. You’ll find 2 new fields, Max Pitch and Min Pitch. These 2 fields will help you to restrict the view of the dark sections of the virtual tour vertically.
iii. Since the Vertical Angle of view is set to 100 degrees, the ideal value of the Max Pitch would be 50 and the ideal value of the Min Pitch would be -50.

Sep 5 – Use A Horizontal Grab Limitation To The Tour
i. Turn on the Limit Horizontal Scene Grab option.
ii. You’ll find 2 new options, Max Yaw and Min Yaw. These 2 fields will help you to restrict the view of the dark sections of the virtual tour horizontally.
iii. Since the Horizontal Angle of view is 300 degrees, the ideal value of the Max Yaw would be 150 and the ideal value of the Min Yaw would be -50.

iv. Click on Preview and check out the output. You will see that the black spaces are no longer accessible.
That’s it. You have created a virtual tour using the panoramic image that you captured using your iPhone. You can then Publish the tour and use it on your website.
You may also add more scenes to the tour if you have captured multiple panoramas, and connect them via hotspots to make the virtual tour more realistic and engaging.
Now, before I show you how you can publish the tour on your site, I would like to give you a few tips to customize this virtual tour and make it even better for greater results.
Tips To Customize Your Virtual Tour Into An Attractive Experience
Let’s look at how you can use different features of WPVR to make it more interactive.
i. Add A Scene Gallery
If you’ve created the tour using multiple images, you can activate a scene gallery on your tour.
This will allow a visitor to get a quick glance at the available scenes in the virtual tour, and visit any desired scenes by double-clicking on the image from the gallery.
- Learn more about using WPVR Scene Gallery here.
This is a great way to allow visitors to explore the tour with more interest.
ii. Use Interactive Hotspots Buttons
The plugin’s hotspot feature is one of the most useful mediums to get visitors more interested.
Among several uses, one of its uses is to view content inside the tours in an engaging way. You can allow a visitor to view content
- By hovering on the hotspot icon or,
- By clicking on the hotspot icon.
The content section is HTML compatible and you can design and view content such as:
- Texts
- Bilder
- Buttons
- YouTube videos
- Vimeo videos
- Self-hosted videos
- GIFs
- Download buttons
- URLs
Here’s a glimpse of how it works.
Follow this guide to set interactive content on hotspots.
Also, you can use any 360 video editing software for this as well.
You can try all-purpose video editing software too.
iii. Set A Background Audio
To give your viewers a more realistic experience and keep them entertained, you can add relevant background audio to your virtual tour.
You can choose to set the audio to:
- Play automatically after any interaction.
- Play in Loop.
Here is a guide on how you can set background audio for your virtual tour.
iv. Turn On The Gyroscope
A huge number of viewers will be visiting your virtual tour from their mobile devices.
Allow them to have a realistic experience and take advantage of using the mobile device by enabling the Gyroscope feature.
Then your viewers can move the mobile device and the tour will respond to the movements. They can also turn on or off the Gyroscope support.
Follow this guide to enable the Gyroscope feature.
v. Show Company Logo and Description:
Since virtual tours are interesting content and viewers tend to spend more time viewing them.
You can take advantage of it by always showing your Company logo design inside the tour.
Here is how you can set your company logo and description.
There are many more ways you can customize your tour and add more functionalities. Learn more about them here.
3. Publish The Virtual Tour on Your Website
After successfully creating the tour and applying all your desired customization, you’re ready to publish the tour on your WordPress website.
Simply follow the steps in this guide to embed a virtual tour using the WPVR Gutenberg block.
Or watch the video below:
You may also embed the virtual tour on your site in other ways if you do not want to use Gutenberg:
- Guide on how to use shortcode for publishing virtual tours.
- Learn to use WPVR Visual Composer Element to embed the tour.
- How to use the WPVR Oxygen Element.
Whichever builder you use, it’s really simple to embed the virtual tour on your site real quickly.
That’s it. Now you can share your webpage with your audience and hopefully, you will get more engagements, thanks to your virtual tour.
Since your goal of using a virtual tour is to increase conversion by creating more engagement with your viewers, make sure to set some interactive content inside your virtual tours.
Summarizing
Now you know, how to make a virtual tour with iPhone Panorama and WPVR. And the best part of it is that it will not cost you a fortune, while still giving you the opportunity to increase your revenue.
Now that you know the easiest way to create a virtual tour, go ahead, and start using virtual tours to grow your business.
- Get DMD Panorama app to capture a panoramic image.
- Get WPVR (it has a free version) to convert the image into a virtual tour
- Use your virtual tour to attract more prospects.
Start growing your business with virtual tours without any exclusive or expensive professional help.


Did I understand that correctly: it is not a true 360° panorama, but only covers an area of about 180°? So I can only look “forward”?
Hi Ralph,
You are correct, it won’t be a true 360-degree panorama, it will be a partial panorama.
You can still create a virtual tour with it.
Here you can see an example: /docs/wp-vr/demo-tours/partial-panorama-virtual-tour/
The image can cover 180 degrees or even 360 degrees horizontally if taken correctly.
It can even cover a 100-degree horizontal area, depending on how the image was captured.
The thing is, it’s not always possible to cover a full 180-degree view vertically.
So, the panoramas taken with phones are not usually full 360-degree panorama.
Let us know if you have any questions about it.
Can I attach the fisheye lens to the phone, so that I can achieve 180 degrees vertically?
Hi Teerapat,
Yes, you can do that. Our plugin will support these panoramic images.
Just make sure that the image file types stay as JPG, JPEG, or PNG.
Herzliche Grüße,