Social Media Marketing Strategy
Revive Old Post To Increase Blog Traffic
If you already have a blog site for a while, then you probably have a lot of articles posted. Think about the amount of money and resources you have spent on so many good contents in the past that are now lost in your website’s archives.
New visitors to your website hardly ever go to very old posts. You might have posted amazing guides, infographics, or knowledgeable articles on topics that are still valuable.
But they are probably getting forgotten since you didn’t update them, or just because you have so much more content posted afterward.
Here’s the thing. Your old posts can still be refined and valuable. You may start re-sharing your old posts via social media and get an amazing response.
To do this you need to
- Identify Potential Old Blog Posts
- Re-work On The Selected Potential Blogs
- Start Re-Sharing Your Content For Traffic
Now let us learn how to do all these in the best way possible, step-by-step.
Identify Potential Old Blog Posts

Follow the steps below to identify the most potential old blogs.
Step1 – Find Old Posts With Good Keywords
- Check back through your archives and round up all of your old blog posts (that are no longer getting traffic).
- Separate the ones that are evergreen, i.e., knowledgeable for everyone. For example, listicles of a few best plugins, or guide to content marketing, and similar posts.
- You can use special tools to detect any old posts on your blog. For example, one such tool is Website SEO Checker by Sitechecker.
- Now, list their keywords on a document and use an SEO tool to find out which keywords among them are currently ranking high on SERPs. (This is because, you will be reviving them not just for Social Media, but also for normal SERPs.) You may use good tools such as Ahref or SEM Rush.
- Rearrange the blog topics and URLs on a document, based on the highest performing keyword to the lowest reasonably performing keyword.
**Not all of your old posts had good keywords, and some of the keywords used back then are no longer usable.
You can immediately consider the top ten blogs with good keywords for reviving.
Step 2 – Separate Old Posts Based On Collaboration Opportunity
Once you separate the blogs that are in the top ten in terms of keyword popularity, the next is to identify potential blogs based on collaboration opportunities from the remaining blogs.
From these blogs, you will separate the ones where you have some opportunity to collaborate for better results.
By collaboration opportunity, I mean getting backlinks.
Let me explain.
Let’s say you have written a blog on “10 Best WooCommerce plugins in WordPress”. You can surely update it with the latest best plugins to start getting traction again.
However, you can do something even better.
You can reach out to some of the latest good WooCommerce plugins, and offer them a collaboration.
You can offer a company to include their plugin(s) on this list with a “do follow” link to their product page, while they will also give you a “do follow” link to your product(s) on one of their articles.
“The best way to build up the online visibility of your business or website is by building relationships with your industry peers. Links will naturally occur as a result of these partnerships.”
Donald Chan, founder of MarTech Wise

Now, many will say “backlink exchange” can be penalized by Google. But not if you do it smartly, especially when these premium links offer a solid ROI, enhancing your site’s value without direct link exchanges. Remember, quality always prevails over quantity in such strategies.
You will be penalized if they give a backlink to the same article of yours, on which you gave a backlink to them, i.e., a direct link exchange.
Let me explain with an example.
Suppose you have a post, Article 1. And another site has a post, Article 2.
Now, let’s say you gave them a backlink for their post, Article 2, on your post, Article 1. And they in return gave you a backlink for your post, Article 1, on their post, Article 2.
This is a direct backlink exchange and will, most likely, be penalized by Google.
However, if it’s not a direct exchange, there is no penalty for it.
Let’s say you have a post, Listicle 1, and a product page, Product 1. And another site has a post, Listicle 2, and a product page, Product 2.
So you can include their page, Product 2, on your post, Listicle 1. And in return, they can include your page, Product 1, on their post, Listicle 2.
Here, there is no direct exchange of links, and is a good collaboration.
So go ahead and separate the blogs with a potential collaboration opportunity.
**Even if you do not do a direct link exchange, frequent exchange of links with the same site is also seen as direct promotion and disliked by Google. So try not to exchange more than 2 links with the same site in a month.
**Also many do collaborations with affiliate links. Keep in mind, Google can trace affiliate links and often penalizes sites with too many affiliate links in them. So do not create any posts with too many affiliate links in them.
Step 3 – Find Old Blog Posts Based On Potential Main Content
Now, for the remaining blogs, you need to identify potential blogs based on lucrative content.
- Open each blog and give a quick read.
- Find out if there is more opportunity with this article by improving keywords and content.
First, check if it is possible to re-write it for a similar keyword that performs above average. In this case, you can be creative and think of a couple of relevant keywords yourself and then check if they rank higher on SERPs, compared to their current keyword.
You can also directly get suggestions from SEO tools. For example, Ahref gives you more keyword ideas that are ranking high for any keyword term you analyze. So you may choose one from there if it sounds relevant to your content. - It’s also best to choose articles among these that will need the least amount of research when re-writing, i.e., you can write about it on your own, without much help from other similar contents or SERP research.
From here, choose around 5 articles that seem potential to rewrite into good content.
So now, you will have around 15 to 20 blogs on your hand that you can work on to revive.
**I am assuming you have many articles, but it’s also okay if you have fewer. Just follow the steps here. The number of blogs is not too important unless you have more than 20 old blogs to revive.
Re-work On The Selected Potential Blogs

In order to revive old posts, you have to make changes to the posts.
Some people simply start sharing the old posts on social media or via e-mail and expect that this social traffic will add value to the post. But that is totally wrong.
SERPs do not rank contents that are not up-to-date. Even if you get a sudden surge of traffic through social media, Google will still crawl and compare your post with old crawling data. And if the content has no change, then the post will still be ranked low.
- First of all, Google values referrals and new backlinks.
- Second, Google wants to present the latest data that are still valuable, to its audience. So along with backlinks, Google also values updates.
- Third, Google values organic traffic over click-through/referred traffic from another site or social site.
So it is a must that you put some effort into revamping your old posts.
Here are a few things you can do to get better results out of each post.
1. Improve the featured image
The old featured image you used is probably no longer trendy in terms of design.
Create a new featured image with improved design.
Changing the featured image with the latest trendy design will give you the following advantages:
- This will be an update that SERPs will see as a major change.
- A newer design will be more engaging with readers.
- The post will be more attractive on social media (if you do not create a separate image for social media).
2. Work on Improving Post Permalinks (URLs)
With time, the trend for setting a permalink has also improved.
Here are a few things to do:
- Check and remove any counting numbers or years from the permalink.
For example, let’s say you have a post with the permalink:
https://www.yourwebsite.com/10-best-checkout-plugins-2011
Here, “10” is a counting number so remove it. This will allow you to add more than ten plugins to the post if you want to, thus removing the limit.
Also “2011” indicates which year this is for. Remove it so that you can rework on the post every year with improved data. Thus carrying the post value along the way.
No need to make new posts for the same topic every year. - Nowadays, we prefer that the shorter a permalink, the better. So, remove any extra text on the permalink that is not necessary to indicate what this post is about and that is not part of the keyword.
For example, let’s say you have a post with the keywords, “SEO tactics” and permalink:
https://www.yourwebsite.com/the-best-seo-tactics-that-you-never-knew
Here, at first “the” is not necessary. Any post with “the” at the beginning, do not include it on the permalink.
The “that-you-never-knew” part was simply a hook, used to attract readers, in the title. It is not necessary on the permalink.
So you may keep the “best-seo-tactics” portion. You can also remove the “best” from the link if you want and it won’t have any effect as long as the keyword is available on the permalink. But it’s best to keep one or two words along with the keyword to make more sense.
Also, you may exclude any helping words or unnecessary prepositions in the link. For example, instead of “best-plugins-in-wordpress”, you may remove “in” and set the permalink to “best-plugins-wordpress”. - Any changes you make to the permalink will mean that it will be considered as a new post by SERPs, which is a bit bad since it will lose all the value it had in the past. So it is best to use a 301 redirection from the old link to the new one.
3. Update the Content with the Latest Data

Since this post was lost, there is a possibility that the data in this post could be back-dated or obsolete.
So here’s what you should do to improve the content:
- Separate all headings within the post. Search on Google with each heading and find out the current data available. Read a few articles and collect important points.
- Compare the data on those articles with yours and find out
- What data you have, that has changed over the years, i.e. back-dated data.
- Any information you have, that is good but missing from the other popular posts.
- Any new ideas that you haven’t used in your post.
- What data you have, that has changed over the years, i.e. back-dated data.
- Use these data to create a more refined, updated content based on each section. While improving, keep in mind, you are not updating this post for your sake only; your post must be helpful to whoever reads it.
Once the content is updated with the latest data, you can be sure to get more attention from SERPs.
4. Restructure the content with the latest trends
The structure of content matters a lot these days. People no longer like to read essays or long descriptive paragraphs.
Even if you improve your content data, if you do not restructure it, it will result in a higher bounce rate, i.e., people will leave your blog without reading most of the content.
According to SERPs, a higher bounce rate is considered as an indication that the content is either not useful, or not attractive to readers, hence bad content.
Here are a few suggestions on what you should do.
● A Small Introductory Summary
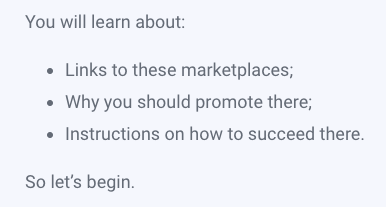
Make the introduction short but precise on what this is about, and what people will be learning from it. You can use a small section stating what they will learn after reading this article. Here’s an example:

You may create bullet points to give a summary of the things viewers will learn. This part will help the reader to understand if they will find what they were looking for. You might take the help of an AI-powered chat PDF to streamline the summarization process, and quickly extract key insights and takeaways from the document.
● Table Of Content
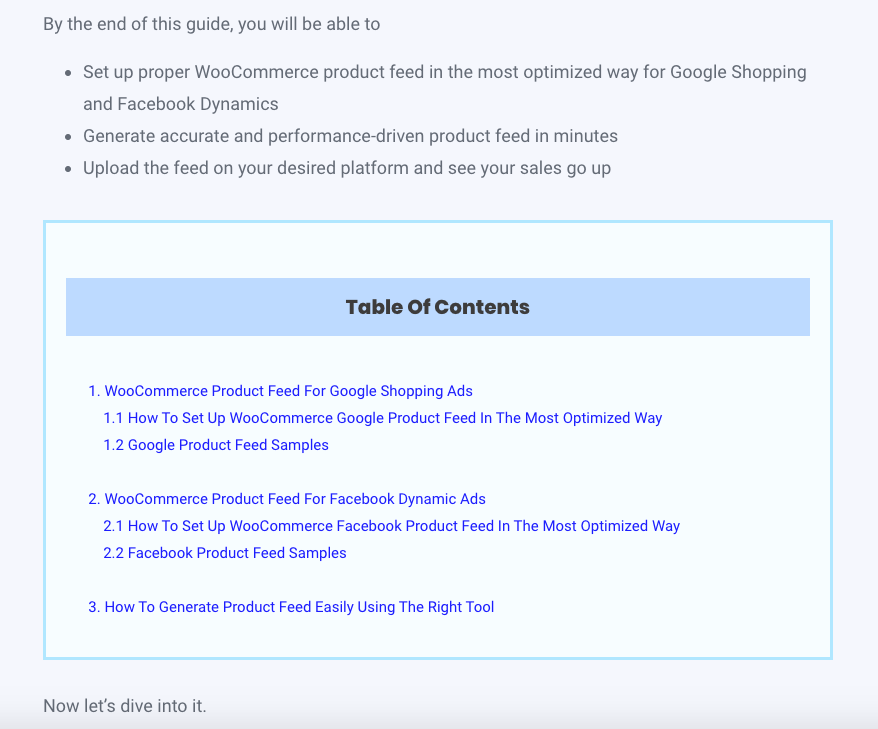
Include a table of contents to allow readers to jump to different sections in the post.
Here’s an example of how an attractive blog may look at the beginning. You can see the summary of what a reader will learn, followed by the table of contents to jump to different sections.

The “table of contents” is necessary because, sometimes, a reader does not wish to read the whole post; he/she is probably looking for something specific, which is a small part of your article.
So a table of content will help the reader understand and read what he/she needs.
● Engaging Blog Structures
Apply more engaging structures such as numbered bullet points, tables, and columns. Rather than reading paragraphs, people find it easier to read bullet points.
So, create a proper mix of paragraphs and bullet points throughout the post for a better connection with readers. For example, here is a portion of an article regarding US online shops for clothing.

You can see that it has a heading, a numbered sub-heading, a small paragraph, and bullet points to explain a few details.
This is an ideal structure that readers find more attractive.
● Use Tables Or Columns
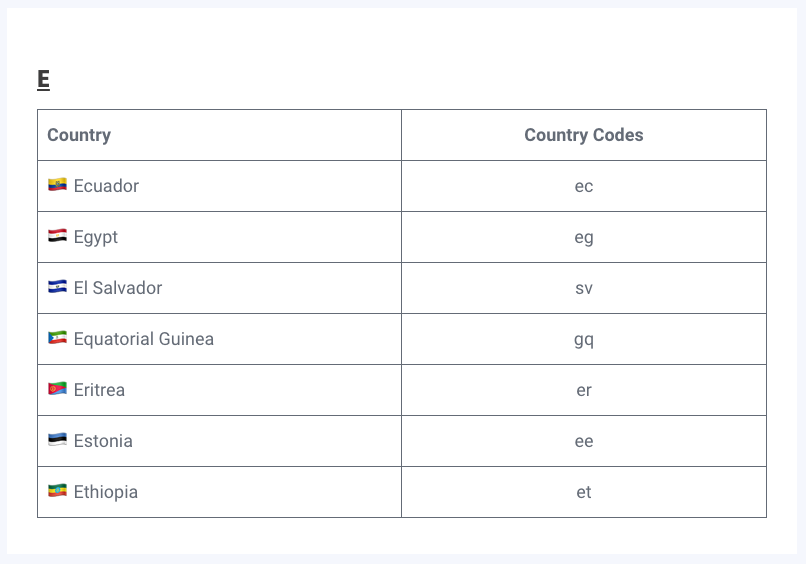
Use tables and columns when listing a lot of points for a topic, or when creating comparisons. Here is an example of using tables.

● More Media Throughout
Use More Media ThroughOut. Images and videos are always more engaging than plain text. So it’s best to use more images and videos.
On top of that, you can always convert some images to video online to make them more engaging.
For every heading section, you may use an image to represent that section.
You can check out this post for learning how to create better videos for your business.
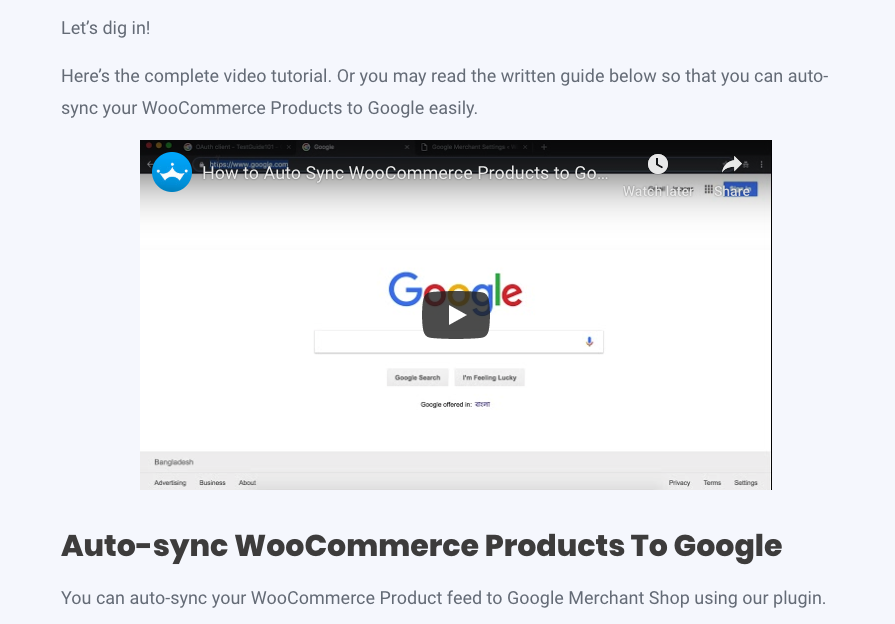
If you have a summary video of the whole post, you may include that right after the introduction or the table of contents.
Here’s an example:

The idea is, to try to include a media for every 300 words written. This will keep the reader more engaged. So, an article with 1200 words, technically, should have a minimum of 4-5 images.
Any section of a post that is very long, you can input one image at the beginning and one image in the middle, to avoid boring the readers.
● Avoid using dull images
Often people take a few image elements from online, place them on a colored background, and then use that as a section image, which is a terrible thing to do.
People lose interest just because of these images.
Here’s an example:

This article talks about things to look at when hiring a web designer. However, the images are like the one above. You can see that there are image elements in the middle, and a green background; an image that piques no interest.
Plus, you may notice another error. The image is placed above the section heading. It should rather be placed below the section heading.
Here’s an example of how it should be:

This is a section out of an article that talks about the advantages of using a virtual tour on a website for realtors.
You can clearly see the heading of the section, followed by an image that is relevant to the section, and not at all boring.
**It is not necessary for the images to be so graphical, but at least it should be relevant to the section and not completely blunt. Maybe use color gradients or at least use images that won’t repel readers.
You can also include infographics or PowerPoint slides to present statistics on the topic. to present statistics on the topic. In a later article, we will learn about the creation and implementation of infographics.
Start Re-Sharing Your Content For Traffic

Once you are ready with the new and improved content, it’s time to start working on getting traffic on it again.
So here are the steps you should follow.
1. Change the Post Date As Appropriate
Sometimes, after you have completely revamped a blog post, you may change the publish date to a recent date.
This is often a good idea for blogs that didn’t perform well for a very long time, or never performed well in the past at all.
In this case, SERPs will completely ignore any old crawling data and consider this as a new post.
So, in this case, take the following actions:
- make a change to the permalink of the post,
- then set a 301 redirection from the old link to the new one,
- and follow up by changing the publish date to a recent one.
This way, in most cases, Google will still consider any old crawling value the post had in the old permalink and will consider the updated post as new content.
2. Share On Social Media To Kick-start traffic

Now that you are ready with your content with a complete makeover, it’s time to start applying Social Media Marketing.
- First one all, follow the Effective Tactics To Optimize Social Share For Bloggers. In this way, your social shares with result in more engagements.
- Then follow the Tactics to Automate Social Sharing. There you will get useful social automation tactics to follow, and you will learn about a reliable social automation tool, Social Booster.
- Set schedules for the blogs to be shared at the right hours using the social automation tool.
- Reach out to influencers to make social shares.
- Reach out to any sites for whom you gave links, for social shares.
- If you have any collaboration plan then inform them right away and finalize the deal.
- Boost the post if it’s evergreen content.
- About 2-3 days after your social share, e-mail it out to your subscribers.
- Post a summary video of the blog on Youtube and put the post link in the video description.
- One week after sharing on social media, share the Youtube video on social media and add the post link in the caption.
- Schedule automated retweets (on Twitter) of the post after every week, for 3 weeks.
- Make sure to reply actively to any comments.
And that’s it. Follow this procedure for every post you revive. Within a couple of months, your old posts will start getting good organic traffic, as a result of your patience and hard work.
Final Thoughts
Social Media Marketing is a broad topic, and one of its parts is to revive old posts and share them on social media.
If all the steps mentioned here are followed properly, then you can easily rely on social media to help you revive old posts with good traffic.
In the next guide, we will discuss how to create videos, which you can share on social media to get the highest reach and engagements.


![How To Revive Old Post To Increase Blog Traffic [2024]](https://rextheme.com/wp-content/uploads/2020/04/Revive-Old-Post-Featured_Image.jpg)


A great blog, it has a lot of useful information to me.
Thank you. We are glad you found it useful.
I am interested in collaborating with you guys. Let me know how I can reach out to you.
Thanks.
Hi Zarnabsafdar,
Thanks for your interest in collaborting with us.
Please reach us at [email protected] to contact our partnership manager.
Cheers.
This post is really amazing.