WPVR is improving and is now better than ever.
As you know, WPVR allows you to create compelling virtual tours without any hassle. You simply need to provide 360 panoramic images and follow our guidelines, and you can create quality virtual tours in minutes. You do not need expert assistance.
Last time, we posted about a lot of features we added a couple of months ago. Read it here.
Recently we have added a few major Pro features to make your virtual tour creation experience even better.
Let us look at these new features.
What’s New in WPVR?
1. Scenes Gallery On Virtual Tours
Along with a satisfying virtual tour, you can now display a scenes’ gallery for better navigation of the tour.
Scene Gallery For Viewers:
Viewers will be able to see a small arrow at the bottom-center of the tour.
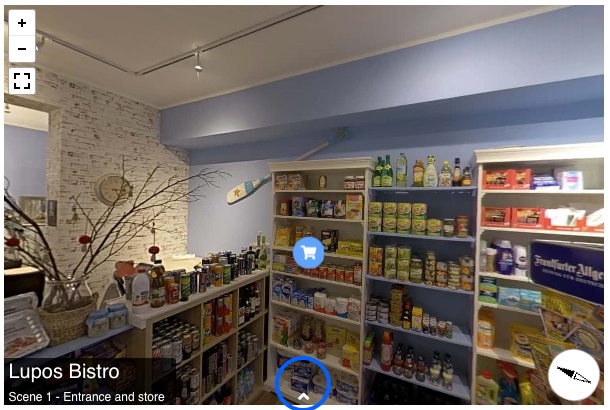
If they click on it, a gallery of all scenes will slide up.
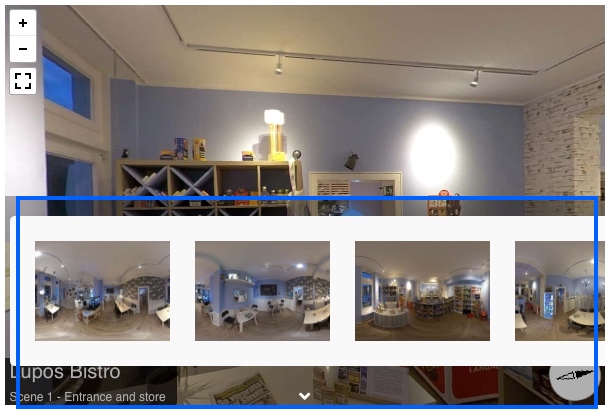
There, viewers can double click on any scene and directly transit to that scene.
Till now, viewers could only go from one scene to another by clicking on hotspots. Now, they can go to any desired scenes directly from the gallery.
Simply enable the option ‘Show Scene Gallery‘ on the GENERAL tab.
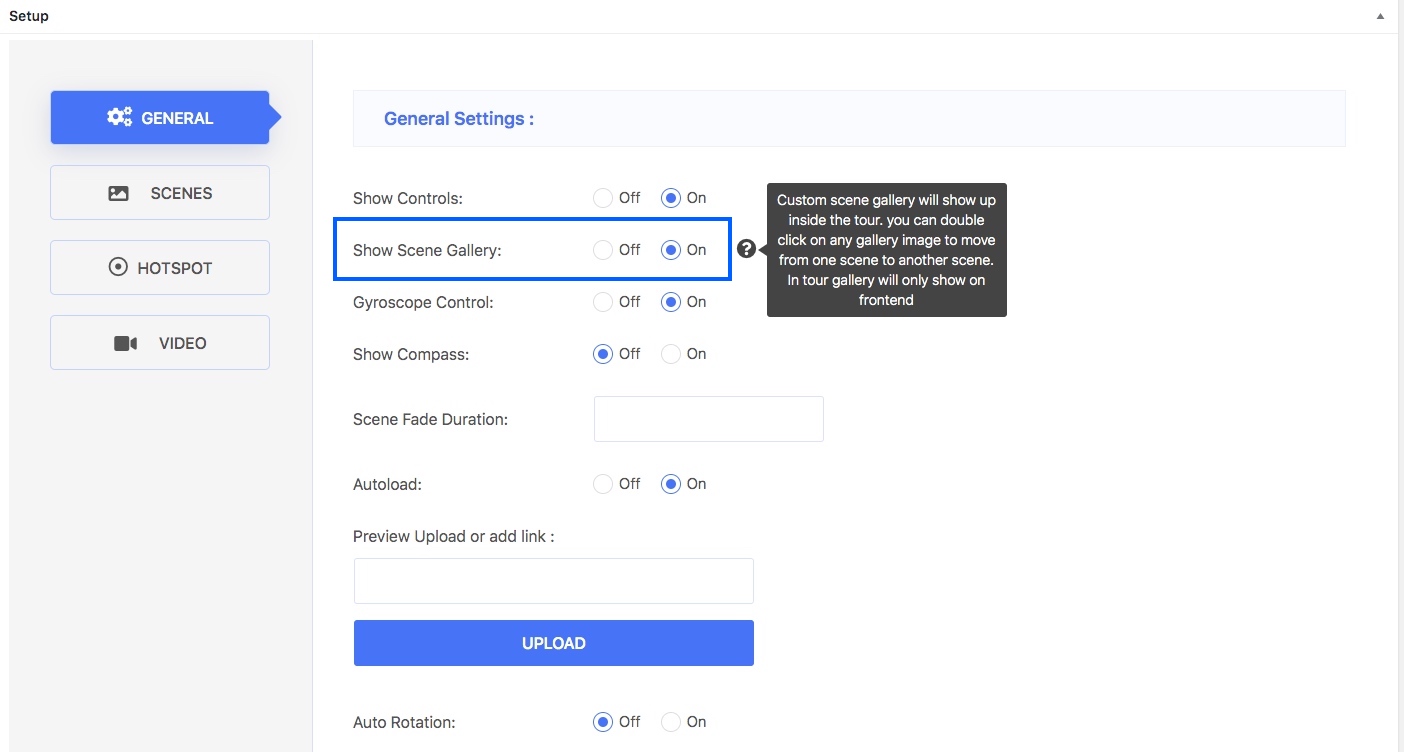
And the gallery will be available for viewers.
Scene Gallery On Tour Preview:
The gallery is also available at the back-end, below the tour preview, for you to be able to view and understand the order of the scenes on your tour.
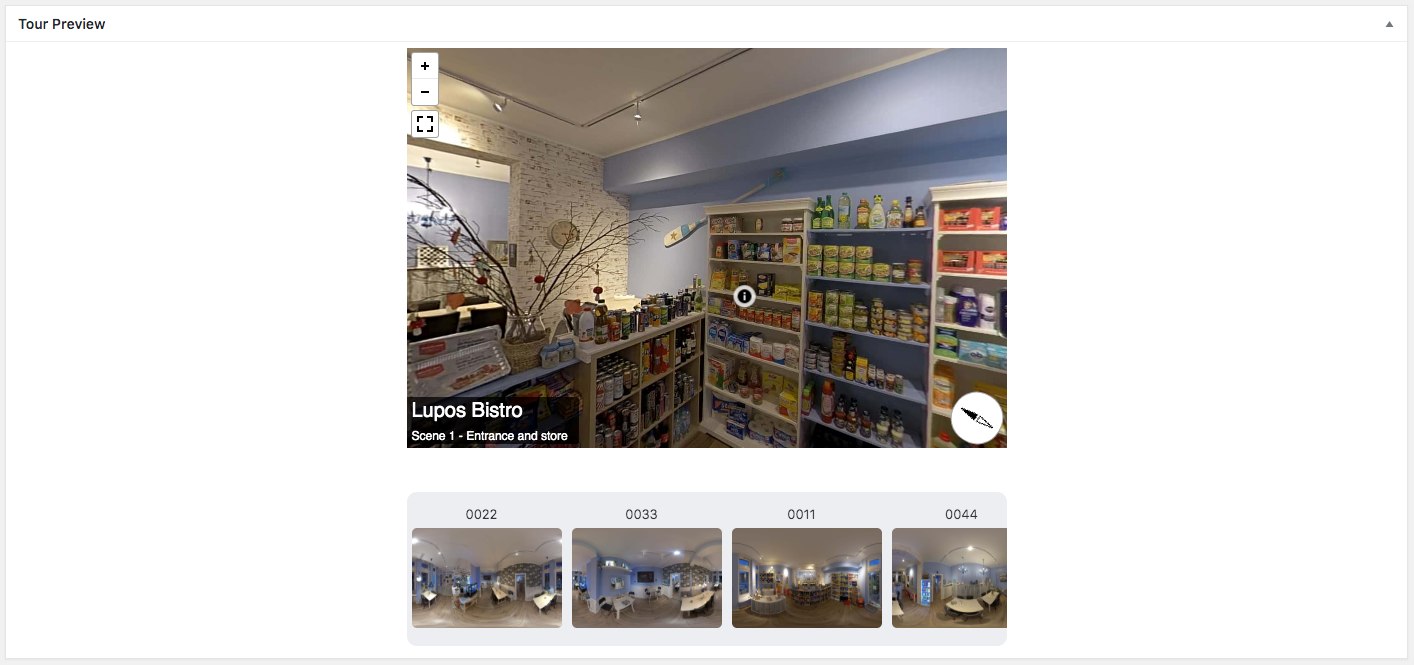
Thus making it more exciting to create and view the virtual tour.
2. Gyroscope On Mobile Devices
You can allow viewers using mobile devices, to get a gyroscope experience of the tour.
If enabled, while taking a tour on a mobile device, viewers will be able to see the icon to enable gyroscope mode.
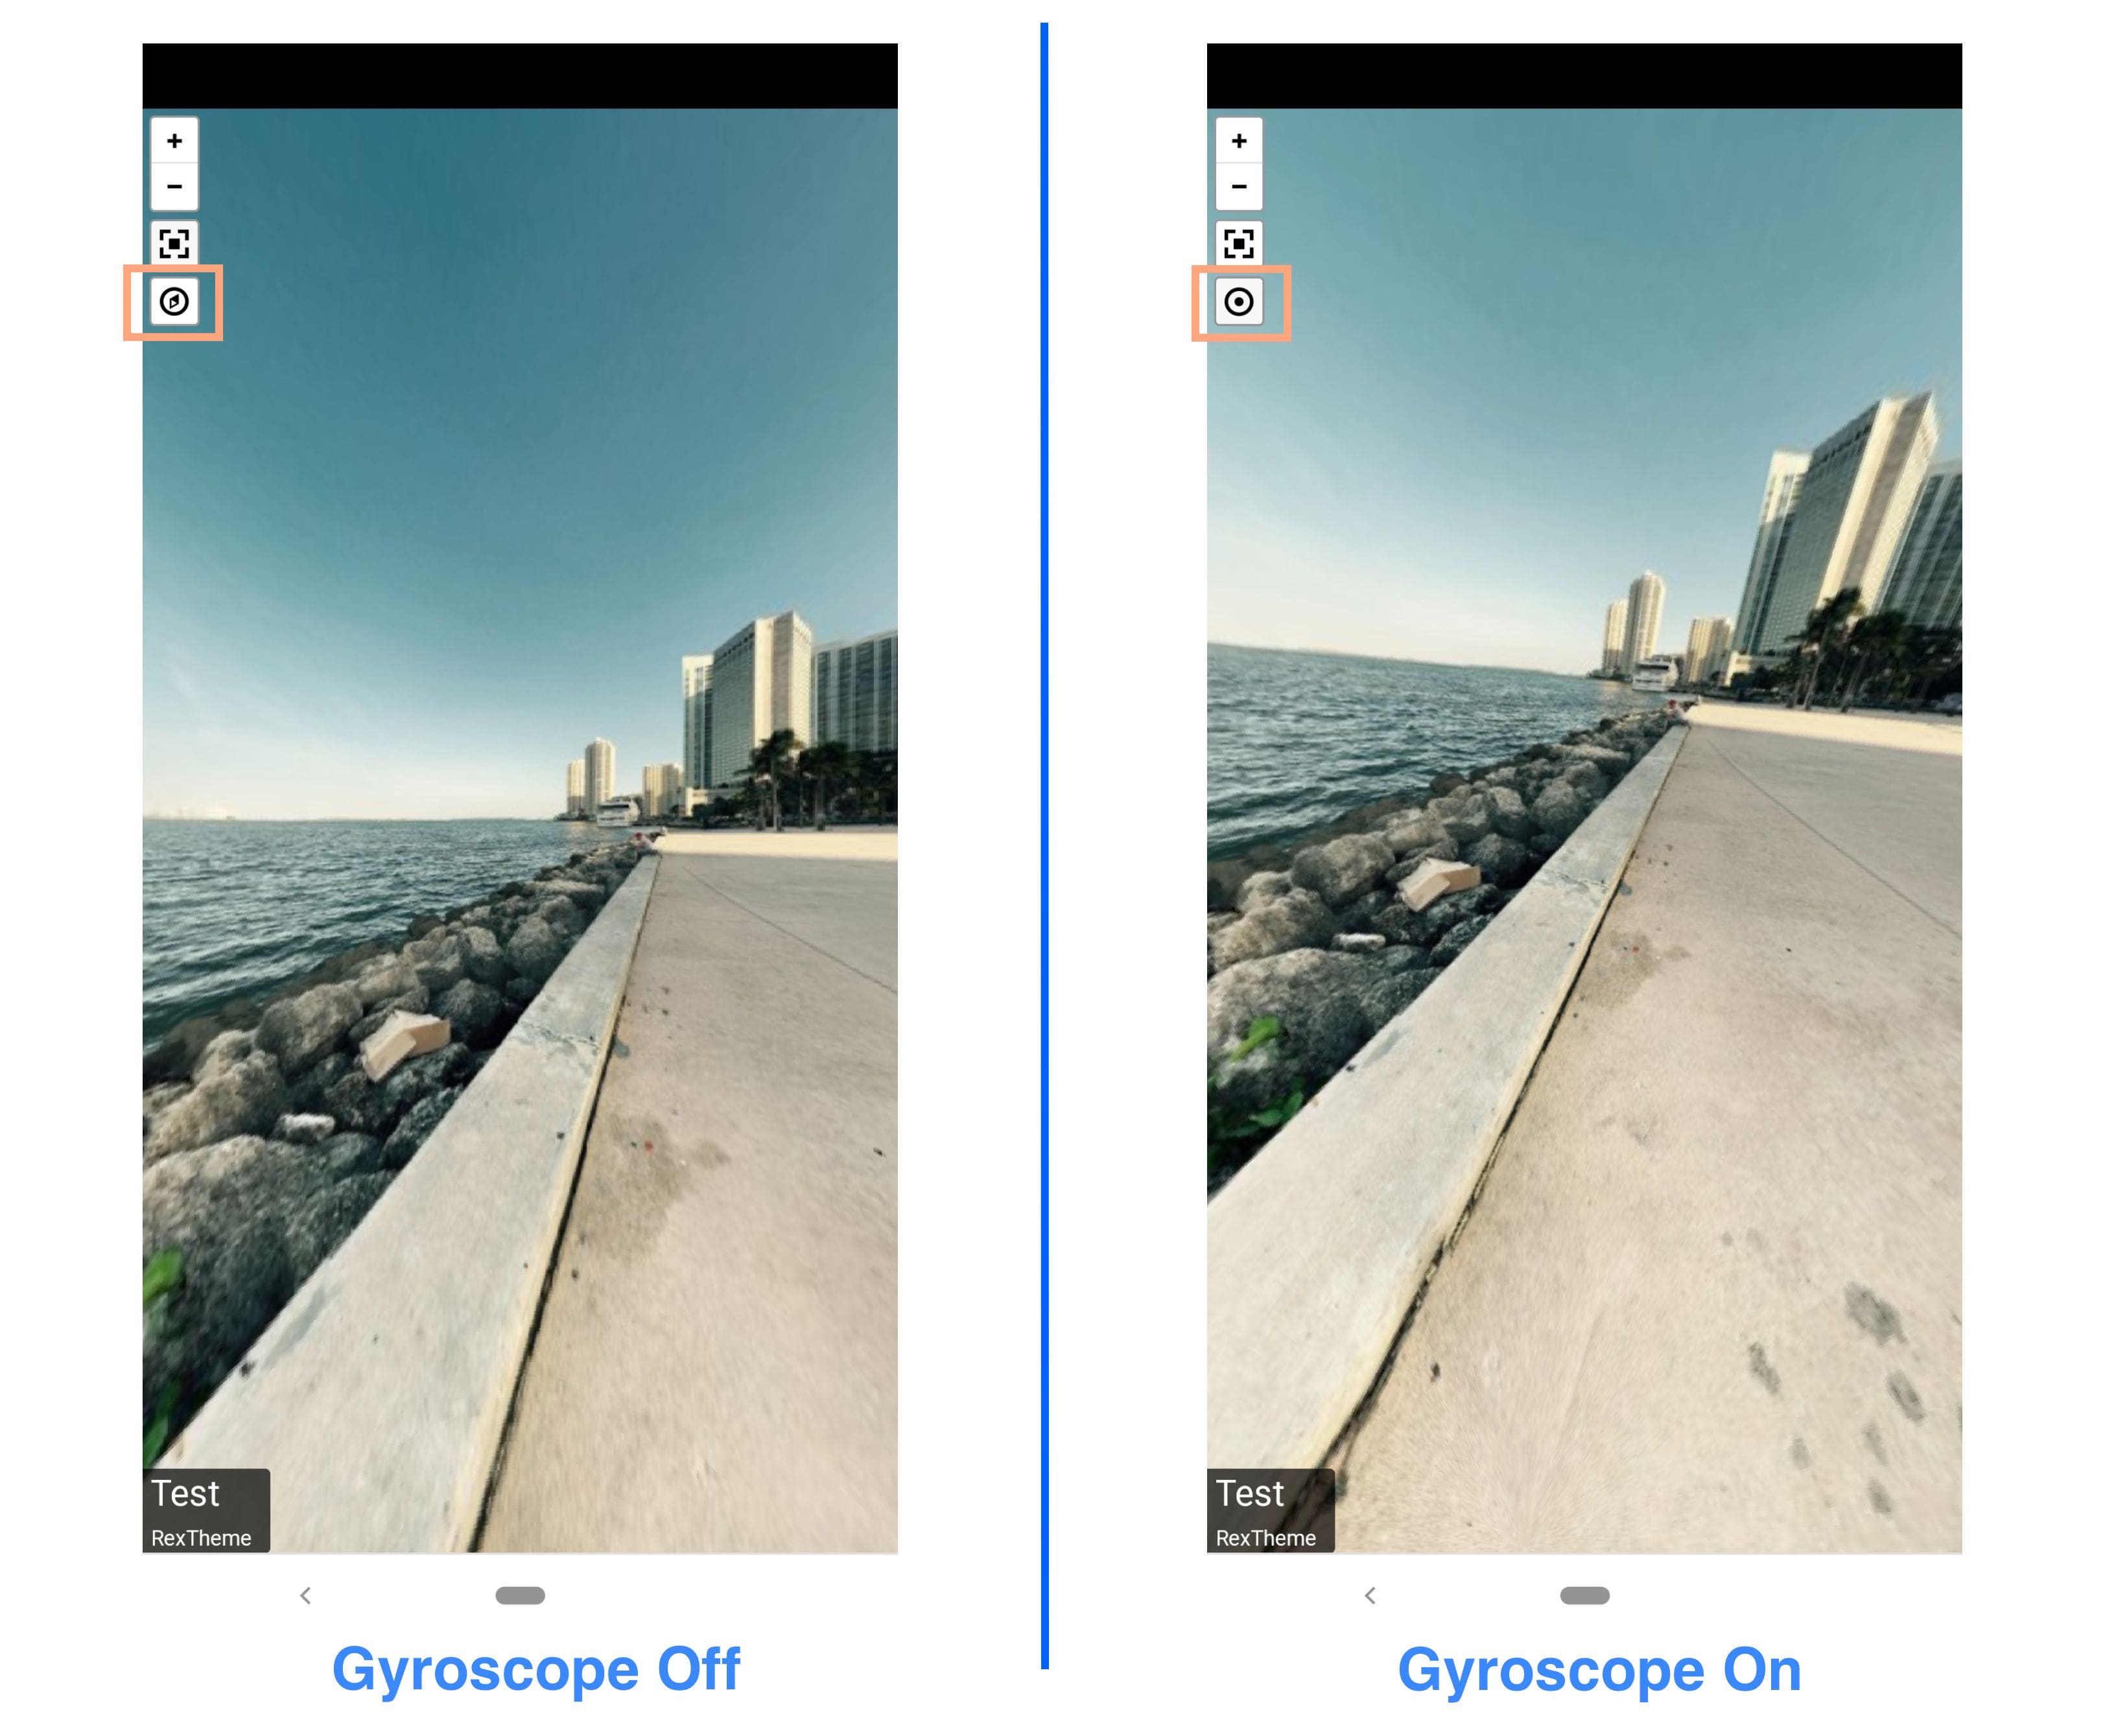
This will allow visitors to move their phones and get a view as if they are watching the place live.
Allow this feature by enabling ‘Gyroscope Control’ on the GENERAL tab.
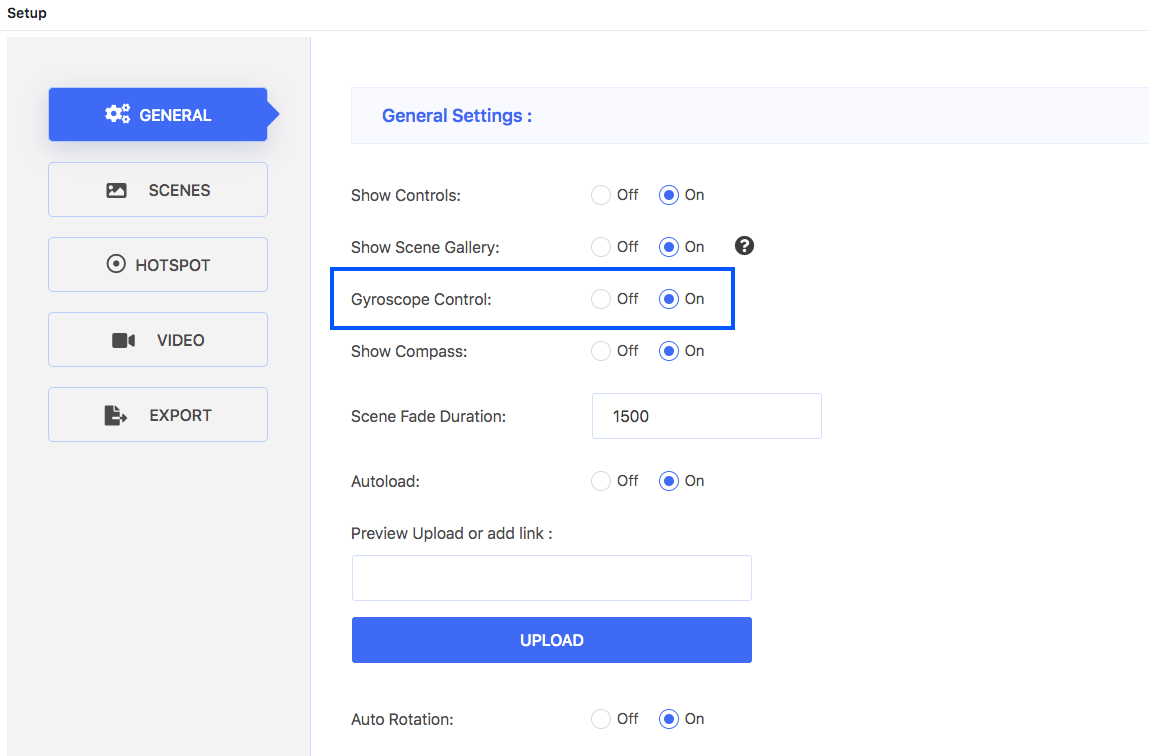
Once enabled, the gyroscope icon will appear on the tour when viewed on mobile devices
3. Duplicate Tour
Do you wish to add the same virtual tour twice on the same page?
Or do you wish to make a copy of the virtual tour, just to make little alterations and use it for some other purpose?
Simply create a duplicate of the tour.
Go to Dashboard > WPVR > Tours. Here you will find a list of all the tours you have created.
Find the tour you wish to duplicate and hover the mouse on it and you should see a Duplicate button.
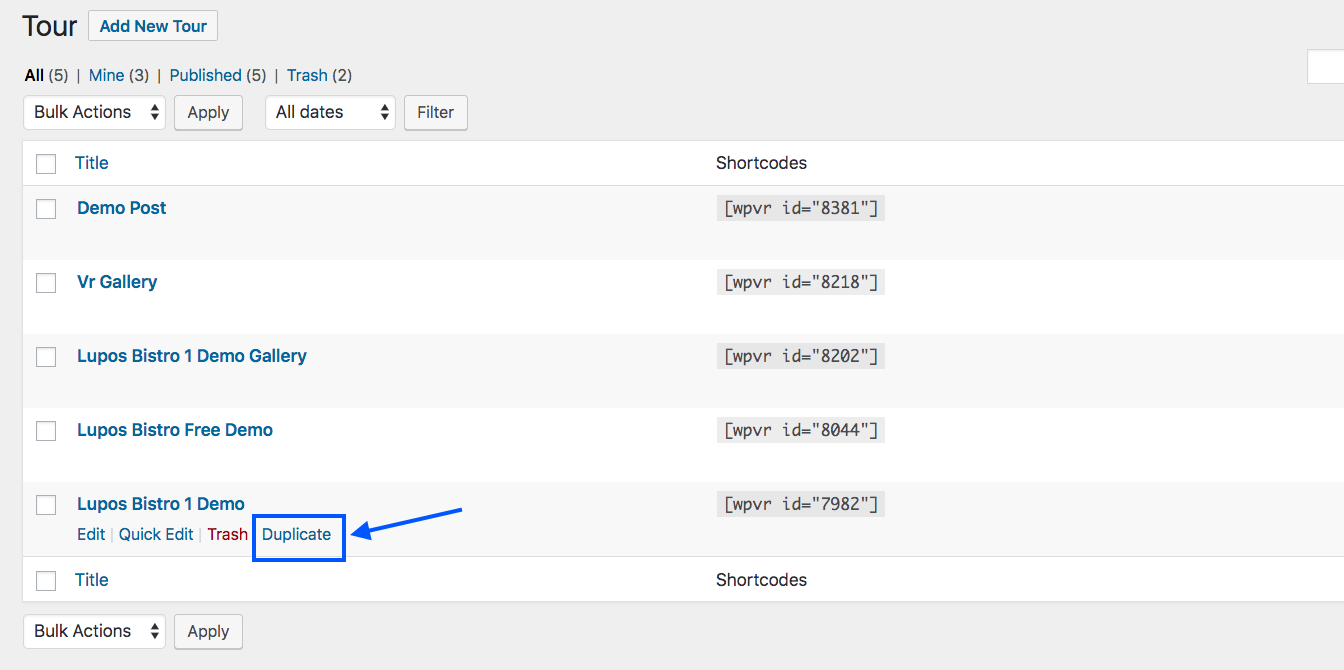
Click on it and instantly a draft copy of the tour will be created with a new tour Id. You will be redirected to the tour setup page.
You can make any changes you want and publish the new tour to be able to use it.
4. Import/Export WPVR Tour
WPVR now allows you to Import and Export tours on different sites that have WPVR Pro activated.
So if you have multiple sites, but you wish to view the same virtual tours on both the sites, then you can just export and import the tours between the websites; you do not need to recreate the entire tour again.
And it’s easy to use so, as well.
Exporting a tour:
Once you publish a tour, a new Export tab will appear on the tour edit page.
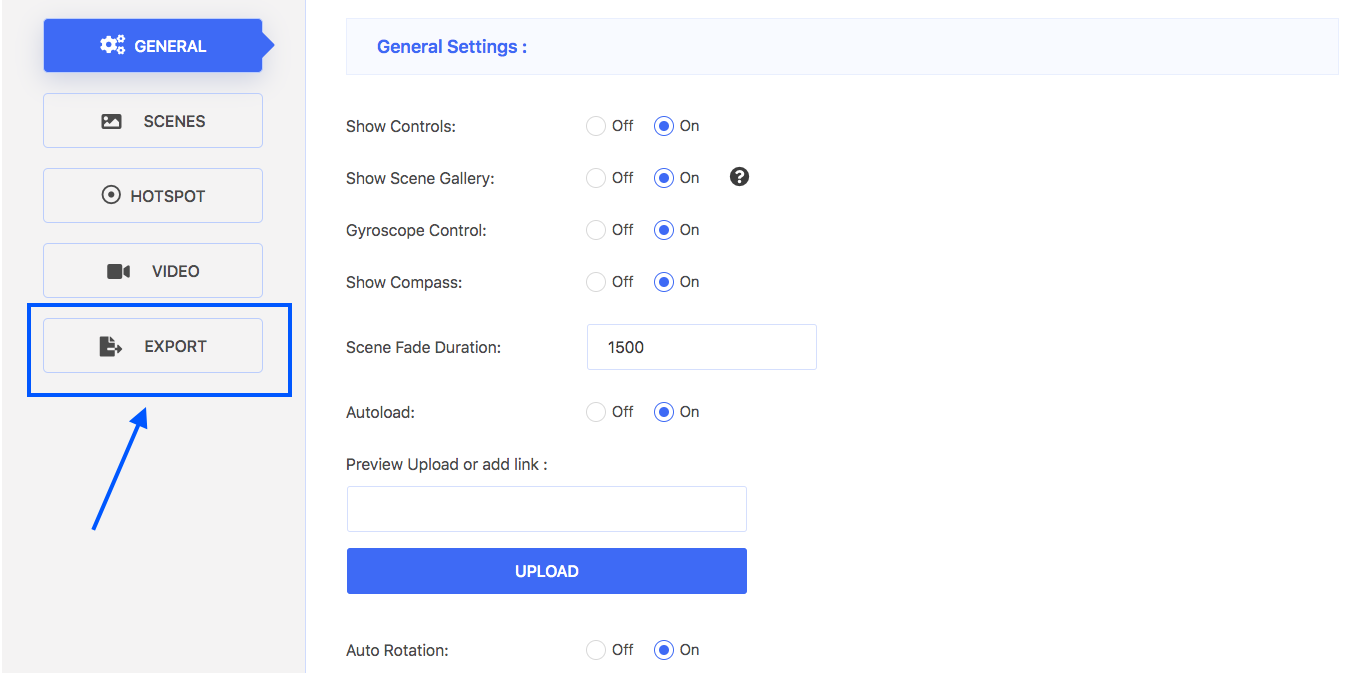
Go to this tab and simply click on the Download button.
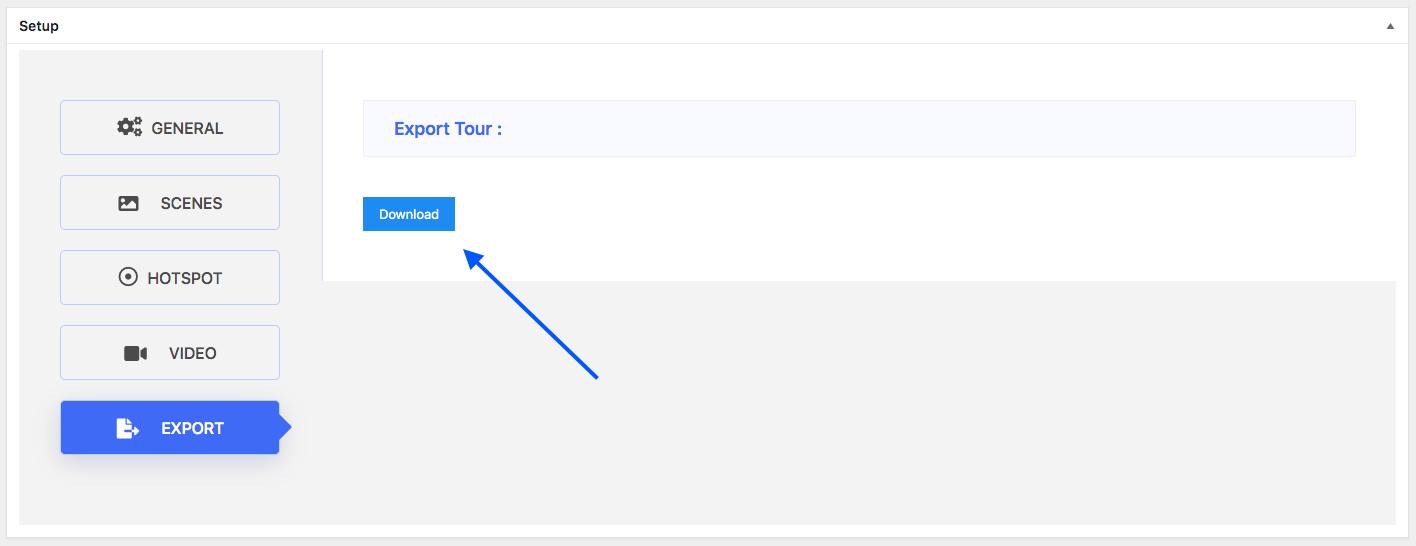
Your tour will be downloaded in zip format.
Importing a tour:
If you have exported a WPVR virtual tour, then you will be able to import it on any website that also has WPVR Pro installed and activated on it.
Go to Dashboard > WPVR > Getting Started. On the top right side, you will see that there is a tab called Import.
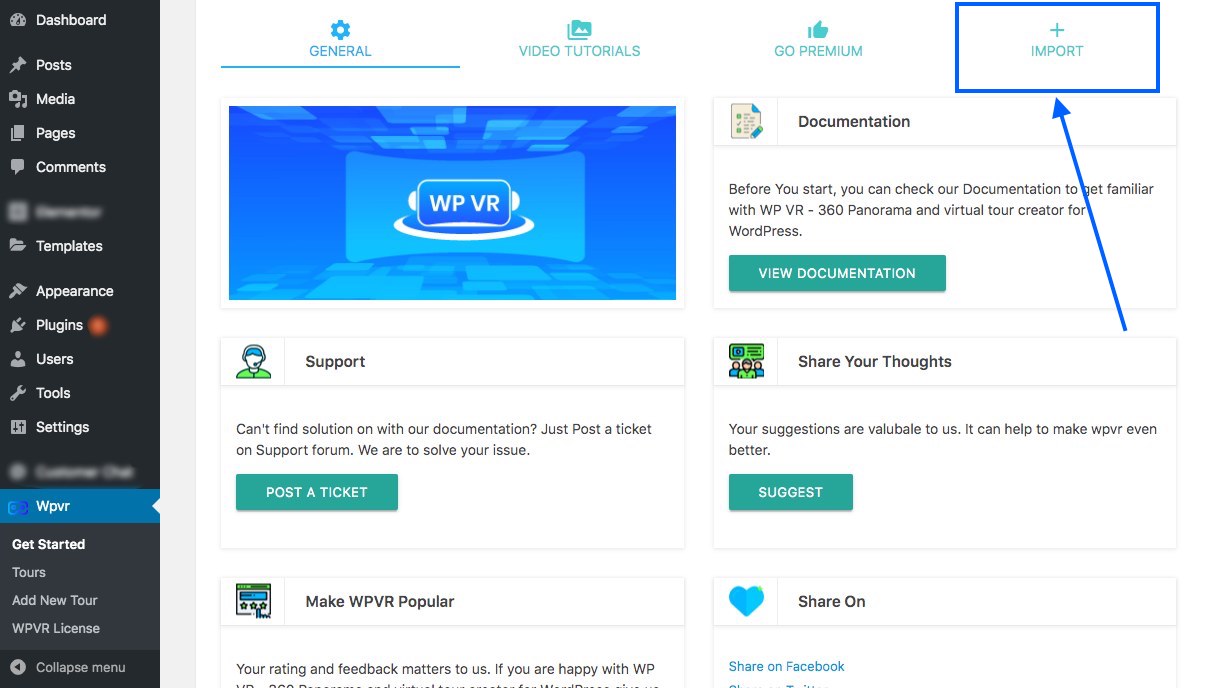
Go to that tab. Here you will see a red-colored button. This is the import button.
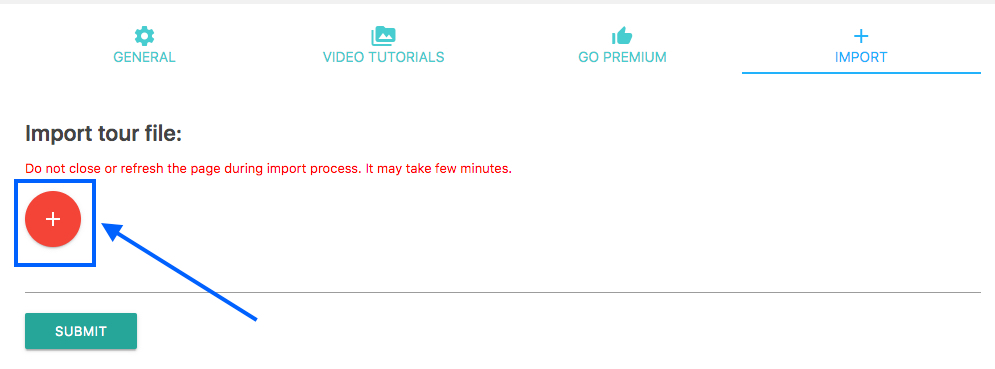
Click on it and upload the tour that you downloaded earlier. Then click on submit. This will upload the tour on your site and redirect you to the tour edit page.
5. The ‘fullwidth’ Tag
There have been several improvements made on WPVR, when controlling the width and height of the tour, including allowing a percentage to control the size of the tour. We recently also introduced the implementation of tour radius.
The latest inclusion was the ‘fullwidth’ tag. For the tour width, instead of assigning a fixed size or a percentage, if you write ‘fullwidth’, this will ignore the container size and will make the tour appear on a full-width view of your web page.
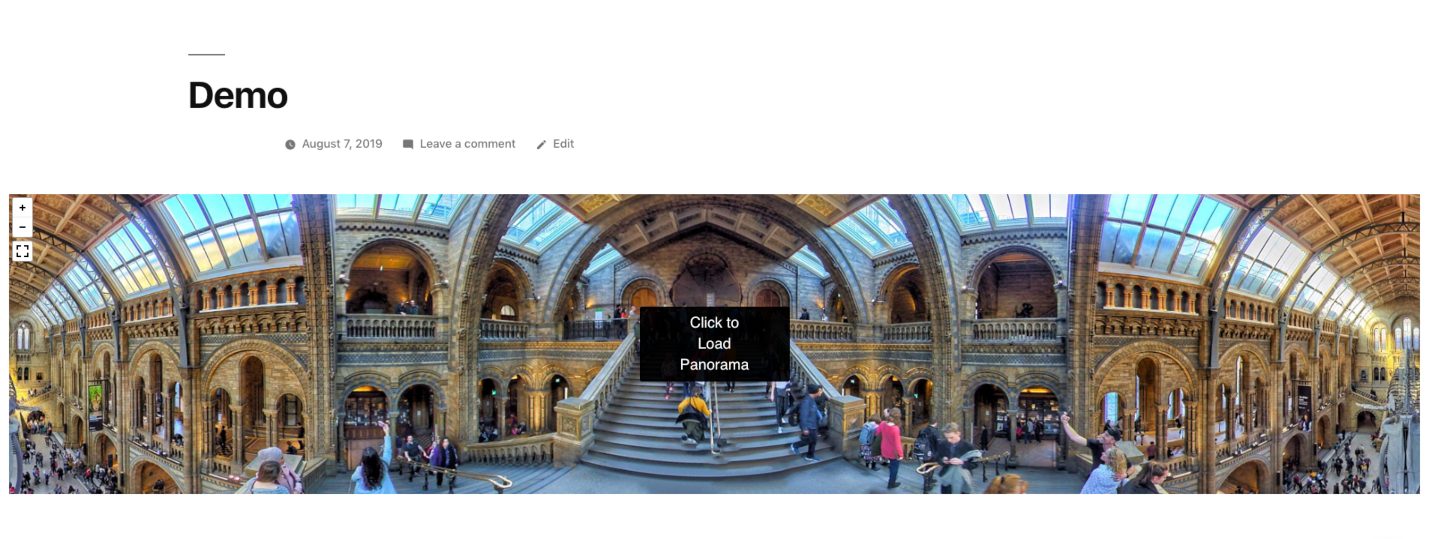
Using the ‘fullwidth’ tag correctly:
On Gutenberg block editor, use the WPVR block and assign width as fullwidth.

On Elementor page builder, use WPVR widget and assign width as fullwidth.
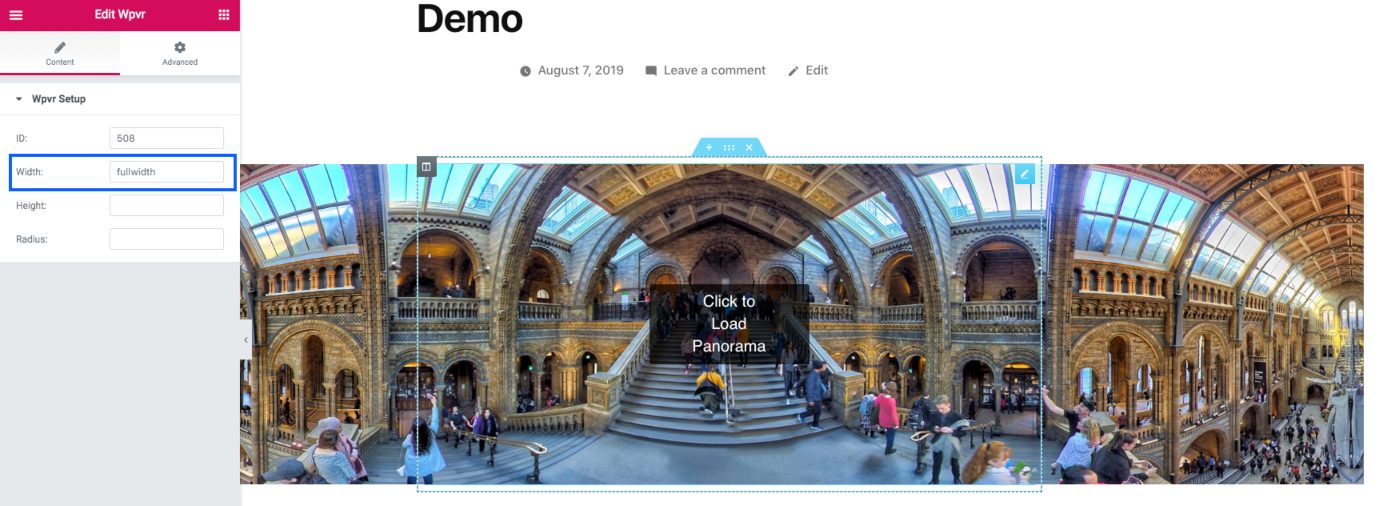
And for Classic editor or any other page builders, apply the tour shortcode (on html blocks or editor for page builders). Edit the shortcode and add the width tag, with the value fullwidth, and add the height tag with any value you desire.

Then publish the page/post and let your viewers get a full-width view of your virtual tour.
Upcoming Features
As you know, we have a lot of exciting features planned out and in the process of development.
>>Ground map – You will be able to create a map of the location you created a virtual tour of. And users will be able to click on pointers on the map to directly go to that particular scene of the tour. This will allow you to create a detailed tour of large locations and allow users to get a better navigation system.
>>Connect multiple tours – We are trying to implement a feature so that you can connect two different virtual tours, either by directly merging them or simply transiting from on to another through a hotspot.
>>Resize images for phones – Currently, the plugin only works with the 360 panoramic images provided by you. But if the resolution is too high (seemingly higher than 4096×2048), then the tour cannot be viewed on mobile devices. We are trying to integrate a resizing option so that the plugin can resize the images for mobile devices if required.
There are so many more features we wish to include and with time, they will all be available soon.
There is no limit to how much you can achieve using quality virtual tours on your site. Whether you wish to highlight real estate properties, museums, hotels, amusement parks, spa, campus or any other purpose, a virtual tour will certainly make it more credible and reliable.
Upgrade to pro to enjoy all exciting features and use quality virtual tours with no limitations.
Hence, go ahead and start using WPVR and create amazing virtual tours for your site visitors.


Is there any demo project? Please keep me informed about future updates. It looks interesting to me.
Hi Miro, it’s great that you find it interesting.
Here is a demo tour created using WPVR:
https://rextheme.com/docs/wp-vr/demo-tours/pro-demo-virtual-tour/
If you have any question regarding the plugin, you may open a support thread. Thanks.