
Setting up Woocommerce might feel difficult at first, Maybe that’s the reason you are looking for an easy beginner-friendly guide to follow and apply.
This beginner’s guide on how to setup WooCommerce covers the entire process from start to finish with VERY EASY STEPS(also I make sure none of the steps miss out)
I will cover all the basic settings you need to configure (with images) when you install WooCommerce for the first time before adding your products.
So let’s begin.
Why Use WooCommerce?
Investing too much right from the start would probably increase your startup expenses.
So, in the beginning, it’s best to start by keeping expenses to a minimum level.

You won’t be locked into any subscription fees or contracts to use the core WooCommerce plugin because it’s free.
Also, The hosting fees for a WordPress site are quite affordable and you can choose according to your needs.

That is why it has been the leading eCommerce platform for a while now.
With over 25% of all eCommerce businesses in the world using WooCommerce.
These businesses are using Woocommerce because it is very much beneficial.
I am going to discuss 4 benefits of Woocommerce here :

Let’s go deeper one by one :
Cost-effective
As explained above, The only cost you need to cover is hosting & domain fees.
The hosting cost depends on the hosting plan you choose. If you have generic shared web hosting, you can get hosting at as low as $3 a month.
The only drawback of this low-budget plan is that it has fewer resources.
If you want more facilities, you can choose from these Woocommerce recommended hosts

You can choose any of the web hosting services as per your needs. For example, Bluehost stands out for its reliability and affordability. With various web hosting offers by Bluehost, you can find plans that fit your needs while staying within your budget.
Flexible With Customization
You may easily customize your whole online store, whether it is the Shop Page, Product Page, or even the Checkout page. If you need more specialized skills, you can hire a WooCommerce developer to tailor your site to your specific needs. P.S. You will find a plugin for almost any custom changes you may want in your store.
Makes Marketing Products Easy
The product page, shop page, and product data are all well-organized and programmed for SERP ranking, you can easily customize the pages using a theme or page builder.
Use-Friendly Even For Beginners
One of the strong suites of WooCommerce is its ease of use. As you read along, you will find out that WooCommerce doesn’t take too much effort to set up.
Now, let us look at how you can set up WooCommerce for the first time and configure the basic settings.
Get Started With WooCommerce
Follow the steps below to install and configure your WooCommerce store for the first time.
Step 1 – Install & Activate WooCommerce
There are 3 ways you can activate Woocommerce :

Here, I am going to pick the last option & explain it in detail.
If you have a running WordPress website, you can easily install WooCommerce from within your WordPress dashboard.
So first,
Go to Dashboard > Plugins and click on Add New
Then, on the search bar, write the keyword WooCommerce. You’ll see the plugin in the first search result.
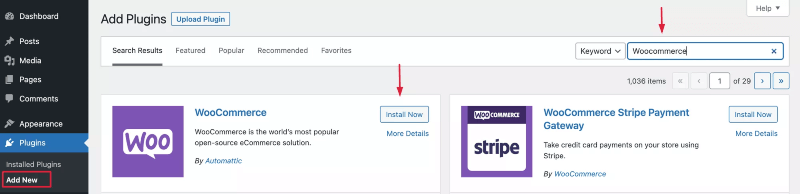
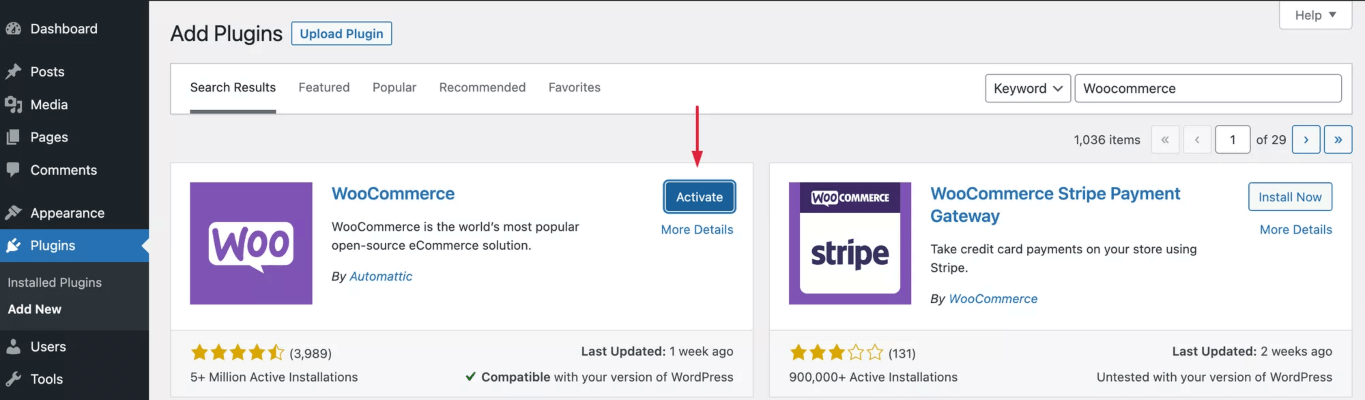
- Click on Install Now and wait for a few seconds. Once it’s ready, click on the Activate button.
Step 2 – The WooCommerce Setup Wizard
When you activate the plugin, it will show you a Run the Setup Wizard.
Click the Run the Setup Wizard button. If you accidentally hit the Skip setup button, you can still run it from Help → Setup Wizard.
Here’s how you should go through it.
- On the first page of the setup wizard, you will need to input your location and business address. Fill them up and click on Continue.

- Once you click on Continue, you’ll see a pop-up that says, “Build a better WooCommerce.“
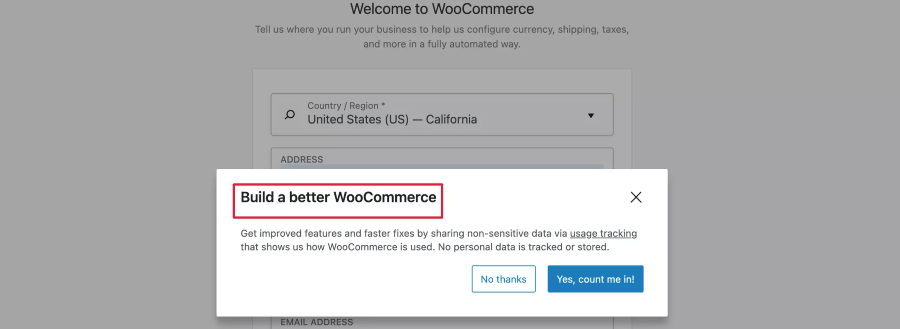
**These are data that help WooCommerce to learn a few non-sensitive data on how you use WooCommerce so that they can come up with better improvements in the future. So you may choose “Yes, count me in!” Or you may choose not to allow it. It’s totally up to you.
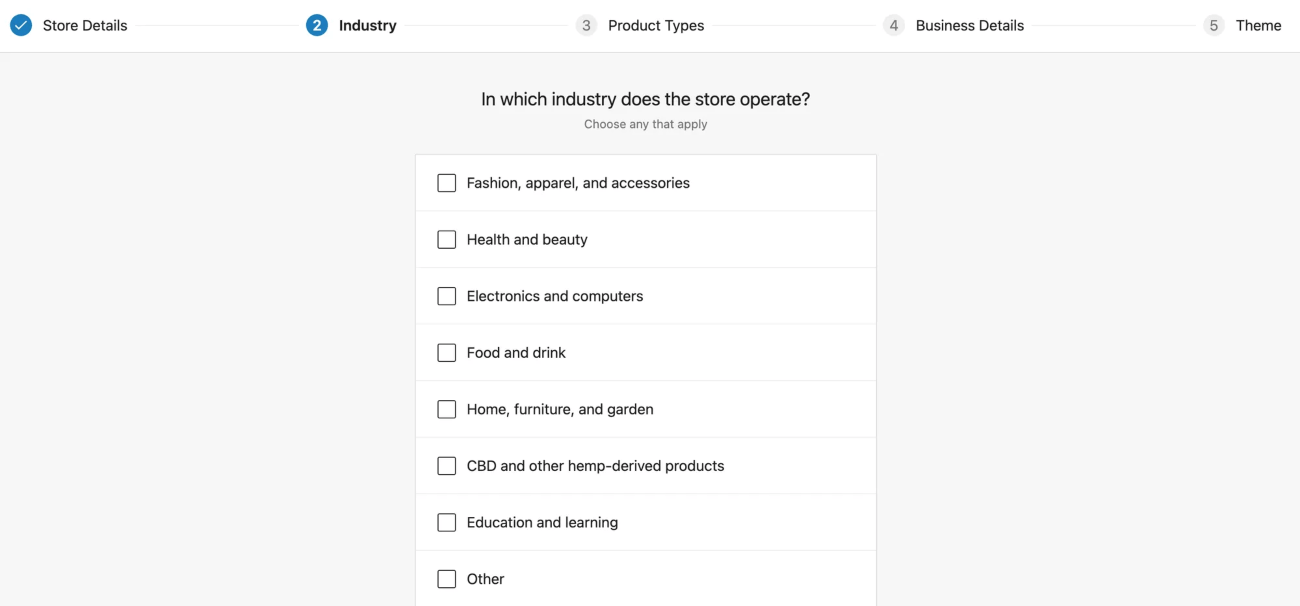
- Next, you will be asked which industry your business is a part of. You may choose one of the options there or choose Other and define your own industry. Then click on Continue.
- Now, you will be asked what type of products you sell.
- For products that you have to deliver physically, choose Physical products.
- If you sell downloadable products, choose Downloads.
- To sell subscription-type products with recurring fees, you may choose Subscriptions.
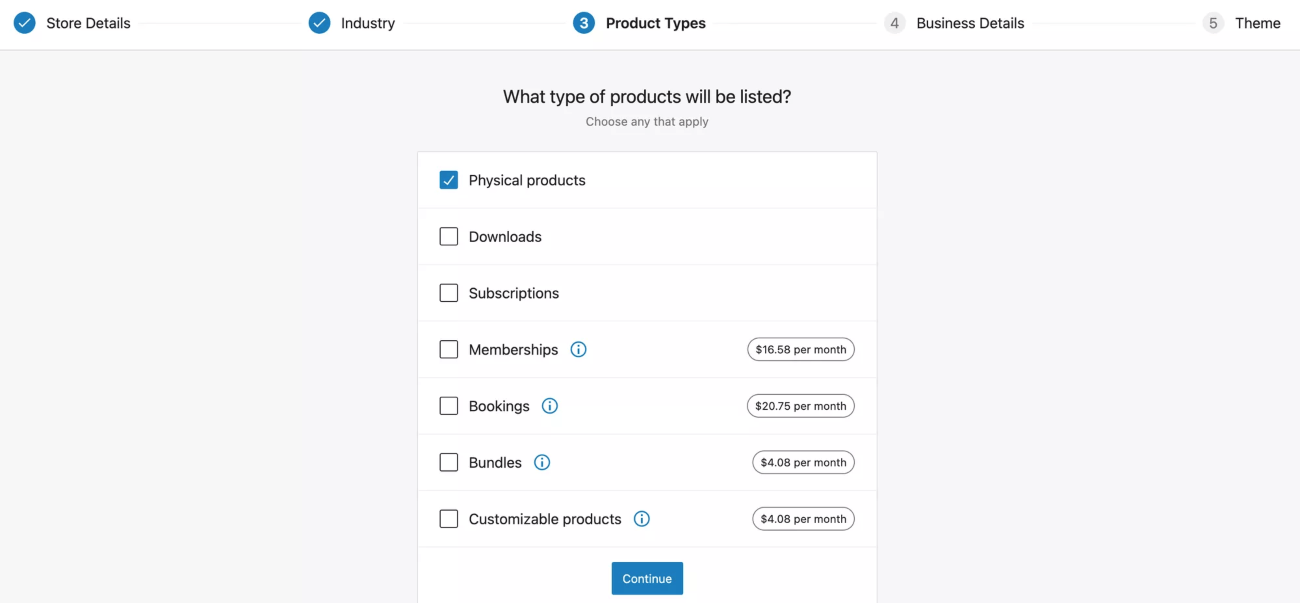
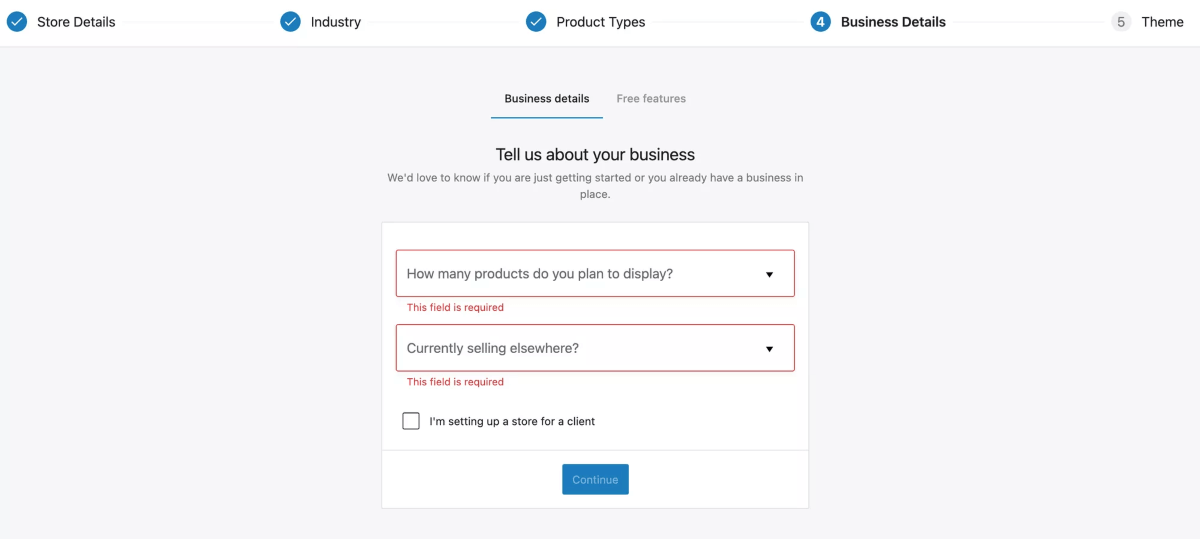
- Then click on Continue and it will ask a couple of business-related questions. Answer and click on Continue.
- Right after these, you will be referred to install a few free WooCommerce plugins that they recommend. We recommend unchecking this option.
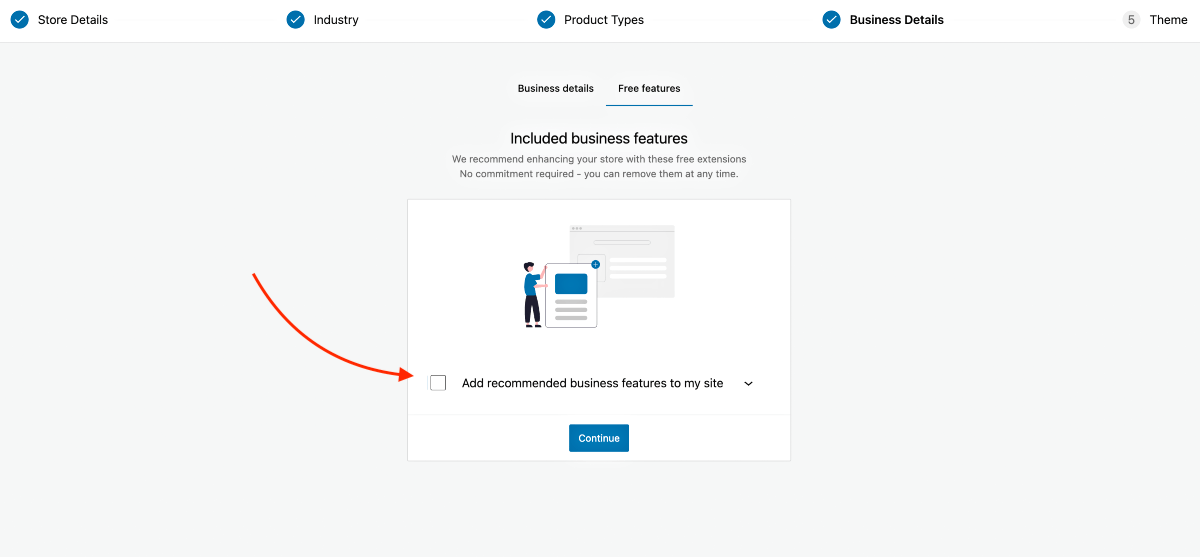
P.S. As a beginner, so many extra plugins may be too overwhelming for you. It’s best to go step-by-step. So we recommend not to get these plugins now. We will create more guides to help you choose the right plugins later on when the time comes.
- Finally, you will be asked to install a theme that’s more suitable for WooCommerce. We recommend StoreFront as it is built by the creators of WooCommerce and is fully compatible.

**Later, you may consider going for better premium themes that allow more customization options, such as WoodMart, Bloksy, Porto, etc., to improve buyers’ experience.

Step 3 – Configure The WooCommerce General Settings
You now have access to WooCommerce. But before adding products or setting up other necessary elements, you first need to configure a few basic settings.
- Go to WooCommerce > Settings, and you will see several tabs to configure. For now, we will focus on the General, Products, and Accounts & Privacy tabs.
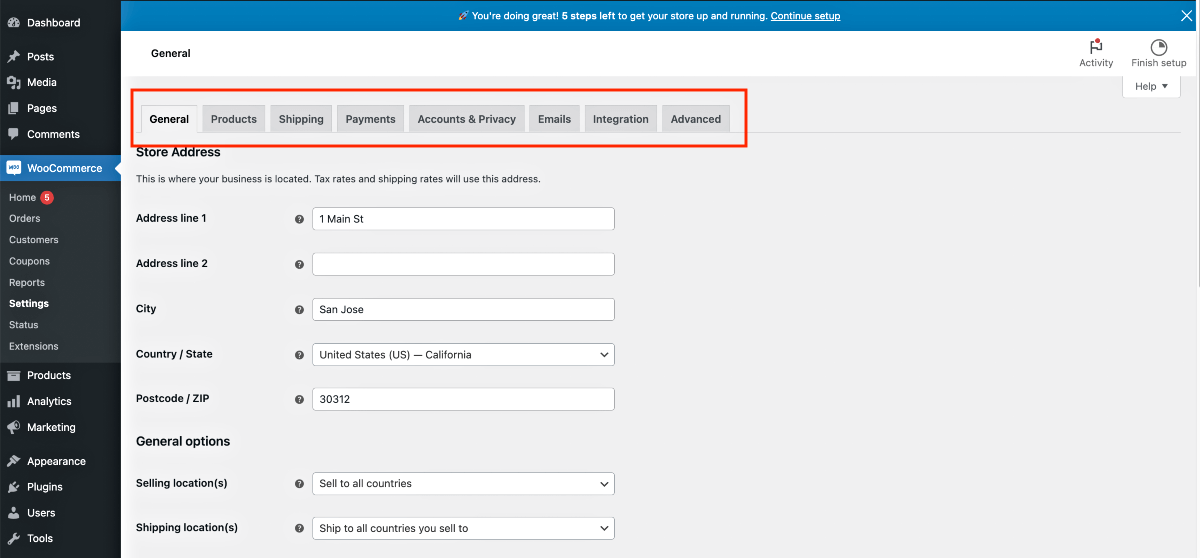
- Initially, you will be on the General Tab. Here, first, Input your Store Address (if you haven’t during the Setup Wizard).

- Next, configure where you want to sell your products.
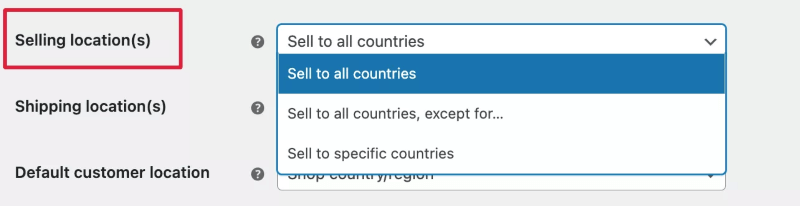
You will get the following options:
- Selling Location
This will let you define the country where people will be able to view and purchase your products. - Shipping Location
Here, you will define where you ship your products to in case you sell physical products. - Default Custom Location
This option will let you geolocate a customer and automatically input the address on the checkout page. If you choose an option here, it will install a plugin that you need to configure for geolocation tracking. For now, let’s not use this option.
- Next, choose if you want to enable Tax rates and calculations. You will need this option but for now, let’s leave it unchecked. At a later guide, we will teach you when to enable this and what to do next.

- Right after the tax option, you have options related to coupons.
- Select “Enable the use of coupon codes” if you plan to run discount promotions via coupons in the near future.
- The next option, “Calculate coupon discounts sequentially,” is not so commonly used as people usually do not allow a stack of discounts via multiple coupons in the same order.
- And finally, you have the currency options, where you define the currency and other useful settings for price.
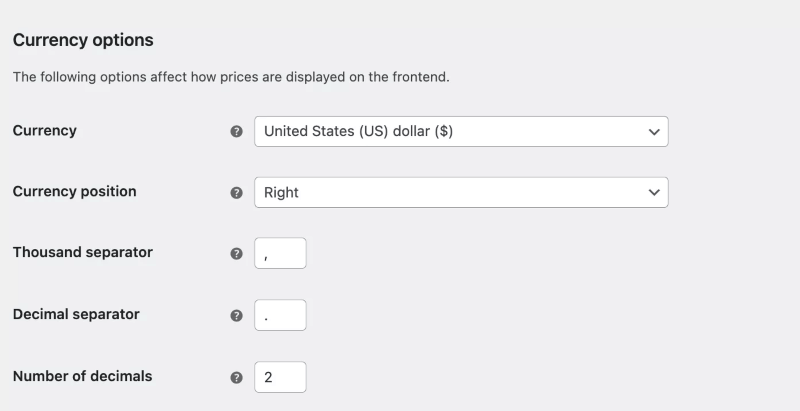
Once the data are ready, make sure to save them.
Step 4 – Configure Basic Product Settings
Go to the Products tab. You will see there are a few important settings that need to be configured before you proceed with adding products.
For now, we will look into the General and Inventory settings. The other options you see there are pre-configured and don’t require much change.
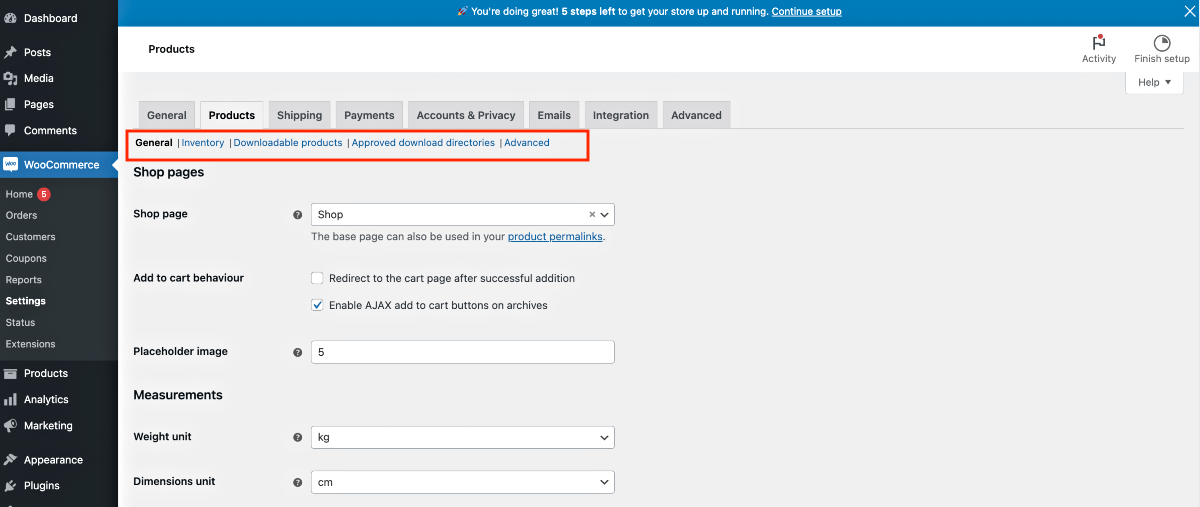
Let’s configure each of them 1-by-1.
1. Products > General
In the general product settings, you will get the following options:
Shop Pages:
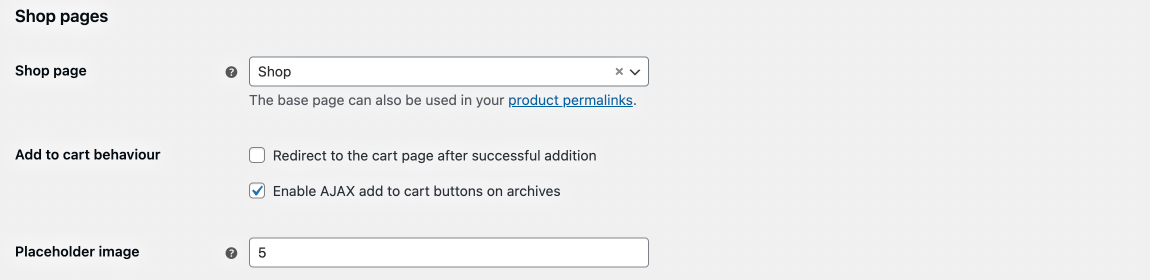
- Shop Page
To choose which page should be considered the shop page. You may leave it as is for now. - Add to cart behavior
- Enable “Redirect to the cart page after successful addition “if you want the buyer to be re-directed to the cart page after adding a product to the cart.
- “Enable AJAX add to cart buttons on archives” option will allow you to show the “Add to cart” button for products on archive pages as well.
- Placeholder image
Here, you may input an image URL or the image ID you want as the placeholder image for products for which you did not upload an image.
Measurements:

- Weight unit
- Dimensions unit
These values are useful, especially for shipping purposes.
Reviews:
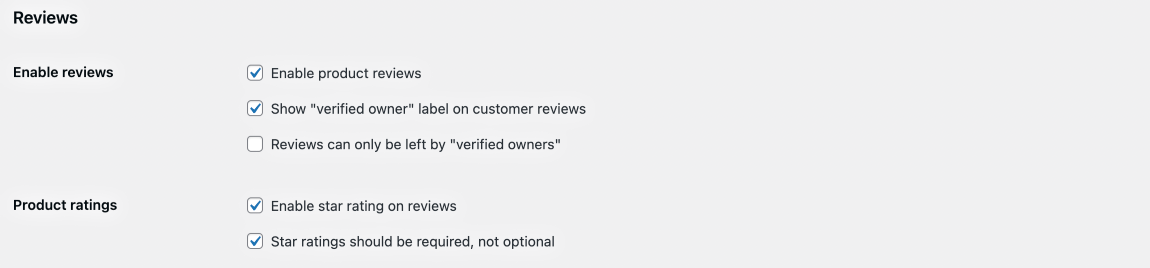
- Enable Reviews
- Here, first, you may Enable product reviews and ensure that the person is a verified owner, as in, the review was left by someone who has an account.
- Product Ratings
- You may also allow star ratings on the product page.
2. Products > Inventory
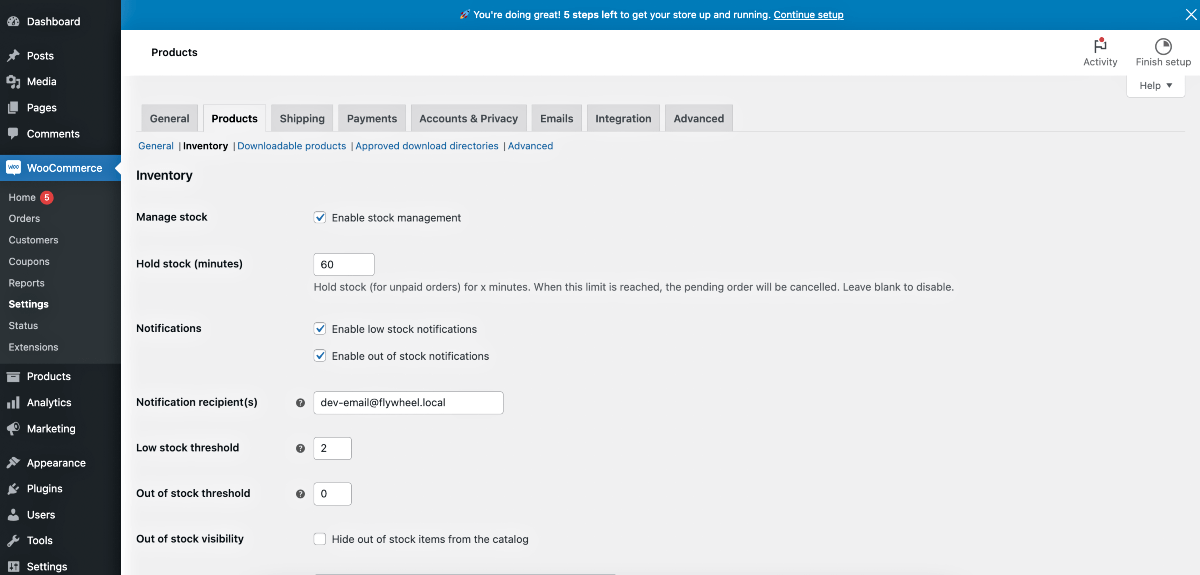
Here, you will get important options to configure how you want to manage your product stocks and other inventory-related aspects.
Enabling it will mean you will mention the quantity of the products you have available, and WooCommerce will keep count every time a product is sold until it gets out of stock, i.e., buyers won’t be able to place orders anymore.
The following are the options:
- Manage stock
- If you check “Enable stock management,” then it means you are willing to input product quantities.
- Hold stock (minutes)
- Here, you can define a time, in minutes, to hold stock for an unpaid order. So, let’s say someone tried to purchase a product, but the card declined. So this product will be held for the time you define here before someone else can buy it instead.
- Notifications
- The “Enable low stock notifications” option means if you have fewer units of a product remaining, you will get an admin notification email to inform you about it.
- The “Enable out of stock notifications” is similar except you get an email notification when all units of the product are sold out.
- Notification recipient(s)
- Email address where you want to receive notifications.
- Low stock threshold
- Mention what number is considered as low stock.
- Out of stock threshold
- Mention what number is considered out of stock.
- Out of stock visibility
- Enabling “Hide out of stock items from the catalog” means people will see this product on the shop page but won’t be able to order.
- Stock display format
- You choose if you want to show the quantity of the product on your product page or not, or only show it when stock is low.
Step – 5 – Accounts & Privacy Settings
Account and privacy settings are important because you want your customers to be able to create accounts where they can track the products they ordered, change the delivery address, etc.
Also, ensure your WooCommerce store is secure, especially for email protection. Missing DMARC records can expose you to email spoofing or phishing risks, so setting them up is crucial for protection.
Plug, you may choose various checkout settings such as allowing guest checkout, create account during checkout, etc.
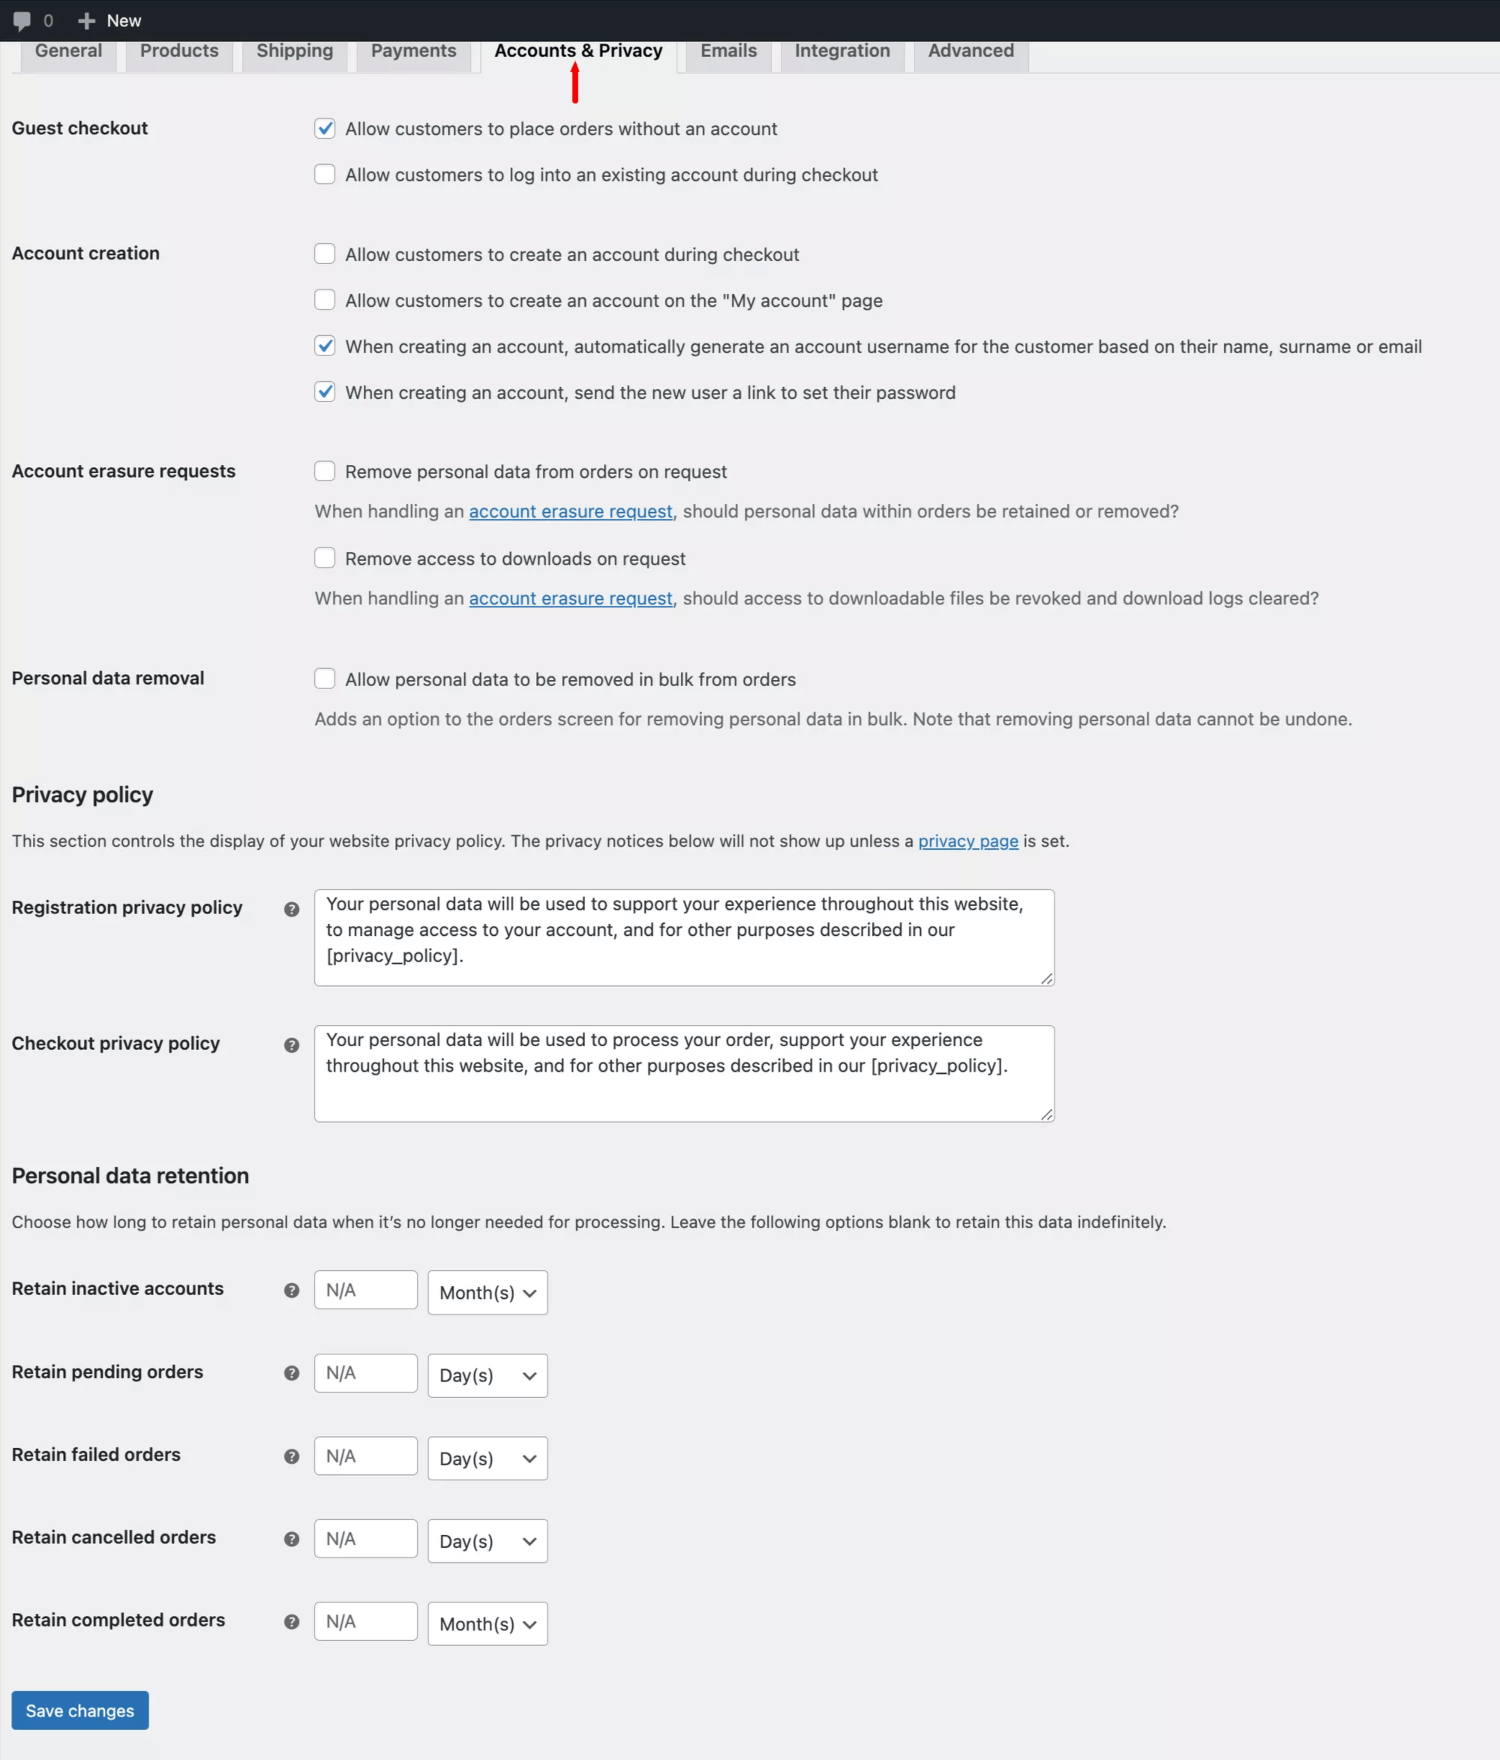
Here you will get several self-explanatory options.
- Guest checkout
You will get a couple of options to define if you would accept an order without an order or allow the user to log in while on that page. - Account Creation
Under this, you will get a few options for controlling the account creation of prospects, such as creating an account during checkout, auto-generating the username and password during checkout, and so on. - Account eraser requests
Here, you may define if you want the buyer to have control over his data. - Personal data removal
Allow users to remove their personal data. - Privacy policy
You may provide privacy policy details during registration and checkout. - Personal data retention
Here you can define how long you want to retain one’s personal data.
And that’s it.
Make sure to Save the changes you made and you are ready for the next step of running your eCommerce business.
The Next Step
So far, you have seen how easily you managed to configure your WooCommerce store.
To learn Woocommerce completely, you can go through the Woocommerce tutorial.
Keep learning and start selling on this popular place.
Frequently Asked Question(FAQ)
What is the easiest way to create a Woocommerce site?
The easiest way to create a WooCommerce site is:
- Choose a hosting provider that supports WordPress.
- Go through this blog on “How to Install Woocommerce” and set up.
- Select and install a WooCommerce-compatible theme.
- Install the free WooCommerce plugin from the WordPress plugin directory.
- Run the WooCommerce setup wizard to configure basic store settings.
- Add your products and customize your store design.
Many hosting providers offer one-click WordPress and WooCommerce installations to simplify the process further. You can also find one with low hosting fees.
How long will it take me on average to be an expert on Woocommerce?
Becoming an expert in WooCommerce can take varying amounts of time depending on your background and dedication.
On average:
- Basic proficiency: 1-3 months of regular use and learning
- Intermediate level: 6-12 months of active development and problem-solving
- Expert level: 1-2 years of consistent work with WooCommerce, including customization, troubleshooting, and keeping up with updates
Continuous learning is key, as WooCommerce trends evolve regularly
What are some tips for beginners to effectively use Woocommerce?
Here are some tips for beginners to effectively use WooCommerce:
- Test your checkout process regularly to ensure a smooth customer experience
- Start with a good WooCommerce-optimized theme to ensure compatibility
- Take time to properly set up your store’s basic settings (payment, shipping, taxes)
- Learn to use product categories and tags for better organization
- Optimize your product images and descriptions for SEO
- Install only necessary plugins to avoid slowing down your site
- Regularly update WooCommerce, WordPress, and all plugins
- Use WooCommerce’s built-in analytics to track your store’s performance
Familiarize yourself with WooCommerce shortcodes for easy customization

Amazing post. Thanks for giving such important information.
Hi Alex,
Glad to hear that you found the content useful.
We are planning to publish some more amazing WooCommerce guides.
Let us know if you have any suggestions for us.
Have a nice day!