


Before connecting the Media Storage To Cloud plugin with Amazon S3 bucket, ensure that you have already created an IAM user account on your AWS account.
If you haven’t created an IAM user account, follow this documentation to create it.
If you already have an IAM user account you want to use, follow these simple steps to connect the Amazon S3 bucket with Media Storage to Cloud:
Step 1: Select Storage #
Go to your Dashboard > WP Cloud. Amazon S3 will be selected by default.
You will see the following form:

Now you have to provide your Amazon S3 credentials.
Access Key ID: #
Insert the Access Key ID of the IAM user account you’ll be using.
Secret Access Key: #
Insert the secret access key of the same IAM user.
S3 Bucket Name: #
Type the name of the bucket you want to authorize with Media Storage To Cloud.
Bucket Region: #
Enter the region name of your bucket.
Here’s the bucket region list:
| Region Name | Code |
|---|---|
| US East (Ohio) | us-east-2 |
| US East (N. Virginia) | us-east-1 |
| US West (N. California) | us-west-1 |
| US West (Oregon) | us-west-2 |
| Africa (Cape Town) | af-south-1 |
| Asia Pacific (Hong Kong) | ap-east-1 |
| Asia Pacific (Mumbai) | ap-south-1 |
| Asia Pacific (Osaka-Local) | ap-northeast-3 |
| Asia Pacific (Seoul) | ap-northeast-2 |
| Asia Pacific (Singapore) | ap-southeast-1 |
| Asia Pacific (Sydney) | ap-southeast-2 |
| Asia Pacific (Tokyo) | ap-northeast-1 |
| Canada (Central) | ca-central-1 |
| China (Beijing) | cn-north-1 |
| China (Ningxia) | cn-northwest-1 |
| Europe (Frankfurt) | eu-central-1 |
| Europe (Ireland) | eu-west-1 |
| Europe (London) | eu-west-2 |
| Europe (Milan) | eu-south-1 |
| Europe (Paris) | eu-west-3 |
| Europe (Stockholm) | eu-north-1 |
| Middle East (Bahrain) | me-south-1 |
| South America (São Paulo) | sa-east-1 |
Remember that you have entered the relevant code for your bucket region. For example, for “Oregon”, your bucket code would be “us-west-2”.

Now, click on the blue Save button.

This message will show up to inform you that your data has been successfully saved.
Step 2: Sync #
Now go to the Sync section.
Choose Amazon S3 from the upper tab.
Here you will get two options from the Select sync option dropdown menu.
- Send all data to storage
- Send unsynced data to storage
If you choose Send all data to storage, it will sync all of your media files to the Cloud.
And if you choose Send unsynced data to storage, it will only upload the unsynced media files to the Cloud.
For the first time, choose Send all data to storage option, you may choose to upload unsynced data to storage option next time if you only want to upload the unsynced data to the storage.
Now click on Sync button.

Your media files will be started syncing with your Amazon S3 bucket.
Now you have to wait for the media files to be synced with the bucket.

After syncing the media file, a success message will appear.
Step 3: Settings #
Now go to the Settings section.
Click on Amazon S3.

You’ll find these 3 options:
Serve Media Files From Bucket: #
Turning on this feature will serve all the media files on your website directly from the Amazon S3 bucket.
Upload Media Files On Bucket When Uploaded On Media Library: #
Turning on this feature will auto-sync all the new media files you will be uploading on your media library with the bucket.
Delete Media From Bucket When Deleted From Media Library: #
Turning on this feature will auto-delete any media file from the Amazon S3 bucket if it’s deleted from the media library.
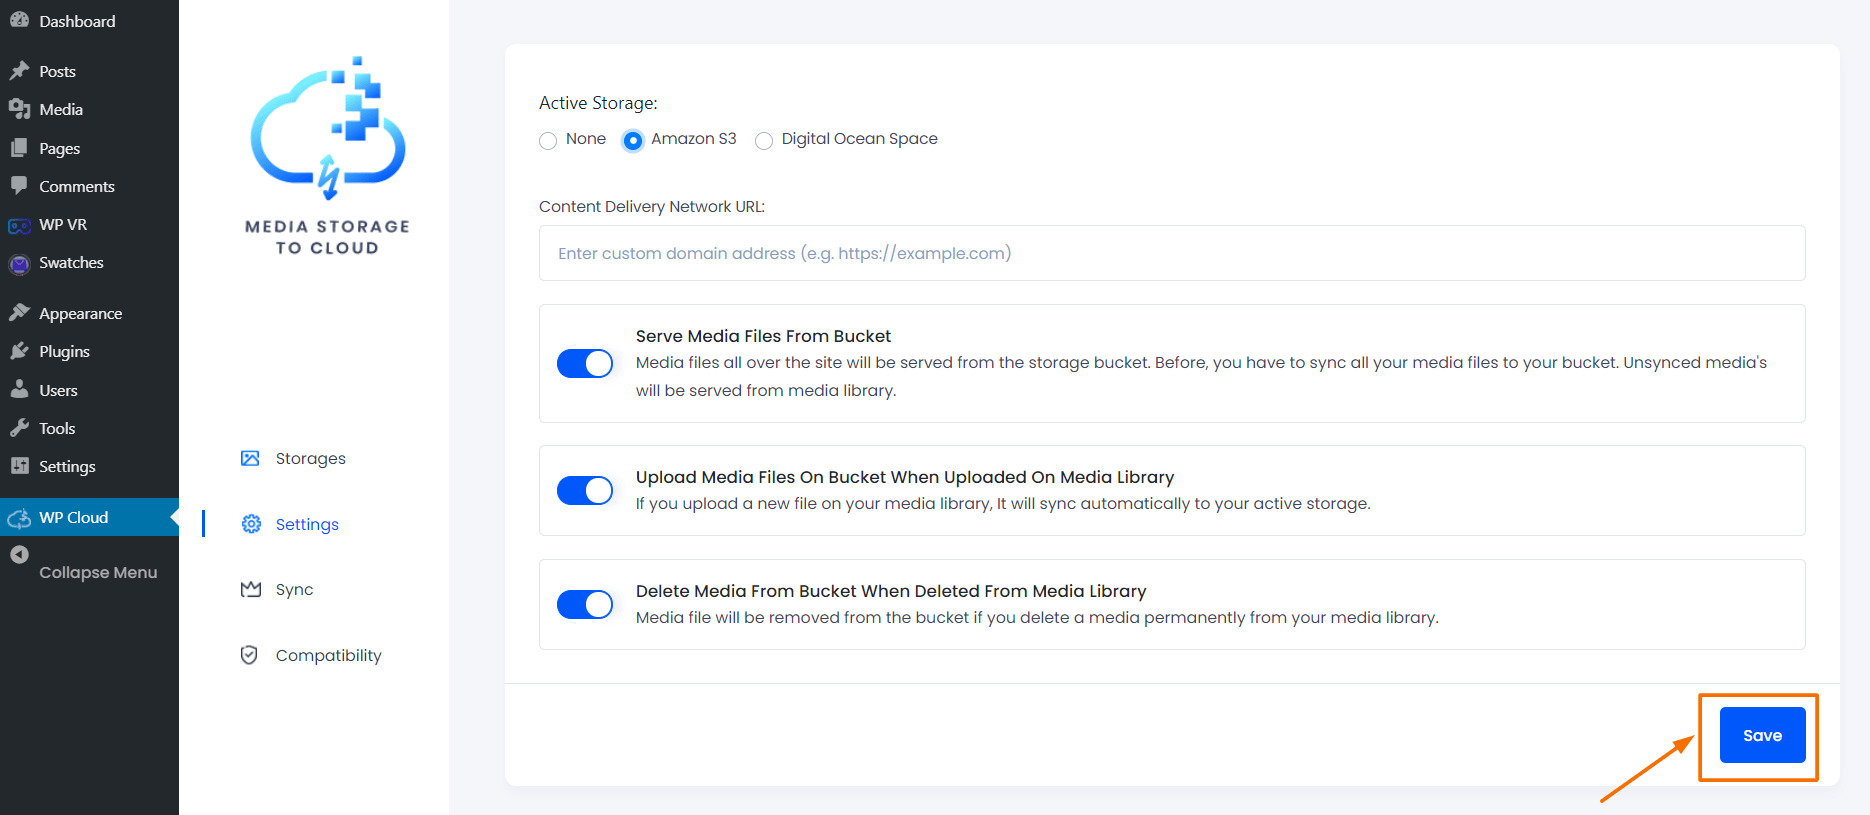
Turn on the features you want to use.
Now click on the blue Save button.

This message will show up confirming that your new settings have saved.
Now you’re ready to offload your WordPress media files to Amazon S3 bucket and serve from there.


